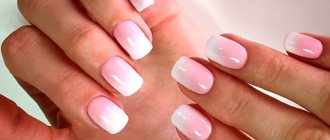
An ideal manicure is an integral part of the image of a modern and successful woman. You can achieve this ideal with the help of gel polish, which guarantees a shiny and durable finish. More and more women are mastering the technique of applying gel polish with their own hands. We will talk further about how to perform a manicure with gel polish.
Beginner's set
What do you need for gel polish at home?
Starter kit for creating a manicure with gel polish:
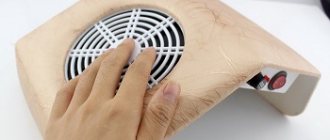
- A UV or LED lamp is a necessary element of the set, since most gel polishes polymerize only under UV rays. You should pay attention to the power of the device; a 9 W lamp is suitable for home use. This is a compact device, the polymerization speed of which is 6 minutes. Beginners should pay attention to 36 W devices that polymerize the gel coating in 2 minutes.
Note! The disadvantage of UV lamps is the short life of the lamps, which need to be changed twice a year. 1 piece costs approximately 150 rubles, and for the device you need to purchase 4 light bulbs.
- A file for shaping nails and a buff (file for grinding), the abrasiveness of which is at least 900 grit. The buff prepares the nail plate for applying the base.
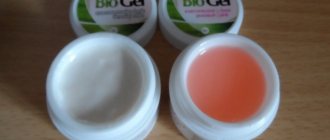
- The base coat smoothes the surface of the nail, ensures its adhesion to the gel and protects the nail from the penetration of aggressive chemical components.
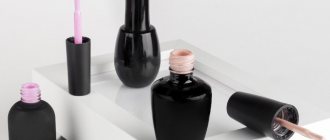
- Gel polish of any color. A novice manicurist cannot do without this product. To get started, you can purchase 3 to 5 polishes of different colors to create designs.
The fixative (finish) can be matte or glossy; it completes the manicure with gel polish for beginners and protects against damage. It is the top that makes the manicure durable.- The degreaser removes grease and dust from the nail plate.
- Lint-free wipes soaked in alcohol are used to remove the sticky layer that forms on the nails after the topcoat has dried.
- Orange sticks used to push back the cuticle.
- Softening cuticle oil is used after completing the manicure. The oil nourishes each nail and gives your hands a well-groomed appearance.
Now everyone knows what materials are needed to create a delightful and durable manicure. The tools described above are included in the list of mandatory ones, but if desired, you can supplement your arsenal.
What to look for when buying gel polish
It is almost impossible to determine the quality of the product at first glance. The information provided on the bottle may not be enough - other factors must be taken into account. For the most part, the specific choice depends on your individual preferences. After all, for some, some features of gel polish are more important, for others – others. Let's consider the most significant criteria.
- Price. When purchasing any product, most of us first of all pay attention to the price tag. Cosmetic products for manicure are no exception. The price of gel polish is determined by the brand, volume and features of the material.
- Pigmentation. No one wants to buy gel polish that is applied baldly and creates streaks and gaps. The exception is translucent shades. If you are looking for a rich and deep color, give preference to more pigmented formulations. It is enough to apply them in 1-2 layers for an even and beautiful coverage. Please note that they require more time to polymerize - they must be dried using a lamp with a power of 48 W or more.
- Density. Liquid gel polishes are easier to apply and allow you to create a thin layer without unevenness or lumps. But they are not without drawbacks - the color coating will most likely have to be applied in several layers, and this requires additional time. In addition, such material can flow under the cuticle, which can ruin your manicure. Thicker formulations minimize the risk of streaking and can be applied in just one layer. But it will take longer to dry them in a more powerful device.
- Application system. It can be single-phase, two-phase and three-phase. The names speak for themselves - for a single-phase system you only need one product that serves as a base, color and top coat. Two-phase and three-phase, respectively, involve the use of several products depending on the type of material.
However, you should not unquestioningly trust the “3 in 1” mark on the bottle. This product will save money and time, but will not provide adequate durability. Especially if you have brittle and damaged nails that need additional strengthening. Single-phase coating will delight you for up to two weeks, after which it will begin to chip and peel off.
Two-phase products combine the action of a base and gel polish, but need to be secured with a glossy or matte topcoat. They are quite rarely found in stores due to low demand. For an impeccable result, it is better to perform a standard three-phase manicure - separately purchase a base, color and top coat. You can find quality products in the Royal Gel online store.
Buy a good primer and degreaser separately. The base can be regular or rubber. Modern products have a self-leveling effect - during the polymerization process they are evenly distributed over the plate. Bases with a camouflage effect can be used as an independent coating - thanks to the presence of pigments, they mask imperfections and give the nails a light natural tint. At the final stage, do not forget to apply a top coat that will create beautiful highlights and provide reliable protection.
Additional materials
Experienced manicurists advise purchasing cosmetics that will make your manicure truly flawless and durable:
- A dehydrator removes excess moisture from the nail and dries it. This product is suitable for girls with oily skin and excessive sweating.
- The primer (bonder), or as the masters call it, “double-sided tape,” reliably adheres the natural nail to the base coating. The bonder has a thick and sticky consistency and dries in 3 minutes.
- An acid-free primer combines 3 products at once: a dehydrator, a degreaser and a base. It contains no acid, and therefore can be used for brittle nails.
- The acid primer softens the horny scales on the nails and firmly adheres them to the gel polish. Methacrylic acid provides this effect. This product should not be used on thin and brittle nails.
Beginners can do without these products, but more experienced masters have long been using them for manicures with gel polish.
Which lamp is suitable for polymerizing gel polish?
It is impossible to obtain a super-resistant coating on your nails without special electrical equipment. Unlike regular varnish, varnish with a polymer composition does not dry in air. A lamp is needed to harden it. She may be:
- light-emitting diode (LED);
- ultraviolet (UV);
- with cold cathode spiral (CCFL);
- hybrid (UV+LED or CCFL+LED).
UV devices with fluorescent light bulbs are considered outdated, as they take the longest to dry the coating (1–2 minutes). However, they are suitable for polymerizing any gel polishes. LED lamps with light emitting diodes are second generation devices. They work quickly, but do not affect all types of artificial materials. CCFL technology is similar to the more advanced UV technology, but is becoming increasingly rare on the market.
UV+LED hybrid lamps are deservedly the most popular. They allow you to quickly and effectively dry all known gel polishes, gels and biogels in a matter of seconds. The power of the device also matters. The optimal indicator is 36–50 W.
Application technique
To apply gel polish at home, you need to lay out the necessary materials on the table near you. On average, the procedure lasts 40 minutes, with experience this time will be reduced to 30 or 20 minutes. Painting is done quickly, much depends on the preparation of the nails and the complexity of the chosen design.
Stages of creating a gel manicure:
- First you need to push back the cuticle and then shape your nails.
- Then the nails are polished with a buff and treated with a degreaser.
- Next, the nails are treated with a thin ball of primer, which needs to be dried under a lamp. The polymerization time depends on the type of lamp.
- The nails are covered with the first ball of gel polish, which needs to be polymerized in a lamp.
- Then a second layer is applied, which also needs to be dried.
- The top of the nail is coated with finish and dried again.
- After the last polymerization, oil is applied to the cuticle and massaged. Ready!
If all conditions are met, a flawless manicure is guaranteed for 2 weeks.
Note! After 14 days, the nails grow back and the manicure looks sloppy. Therefore, it is recommended to remove the old coating and apply a new one.
Removing the coating
Removing gel polish for beginners is also not difficult.
Required tools and materials:
- Remover is a special liquid that can be used to remove coating.
- A roll of foil, which needs to be cut into 10 small squares.
- Orange sticks or pusher (scraper) for working with cuticles.
- Glass file and buff.
- Cotton sponges.
- High fat cream.
- Softening cuticle oil.
Gel polish removal steps:
- The sponge is soaked in remover and the nail is covered with it, which is wrapped in foil on top.
- Then they are washed in warm water and soap and blotted with a sponge, the skin around the nail is covered with cream.
- Nails are polished with a nail file to remove gloss.
- After 17 minutes, the foil is removed and the polish is removed from the nail with a pusher or stick.
Tip: To shorten the exposure time of the remover and make it easier to remove the old coating, massage the nail in the foil.
Note! If the coating is not removed the first time, then repeat the procedure. It is forbidden to remove the varnish with force!
After removing the old polish, the nails need to be sanded and oil rubbed into the cuticles.
Gel polish at home
If you decide to perform the procedure for applying gel polish yourself, study several video tutorials in advance, and also prepare everything you need. We will consider the technology of applying a three-phase composition.
What you will need Prepare everything you need for a regular manicure, be it an edged, European or hardware manicure, buy color, base and top coats, lint-free napkins, files and buffers in advance. Make sure you have an ultraviolet or LED lamp - without it the coating will not dry. It's also good to have cuticle oil.
How the coating is performed
- If necessary, remove the old coating, completely cleaning the nail.
- File the free edge of the nail, giving it the desired shape. Avoid using metal files. File only on dry nails; try not to soak them before the procedure. This will avoid delamination.
- Remove the cuticle. It is better to use special products for this, regular use of which will greatly facilitate manicure. Apply the product to the cuticle, wait a couple of minutes, carefully move the skin away and carefully remove any remaining product.
- Grind the nail, especially carefully treat the areas near the cuticle. Try not to damage the nail, avoid pressing. The task of this stage is to remove shine for better adhesion of the material to the natural nail. After sanding, carefully remove dust with a brush.
- Degrease the nail with a professional product; in extreme cases, you can use alcohol for this purpose.
- Apply a thin layer of base coat to each nail. Be careful not to let the base come into contact with the skin around the nail. When applying, be sure to work around the loose edges, sealing them. Dry the nail under the lamp.
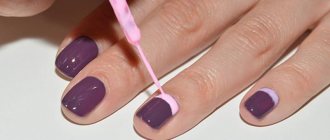
- Start coating with color. Do not shake the bottle before applying as this may cause bubbles and uneven coverage. Apply a thin layer and let it dry in the lamp. Reapply coat. Each layer should dry for two minutes if you are using a UV lamp, and thirty seconds if you are using an LED lamp.
- Finally, apply a top coat to your nails, carefully treating the free edge, and dry in a lamp. If the top coat has a sticky layer, carefully remove it with a lint-free cloth moistened with a degreaser.
- The final stage is treating the cuticle with moisturizing oil, this will give the manicure a well-groomed look. Rub in the oil and remove any remaining residue with a napkin.
Recommendations from experts
Gel polish manicure for beginners will look perfect if you adhere to the following rules:
- It is necessary to use only high quality base and finish.
- Before applying gel polish to your nails, you need to file and polish them.
- Primer, base, finish and gel polish are best applied in a thin layer. Each ball must be sealed (paint the end of the nail).
- For 2 days after creating a gel manicure, you should avoid water.
Now everyone knows how to cover their nails with gel polish at home. For a flawless manicure, you need to purchase a starter kit and not skip a single application step. It is important to remember that nails should rest from gel polish for at least 3-5 days. It is recommended to nourish and moisturize them after removing the old coating.
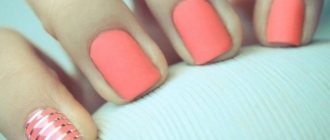
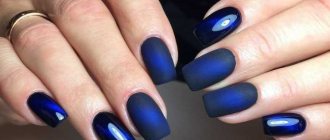
Photo of nail polish coating
Even more photos at the link: Gel polish photo.