I really love wedding cakes - large, beautiful, with flowers, decorations and always with figures of swans or the bride and groom. Only the figurines of the bride and groom are, as a rule, inedible - somehow it is not very ethical to eat the bride and groom at a wedding.
But with swans it’s a different matter: symbolic, romantic, and delicious, in the end! So, for my husband and I’s next wedding anniversary, I decided to make these very swans, so that later I could solemnly eat them (don’t think anything bloodthirsty). But in general, I simply decided to give my husband such a gift in the context of my unemployed stay at home with my child and, again, in a crisis.
First you need to draw these same swans. But because Since my creative talents remained in deep childhood, I simply downloaded a drawing of a swan from the Internet.
Then we prepare the protein glaze: beat the cold white of one egg and gradually add almost a glass of powdered sugar (I had a little less than a glass).
At the end, add a couple of drops of lemon juice for smoothness. You need to beat for about 10 minutes. The result is a thick mass, similar to whipped cream, only denser.
Place this mixture into a pastry syringe or bag with the thinnest tip. We put the drawings of swans under the file and start drawing. I didn’t have any free files, so I drew directly on tracing paper.
Although the file in this case greatly simplifies the task - the drawing can be placed inside, and it will not “run away” anywhere, the film is quite dense and does not bunch up, and after the figures dry, removing them from the file is much easier than from tracing paper.
For two swans I drew 4 bodies and 4 wings. Only one pair of bodies and wings should face the other direction, i.e. be a mirror image of the first couples, so that they can later be combined.
After about 15 minutes, the contours will be dry and you can continue drawing. Now we take a round nozzle, but wider than it was at first, and draw the head and neck of the swans with it. Despite its beauty, it is better to make the neck thicker so that it does not break later when we remove the swans from a file or tracing paper.
Then we put on the star attachment (large) and draw everything else - the body and wings:
Now we leave it all to dry for about 5 hours. I did it in the evening, so I just left it overnight. The wings must be placed on a convex surface so that they have a bend. We wrap the remaining glaze in the syringe in film (or simply put it in a bag) and put it in the refrigerator - we will need it later.
When the figures are dry, very carefully remove them from the file. If the figures do break somewhere, you can still glue them together: to do this, apply a little glaze to the broken places, then fold the entire figure as it was originally laid out, and “walk” a little more glaze on top. And leave it to dry again.
After drying, we begin collecting the swans: place one half of the swan on a sponge (or any other surface where you can stick toothpicks) and secure it with toothpicks, i.e. we just lean against the swan so that it doesn’t fall
Now we glue all the parts of the swan using protein icing and secure the entire swan with toothpicks
At this time I made the cake myself. Actually, the cake is called “California”, the cake is very tasty! Therefore, if you don’t decide to raise swans, then make a cake - you won’t regret it! So, first we prepare the dough for the cakes.
We will need:
Separate the yolks from the whites and beat the whites with a pinch of salt, first at low speed, then at high speed.
When the foam is dense, reduce the speed and gradually add sugar and vanilla sugar:
Again, beat a little at high speed, then add the yolks one at a time and beat a little more.
Now combine all the dry ingredients, add them to the beaten eggs and sugar and mix very carefully, from bottom to top:
Pour the dough into a mold, greased and lined with baking paper (I had a baking sheet) and place in a hot oven at 180° for 30-40 minutes. Focus on your oven and pan, because... The higher the pan, the longer you need to bake the cake. If you have a small pan, you can bake 2 cakes separately, or 1 cake, which you then cut.
Check readiness with a toothpick: if it’s clean, it means the cake is ready.
That's it, now let's make the cream. I can even say that all the flavor of the cake is in the cream. It’s already delicious in itself, you can eat it like that.
For the cream you will need:
- 4 eggs,
- half a glass of milk,
- ¾ tbsp. Sahara,
- 2 tbsp flour,
- half a stick of butter,
- 200 g cream cheese (Philadelphia or Almette)
Beat eggs, sugar, milk and flour with a whisk. There is no need for a mixer here - as long as everything is mixed well.
And put this entire homogeneous mass on low heat, stirring constantly. “Brew” the cream until a thick mass is obtained, the consistency reminiscent of thick sour cream:
Now cool the cream, add softened butter and curd cheese. In general, the recipe calls for Philadelphia cheese, but I took Almette, remembering the famous Mrs. Pumpkin Cheesecake (https://www.u-mama.ru/read/article.php?id=3149). And whisk everything together:
Now let's assemble the cake. Here it is at your discretion - you can simply coat the cakes with cream. I decided to add more fruits (bananas and kiwi), coating them with cream:
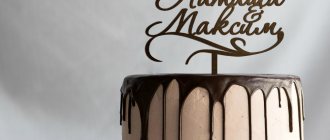
I got 2 cakes. Place the second cake layer on top of the fruit, and then decorate the cake as you wish - you can pour glaze on it, sprinkle it with chocolate or coconut shavings. Or you can paint the remaining cream blue with food coloring and make a “lake” for our swans. I covered the cake with blue fondant.
I also had jewelry prepared from the same mastic. Well, the main characters are swans.
Bon appetit!
Source: https://www.u-mama.ru/read/home/yummi/cakes/4899.html
Mastic swans: how to make a wonderful cake decoration
Swans are amazing and beautiful birds that have been a symbol of lasting love for many years. That's why they often decorate the tops of wedding cakes. In order not to order these cute figures from unfamiliar chefs, you can easily make them yourself. If you don’t yet know how to make swans from mastic, this article will definitely come in handy.
Cooking instructions
To get the most delicious birds, you need to use milk, gelatin or marshmallow mastic. These base options do not contain complex ingredients and are also very easy to make.
For milk mastic you will need:
- powdered sugar;
- powdered milk;
- condensed milk.
Combine all ingredients in the same amount of grams and knead until the consistency of soft clay. The resulting mass should be creamy or light beige.
Swans made from this mastic will turn out very tasty, but soft. Therefore, this option will not work if the cake will stand for a long time.
For gelatin mastic you will need:
- gelatin;
- water;
- powdered sugar.
Read this: DIY appliqués on clothes for original decor
Soak 1-2 tablespoons of gelatin in cold water for a couple of hours, then heat it over the fire until the clots dissolve, without bringing it to a boil. Add 2-3 cups of powdered sugar and stir. Add food coloring of the desired color.
One of the easiest recipes for making mastic swans is based on marshmallows. You need to take 100 grams of marshmallows, add a tablespoon of water and put in the microwave. When the volume increases, begin to gradually add powder (1.5 cups), then mix everything. The homogeneous mass is ready.
Thanks to these recipes from the master class, you can easily make the basis for swans at home. And you don't have to buy an artificial analogue in the supermarket.
Wedding cakes with swans and roses - step by step instructions
The wedding celebration always ends with the serving of the cake.
Traditionally, the final dessert carries a lot of meaning, because previously, beauty and taste were used to determine how good a housewife a bride would be.
By placing figurines of a pair of swans, the newlyweds demonstrate that they do not plan to separate - just like these beautiful birds. Loyalty and mutual understanding flourish in a union, because there is eternal and unfading love between them.
Types of swans for decorating a wedding cake
There are both inedible and edible swans. If there is a desire to preserve the figurines for many years, then order porcelain decoration. But most often they are the edible part of the cake and are made from different materials.
Types of swan figurines for cake:
- Made from caramel - hardened sugar syrup. In order for it to thicken properly, you need to stir a lot of sugar in a very small amount of water and heat it up. This is a difficult material to work with and quickly burns, turning brown. Another disadvantage is that the mass hardens at room temperature. Only chefs with extensive experience create real works of art - swans that look like crystal products. Sugar figures are very hard. To eat them, you will need to suck the pieces for a long time or dip them in hot tea.
- Mastic . Mastic is a sweet edible mass, good for sculpting and maintaining shape. The consistency is similar to plasticine. There are many formulations that necessarily include milk, sugar, gelatin or agar-agar, and can also be found with honey, marshmallows, marshmallow or marzipan. To create a beautiful swan figurine with your own hands, you will need patience to draw all the details.
- Chocolate . Swans are created from black, milk, white or a mixture of different types of chocolate. For this purpose, figures are used into which the melted mass is poured. After hardening, remove, if necessary, additionally paint the beaks and place on the cake.
- From marzipan . Marzipan, like mastic, has an elastic consistency that can be easily molded into any shape. But the composition of this mass is different; it contains ground almonds and powdered sugar. Due to the high fat content in nuts, it does not require additional binders. But such swans need a cool place and can become weathered and darken; to avoid this, they are often coated with glaze or lemon juice.
How to decorate a cake with swans?
Swan figures are used to decorate wedding cakes without mastic and with a mastic surface. The most common way birds are positioned is by joining their beaks together, a position that forms a heart shape from their necks.
A wedding cake with swans without additional decoration will look dull and inexpressive, so intricate compositions with a variety of decor are created for the treat.
To prepare such a dessert, cream fillings for a wedding cake are suitable.
Options for decorating cakes with swans for a wedding:
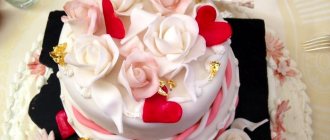
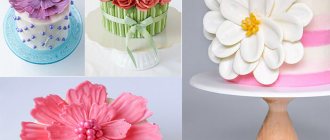
- Decoration with roses and other flowers. Flowers are often added to symbolize feelings or hopes for family well-being. Roses symbolize falling in love, passion and the beginning of a new relationship. Calla lilies mean good relationships. Lilies have 2 meanings: purity of thoughts or greatness and success.
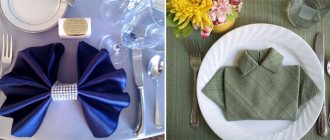
- Figurines . Sometimes figurines are placed next to the birds, indicating the hobby, occupation or character traits of the newlyweds.
- Rings . If they want to emphasize the fidelity and devotion of the newlyweds to each other, then paired rings are placed next to the swans.
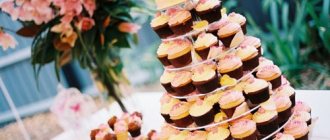
An alternative dessert option for a wedding could be a wedding cake with cupcakes.
How to make swans for a wedding cake: useful tips
To create a swan from mastic you will need a knife with a sharp end, some wire and a tapered spatula. It is also advisable to have a mold for the wings. If you don’t have one at hand, then create a paper template from which you carefully cut out the necessary parts.
- The mastic is divided into 3 parts, the smaller one is fixed on a wire and rolled out, forming a neck. You need to leave more mass at the end to make the head and beak.
- After uniform distribution, the wire is bent and defects in the neck are removed.
- A piece of mastic is rolled into an oval shape.
- A recess is formed inside the workpiece with a round stick and the finished neck is inserted.
- The entire structure is carefully pressed onto the table.
- The mastic is rolled out and identical leaves 5 mm wide and 10 mm long are cut out.
- The blanks are embossed using a mold or spatula.
- The finished leaves are applied to the swan's body from the tail, bending the edges upward so that they imitate feathers.
- Embossed leaves are also applied to the cut out bases for the wings.
- The finished wings are secured to the body with sugar syrup or vodka.
- At the end, the beak and eyes are drawn, decorative elements are attached and left to dry for 1-2 hours.
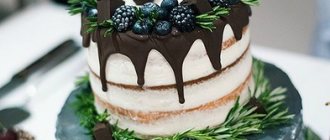
If making swans seems like a difficult process for you, then try making a simple naked wedding cake. You will find a master class on how to make a delicious wedding cake on our website by following the link.
Detailed master class on decorating a wedding cake with cream swans:
Nowadays, cakes in the shape of a swan have become quite popular. To create such a dessert, you need to have extensive pastry experience. The base is ordinary, but baked or cut into a special shape to imitate the body and head, and then covered with whipped cream, which creates the effect of feathers.
Source: https://svadba.expert/podgotovka/banket/blyuda/tort/s-lebedyami
Step-by-step master class
First of all, you need to prepare all the necessary tools. Place them on the surface. Prepare bags and balls.
Melting rules:
- We do this in the microwave or in a water bath. It is important to choose a method that is more convenient for you personally.
- In the microwave. Place the butter and chocolate for 15 seconds. Take it out and mix. If the chocolate is not melted, put it in the microwave again for 15 seconds.
- At the bathhouse. We also don’t wait for the chocolate to completely melt. Mix. This will help the chocolate mass to be homogeneous.
- Ideally, the temperature of the chocolate should be 45-50⁰ (melt white chocolate at 40-45⁰).
- Cool the melted chocolate to 26⁰ to make it convenient to work with.
To make the chocolate cool faster and more evenly, stir it.
If we pour chocolate into a mold, be it silicone or polycarbonate, we need to tilt the mold in one direction or the other so that the mass goes over all the walls. And then turn it over to drain off the excess chocolate.
The height of the cups we make using balls is up to your taste. You can just lightly dip the balls into chocolate, or you can tilt the ball and coat it with chocolate very high on all sides.
What else is important if we make a figure using balls. You need to make a “stand”. That is, make round figures on the film. It is on them that we will place the balls.
How to make figures or patterns? Very easy if you use a pastry bag. Transfer the mass into a bag. We cut off only the very edge to make thin strips; If you make a slightly larger hole, you can make thicker strips.
Comb. The stripes that the comb leaves on the chocolate mass are very beautiful. These could be membranes on leaves, feathers on wings, etc.
Use a skewer to separate off the excess.
IMPORTANT! Whatever we use, we can make stripes ALONG the chocolate mass, not all the way to the bottom. Or we can draw a line so as to separate a part to get the figure we need. I have shown this clearly here.
Brush. The stripes left by the brush are not as clear, but very nice. I use a brush to prepare the wings for the swans.
For the swan figurine, you will also need a head with a beak, a long curved neck and the body of a bird, to which we will glue (using the same chocolate) wings. We separate all excess with skewers.
We put all the figures and patterns in the freezer.
Once the chocolate has set well, you can deflate the air from the balls and carefully separate the chocolate from the balls.
It is very easy to shape the figures. For example, if you place a film with a chocolate pattern on an uneven surface and let it harden. I put this leaf on a plate with high sides: part of the leaf is on the side, part is on the bottom of the plate.
These are the leaves we got. I drew one of the leaves using a bag. This leaf turned out to be especially delicate.
Figures that were made using balls, muffin tins and polycarbonate hemispheres (I joined the halves of the sphere to make balls).
Let's dress up these figures: fill them with cream and decorate them with chocolate decor.
And now there is a swan. A couple of drops on the base (cake, pastry or just a plate). We place the body of the bird on this chocolate mass. On the sides there are wings. Let the figurine harden in the freezer.
After hardening, this figurine can be “transplanted” for dessert.
Let all the figures not be perfect and very simple. But this decor looks very beautiful. I really like this recipe. With its help I make very tasty desserts.
The wedding celebration always ends with the serving of the cake. Traditionally, the final dessert carries a lot of meaning, because previously, beauty and taste were used to determine how good a housewife a bride would be. By placing figurines of a pair of swans, the newlyweds demonstrate that they do not plan to separate - just like these beautiful birds. Loyalty and mutual understanding flourish in a union, because there is eternal and unfading love between them.
Swans on the cake
Added: 2011-08-05
Swans on the cake
Without forgetting about our true purpose and promise to our dear reader, we continue to publish a master class on decorating cakes from mastic . Today you will learn how to make swans on a cake. I borrowed the idea from one bourgeois website and this is what happened:
Let's start by preparing the swan's head and body. from pre-prepared mastic and form heads from them, smoothly turning into a neck, then we form a body, make a depression on one side, insert the neck there and leave to dry.
Now let's take hold of the wings. To do this, apply with a stencil, or we make the blanks ourselves using mastic , first cutting the blank in the shape of a flower, then we separate the petals from it - these will be the feathers of a swan. Glue the feathers onto the swan's body, starting from the back. When the whole body is covered with feathers, we send it to dry.
At this time, having previously drawn a wing on paper and cut out a wing from mastic, begin gluing similar feathers along the wing until you fill it completely. To make the wings slightly concave, leave them to dry by placing, for example, a marker in the middle of the wing.
How to decorate a cake for a man’s birthday, February 23, farewell to the army and anniversary?
Men's cakes taste little different from the rest. It can be a classic sponge cake, Napoleon or honey cake. The shape of the cake can be made in the shape of a woman’s breast or something erotic.
Tanks or military equipment are also appropriate for Defender of the Fatherland Day. For a man, the cake is decorated in blue, light blue or green. Flowers are rarely used for decoration.
decorate a cake for a man's birthday, February 23, farewell to the army and anniversary
decorate a cake for a man's birthday, February 23, farewell to the army and anniversary
decorate a cake for a man's birthday, February 23, farewell to the army and anniversary
decorate a cake for a man's birthday, February 23, farewell to the army and anniversary
Marshmallow swans for cake decoration (MK)
Ingredients:
- regular white marshmallow
- confectionery mastic white
- thick cream
- mastic or food gel for decoration
Choose marshmallows that are elastic and textured, rather than soft, so that they do not crumble or float.
Preparation
In advance, sculpt necks for swans from confectionery mastic and dry them. Make extra necks just in case.
Necks can also be made from icing or white chocolate.
Divide the marshmallows into halves.
To make the wings, cut one marshmallow half in half lengthwise.
Turn the other half upside down and apply a high strip of thick cream in the center (using a pastry syringe), forming the body of a swan.
Place marshmallow halves on either side of the cream strip, cut side down, to create wings.
Insert the swan's neck into the cream and decorate the head with food markers or colored icing or fondant.
| The book “Sweet floristry. Exquisite Cake Decorations by Peggy Porschen |
| Tescoma “Delicia” cake stand, rotating |
| Charmel marshmallow vanilla |
Source: https://eda.parafraz.space/lebedi-iz-zefira-dlya-ukrasheniya-torta-mk/
Dessert preparation technology
First, put the ingredients for the chocolate cake in a bowl and knead the dough. Then bake the pie in a mold (20 cm in diameter) for 35 minutes at 160 degrees. After cooking, let the crust cool.
It's time to cut the cake into pieces horizontally. After that, remove the inside of the lower part with an ordinary spoon, but leave the walls about a centimeter wide on the sides.
The secret of Alferova’s happy brother is “For me he is a man, not an actor”
Long-term weather forecast for March 2021 by region (works on site)
It's time to pamper yourself: we're preparing a delicious cake with berries and cream
Afterwards, distribute the finished strawberry flavored cream into the formed empty cavity of the pie, cover with the second part of the cake. Next, you should cool the cake in the refrigerator.
While the dessert is cooling, make the glaze: put all the ingredients for it in a deep container and mix them into a creamy mass.
Sweet symbol of devotion - wedding cake with swans: how to make birds
Confectionery skills allow you to create the most unusual dessert options for a wedding. But there are classics that never go out of date, like a wedding cake with swans.
To this day, such a treat for guests is often found at wedding banquets.
But it cannot be called banal at all, since different design techniques are used for production.
If desired, even the future newlyweds themselves will be able to make swans for their wedding cake and decorate it as they wish.
Why do you need dessert?
Traditionally, the main dessert on the occasion of a wedding is served at the end of the banquet, when all the main dishes have already been tasted, gifts have been presented, and the guests are happy and relaxed.
It is believed that by cutting a piece of the cake for each person, the newlyweds thereby share their love with those present.
Friends and relatives, while eating dessert, wish the newly-made family happiness, prosperity and prosperity.
The cake should highlight the overall style and color scheme of the wedding, so it should be ordered after the main concept of the event has been determined.
Peculiarities
There are many legends and traditions associated with them, but the basic symbolism of different peoples is the same. It is believed that the swan is a symbol of rebirth, purity, nobility, wisdom, and perfection. These birds choose their soul mate once and for the rest of their lives, which is about a hundred years.
A well-designed dessert allows you to emphasize the theme of the celebration and take bright, harmonious photographs as a keepsake.
Elena Sokolova
Swans are incredibly loyal, every day they are ready to give each other affection, tenderness and care. A pair of these creatures is identified with the bride and groom, because they must maintain warm feelings and sincere relationships for their entire life together.
Tamara Solntseva
A single-tier wedding cake with swans can look completely different. For some, a creamy design would be ideal, as soft and airy as the birds themselves. Others prefer the elegance and sophistication of swans, which can be emphasized with mastic.
You can decorate such a cake in the form of a pond or waterfall, and lilies, roses, a couple of rings or hearts are used for decoration. The swans themselves can be purchased ready-made at a confectionery store, and the birds can be either edible or not.
The second option allows you to save the cake decoration as a keepsake.
A cake with swans is most often made for a classic celebration that is not associated with any style. Since these birds are white, the dessert itself is decorated in this shade; you can only choose one or two additional colors for decoration. Often such a cake is decorated for a wedding in a certain shade, most often red, blue, pink or gold.
Interesting! Here you can see the filling options. And this article contains instructions on how to choose the optimal size of dessert.
Options – with flowers and others
The cake can be made round, square or heart-shaped, and in addition to the swans, depict a small lake. You can make two identical single-tier desserts by placing them side by side. The surrounding space can be decorated with lilies and water lilies.
In this case, one swan is placed on each of them, their necks are arched towards each other, and their beaks are touching.
Multi-tiered cakes can be made more original. The swans are located on the top element, and since it is not too large, no additional decoration is required. Only other tiers are decorated, for example, small water lilies are arranged in a cascade along the side. Decorations in the form of flowing fabric or a waterfall will harmoniously fit into the decor.
Swan Lake Cake
I really love wedding cakes - large, beautiful, with flowers, decorations and always with figures of swans or the bride and groom. Only the figurines of the bride and groom are, as a rule, inedible - somehow it is not very ethical to eat the bride and groom at a wedding. But with swans it’s a different matter: symbolic, romantic, and delicious, in the end! So, for my husband and I’s next wedding anniversary, I decided to make these very swans, so that later I could solemnly eat them (don’t think anything bloodthirsty). But in general, I simply decided to give my husband such a gift in the context of my unemployed stay at home with my child and, again, in a crisis.
First you need to draw these same swans. But because Since my creative talents remained in deep childhood, I simply downloaded a drawing of a swan from the Internet.
Then we prepare the protein glaze: beat the cold white of one egg and gradually add almost a glass of powdered sugar (I had a little less than a glass).
At the end, add a couple of drops of lemon juice for smoothness. You need to beat for about 10 minutes. The result is a thick mass, similar to whipped cream, only denser.
Place this mixture into a pastry syringe or bag with the thinnest tip. We put the drawings of swans under the file and start drawing. I didn’t have any free files, so I drew directly on tracing paper. Although the file in this case greatly simplifies the task - the drawing can be placed inside, and it will not “run away” anywhere, the film is quite dense and does not bunch up, and after the figures dry, removing them from the file is much easier than from tracing paper.
For two swans I drew 4 bodies and 4 wings. Only one pair of bodies and wings should face the other direction, i.e. be a mirror image of the first couples, so that they can later be combined.
After about 15 minutes, the contours will be dry and you can continue drawing. Now we take a round nozzle, but wider than it was at first, and draw the head and neck of the swans with it. Despite its beauty, it is better to make the neck thicker so that it does not break later when we remove the swans from a file or tracing paper.
Then we put on the star attachment (large) and draw everything else - the body and wings:
Now we leave it all to dry for about 5 hours. I did it in the evening, so I just left it overnight. The wings must be placed on a convex surface so that they have a bend. We wrap the remaining glaze in the syringe in film (or simply put it in a bag) and put it in the refrigerator - we will need it later.
When the figures are dry, very carefully remove them from the file. If the figures do break somewhere, you can still glue them together: to do this, apply a little glaze to the broken places, then fold the entire figure as it was originally laid out, and “walk” a little more glaze on top. And leave it to dry again.
After drying, we begin collecting the swans: place one half of the swan on a sponge (or any other surface where you can stick toothpicks) and secure it with toothpicks, i.e. we just lean against the swan so that it doesn’t fall
Now we glue all the parts of the swan using protein icing and secure the entire swan with toothpicks
Well, we leave the swans to rest again until they dry completely.
At this time I made the cake myself. Actually, the cake is called “California”, the cake is very tasty! Therefore, if you don’t decide to raise swans, then make a cake - you won’t regret it! So, first we prepare the dough for the cakes.
We will need:
- 5 eggs
- 1 tbsp. Sahara,
- 5 tbsp cocoa,
- 70 g flour,
- 70 g starch,
- 1 tsp vanilla sugar,
- a pinch of salt and
- 2 tsp baking powder.
Separate the yolks from the whites and beat the whites with a pinch of salt, first at low speed, then at high speed.
When the foam is dense, reduce the speed and gradually add sugar and vanilla sugar:
Again, beat a little at high speed, then add the yolks one at a time and beat a little more.
Now combine all the dry ingredients, add them to the beaten eggs and sugar and mix very carefully, from bottom to top:
Pour the dough into a mold, greased and lined with baking paper (I had a baking sheet) and place in a hot oven at 180° for 30-40 minutes. Focus on your oven and pan, because... The higher the pan, the longer you need to bake the cake. If you have a small pan, you can bake 2 cakes separately, or 1 cake, which you then cut.
Check readiness with a toothpick: if it’s clean, it means the cake is ready.
That's it, now let's make the cream. I can even say that all the flavor of the cake is in the cream. It’s already delicious in itself, you can eat it like that.
For the cream you will need:
- 4 eggs,
- half a glass of milk,
- ¾ tbsp. Sahara,
- 2 tbsp flour,
- half a stick of butter,
- 200 g cream cheese (Philadelphia or Almette)
Beat eggs, sugar, milk and flour with a whisk. There is no need for a mixer here - as long as everything is mixed well.
And put this entire homogeneous mass on low heat, stirring constantly. “Brew” the cream until a thick mass is obtained, the consistency reminiscent of thick sour cream:
Now cool the cream, add softened butter and curd cheese. In general, the recipe calls for Philadelphia cheese, but I took Almette, remembering the famous Mrs. Pumpkin Cheesecake (). And whisk everything together:
You get quite a lot of cream, so it’s better to put the cream in the refrigerator for a while to make it thicker. Or you can frost the cakes and eat the leftovers.
Now let's assemble the cake. Here it is at your discretion - you can simply coat the cakes with cream. I decided to add more fruits (bananas and kiwi), coating them with cream:
I got 2 cakes. Place the second cake layer on top of the fruit, and then decorate the cake as you wish - you can pour glaze on it, sprinkle it with chocolate or coconut shavings. Or you can paint the remaining cream blue with food coloring and make a “lake” for our swans. I covered the cake with blue fondant.
I also had jewelry prepared from the same mastic. Well, the main characters are swans.
That's it, our Swan Lake cake is ready. It may seem that making such a cake is very long and tedious, but in fact you spend very little time on the swans, and, as a rule, you make the cake the very next day. And by evening the cake is ready. In general, I can say that in this matter what is important is desire and a creative spirit, and the rest will definitely work out!
Bon appetit!
Mastic swan: master class step by step
No wedding is complete without a beautiful cake, the top of which is most often decorated with fondant swans in love. Let's learn how to make them using the example of a master class with step-by-step instructions.
Master class Swans made of mastic
To make such beautiful birds, we will look at each stage of the work step by step. In the end, even novice needlewomen will end up with birds like these:
- We start by making the head and torso. To do this, from the prepared mastic we form flagella for the head and neck, as well as the torso.
- We make indentations in the body on one side and attach the neck and head there. Let it dry.
- Next, let's move on to the wings. First, we make a flower using a stencil using rolled out mastic; its petals will be the feathers of a swan.
- Glue the feathers onto the body starting from the back. When you have covered the entire body, leave it to dry.
- At this time, having previously drawn on paper, we cut out the wings. We also glue them with feathers. To give the parts a slightly concave shape, let the wings dry, for example, on a marker.
- When all the pieces of work have dried, we begin to assemble the swan. Glue the wings on, then leave to dry completely.
- Only after complete drying do we decorate the swan’s head by drawing eyes or using edible beads.
- We make the second one in the same way, making a pair.
If you work correctly and take your time at each step, you will end up with a beautiful pair of swans that will suit any cake.
Answering the question of how to make swans from mastic, a second question involuntarily arises: how to independently make the material for work. We'll talk about this further.
Making culinary mastic at home
The main types that are most often used in creating sweet masterpieces are milk, gelatin and marshmallow mastic. These options do not contain complex ingredients and are quite easy to make.
Milk mastic recipe
Combine the ingredients in a ratio of 1 to 1 to 1, and knead until the consistency of plasticine (soft). The resulting mass is usually creamy or light beige. Therefore, this mastic is not suitable for swans, but it tastes very pleasant.
Gelatin mastic recipe for cake
This mastic is more capricious, but more delicate, so it is suitable for many figures. To work you will need:
Mixing and cooking:
Soak 1–2 tablespoons of gelatin in cold water for several hours, then heat it over the fire until the clots dissolve. Just don't bring it to a boil. Then, add 2-3 cups of powdered sugar and mix. Add food coloring of the desired color.
Marshallese mastic recipe
One of the easiest recipes, suitable for further production of small parts from mastic. Take 100 g of this airy cookie, add a tablespoon of water and put it in the microwave. After increasing the volume, gradually add powdered sugar, stirring constantly (1.5 cups). Your homogeneous mass is ready.
With these common recipes, you can easily make the base for your swans at home. And you don’t have to look for candy stores to buy it.
Let's look at another master class on how to make a swan without special tools.
Second master class on making a swan from mastic
Here is another way to make delicious swans from made mastic and scrap materials, such as toothpicks and paper.
To work you will need:
Progress:
- Draw and cut out a wing on a piece of paper.
- Place the blank on the rolled out mastic and cut it out.
- And we do the same with the second wing.
- Using a toothpick, cut through the feathers.
- Leave to dry with a piece of foil underneath to give it shape.
- Roll out a piece of mastic into a sausage and make a thickening - the head. And on it we form a beak.
- We bend the neck and flatten the lower part to make it easier to attach.
- For the body, make a teardrop-shaped piece of mastic, pressing the narrow part with your finger.
- Using a toothpick, cut through the feathers on the flat part.
- When all the parts are dry, assemble the swan.
- Glue the neck to the body; you can use white chocolate for this.
- We cover the joint with wings, also gluing them.
Your swans are ready.
There are many more variations in making and decorating swans from mastic. At the same time, the basis is not necessarily the culinary one, which we discussed in the article. This could also be a souvenir work, then, for example, polymer clay would be suitable as a mastic.
We prepare culinary mastic at home, studying basic recipes
The main types that are most often used in creating sweet masterpieces are milk, gelatin and marshmallow mastic. These options do not contain complex ingredients and are quite easy to make.
- Powdered sugar;
- Powdered milk;
- Condensed milk.
Combine the ingredients in a ratio of 1 to 1 to 1, and knead until the consistency of plasticine (soft). The resulting mass is usually creamy or light beige. Therefore, this mastic is not suitable for swans, but it tastes very pleasant.
This mastic is more capricious, but more delicate, so it is suitable for many figures. To work you will need:
Mixing and cooking:
Soak 1–2 tablespoons of gelatin in cold water for several hours, then heat it over the fire until the clots dissolve. Just don't bring it to a boil. Then, add 2-3 cups of powdered sugar and mix. Add food coloring of the desired color.
One of the easiest recipes, suitable for further production of small parts from mastic. Take 100 g of this airy cookie, add a tablespoon of water and put it in the microwave. After increasing the volume, gradually add powdered sugar, stirring constantly (1.5 cups). Your homogeneous mass is ready.
With these common recipes, you can easily make the base for your swans at home. And you don’t have to look for candy stores to buy it.
Let's look at another master class on how to make a swan without special tools.