Necessary materials
The shopping list may immediately seem quite impressive. Therefore, if you decide to do your own gel polish coating, first think about whether such expenses will pay off for you in comparison with regular trips to the salon. If you still want to master the procedure yourself, you should purchase the following materials:
- Set for manicure and nail treatment,
- Equipment (lamp and, if desired, some others),
- Consumables,
- Base, top, primer and gel polishes,
- Materials for nail design.
To clarify, let's look at each point separately.
Tools
It is better to purchase tools in a professional store for manicurists. This way you will be sure that it is new and well sharpened. Nowadays it’s very easy to do this online: you can buy everything in one place, choose a palette, read reviews, look for cheaper prices and get your order delivered.
To perform a manicure you will need the following tools:
• Cuticle pusher (also called a spatula or scraper). This tool is needed to lift and push back the cuticle. An orange nail stick is often used as an alternative to a pusher. Its price is much lower, but it is a disposable tool, which is more likely to be consumable.
• Mills. They are needed only for hardware manicure with gel polish and removing long-term coating using a machine. For classic manicure, cutters are not used. A set of attachments along with the device is rarely purchased for independent use at home, since training is required to use it correctly. And the cost of the device is not so small.
• Nippers and/or nail scissors. They are used in classic and combined (using a machine) manicure to cut off raised cuticles. What is better to use, wire cutters or scissors, you can only determine by trying both at work - the choice is individual.
Thus, the only mandatory tools for processing the cuticle when performing a manicure followed by gel polish coating at home are a pusher and nippers/scissors. Don’t rush to buy cutters with a machine at the initial stage. Even experienced professionals recommend first learning how to perform a classic edged manicure.
Features of applying shellac to extended nails
You can apply gel polish to extended nails, if you take some points into account. Applying gel polish to extended nails can make them look more voluminous, so all layers should be as thin as possible so that the manicure does not look too bulky.
The procedure for covering extended nails is carried out according to the classic scheme of applying gel polish to the nail plate.
The extended nail is also polished with a special file, degreased and a thin layer of base is applied. After this, it is dried in a UV lamp and a color coating is applied, dried again and a second color coating is applied, polymerized again, a top coat is applied, dried, and the sticky layer is removed.
Applying gel polish to extended nails at home is quite simple, but removing it is problematic. Shellac is the same gel as extended nails, so you can remove it. Keep this in mind if you decide to apply a coating to gel or acrylic nails.
A step-by-step guide will help you understand: how to make gel polish at home
Equipment
To apply gel polish at home you will need the following equipment:
• Hybrid, LED or UV nail lamp. Without it, there is no way to dry the gel polish. UV lamps are currently fading into the background, and users are increasingly giving preference to hybrid lamps when purchasing. For personal use, you can buy cheaper equipment, for example, a Sun 5 48w hybrid lamp. To work with clients, you will need more powerful equipment.
• Machines for hardware manicure and pedicure. If you decide to master hardware technology, you need to buy a router. The power of the machine is determined by the number of revolutions of the cutter. Simple devices for home use usually perform 20,000 revolutions, the strongest ones - about 45,000. However, when choosing a router, other criteria are no less important, but this is the topic of a separate article.
• Desk lamp. Even when applying gel polish at home, you need to have good lighting. So if you don't already have a desk lamp on your desk, it's definitely worth getting one.
The equipment also includes devices for sterilization. These are an ultrasonic washer VGT 2000, glasperlen devices, ultraviolet cabinets and dry heaters for manicure instruments. Expensive disinfecting equipment is usually not purchased for personal use. However, if you are going to do a manicure with the same tools not only for yourself, but also for others, then be sure to take care of good disinfection.
Review of sterilizers
How to choose a UV lamp for drying gel polish at home
When choosing a UV lamp for home use, you need to know what it is for and how much you are willing to spend on this purchase.
There are different types of UV lamps for manicure
UV lamps are:
- By size: you can dry one or two hands at the same time.
- By type: LED and fluorescent.
- According to the ignition circuit.
- By power: the power of the lamp determines the drying time of the gel polish; the higher it is, the faster the polymerization of the coating occurs.
For home use, a UV lamp with a power of 9 W to 54 W is suitable. Lamps of different wattages contain different numbers of bulbs.
For example, a 36 W lamp has 4 light bulbs, and a 54 W lamp has as many as 9 light bulbs.
Remember that drying the varnish in a UV lamp is necessary after applying each layer. The lamp has a power of 36 W - it takes 30 seconds to dry the base, and 2 minutes to dry the color and topcoat.
The higher the power of the UV lamp, the shorter the drying time, and, conversely, with low power, the polymerization time of the coating increases.
Consumables
For the shellac procedure, you must have various consumables. If you are going to do your own manicure on an ongoing basis, then it is most profitable to buy materials in large quantities. This way, the cost of each product will be much cheaper and you won’t have to spend a lot of time going to the store.
List of consumables:
- Files and buffs of various abrasiveness for correcting the shape and length of nails and removing gloss.
- Lint-free wipes will be needed to degrease the nail plate and remove the sticky layer from the top coat.
- Orange sticks can be used as an alternative to a pusher when pushing back cuticles or for performing a European manicure.
- Cuticle softener. It will be required if you are doing a European or classic manicure when processing the cuticle. You can replace it with a warm bath with soapy water.
- The degreaser is used to prepare nails for applying gel polish.
- Cuticle oil. Rub in after finishing the procedure of covering nails with gel polish to nourish the base of the nail.
- Sticky layer remover. Often comes 2 in 1 along with a degreaser, which allows you to save a little.
- Acid-free primer. Used to improve the adhesion of artificial coating to the nail bed. This allows you to extend the wear life of the coating.
When purchasing liquids, it is best to purchase products from trusted companies. These include popular manufacturers such as Kodi Professional, Severina or Domix.
Preparing nails for applying gel polish
This is the most important stage and, alas, the most underestimated by many women. Most problems are caused precisely by incorrect technique for carrying out this step or (oh, horror!) by skipping it altogether. So…
We treat problem nails
Before applying gel polish, you just need to take care of the health of your nail plates, because gel polish will not last long on brittle and peeling nails.
Fortunately, the modern beauty industry offers us products that quickly and efficiently deal with poor nail condition. We strongly recommend trying the IBX complex nail plate regeneration system from Famous Names. Unlike other products that work only on the surface of the nail, IBX penetrates into the plate, exerting its healing effect on the deepest layers. The IBX system makes nails stronger, stronger and more flexible, helping to get rid of all kinds of defects.
Famous Names, IBX Duo Pack (IBX 10.4 ml, IBX Repair 7.4 ml)
Innovative system for deep nail treatment. The set includes IBX and IBX Repair.
(178)
RUB 3,650
RUR 3,650 Buy
Famous Names, IBX Mini Pack
The system for restoring and protecting nails includes: IBX Repair (2.7 ml), IBX Strengthen (3.75 ml) and Dadi Oil cuticle oil (3.75 ml) as a gift.
(195)
RUR 1,630
RUR 1,630 Buy
Famous Names, IBX Boost Duo Pack (IBX Boost Base, 15 ml and IBX Boost, 16.5 g)
An innovative system for strengthening nails and protecting artificial surfaces. The set includes IBX Boost Base (15 ml) and IBX Boost (16.5 g).
(81)
RUB 3,784
RUR 3,784 Buy
Soften and push back the cuticle
We need to give the skin around the nail a well-groomed appearance. After all, even the most flawless manicure won’t look beautiful if it’s framed by rough, sloppy cuticles, don’t you agree?
First, choose a cuticle remover. Its beauty is that it acts almost instantly, and the choice of products is huge - from expensive to very budget ones. Whatever price category you choose, pay attention to the hypoallergenic nature of the remover and to the information in the instructions for its use: its stay on the side rollers should be limited to one minute. Of course, it would be great if the product also contains all sorts of useful extracts.
How to use the remover? Very simple! Apply it directly to the cuticle area using five fingers at once. After a minute, carefully remove along with the softened cuticle with an orange stick.
Preparing the nail plate
And now the most important thing: we need to prepare our nails to accept gel polish and have good adhesion to it.
Remove the natural gloss from your nails using a polisher. Why is this necessary? This way you get rid of the protective film that repels the artificial turf.
Use a stiff brush to brush away any remaining sawdust. And stock up on lint-free wipes. Why lint-free? Because when working with sponges, small hairs may remain on the nails, which can subsequently interfere with the strength of the connection of the gel polish to the nail, and also cause unsightly unevenness.
Why do we need sponges? In order to saturate them with disinfectant! And the disinfectant, in turn, serves to degrease the nails and rid them of harmful bacteria (which also prevent good adhesion of the gel polish and the nail).
If the nail plates are prone to increased moisture production, then you additionally need to use a dehydrator and apply it immediately after the disinfectant using the same lint-free wipes or brush (if the dehydrator is in the appropriate bottle).
Apply primer
Now our nails are ready to apply a primer - a liquid that acts as a kind of primer. The main property of the primer, in addition to additional degreasing of the nail, is drying the top layer of the plate, preparing the nail to accept the base and have excellent adhesion to it. After using the primer, the coating lasts for a very long time even on brittle and thin nails.
The acid primer is made on the basis of methacrylic acid. It is most often used for extensions with acrylic powder; it does not have a very good effect on the condition of the nails and therefore is not useful to us in the process of applying gel polishes.
An acid-free primer removes fatty deposits from the nail plate, destroys harmful bacteria that multiply under the layer of artificial material and cause diseases. It perfectly dries the nail, removes excess moisture, affects the scaly structure of the upper layers and works like double-sided tape: a covalent bond is created between the nail and the artificial material. It is great that the drug does not affect the color of the extension material and is not too dangerous for the skin, although when applied in some cases it is still recommended to avoid getting the drug on the cuticle, because redness and irritation may occur on sensitive skin.
TNL, Primer Bond, 15 ml
Acid-free primer with a tacky layer for nails.
(92)
240 rub.
240 RUR Buy
ruNail, Nail Prep Dehydrator, 15 ml
Dehydrator without a sticky layer for preparing the nail plate for gel extensions.
(74)
160 rub.
160 RUR Buy
UNO, Rubber Base, 15 ml
Base coat, rubber base for gel polish.
(809)
690 RUR
690 RUR Buy
Apply the primer, wait a minute, and then you can start applying the base. Attention: a UV lamp is not needed to dry the primers!
Bases, tops, primers and gel polishes
These are the main components of a three-phase nail gel polish system.
• Bases
. There are rubber, regular and biogels. For thin and weakened nails, it is better to use biogel: it is thicker and more elastic. Regular bases will work for good nails. Rubber bases are easier to work with and self-leveling easily, but cost a little more.
• Tops
. Tops can be thick and flowing, with or without a sticky layer. The consistency should be chosen based on ease of application. Tops with a sticky layer are used to secure designs, sliders and other accessories. The non-stick topcoat is suitable for any other topcoat.
• Primers - enhance the adhesion between the nail plate and the color coating, respectively. The average wear of gel polish increases.
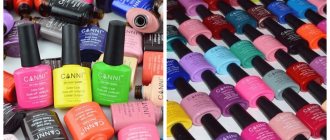
• Gel polishes. In order to choose the right gel polish brand for you, you will have to try some of them. They differ in thickness, fluidity, and color palette. We recommend reading reviews before purchasing.
There are also 3-in-1 or single-phase colored gel polishes. They do not require the application of foundation and top, as they are already included in their composition. Such materials have not gained much popularity, since they are still inferior in properties and brilliance to the three-phase application system.
Review of rubber base for gel polish
Materials for designs
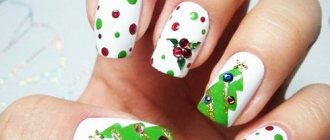
Materials for nail design are not required to be purchased, but you will most likely quickly get tired of wearing a single-color coating. To do this, you can purchase different decor that will decorate your manicure and make it individual. Here are just some of the possible options:
- Sliders.
- Kamifubiki.
- Rhinestones.
- Ribbons.
- Foil.
- Spider gel.
- Gel paints.
Every day something new appears on the market, so it’s simply impossible to list everything!
A little advice that I would like to give to novice craftsmen is not to use cheap Chinese materials. This is especially true for liquids that come into direct contact with the skin and nail plate. Chinese materials very often cause severe allergies and can cause serious harm to the body.
Applying gel polish at home
Having dealt in detail with the list of necessary equipment, materials and tools, let’s move on to the step-by-step procedure for applying gel polish. Please note that you should not apply cream to your hands first, otherwise the coating will come off the nail plate very quickly.
The procedure includes:
- Preparing the nail plate (or performing a manicure).
- Application of materials.
When preparing the nail plate, it is important to follow each step and perform it efficiently, otherwise the coating will not last long and detachments or chips will appear.
Nail preparation is performed in different ways, depending on the chosen manicure method.
Next we will look at the classic version, which consists of several stages:
1. Remove the old coating from your nails using nail polish remover or gel polish, depending on what you had on your nails.
2. Give the free edge of the nail a uniform and even shape using a nail file. If necessary, the side ridges around the nails are also processed with a nail file.
3. A softening agent is applied to the cuticle area, which must be left for a while (read the instructions for your remover) so that the skin becomes more pliable. Usually it does not exceed 1-2 minutes. You can also soften the cuticle in a bath with warm soapy water.
4. Push back the cuticle using a pusher or an orange stick.
5. Wipe off any remaining product with a lint-free cloth.
6. Cut off the raised skin with nippers or scissors.
In hardware manicure, cuticle processing is performed using a cutter. Carefully, at 10-15 thousand revolutions, we pass the device over the cuticle from right to left, lifting it.
Then we switch the reverse and work in the opposite direction - from left to right.
It is important to perform cuticle removal very well. Since if there are at least some protruding parts of the skin, hangnails or pterygium on the nails, it will be difficult to apply gel polish very close to the cuticle, it will flow and lie unevenly, which will lead to rapid peeling of the material.
Advantages of gel polishes over regular ones
Even a multi-step sequence of applying gel polish should not be distracting because it is complicated and painstaking, because the final result will last for about a month. This is the most important difference from ordinary varnishes.
In addition, it is convenient to work with gel polishes while creating a design on your nails. Due to the fact that your nails dry under the lamp, you have enough time to get the desired design.
Also note the implicit savings. After all, although regular varnish is cheaper, it can be used almost every two to three days. So the benefits of such varnishes are questionable.
After polymerization, gel polishes are more resistant to external influences from environmental factors: washing dishes, working in the ground or other activities.
Another significant advantage is the drying method. The gel polish has already dried after the lamp, and there is no need to be afraid to wipe it on something. Conventional varnishes, especially in two or three layers, require a long time for final drying. Otherwise, you can ruin a perfect manicure with unnecessary scratches or abrasions that ruin the glossy surface.
Gel polish application technique
1. Remove the natural gloss from nails using a buff. This will improve the adhesion of the material to the natural nail.
2. Degrease the nails with a lint-free cloth soaked in a special liquid.
3. Apply a thin layer of primer to the entire surface of the nail plate and wait until it dries in the air (about 1 minute).
4. Apply the base and dry in a UV (LED) lamp for 30-60 seconds.
5. If necessary, use a second layer of base to level the nail plate. It is convenient to use a rubber base for this. Before drying it, the nail must be turned over for literally 30 seconds to self-level.
6. Apply the color coating in two thin layers. Dry each layer in a lamp for 30-60 seconds. If the gel polish is highly pigmented, applies evenly and without bald spots, you can apply it in one layer.
7. The desired design can be made on top of the color coating.
8. We cover the nails with a finishing topcoat and also polymerize it in a lamp.
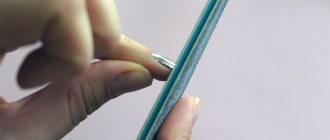
9. Remove the sticky layer, if there is one on your top.
10. Apply nourishing oil to the cuticle area and rub it in with massaging movements.
Gel polish manicure is ready. After the procedure, prolonged contact with water is not recommended for two to three hours. Correction should be carried out when the coating becomes unpresentable or the nail grows too long. The most optimal time is three weeks.
Step-by-step instructions for applying gel polish for beginners at home
First you need to prepare your hands and make a special warm bath to disinfect and soften the skin.
If you add several components to it, the procedure will not only be pleasant, but also very useful for your nails. It is recommended to add a drop of shampoo, liquid soap or shower gel, 1 teaspoon of sea salt and lemon juice to a small container with warm water, mix all the ingredients and dip your fingers into the prepared solution.
After 15-20 minutes, rinse your hands with a brush and dry with a towel.
To soften the cuticle and make it easier to remove, you can make a bath based on any nourishing or medicinal oil, heated in a water bath, adding a few drops of vitamin E and lemon juice.
We immerse our fingers in the prepared solution for about 10 minutes, after which we thoroughly wipe each finger with a paper towel and begin processing the cuticle after a couple of minutes.
The cuticle has softened and now you can easily push it back with an orange stick and begin to remove the dead part and excess skin around the nail plate, but do not overdo it, because small cuts leave a sloppy appearance and also contribute to the possible introduction of infections into the nail bed. Before starting the procedure, you can treat your nails and skin with a disinfectant.
You may be interested in: “What manicure looks expensive: examples and photos”
“Beautiful manicure for short nails: trends 2019-2020”
Nail preparation
In order for the gel polish to lay evenly and adhere well to the nails, it is important to prepare them correctly. Wipe the nail plate with alcohol and polish with a buff. Use a polishing block to carefully remove the keratin layer, making sure that the entire surface of the nail is treated.
You need to apply the buff with the wide side to the nail plate; the direction of the cut when polishing is carried out along the nail plate and only in 2 directions: to the right and to the left.
When the surface of the nails is prepared, apply sunscreen to the skin around the nail plate so that the ultraviolet radiation during drying the gel polish in the lamp does not dry out the skin.
Applying base coat
In order for the gel polish to adhere better to the nail plate, a special base is needed. Therefore, when purchasing a base coat, choose a quality product, because the quality of the coating and the durability of your manicure will depend on it. The base is applied in a thin layer to the surface of the nail, then dried in a UV lamp.
Interesting article on the topic:
- “Fashion trends in manicure 2019-2020: new designs, ideas, photos”
Applying gel polish
Now you can apply any color gel polish to your liking. Gel polish is usually applied in 2-3 layers, and each layer should be as thin as possible, then the shellac will adhere perfectly. Excess gel polish from the skin around the nail can be easily removed with an orange stick.
Helpful advice! Before applying shellac, you can use regular Vaseline to create a protective barrier around the nail plate. You should carefully apply Vaseline to the cuticle and the skin around the nail, this helps coat the surface of the skin and prevents the varnish from penetrating into it.
After applying each layer, the nails are placed under a UV lamp to polymerize the varnish. If the color of the varnish is not saturated enough, you can repeat the procedure again. When the color coating has completely dried, you can begin the final stage - applying the top coat.
Applying top
The final coat or top is the final stage in creating a manicure. The top is needed to secure all the coatings that have been applied to the nail. Using a topcoat can prolong the durability of a manicure, protect it from mechanical stress, and add brightness, richness and depth to the color.
There are a lot of top options; manufacturers offer matte and glossy products with a characteristic shine, with or without a sticky layer.
The top is applied in a thin and even layer only to the material; after the color has completely dried, the coating is evenly distributed over the entire nail plate, including the end part, to seal it.
After applying the final coating, it must be dried under a UV lamp for approximately 2 minutes. If you have a top coat with a sticky layer, then after polymerization you need to remove it with a cleaner or alcohol. After that, all that remains is to rub in a special oil to moisturize and strengthen the cuticle and enjoy a flawless manicure.
As you can see, making gel polish at home is easier than it seems, and you shouldn’t be afraid of it.
Composition of gel polish
Gel polish has a polymer structure, it is quite durable and beautiful. The chemical composition of gel polish includes the following components:
- Film former;
- Photoinitiator;
- Methacrylates;
- Pigments;
- Silica;
- Thinner and other decorative fillers.
The film former in the gel polish ensures the strength and elasticity of the material by forming a hard film on the surface of the nail plate when exposed to ultraviolet radiation from a UV lamp. Thanks to this component, the gel polish does not deteriorate and is highly resistant even when in contact with active substances in household chemicals and other substances.
The photoinitiator reacts to ultraviolet radiation and promotes polymerization. The amount of this component affects the drying time, and the more of it in the gel polish, the faster the nail polish hardens.
Methacrylates create the desired consistency of gel polish. Silica prevents the appearance of pigment sediment at the bottom of the jar. Pigments determine the final color of the gel polish and its density. To obtain a variety of shades and new colors, shellacs can be mixed with each other. When creating a high-quality manicure, when mixing, it is better to use gel polishes from one manufacturer.
Other chemical components - additives and various fillers - may differ slightly from one manufacturer to another, because they also affect the quality of the final product, giving the coating its sophistication and individuality.
You may be interested in: “Retinol and retinoids: leaders in skin rejuvenation and acne treatment”