Acrylic nail paints are increasingly gaining popularity. This is a very simple safe material. Their main advantage is that they have a large palette, and for just 1000 rubles you can become the owner of a whole set with many colors of excellent quality. As for gel polishes, for this amount you will buy at most 2-3 bottles.
Acrylic paints work well; they can be used to create color mixtures, subtle elegant patterns, as well as bright details and even entire paintings. However, painting with acrylic requires skill because it dries quickly: if you hesitate a little, the drawing will dry out and it will be difficult to correct it.
If you are interested in learning more about the use of acrylic paints in nail design, then you will find a lot of useful information, namely: their types, how to choose acrylic paints for painting on nails, how to use acrylic, what ideas can be implemented in manicure with their help.
What is watercolor painting
Watercolor painting is one of the types of nail painting. Thanks to the use of special tools and techniques, the patterns on the nails resemble artistic watercolor drawings with their blurriness, halftones and fuzziness.
Watercolor painting, unlike many nail art techniques, requires artistic skills from the master, since each element of the design is created manually with a brush, but at the same time it provides almost unlimited possibilities for an original design.
You can create a drawing using watercolor technique using:
- special gel polish for watercolor design;
- nail paints “Watercolor drops”;
- acrylic paints;
- artificially liquefied gel polish.
Some tips for creating watercolor nail art:
- use a light base - white, beige, nude or pastel shades. Against a dark background, watercolor is lost;
- any dye, be it paint or diluted gel, must be sufficiently liquid. When applied to the nail, the color should be washed out. To check the degree of blur, do tests on a tip or other plastic surface;
- At first, when creating a design, use the examples of other masters. This will allow you not to be distracted by fiction and practice your technique.
Video: Creating a manicure with Kodi gel paint
Today, the nail industry has so captivated cities and villages that even schoolgirls know that gel and acrylic are the main ingredients for “making” an artificial nail in a manicure. In other words, these are materials for extensions. Today we will look at them from a different point of view. Let's learn how to make nail designs for beginners using acrylic paints and gel.
The next step is to clean the mixture. We believe that with this tool we can achieve good effects. But by fusing it with spin gel, we can make our famous dripping very well. It is this syrupy effect that gives the gestures momentum. We shouldn't focus on plots because that's not the subject. We are in exactly the situation we want to be in and get the desired result. We have a molasses paint effect with inertia that follows movement.
After that you have to learn the gestures, which is none of my business, to get very random and syrupy marks. This was more of a test than a demonstration for us since we had never used a spinning gel. The result can be predetermined by the technical data sheet of the product. In this case, the color does not change in any way. Once mixed, the result is a syrupy, non-greasy material that gives inertia to the gestures. A conclusive drip test was performed. This is a good tool that will add another arrow to our quiver to continue learning all the techniques and expressing ourselves on our canvases.
Advice from professionals
When painting your nails with acrylics yourself, you should consider some recommendations from professional nail artists:
- To perform the procedure, you need to choose a comfortable place where your hand will lie without tension.
- When covering the surface, do not press hard on the brush.
- You shouldn’t choose a complex pattern for the first time.
- When depicting a drawing, first of all, draw an outline, which is then shaded.
- It is better to perform a complex design on one nail plate; on the remaining nails, depict simplified fragments that echo the main theme of the design in color.
- Any image made with acrylics must be fixed with a special fixative.
Advantages and disadvantages
Advantages:
- Large color palette.
- The use of a coating does not require large cuts of the plate surface.
- Possibility of mixing several tones to obtain an interesting shade.
- During polymerization, you can adjust and make changes to the design.
- Used for applying designs and completely covering the nail plate.
- The dense texture makes it easy to master the technique of drawing.
- The manicure remains presentable for 14-20 days.
Flaws:
- The layer is removed using mechanical force, which can lead to damage to the nail structure.
- The procedure for using the coating requires the presence of an ultraviolet lamp.
Lifehack for watercolor painting
To save time or if you lack artistic skills, use ready-made watercolor-style stickers. You can find them in online stores of nail products and, of course, on Chinese sites.
Stickers can be:
- water - to separate them, you need to place the fragment in water for 10-15 seconds;
- on an adhesive basis.
Before transferring the image to the nail, do a standard manicure, apply a top coat and a colored background.
Product price
You can purchase manicure paints at any specialized or chain store. You should avoid retail places of sale with mountains of vials or tubes piled into boxes - their cost and quality will be extremely low.
To check the suitability of the purchased paint, you need to lightly dip the brush into acrylic liquid. If the dipping area immediately begins to “tighten”, the paint is fresh; if the damage to the surface remains for a long time, the paint is expired or counterfeit.
Tip: If you buy a set of acrylic paints, check all the containers, not just one to choose from. You should not trust the information about the expiration date indicated by the manufacturer on the packaging, since its storage conditions are unknown.
The price of a bottle (20 ml) of acrylic paint for painting on nails from a well-known brand is 200 rubles. and more.
Formulations of the same volume from less popular companies cost 70-90 rubles. Standard forms of release of acrylate compositions are soft tubes, glass or plastic jars, as well as pencils for creating thin and clear inscriptions.
It's time to learn how to use acrylic nail paints.
Watercolor gel polish
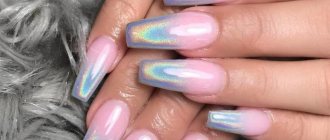
Gel polish for watercolor techniques, or watercolor gel polish, is a special medium-density gel product that is devoid of ductility.
With its help, you can create abstract patterns or apply it pointwise, creating a flowing watercolor effect. Using this method, patterns are obtained, for example, as in the photo below.
Examples of gel varnishes for watercolor techniques:
For watercolor gel polish, you need to use a special base - without it, the dye will not spread. A large selection of watercolor gel polishes is presented by the Irisk brand in the “Watercolor” collection. The manufacturer also offers a special base - Wet Gel Polish.
To create a design, prepare:
- watercolor gel polish and a special base for it;
- colored gel polish for the background;
- base and top.
Step-by-step instruction:
- Apply a thin layer of your usual base – Kodi, TNL – to the nail plate and dry it in a lamp;
- Now prepare the background - with any gel polish, preferably a light shade and dry it again in the lamp;
- Apply a special base and, without waiting for it to dry, start creating your abstract pattern. The drops will spread, mix and form streaks;
- After finishing decorating, dry the coating in a lamp. Watercolor patterns need to be dried in LED from 30 to 60 seconds, in UV - 120 seconds;
- Secure the design with topcoat, seal the ends and dry again.
With gel polishes, you can try to create a meaningful pattern with a brush, but the process will be quite labor-intensive. It is recommended for experienced nail artists with well-practiced nail painting skills to use this method. At the initial stage, try using special or acrylic paint for these purposes.
Drawing gel
Let's remember what gel for nail extensions looks like. This is a viscous, viscous mass that we hardly distribute over the nail plate, trying to reproduce the shape of a real nail. It is not this gel that is used as an artistic material, but gel varnishes. They are also otherwise called shellac or shilak (a derivative of the popular Shellac brand from CND).
A distinctive feature of gel varnishes from conventional varnishes is the need for their polymerization
. The structure of gel polishes is slightly different from other nail products that dry on their own in the air. A manicure done with shilak (pictured) must be held under a special LED lamp so that it adheres properly to the nail.
For beginners, we present a video tutorial with an interesting shilak design.
The technique of applying gel polish to nails is quite simple.
The difficulty lies in preparing the nail plate for shilak. The nails need to be sanded, degreased, coated with a special base... Full detailed instructions for beginners are presented in the article on our website “”.
Nail designs using gel polish are made with a regular or special thin brush, depending on the nature of the pattern. Each layer of shilak must be polymerized in a lamp for a more durable manicure!
Step-by-step instructions for use
Now let's look at detailed instructions on how to use gel nail paints. In this example, we described working with gel paint for coating with gel polish.
- Apply a base coat to the prepared nail and dry for 2 minutes in a UV lamp.
- Then we cover the nail with colored gel polish and dry it for 2 minutes in a UV lamp.
- If necessary, apply another layer of colored gel polish.
- We cover the nail with top coat and also polymerize it. Remove the sticky layer from the top, if there is any.
- Open a jar or tube of gel paint of the desired color and put the required amount on the brush. For painting you need to use special brushes for nail design. We looked at which brush is intended for what here.
- Let's start drawing. If the design is complex, we recommend drying each element separately in a UV lamp. Gel paint should be dried in a UV lamp for 2 minutes, in an LED lamp for 30 seconds - 1 minute.
- Depending on the need, cover the nail with topcoat and dry it as well.
How to remove gel paint from a nail coated with gel polish? To do this, you must first file off the top coat and pattern, then remove the gel polish with your usual special product.
How to create a manicure with gel paints yourself
As we have already noted, nail designs with gel paints can be made in a wide variety of ways. We will tell you 2 main technologies: covering the entire nail plate with gel paint and making designs with this material on gel polish.
Which brand of acrylic paint should I choose?
Depending on the quality of the paint, they can be classified as follows.
What is Acrylic Painting Medium
The product allows you to adjust the properties of the paint or improve the fluidity of the paste without changing its color.
There are three types of staining media. Madima to prepare the surface for painting. Example: acrylic or universal gesso. Means for changing the structure of a picture. Example: acrylic binder, natural pumice. The embroidery tool is already dry paint. Example: glossy or matte acrylic varnish.
How to cover an entire nail with gel paint?
To perform a manicure with gel paint, in addition to this coating, you will need:
- Buff for removing the glossy layer from nails.
- Means for degreasing and cleaning plates.
- Ultrabond is a primer that does not contain acids.
- Base for gel polish.
- Top for gel polish.
It is advisable to purchase all materials from the same manufacturer as the gel paint you have chosen. The step-by-step instructions for performing a manicure are as follows:
Does acrylic work need to be varnished?
To protect the work in time, it is necessary to varnish it as soon as the paint is completely dry. Therefore we will have 2 types of finish depending on the varnish used: gloss or matte.
What varnish to use for acrylic paint
To protect dry acrylic paint, use matte varnish or gloss varnish. It all depends on the rendering of the work. For a shiny rendering, 2 coats of gloss varnish will be used, let dry first for at least 6 hours. For matte rendering, first apply a layer of gloss varnish, then a layer of clear matte varnish.
- We prepare the nails by lightly walking over them with a buff.
- Degrease the plates.
- Apply an acid-free primer.
- Apply a thin layer of gel polish base and dry it in a lamp (2 minutes in UV or half a minute in LED).
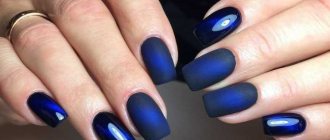
- Using a brush, cover the nails with the selected shade of gel paint. You can mix the shades directly on the nail, creating a gradient effect, or you can apply two contrasting shades, for example, as in the photo below, and then add silver dots using dots. Dry in a UV lamp for 1-2 minutes.
- Cover with top coat and put your hand back into the UV lamp for 2-3 minutes. If the top you used has a dispersion layer, remove it with a degreaser.
What to dilute acrylic paint with?
To achieve a satin finish, two varnishes will be mixed.
It is not recommended to dilute acrylic paints with gasoline. Even the water thinning method is not recommended as it depletes the paint, but you can use water judiciously. To completely thin out acrylic and maintain all its characteristics, choose paint products specifically formulated for this technique. If your acrylic is too thin, choose a thickening medium. If you have other questions about acrylic paint, feel free to send us your question through the contact form at the top of the page. We'll be happy to answer them and add them so other artists can benefit from them.
Drawings with gel paint on gel polish
Most often, a manicure with gel paint is created on the nails, first. After applying a bonder, a base for gel polish and a layer of colored gel polish to the nails, as well as drying each of these layers in a UV lamp until completely polymerized, you can begin to make the design. There are many ways to apply gel paint. Here are some of them:
Add this spinning medium to your acrylic to get these effects without any difficulty. Use rotating gel for dripping. In fact, I'm fascinated by the material many artists use to drip. This is a technique that consists of creating cuts and finishing the canvas with colors, lightly cut, light or dark. Immerse the utensils: kalam, brush, knife, etc. in a can of paint mixed with spin gel, very large, very interesting runs are produced.
The texture of the resulting material is particularly honey-colored. This avoids any hacking and any other inconvenience. My main goal with these videos is to give you academic tips so you can do a lot. Demonstration of dripping using gel freezing.
- Take a thin brush and, dipping it in gel paint, draw monograms and curls. Dry the drawing in an LED lamp for about a minute or 2-3 minutes in a UV lamp. Then apply the topcoat.
- Take a dots, dip it in one shade of coating and place dots on the nail in a chaotic manner. Then take a second shade that is similar in color and add smaller dots. Dry in a lamp, cover with top.
- Apply a matte coating to the gel polish layer, dry it in a lamp and remove the sticky layer with a degreaser. Then, using gel paint to match the background, apply a pattern or draw a smile line. You will get a combination of matte background and glossy design. Transfer foil can be printed on top of the pattern, creating a casting effect. Apply gel polish topcoat locally to the drawing and dry in a lamp.
- Using a thin brush, fill the nail hole with the selected shade of coating. Use the same shade of gel paint to draw a smile line. Dry the design under the lamp and cover the nail with a top coat without a sticky layer.
Now we will test the freezing gel. At first glance it looks like honey. It is referred to as the gel making copper honey. To get interesting effects, it will be mixed with somewhat thin acrylic paint. The hope is that the mixture will produce the result you're looking forward to, and then when one runs the test together, you'll know right away what to expect. Let's turn now to the demonstration.
We'll take our spinning gel and we'll add a good dose to the bowl. Then pour the gold liquid into the acrylic paint. Remember that the latter must be liquid enough so that the mixture is homogeneous. We'll check that proportion there and then give the paint a shooting property. In any case, the acrylic will not be altered by the gel. After the exchange, the color becomes more transparent and we get a beautiful consistency according to the height of our expectations.
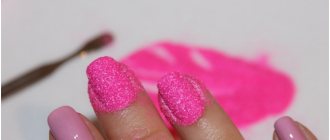
Paint for painting “Watercolor drops”
Using watercolor paint, you can create both abstract and detailed designs, such as flowers. The paint is water-based and does not require polymerization - it dries in the open air within 30-120 seconds.
Watercolor paints offered by brands:
- Irisk
- Patrisa Nail;
- In Garden;
- Dona Jerdona.
To create a drawing, no special basic tools or other additional materials are required - the drawing is drawn on a dried background and secured with a topcoat after drying.
Step-by-step instruction:
- Prepare the background - apply a thin layer of base and color, drying each layer separately;
- Drop a little paint onto foil or a palette and use a thin brush to create the desired pattern on your nails. If it is necessary to blur the pigment, wet the brush in degreaser and then pick up dye on it;
- Wait for the pattern to dry and secure the design with topcoat.
For work, use any brushes that are convenient for the master and suitable for a specific pattern. If you haven’t acquired such a tool yet, take a look at sets from TNL or Roubloff. Roubloff has a small line of Watercolor brush sets specifically for painting.
Rules for using brushes for manicure. Basic techniques
Manicure brushes - types, purpose, how to choose and care
How to choose gel paint
Today, there is, without exaggeration, abundance on the cosmetic products market. A lot of brands produce their own products, including gel polishes. How to choose “your” product in this variety? Of course, by experience, however, while this is not enough, before applying gel paint to natural nails or extended nails, you should familiarize yourself with the brands.
- Canni. The container volume is 5 ml, the palette is very rich, the paint does not contain aggressive components and is devoid of an unpleasant, irritating odor.
- Miranda. The product is produced in jars, colors are offered both pure and with iridescence.
- RuNail. 7.5 ml jars, excellent value for money. The product is especially suitable for artistic painting.
- Emi. German product in tubes, can be purchased both in sets and individually. By the way, painting your nails with Amy gel paint is also great because it gives an excellent dense coating. German quality, in a word.
- Kodi. Favorite product of professionals. Of course, it can be used to effectively create flat coatings, castings, and volumes.
Popular manufacturers
We have already talked about such materials, now we will talk about the manufacturers. Common and well-known brands of acrylic nail paints include:
- “Polycolor” is one of the most popular series, famous not only for its durability, but also for its wide color palette. It is worth understanding that you will have to buy Polycolor acrylic paints for nails at a higher price than other brands;
- “Wealth” is produced mainly in the form of small volume tubes (up to 12 ml), which have a low price;
- "Oumaxi" belongs to the relatively inexpensive segment of acrylic paints and has a small selection of shades used to obtain a rich palette;
- Starlet Professional is usually sold in the form of kits, which allow you not only to use the original mixtures, but also to combine them with each other.
Acrylic paint
The main advantage of working with acrylic paints is their drying time. If paint for watercolor painting sets within 1 minute, then acrylic paint gives the master 3-7 minutes to maneuver, refine and correct flaws in the drawing.
Prepare for work:
- acrylic paints in the desired tones. You can buy them individually or as a whole set, like TNL or Runail;
- brushes for painting. Choose brushes based on the complexity and composition of the drawing. To draw small details, use the thinnest brush, and to fill a large area, use a flat one;
- base and top;
- water;
- gel polish for the background.
Step-by-step instruction:
- Before painting, cover your nails with base and color, drying each layer in a lamp;
- Drop a little water and 1-2 drops of acrylic paint of the desired shade onto the foil or palette. Try not to add too much water at once, test the dye on a tip and dilute gradually until you get the desired shade;
- With light movements, outline the design on the nail and gradually draw out all the details;
- To add volume, shade large elements of the pattern with highly diluted paint with a light color tint;
- After finishing the painting, wait for 3-7 minutes to dry and cover the pattern with the finish.
Painting on nails: materials, step-by-step instructions, design ideas
What is gel nail paint?
Modern nail art uses a wide variety of materials, using which you can create an almost imperceptible delicate and light pattern, as well as bright, eye-catching designs, make the coating translucent with light lace, or decorate your nails with paintings worthy of the title of masterpiece. One of these materials is gel nail paints.
Gel paint or gel nail paint is a thick, plastic substance with high pigmentation. This substance does not bubble or spread. Just like acrylic used for nail extensions, it polymerizes under the influence of ultraviolet lamp radiation for a maximum of two minutes.
How to properly paint wooden products with acrylic paints? The properties of this substance allow you to create super nail designs. When working with gel paints, the master can take his time, fearing that the material will harden, and carefully draw every detail of the design or element of the pattern.
Gel nail paint is a universal material. You can paint with gel paints on both natural and extended nails of any shape and length. You can make both Chinese and elegant French manicures with gel paints, and also use them for aquarium design.
In 2021, French nail design is a combination of poorly compatible design elements, colors and patterns. The classic white tips of the nails are giving way to dark, black, foil, silver colors, various intricate ornaments and patterns that highlight the free edge of the nail. Today, making a French gel paint does not mean drawing simple white or colored stripes on the free edge of the nail, but also skillfully choosing patterns, rhinestones, sparkles, foil for them, in a word, it is interesting to play with the classic version of this type of nail design, beloved by many girls.
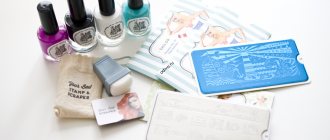
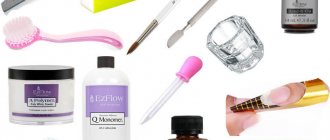
What you need for a manicure
Before you start designing your nails with acrylic paints, place the following items close to each other: acrylic art paints of different colors (a few pieces will be enough to start), dots, a thin paint brush, a clear topcoat, colored varnish, a container with water for cleaning brushes, a palette for mixing paints, a napkin for blotting the brush, nail polish remover, a cotton swab for correcting the design and cleaning up mistakes.
For more complex designs, you can also prepare pebbles, beads, rhinestones, and seed beads.
Tip: for acrylic manicure, it is better to use synthetic fiber brushes.
Pre-workout
Before you start doing a step-by-step manicure with acrylic paints, you need to learn how to use a brush correctly - understand how it is more convenient to hold it, how hard to press, how much paint to take. Therefore, for girls just starting to learn the basics of performing manicures with acrylic, it is better to start by practicing not on nails, but on any other surface, for example, on a piece of cardboard or plastic.
Cover the selected surface with colored varnish and wait until it dries completely. Apply a little paint to the palette and mix several shades. Try to draw simple lines on the surface first with different brush angles and different pressures, taking different amounts of paint.
Then complicate the task: draw a nail plate on the surface, apply varnish to it, let it dry and try to complete the chosen pattern.
Once you feel that you have become more confident in using the brush, and the drawings have become clearer and brighter, you can begin to perform a manicure with acrylic art paints on real nails.
Application technique
Any technique for applying acrylic materials to the surface of nails requires compliance with general rules:
- before starting acrylic painting, it is necessary to carry out the usual manicure treatment of nails;
- It is better to degrease the surface of the nails, because without this the acrylic will not fit well on the nail plate;
- preliminary application of cosmetic varnish is allowed, with which the nail surface must be covered in two layers. The design is applied after the varnish has completely dried;
- when using several colors, you should provide different brushes or ensure good rinsing of one brush;
- The applied design must be protected by covering it with a fixative.
Nail design using acrylic materials is distinguished by a wide variety of artistic techniques. They can use paintings reminiscent of watercolor, oil, gouache drawings and other techniques for decorating nail surfaces.
Common drawing techniques are:
- oil;
- pasty (gouache);
- watercolor;
- sliding - technique;
- glaze.
Oil painting
Oil painting of nails with acrylic paint
The most commonly used method is to depict a design in the form of voluminous relief strokes applied with a brush. Paints are not diluted with water to create a three-dimensional design, so their consistency resembles oil-based paints.
To make the design neat, use a small brush with a flat shape.
Sometimes, to apply a complex stroke, two different unmixed colors are drawn onto the brush.
Gouache painting
The impasto technique, reminiscent of gouache painting, is also carried out with paints not diluted with water. Unlike the oil technique, the nature of the applied acrylic strokes is uniform in color and texture.
Watercolor painting
The watercolor technique is carried out using diluted paints of translucent tones.
It is used both for applying a background coating and for creating some details of the main design, for example, images of delicate flower petals or smooth transitions of patterns. Unlike watercolors, acrylic diluted with water takes much longer to dry.
Sliding
The sliding style technique is the most complex, performed by professional craftsmen. A structural gel is added to acrylic paint. After this, the color of the acrylic acquires a whitish tint due to the gel, which becomes transparent after the paint dries. The color of acrylic acquires rich brightness and depth.
Glaze
Glazing on nails
The glazing technique is as follows: paints diluted with water are applied to the nail surface in layers, one layer on top of the other. The previous layer must dry well before this.
The color after dilution can be translucent, and the overlapping layers, when translucent, give complex, beautiful shades.
Depending on the degree of dilution of paints with water, a drawing created using this technique may resemble work done in gouache, oil or watercolor.
Benefits of acrylic
Acrylic art paints have appeared on the market recently, but are already loved by professional and novice manicure lovers due to their positive properties:
- long-term preservation on nails due to weather resistance and flexibility (do not chip or crack);
- a wide variety of colors, while the brightness and shine are maintained throughout the entire time they are on the nails, and the possibility of mixing provides additional shades and scope for design ideas;
- acceptable, quite affordable cost;
- long shelf life;
- economical material - one tube is enough for several applications;
- quick drying, allowing quick application of the next layer and preventing smearing of the previous layer;
- harmlessness – during operation there is no evaporation of substances harmful to the human body;
- resistance to UV rays, which is why the painting is not susceptible to fading from exposure to sunlight;
- easy solubility in water allows you to adjust patterns during application;
- Acrylic nail paints are very convenient for beginners because of the ease of application.
Information: the only disadvantage of acrylic art paints is the poor tolerance of very low temperatures, at which the coating loses some of its properties.
Advantages
Acrylic paints have the following advantages:
- A rich palette allows you to choose suitable colors to update your nails. When mixed, many other interesting colors are produced;
- Acrylic is flexible and easy to use;
- The paint can be applied to your own and extended nails. An excellent result is obtained with gel polish;
- For dilution, ordinary soda is required;
- No special cosmetics are required to remove paint. You can use standard liquid;
- Drawings dry quickly;
- Acrylic is consumed quite sparingly. One tube lasts a very long time.