What is nail casting?
This is one of the types of nail designs that is performed exclusively on artificial nails. Such designs are created on a strip of gel using manicure foil.
To perform such a manicure at home, you will need some skill, so it is advisable to take the first steps in this direction on false nails. After trying your hand, you can start training on your own hands. Be patient and don't be discouraged if the drawing turns out uneven at first. This is quite normal for beginners.
On our page you can find a sufficient amount of information about performing nail casting and traditional photo and video materials.
How to make casting on nails using “liquid stones”
The nail art of professional artists fascinates and delights. Innovative solutions and technologies are rapidly developing and help us turn the most unexpected ideas into reality. Casting on nails with iridescent “liquid stones” is considered the most fashionable and extravagant today. The effect of a three-dimensional pattern and metal shine is achieved through foil. We suggest you try this technique yourself. To create a manicure you will need:
- tear-off (gold) foil;
- brushes (natural, angled and “hair”);
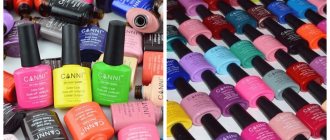
- art gels of different shades;
- stained glass gel;
- protective gel;
- thick sculpting gel;
- UV lamp.
Required tools and materials
You probably already realized that casting is done using manicure foil. For a more impressive design, it is advisable to purchase silver or gold foil.
Since casting is performed exclusively on artificial nail plates, we will work with gel. There should be several different colors in your arsenal. A final coat is necessary for any type of manicure, and casting is no exception. Just buy a gel finish that is designed specifically for working with gel and acrylic.
And, of course, we can’t do without thin brushes and a UV lamp.
Variety of designs
Casting on nails consists of various patterns; they can be openwork or using liquid stones . Nowadays, stained glass and mosaic patterns are in trend, the creation of which requires skill and experience in nail art.
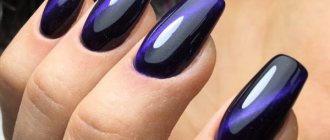
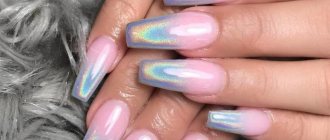
There are a lot of options for creating a beautiful manicure with casting. For example, this manicure looks good with a cracking effect. In this case, it is better to choose blue and gold colors.
If you are an eccentric person, then do not ignore the aggressive black and red design - with it you will definitely show everyone your passionate nature, which is not used to standing on the sidelines. You need to stand out from the crowd!
A French jacket with casting is suitable for any holiday . Against the blue main background, the marble jacket, decorated with silver casting, looks noble. To do this, just buy foil in the shade you need. You can also make fancy patterns in gold. A white jacket with silver or gold casting is an option that is equally suitable for holidays and everyday life. Golden edging always gives the design a sophisticated look. Often this feminine option can be found on the nails of brides.
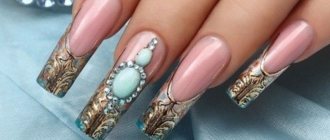
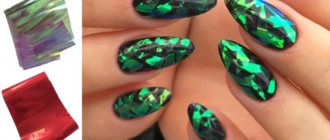
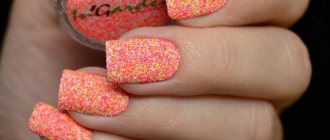
The technique of casting using liquid stones is an option for those who cannot imagine their life without the chic and sparkle of jewelry. But to actually use the technique, you will need a specialized polymer; with its help, it is easy to recreate emeralds, malachites, and sapphires on your nails.
Choosing foil
Foil for manicure is produced in two types: transferable and non-transferable. Transfer foil is sold in sheets or strips and is often covered with a protective film. Her assortment is extensive, there is plenty of room for your imagination to run wild. It is used both for regular manicure and for extensions. With this foil you can create almost any design, from delicate to bold.
Non-transfer foil is much more difficult to handle. This foil is denser than transfer foil and is sold in small rolls. When creating a manicure with its help, the design must first be cut out and then “planted” on a layer of varnish.
If you are striving for the highest quality manicure, then it is better to use E.Mi foil, which can leave imprints even on sticky skin. This foil is quite thin and flexible, and therefore is simply ideal for nail art in the art casting style.
Materials for casting on nails. Types of gel paint and varnishes
You can create unique nail art not only in the salon. With a little practice and acquiring the necessary tools, you can do a fashionable manicure at home.
The first thing you need to get is metallized foil, which comes in two types:
- Transfer foil is thin sheets or strips with different patterns, embossing, with a solid print or individual images. Transfer foil has two sides, one glossy (top layer) and the other matte (bottom layer).
- Non-transfer foil is mainly used in aquatic design. Before application, a pattern must be cut out of it, which is then attached to a layer of varnish and covered with a fixative.
Using foil you can quite easily create a bright and unusual manicure.
The foil does not have to have a metallic color; the colors available on the market are almost unlimited. If you plan to do manicures not only for yourself, but also for friends or clients, it is more economical to buy foil in sheets or rolls. But for yourself it is more convenient to use foil in the form of small plates.
The sticky base for applying foil can be not only a special gel, but also black gel paint with a sticky layer or special glue for transfer foil.
Black gel is more convenient because you can clearly see the design being created
Clear foil adhesive blends into background varnish
If you are sure that you can create a neat pattern with transparent glue, then there is no qualitative difference between black gel and glue
Tip: If you're just learning how to do nail art with foil, use plain nail polish as a sticky base. It will be easier to remove from your nails and you will save expensive consumables.
To create a background for casting and drawings, you need to acquire colored gels. To remove the sticky layer from the base varnish so that the foil does not stick to it, you will need a special alcohol-based liquid . Some manufacturers offer impregnated wipes that are more convenient to use instead of liquid for the same purposes.
In addition to supplies, you will need a UV lamp and a set of brushes. If you plan to create complex patterns, you can limit yourself to one thin hair brush.
No one is immune from failure, but if embossing fails, the problem is most likely not with you, but with the quality of the foil or gel.
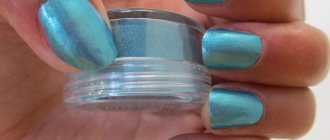
If you also want to master the technique of manicure with liquid stones, then you need to buy a special gel. For beginners, it is better to use ready-made polymer pebbles; they are as easy to use as possible and will allow you to get better at it. In addition, ready-made stones are more affordable; a set of such jewelry will cost an average of 3-4 dollars.
But what you shouldn’t skimp on is stained glass gel for liquid stones. It creates the effect of a magnifying glass, making the stones more voluminous, shiny and similar to natural materials.
Design Features
We have already mentioned that casting is performed only on extended nails and it is advisable to use transfer-type foil for this.
The process of performing such a manicure is as follows. Extended nail plates are covered with gel and baked in a lamp. Then we glue the foil to the drawing and polymerize the nails again. At the final stage, tear off the foil with a sharp movement. As a result, the top layer of foil “gives” your drawing.
The baking time for manicure in a lamp can vary and depends, first of all, on the materials used.
Step-by-step master class
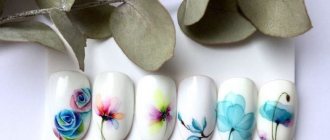
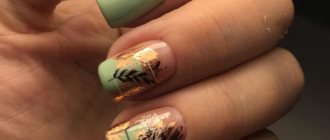
In our today's lesson we will create a manicure using the artistic casting technique. And we will make a simple butterfly on a long jacket.
We will need:
- gel paints black, white and pink;
- gold foil without additional effects;
- two brushes: thin and with a beveled edge;
- liquid to remove the sticky layer;
- finishing coating;
- directly the marigolds themselves (artificial, of course).
We will not consider the subtleties of creating a French jacket here. To do this, you can use video materials about nail extensions and manicure for beginners, which are available in abundance on our website. For our lesson we need a long jacket, made in a classic style, without unnecessary frills.
To begin with, draw butterfly wings on the French area. To do this, put white and pink gel paints on a flat brush, mix them on the palette and begin to create a pattern using the Chinese painting technique. Dry the nail in the lamp for about 15 seconds.
For a more saturated shade, we make a second layer of our pattern using the same technique. Now we immerse ourselves in the lamp for 2 minutes. At the end of polymerization, remove the sticky layer using a special alcohol liquid.
Take black gel paint and paint the lines on the wings. Bake in a UV lamp for 1.5 minutes using a power of 36 watts. Try to make your lines a little convex, so the foil will be printed better.
We apply the transfer foil in a matte layer to the image, press it well and tear it off with a sharp, confident movement. As a result, the gold will be “donated” to the design, and transparent lines will remain on the foil, repeating the pattern. If the planned lines of the drawing are not completely dressed in gold, we repeat the imprinting movements as much as necessary. When performing these manipulations, it is important not to move the foil after it comes into contact with the design, as this will negatively affect the quality of the resulting print.
Now we do the same with the body of the butterfly. We draw the contours of the body with black paint, bake it a little in a lamp, and make a foil imprint.
At the last stage, apply the finishing coat to the nail and polymerize it in a lamp for about two minutes. Many people use two coats of regular clear nail polish as a top coat. This, of course, is not prohibited, but keep in mind that such a coating lasts much less and is more susceptible to various damages. Ideally, you should use a gel finish that is designed to work with gel, shellac and acrylic. This coating reliably protects the foil pattern from abrasion and preserves it for quite a long time.
What to do if the foil does not fit well on the gel?
This problem occurs quite often, especially among beginners. There may be several reasons for this state of affairs.
First of all, pay attention to the quality of the materials you purchased. Perhaps the foil isn't good enough and just isn't sticking as well as it should. Maybe the reason is in the gel itself. After baking in the lamp, a sticky layer should form on it. If this does not happen, then there is simply nothing for the golden layer of foil to stick to. In this case, you can use special glue for foil.
It is also necessary to pay attention to the baking time of each layer in a UV lamp. Each gel has its own individual polymerization time. Take this into account when creating a manicure.
A manicure made using the artistic casting technique lasts about two weeks. It is not afraid of harmful environmental factors, so nothing can stop you from enjoying the beauty of your hands in the near future.
- At home
- Master Class
How to create a “casting on nails” design yourself? Sequencing:
Manicure casting step by step
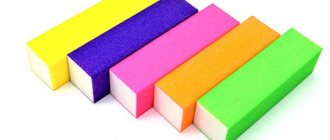
- First, the nails must be carefully sanded and polished with a buff.
- We cover the nails with a base coat in 2 layers, after each coating thoroughly drying the gel polish in a UV lamp for 2-3 minutes.
- Apply the base color on top, which will be the background of the composition, in one or several layers, also drying after each application.
- Apply the future pattern to the dried layer with a contrasting (preferably black, because this color will add depth to the selected foil) gel polish and dry it slightly. Remember that the lines must be thick enough for the foil to print.
- Press a small piece of the selected foil tightly onto the design with your fingers, hold it for a while and sharply tear off the lining. The foil itself will stick to the sticky layer of the pattern and remain on the nail, creating the design you came up with.
- Let's apply a finishing layer of topcoat to the resulting design and dry it just as thoroughly in a UV lamp.
When working with conventional varnishes, the sequence of actions remains the same, except that they will have to be dried not in a lamp, but in air. If you wanted to create a design using liquid stones, then you need to apply the polymer before applying the finishing layer.
Recommendations for creating a home manicure with casting
- Quite often it happens that the foil does not print. There are many reasons for this, but it usually all comes down to poor quality foil or varnish.
- Remember that the layer of gel polish on which the foil is applied must be sticky. Each company creates varnishes with different drying times, and this must be taken into account.
- This manicure lasts up to 2 weeks and is quite difficult to remove, especially at home. To remove it, use special clippers for removing gel polish.