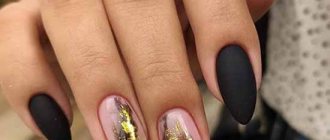
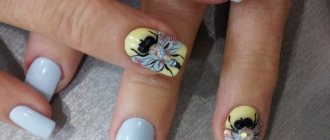
Why did this type of manicure get such a name?
Everything is simple here. Only you will know that the “pebbles” on your nails are a specially formed mixture. For everyone else, especially for those who have never seen such a manicure, it will evoke admiration and confidence that it is rhinestones or stones that are glued to the nail plates.
Of course, they will not be “liquid” by themselves. A three-layer application that involves contour, stained gels and sculpting gel will ultimately be hard and durable.
The compositions themselves are liquid, in fact, the same as conventional varnishes, which harden after drying.
How to make liquid stones on nails?
How to make liquid stones on nails? First, make sure you have all the necessary materials and tools:
Gels
- protection gel without dispersion, which will not reflect light and will not affect the final appearance of the manicure;
- gel paint or black gel with a non-oil dispersion, which will be needed to make the contours (the dispersion must be non-oil so that foil can be printed on it after polymerization);
- color art gel for French manicure;
- stained glass gel of the shade you want to make the stone;
- a sculptural thick gel that does not spread and can be used to add volume.
Brushes
- an angled brush, which you will need to make a French brush;
- a thin brush called a “hair” for drawing contours;
- A base brush that tapers to a point that you will use to apply most layers.
You can take several basic brushes if you will be making stones of two or more colors. This way you don't have to clean your brush of gel before applying each new color.
Foil
It is best to take a special tear-off foil for manicure. But if you don’t have it on hand, regular thin foil, for example, baking foil or chocolate foil, will do. Use gold or silver foil, depending on what kind of stone you will be making.
Drying lamp
It is needed to quickly dry the gel patterns and achieve complete hardening of the volumetric stone. You can use a standard UV lamp or a modern LED model. It will help you do a manicure even faster, since the gel in it dries and polymerizes 2 times faster.
Matte manicure with pebbles: ideas 2021
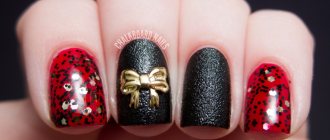
Matte manicure will captivate many girls around the world with its texture, and this is not surprising, because it looks amazing. Rhinestones will only complement the beauty of a matte manicure; adding an accent in the form of rhinestones will give you a gorgeous result that you will definitely want to repeat again someday.
Matte manicure looks great in a palette of delicate light and deep dark shades of varnish; it is very elegant in any design.
Matte manicure with stones will be a definite trend for 2021, so you can safely choose this design for your nails.
Sparkling Jewel
A light and pleasant abstraction that shimmers in an unusual way. Marble manicure is performed with metallic colored gel polishes with large glitter. This technique is done wet.
What you need
- base;
- colored gel polishes;
- metallic gel polishes with dense glitter;
- flat brush;
- top;
- lamp.
Execution technique
- It is good to degrease your nails and apply a base.
- On nails without a design, apply white polish or a neutral, delicate cream color.
- Cover the design nails with metallic varnish with thick glitter. For a deep effect, you can create a gradient of several metallic varnishes, smoothing out the transitions with a flat brush.
- Place a drop of thick topcoat and white gel polish on the palette. White should not be dense and should not spread in the top.
- Use a flat brush to grab the top coat and white gel polish. Transfer it to the nail so that chaotic stripes form on the surface. You can move the brush and braid the texture in any direction, changing only the pressure. Don't apply the polish too close to the cuticle and side rollers, otherwise it will bleed.
- Cover the design with a transparent top.
- And apply a matte top coat to nails without a design.
- Send everything to polymerize in a lamp.
The marble design in the photo looks quite mysterious. White nebula and streaks on a sparkling gradient in naive colors successfully echo each other. They slightly hide the unbridled shine, which adds uniqueness to an unusual manicure.
Natural stone effect
Marble design is done with several varnishes at once. To complete this coating you will need a makeshift palette. It can be foil or any plastic lid.
What you need
- base;
- colored gel polish for base;
- colored gel varnishes for veins;
- round brush;
- thin brush;
- palette;
- top;
- lint-free napkin;
- lamp.
Step-by-step instructions for creating a marble manicure
- Prepare your nails for work: degrease them well and apply a base coat.
- Cover your nails with a green base coat.
- Add the main colors of gel polish to the improvised palette: light purple, green, gold, pink, white, black.
- Draw the pattern using a round brush with a slightly shaking hand so that the stripes lay down in a slightly uneven layer. You need to start at the cuticle and move diagonally to the free edge.
- There is no need to wipe the brush before applying another shade. The colors should mix with each other.
- At the end, you need to take a thin brush and draw lines with white and the darkest color.
- If the design option suits you, then you need to send your nails to dry in a lamp.
- Apply the top, put it back into the lamp and remove the sticky layer with a lint-free cloth.
Marble nail design with gel polish at home is ready.
Malachite Box
How to make a marble manicure, imitating an expensive stone? This idea will appeal to those who like to wear only the most expensive things. The design will immediately add a few zeros to your luxury look.
Required Tools
- base;
- foil;
- colored varnishes;
- dots;
- flat brush;
- top;
- lamp.
Techniques for creating marble design at home
- Degrease nails and apply a base coat.
- Dry the layer in a lamp.
- Cover your nails with colored varnish.
- On foil you need to mix many varnishes into one shade. The colors need to be applied one after another: dark green, lavender, herbal, olive, emerald, black. If the gel polish does not drip well, you can help it with dots.
- After this, you need to create a chaotic dots pattern from these drops.
- Apply a layer of top coat to the colored nails.
- Use a flat brush to scoop out the pattern.
- Transfer the chaotic pattern to your nails. The pressure on the hand should be minimal.
- Dry the layers in the lamp a little longer than usual.
- Cover the coating with a finishing topcoat.
Video instruction
The technique for creating a marble manicure can be seen in the video.
Nail design with liquid stones and casting: photos, examples of ideas
To more accurately understand the breadth of your capabilities, consider the basic ideas for performing manicures with liquid stones and casting. They look like this:
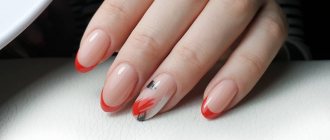
- French manicure with liquid stones and casting - the first step is to perform a classic French manicure. Next, using the casting technique, the two colors of the varnish used are distinguished. Liquid stones are usually used to decorate one nail plate, for example, on the ring finger;
- liquid stones and casting on a single-color varnish - here the principle of operation is similar to the previous option - all nails remain plain, and one is decorated with a pattern. It can be varnished in a contrasting color to highlight it even more;
- drawings using casting techniques and decoration with liquid stones on colorless varnish. The manicure in question looks very interesting and unusual. Here you can make any patterns, for example, floral or geometric.
To summarize, it can be noted that the number of ideas is not limited. It depends only on your imagination. To see this, look at the photos of nail designs with liquid stones and casting. You can exactly repeat the decor you like or create your own design based on it.
Important! To get a more stylish manicure with liquid stone and casting, you can paint the space between the foil strips with a different color, achieving even greater aesthetics of your nails. The main thing is not to overdo it so that the manicure looks stylish, but not intrusive.
Expensive design with package
An ordinary plastic bag will help you create a marble design in a luxury style. If you crumple it well, it will be able to transfer the desired texture of the stone to your nails.
Required materials and tools
- base;
- white gel polish;
- black gel polish;
- package 5*5 mm;
- thin brush;
- top;
- lamp.
How to make marble design at home
Step-by-step instructions on how to do a marble manicure at home:
- Degrease nails and apply one coat of base.
- Dry everything in a lamp.
- Apply the base color to your nails.
- Without waiting for your nails to dry, crumple up a small bag and rub it over your nails with patting movements.
- The result is an unusual pattern that repeats the texture of the stone.
- With black varnish, using a thin brush, you can draw veins of different shapes, bends and sizes.
The marble design at home is ready, an example of it can be seen in the photo!
Rock
Marble manicure design looks very impressive on nails of any length. It is a substrate with chaotic stains. It is the veins of different widths that help create the unique texture of the precious stone. The most popular coating substrate is white. Black and dark gray stains that imitate marble look best on it. But for those who like to experiment with nails, gel polishes can create an imitation of malachite, turquoise, jasper, agate, quartz and many other stones.

