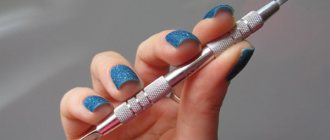
Type of brushes
A huge assortment of manicure tools is available in almost all cosmetic boutiques. They are sold individually or as a set.
Sets most often include all the necessary brushes designed to perform various tasks. Each brush has its own purpose.
A dotted or thin brush is used when fine details need to be applied. She draws patterns well. With such a thin manicure brush, you can also apply rhinestones or glitter quite easily.
A petal brush is needed for applying simple strokes and glitter. This tool has a flatter shape, unlike a point tool, and it also has a special corner.
You will need a fan brush for manicure when applying abstractions and landscapes. She can blend shades very well. It has a semicircle shape, which makes it quite easy to apply glitter.
Using a dagger-shaped brush, complex three-dimensional drawings can be easily created. The tool has a flat, beveled end that allows you to pick up several polishes.
A wide brush is necessary when you want to completely cover the surface of the nail with varnish.
We recommend reading:
Cuticle removal - tips on choosing products and an overview of the best removal methods. 130 photos and videos of cuticle careHow to restore nails after gel polish - a review of the best means and methods of restoration at home (120 photos + video master class)
Magnet for a cat's eye: tips on how to apply iridescence simply and beautifully with your own hands (110 photos + video)
A tool that has a short pile at the end is most often used to draw curls of various shapes, as well as leaves.
The hair is available in piles of various lengths. With its help, more complex patterns are created: ornaments, animal drawings, straight lines.
You can easily notice the visual difference in the shapes and sizes of the bristles of each of the above tools in any photo of manicure brushes.
Other brushes
What else are there for and what kind of manicure brushes are there? They are divided into 4 groups:
- For varnish. They are used when it is necessary to make drawings with your favorite varnish. The brush in the bottle does not always correspond to the desired thickness. Therefore, you have to use the devices from the set mentioned above.
- For modeling with acrylic. These brushes are required for nail extensions. They perform the required bending and modeling of the shape. The products are hard and have long pile. The brush bundle is elastic and perfectly restores its original shape after pressing. The tip of this tool spreads the powder while making the cuticle line.
- For working with gel. If you are interested in what brushes are needed for gel polish manicure, we will explain that such tools must have hard bristles. They are similar in shape to a square or rectangle. Thanks to these properties, the tool can work with fluid and viscous gel.
- For nail design. What kind of manicure brushes are needed to create an original nail design? For this, there are special tools that art painting masters have in their kits.
Usually the description indicates which manicure brushes are intended for what. Any device must be worked carefully, then you will get a high-quality result.
Purpose of brushes
There are 4 main groups into which manicure brushes are divided depending on the material to be worked with.
Gel brushes
This category of brushes is very different from all others and most often it is labeled as such. They are intended for modeling the nail, giving it a bend, forming an arch, as well as the final coating. These are flat brushes in shape, which can be either square or rectangular, sometimes curved, which simplifies the process of operation.
The pile should be natural or artificial, but quite hard. The gel is liquid and viscous, and therefore it will simply pull with a soft brush. But even if the brush is very stiff, it should still be flexible enough to keep the nail lines smooth and the material placed evenly.
Brush care
After we have told you what and what a manicure brush is for, let's talk about care. Proper care is important when using any tool. Manicure brushes are no exception.
The service life of your brushes directly depends on how you properly care for them. It is under no circumstances recommended to use manicure tools for anything else. Nail design only. Otherwise, sudden hair loss will begin.
Do not keep the manicure brush under water for too long. This deforms the original appearance of its pile shape.
If this happens, we recommend holding the tool under hot water for several minutes. This will help restore the original look.
To avoid the varnish drying on the bristles, the brush should be washed immediately after use. If the varnish dries, you will need acetone to remove it, which has a detrimental effect on the fibers.
Do not expose brush bristles to hot air from a hair dryer.
Before placing brushes in a special storage box, they must be thoroughly dried.
NEW BRUSH. PREPARATION CARE WORK STORAGE
Hello friends! Today I will tell you how to prepare a new brush for use.
First, you need to knock out the factory glue from the new brush. Take a paper napkin, wrap the brush to soften and unstick the hairs, then knock the glue out of the brush onto the napkin.
When working with acrylic we use a brush with natural bristles, and with gel - artificial bristles. When the brush is knocked out, you need to check that there is no glue left in it - spread the bristles with your fingernail and make sure.
If there are still particles of glue, then you need to knock the brush out on a napkin again. If any hairs stick out, they can be trimmed immediately.
A very important point : I will degrease the brush and this will be the only time in the life of the brush. Because if you constantly degrease your brush, it will become frayed, the hairs will spread out and it will be unsuitable for work. Using a cotton pad soaked in degreaser, I gently rinse the hairs, spreading them apart.
Then I take a dry cloth and wipe the brush with it.
The question is often asked: how to properly rinse a brush after gel? There is no need to rinse it. I take a simple single-phase gel or base. I take a small amount of gel and saturate the brush with it, moving from side to side.
If you are making a design with a brush, then you can only work with transparent or camouflage gel; you cannot use it to cover gel polish, glitter, paints, etc.
If you have a thin brush and you need to wash it of black paint in order to paint with white, then first I thoroughly wipe the brush on a napkin, then dip it in white paint and wipe it again. This way the brush is ready for use.
I now also wipe our new brush, soaked in gel, on a napkin, giving it shape and the brush is ready for storage and work.
I store my brushes in a glass, away from windows and lamplight. I hope this master class was useful to you.
Creation at home
For those new to nail art, we can recommend creating a manicure brush from a regular paint brush.
To create, you will only need ordinary tweezers and a paint brush itself. Using forceps, carefully remove the tufts of villi at the base of the brush, moving from the edge to the center.
You need to make sure that the brush is located in the center. We carefully process the resulting pile with scissors to the size and length we need. As a result, we get a completely complete tool for manicure. Caring for this brush is very basic.
Nail care tools
To perform a manicure at home, you need to buy high-quality basic equipment and consumables. You will need:
- Scissors and tweezers. It is important that they are made of stainless steel and sharpened by hand. It is better to buy a tool in a specialized store. The scissors are expensive, but they will last a long time. Sharp scissors make it easier to remove prepared cuticles and shape nails. The forceps remove rough skin and are used to treat areas that are difficult for scissors to reach.
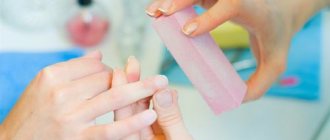
- Files. A tool made of abrasive material is suitable for home use. It would be better to buy a double-sided tool with an abrasive coating of different densities on each side. This file is convenient for shaping and polishing your nails.
- Bafa. This device is optional.
- Orange stick. You can buy a set of sticks of various lengths and diameters. The wide side is designed to push back the cuticle, and the sharp side is designed to remove dirt and dust from under the nails. The files are made from antiseptic wood and are therefore considered safe and hypoallergenic. Since wood absorbs moisture well, orange sticks should be disposable.
- Brushes for removing dust.
- Antiseptic. Even when using the instrument individually, it must be treated with cleaning liquid. This procedure helps prevent bacteria from growing in a humid environment. For scrap, it is not necessary to purchase an ultrasonic cleaner - this accessory is used only by professionals.
- Hand baths.
- Consumables – gloves, cotton pads, sponges, towels.
- Materials for coating and decorating nails - varnishes, stencils and brushes.
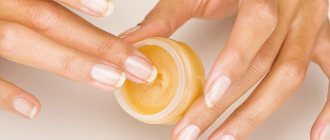
- Cuticle oils. The product perfectly nourishes and transforms the skin.
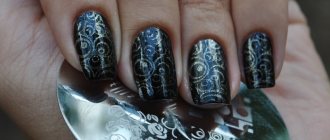
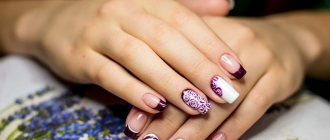
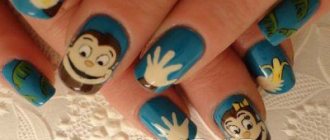
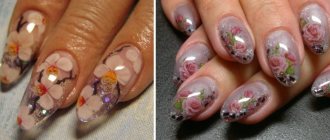
Photos of manicure brushes
Please repost
0