Types and ideas
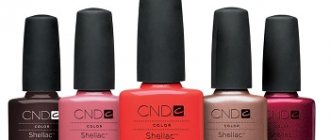
Shellac is a gel polish that can withstand almost all known aggressive factors. It can stay on the nails for 2 weeks, sometimes longer, it all depends on the speed of nail growth. At the end of its life, shellac should not chip or flake off - it’s just that the hole near the nail demonstrates the transition from the natural plate to the painted areas, which is not an aesthetic sight.
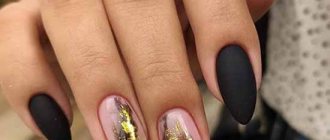
Shellac comes in matte, glossy and glitter. Now some companies have also introduced original varnish, in which the coating changes texture after hardening. It becomes velvety, grainy or sandy.
Shellac manicure options are so varied that it is almost impossible to single out one of them. Every day new ways of decorating nails are being invented. Let's look at the most popular types:
- Classic . This includes a monochrome coating using one color, French and other familiar options;
- Design is a very broad subcategory. It includes decorating one nail with polish, two or all, creating patterns with sparkles, rhinestones, knitting techniques, lace and patterns;
- Non-standard ones are matte, textured options, patterned technologies and with a pattern (cat's eye, liquid stones) and other types of Shellac manicure that attract attention from the outside.
This type of varnish has a huge number of advantages . Firstly, you can easily grow your nails with it. Together with the varnish, plate strengthening technology is used, which prevents the appearance of peeling and eliminates brittleness and flaking. Secondly, it does not require maintenance. You painted your nails and walked like that for two weeks, not worrying about their appearance at all. Thirdly, any girl can do a beautiful manicure at home. All you need is a set of varnishes, an ultraviolet lamp and a little patience.
But there is one drawback. Many girls like the eclecticism of the water design style, but, alas, it is impossible to do a water manicure with gel - it sinks in water due to its high density.
Let's take a closer look at the various shellac techniques.
What is the procedure?
The coating of the nail after applying shellac is not much different from ordinary varnish, except that the layer of the latter is not always as even as that of the first. Shellac is also much more durable and stronger, giving beauty to nails for a long period. The process of applying a special substance has its own differences, which consist of multi-level painting and drying in a UV lamp.
Also, shellac nail designs are made according to a different pattern, they look brighter and neater.
Manicure for short nails
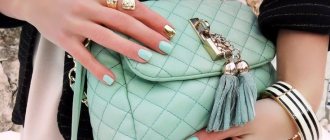
Ideas for designing small nails are very diverse. You can draw a pattern, glue liquid stones, add rhinestones, sparkles, stripes, etc. to the plates. Let's look step by step at how to make a delicate gradient manicure with shellac (ombre) for short nails :
- We suggest using white and red, which are very suitable for festive gel nail designs. First, a degreaser is applied to the nails, then they are lubricated with a base and dried in a lamp;
- After this, the most interesting part begins - drawing the gradient. The peculiarity of working with gel is that each shade will need to be dried in a lamp;
- First, apply the base and let it dry. After this, the extreme gradient is painted over. To do this, apply a few drops of varnish to the sponge. Then dry again. This is repeated until the moment of complete sketching;
- The materials can be applied immediately - if, for example, the gradient is not complex. In other words, spread all the polishes one by one onto the sponge, and then apply it to the nail. This will save a lot of time, although the pattern will not be as beautiful as when drawing each gradient level separately;
- Afterwards you need to fix the design and dry it with a lamp. The sticky layer can be wiped off with alcohol.
You can also make a mirror shellac manicure, it is perfect for a wedding or just a festive one. This is the easiest technique for beginners. To make it yourself you won’t need anything other than a lamp, foil and varnish fixer. The nail is cleaned with a buff, then a base is applied to it. Foil is glued to the base. It is trimmed around the perimeter and leveled. The second layer should be applied with a fixative. Afterwards, the nails are dried in a lamp.
How to properly remove shellac coating
You will need foil, remover (a special product for removing shellac) and cotton pads.
Don’t make the mistake of removing shellac mechanically , as you will definitely damage your nails.
- Cut the cotton pads and soak them in shellac remover.
- Apply soaked cotton pads to your nails and wrap with foil. Hold her on average up to 5 minutes, the duration also depends on the composition, so pay attention to the instructions for the remover.
- Remove the foil and carefully scrape off any remaining shellac.
- Finally, treat your nails with oil .
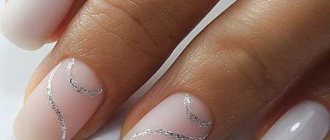
Lunar manicure with shellac
The lunar version of nail design never goes out of fashion. It can be done on nails of any length, and the holes can be located at the tips or in the hollows of the nails, painted over or not. To choose the right type of hole, you need to look at the examples and take into account some features:
- An unpainted hole grows less noticeably than a painted hole. This means that such a manicure will last longer;
- During the application process, several transitions are formed, so if 2 or more holes are made, the last one will rise slightly above the rest - not everyone likes this;
- It is best to do this design in contrasting colors: red - black, blue - white, etc.
How to make a moon manicure using shellac at home:
- You need to clean the plate and apply a base on it, then dry it under a lamp;
- The outline of the future hole is drawn. This is done either with a thin brush or with a stencil. The first “frame” of the hole is made of the main color;
- Afterwards drying is carried out;
- A hole appears. Professionals prefer to work “live”, without stencils;
- All that remains is to fix the varnish, dry it and wipe it with alcohol.
This technique is performed by any salon, because of all the design options it is the simplest and most elegant. You can do a pedicure in the same way.
Video lesson: how to do a shellac manicure at home
Execution technology
If all the necessary materials and tools are at hand, then you can begin to perform a manicure. The master class presented in the video will tell you how to make nail designs and drawings with shellac. The main steps look like this:
- Prepare your nails for a manicure. Push back the cuticle, trim the free edge and polish the plate thoroughly. The smoother it becomes, the better and more durable the manicure will be;
- Degrease your nails;
- Apply primer. Thanks to it, the scales of the plate will open slightly and the adhesion of the coating and the nail will be stronger;
- Next, as shown in the video lessons teaching how to perform shellac - design, apply a transparent base. It protects the plate from contact with coloring pigments. Dry the base under a UV lamp for the time specified in the instructions;
- Apply colored shellac. Dry under a UV lamp. If necessary, apply another coat. Polymerize it too;
- Now do the drawing. If you use shellac, as in the video, then the design must be carefully thought out in advance and the stages of applying the design must be determined. Since before each new layer you will need to polymerize the previous one. When working with acrylic, such scrupulousness may not be required, since it dries quickly and is easily removed from the coating;
- As the video tutorial shows, after the shellac or acrylic has dried, you need to apply a protective (top) coating. It will give your manicure shine and durability.
Before you start painting with shellac, spend a little time learning with our videos. After this, you can easily complete a simple design yourself. In the future, you can improve your technique and complicate patterns and designs.
A review of useful articles that will tell every woman what shellac is and how to use it correctly!
This video describes in great detail the entire process of creating a manicure using shellac. In order to provide the same quality care as in the video, you need to make sure you have all the necessary tools and materials in advance. So, what will you need to buy?
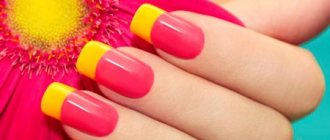
French shellac
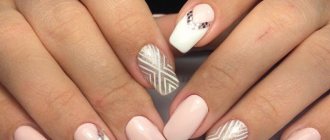
French manicure coated with shellac is a recognized classic manicure. It is suitable for any season and holiday. Let's look at how a classic French manicure is done using shellac varnishes:
- The nail is treated with a buff and base. Then it is dried under the rays of a UV lamp;
- The main part of the plate is painted pink or beige. Of course, you can use black or red, but it is recommended to leave dark colors for the cold season (autumn-winter), when the contrast with the skin will be more noticeable;
- Next, the tip of the selected shape is drawn with a brush. It can be straight, oval, triangular. Drying is in progress;
- You can stick rhinestones along the contour or draw a pattern. Afterwards the fixative is applied.
You can complement this style with any pattern or stickers.
Shellac nail design step by step. Video lessons
Stylish shellac nail design is available to inexperienced beginners and experienced craftsmen. In our video tutorials you will find a lot of interesting ideas with step-by-step execution and secrets of applying shellac. You will also learn how to quickly remove gel polish from nails and how you can strengthen your nails
, suffered after constant experiments with gel polishes.
The use of shellac is becoming increasingly popular among manicure lovers. The durability and high aesthetics of this coating allows you not to renew your manicure for up to 2-3 weeks. In this material we will look at how to perform manicure and nail design using shellac coating, and also present video lessons on the topic. They will help you better master this, however, quite simple technique.
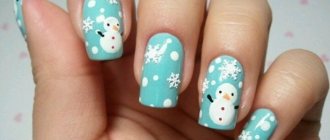
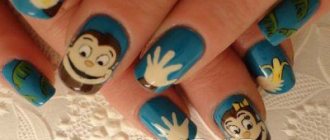
Winter and New Year's
New Year's and winter shellac is a stylish holiday manicure that seems to bring the holiday closer to us. Its difference from other options is variations on the theme of drawings. Patterns can be very different: Christmas tree branches, cones, balls, bows and others.
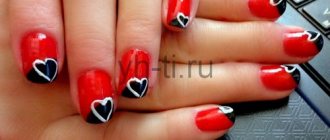
Let's look at how to make a cool beaded manicure for the New Year:
- The beads are made of black, red and white varnish. The base is applied and dried, after which the base is painted white;
- Use red dots to draw a kind of moon at the base of the nail. Also, the point is located in the center of the plate. Everything is dried;
- Then take a brush and black varnish, with which you need to evenly draw petals around the central point. Inside these petals are painted white, but so that the black edging is visible;
- Dots are drawn around the petals;
- This is done on one of the fingers. The rest are decorated with dots. Your goal is to draw a diamond-shaped dotter pattern where the four tops of the diamond are larger than the side points;
- If desired, this manicure can be used for summer or spring, just with different colors.
If you prefer to draw patterns, then you can make a simple jacket, and then draw a Christmas tree or a snowman along the edging of the white tip.
Necessary materials
To make your shellac drawing stand out with clear lines and bright colors, you need to have special tools in your arsenal. This:
- base for manicure;
- basic shades of good quality shellac (it is better to give preference to trusted companies);
- finish;
- UV lamp of optimal power;
- products that destroy bacteria;
- brushes and sticks;
- file;
- softening cuticle oil;
- file for polishing.
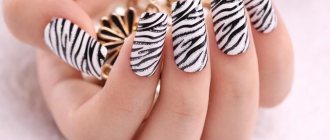
Knitted
Photos of knitted shellac manicure surprise with their beauty and grace. But it seems almost impossible to accomplish it. In fact, this is a very simple technique that you don’t need to be a super manicurist to implement. You will need polish, brushes, lamp and powder (sand for nails). Steps:
- Gel polish is applied to the prepared nail. The first strip should be thin, but voluminous, i.e., rise above the plate. If the varnish begins to spread, then you need to quickly apply a strip and sprinkle it with powder or sand;
- The following patterns are located symmetrically on both sides of the plate. Draw several letters “Z”, how to draw them becomes clear after watching the video;
- Next, powder is poured onto the shellac. It is very important that the varnish is not dried;
- The nails are dried and then cleaned of any remaining powder using a brush. That's it, no fixings or re-patterning required.
The price of shellac depends on where and by whom the manicure is performed. Naturally, the services of fashion salons will cost much more than home craftsmen. Novice specialists often offer to design their nails for free or literally for consumables, which is relatively inexpensive. But if you buy yourself a lamp, you can conduct sessions for free.
How to properly prepare a base for a drawing?
The high-quality application of the shellac base affects the appearance of the design. And also for the subsequent period of its existence. Drawing on shellac is an elegance that requires a smooth and painted surface.
The basis of a good manicure with shellac is:
- use of disinfectants, equipment treated with quartz treatment;
- good polishing of the nail coating, which is important for the base to adhere well;
- shaping the nail plate using a file or electric file;
- applying a base to the nail;
- drying nails after application in a UV lamp with a power of at least 36 W;
- careful application of shellac of different shades;
- To make a high-quality manicure, you need to dry each nail very well and thoroughly.