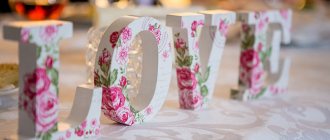
DIY wedding place cards
Preparing for a wedding is a long, labor-intensive process. Every bride knows that every little detail needs to be thought through. One of the important details of the celebration is the beginning of the banquet, where all the guests will look for a place. To save time, celebration organizers are increasingly using special cards on which the names of the guests are written - they are placed on the table. You can buy this banquet accessory, but it's much nicer to make your own place cards.
DIY sign with a number on the table for guests.
Hello! Today we’ll talk about how to beautifully number tables for guests at a wedding. It's no secret that a wedding is a bustle, the issue of seating of guests is perhaps the most important thing, after registration, of course. Usually the signs that are placed on the table are nondescript. In this master class we will give them more shine and brightness, the color scheme is blue and light blue. Believe me, such numbers will not go unnoticed.
- a sheet of paper (color does not matter);
- A6 sheet of white cardboard;
- scissors;
- blue sparkles;
- acrylic paint white and blue;
- brush;
- pen or pencil;
- glue gun;
- PVA glue;
- metal lid from under any can;
- number templates from the Internet.
What kind of seating cards can you make?
Cards can be of different sizes, shapes, colors, accordion-shaped, origami, hung like garlands, and so on. Use all kinds of decorations to create the perfect look. The place card can be themed if the wedding has a specific concept. For such ceremonies, use unusual solutions: fallen leaves for an autumn celebration, shells for a nautical-themed wedding, tree bark for an outdoor celebration.
Butterfly
Delicate butterfly cards are perfect for a summer wedding. To create a decoration, you will need white or any other pastel-colored cardboard (or thick paper), scissors, gel pens, pencils. How to do:
Bantika
For those brides who cannot devote a lot of time to making place cards, this simple option is suitable. To make a banquet accessory, you will need two things - a wide satin ribbon and scissors. The ribbon should be tied with a beautiful bow, and the name and surname of the guest should be written on both edges.
Heart
The heart symbolizes the love of the newlyweds, so this figurative decoration is perfect for the holiday. To create original place cards with your own hands, you will need a heart stencil (size - 10 cm wide), colored red paper, pen or marker, glue, pencil, scissors. Here are the instructions for creating cards:
Postcards
To create this place card, take construction paper, ribbon, scissors, a hole punch and a marker. The postcard can be of any size. To do it:
Look at the photos of different postcards - a popular holiday table accessory.
Floral
Place cards made with flowers look romantic. This idea can be implemented in several ways:
It will be good if the plants are the same as those present in the bride’s bouquet.
With applications
Applique involves cutting out shapes and gluing them on top of each other to create the desired image - it can be an animal, a person, plants, or figured patterns. Place cards with handmade appliqués will look interesting. Use your imagination to come up with different variations of the accessory.
Origami figures
Elegant origami place cards with your own hands are ideal for a wedding in a Chinese or Japanese style. Making paper cutouts is a labor-intensive process that requires precision, so ask for help creating the cards. To decorate the entire banquet hall, you will need a large number of them.
Watch the video that describes step by step how to make a paper crane:
Write the name of the invited guest on the wings or use the figurine as a stand for a business card with an inscription.
Stands and holders for beautiful place cards
Various objects can act as stands for place cards - glasses, special “legs”, fruits. Below we'll look at some beautiful ways to secure them.
Bonbonnieres
Bonbonnieres are not only a beautiful, but also a pleasant way to secure a card and seat the guest in his place. A bonbonniere is a box where organizers can put a pleasant surprise for a visiting guest - a sweet, a small souvenir.
Fruits and berries
To make an edible card holder, you need to take the fruit, make a cut and attach a name card. Cards with leaves on apples and pears look beautiful (see photo). The berries are usually poured into a vase, a toothpick is inserted into it, and a piece of paper with the name of the invited guest is glued to the upper tip with glue or double-sided tape.
Master class: step by step with photos
To create one beautiful place card, you will need the following blanks:
Step-by-step instructions for making an accessory:
Beautiful hand-made place cards will help you quickly seat guests, support the concept of the celebration, and create the right mood. Be guided by your imagination, come up with an original style that will reflect your vision of the holiday.
What card ideas did you like? Share your opinion in the comments.
Source
Which seating cards should I use? Interesting ideas
Seating cards are now a mandatory item at a wedding, which helps all guests quickly find their place at the festive tables at a restaurant banquet.
They serve as place markers. It also helps guests get to know each other better, because not all guests have seen each other and know each other. Guests are usually seated at tables, taking into account their interests, age, and marital status, so that they can feel more comfortable at the holiday. Placement cards should be made in the same style as the rest of the wedding items. The names of the guests should be written large and clearly so that all guests can see.
Table number for a wedding - ideas and ready-made solutions
At a wedding event with a number of guests exceeding 30 people, it is quite difficult to organize the movement of guests.
Due to the problems associated with this, both disruptions in the holiday program and minor misunderstandings occur. To avoid them, set a number on the wedding table, which helps guests find their seats in the hall, focusing on the seating plan.
A beautifully designed number plate can also serve as a souvenir for guests. It’s quite easy to make it yourself using a ready-made template.
How to make your own seating cards
You can go to popular websites on the Internet, where wedding details can cost much less, but expect that delivery can take up to two months.
You can do it yourself, following the color schemes of the wedding.
Cardboard cards
You can make cards for seating guests at tables yourself at home. This is a creative process that you will have fun with.
To work on cards you will need: thick cardboard, glue, scissors, ruler, hole punch, ribbon, needle, elements for decorating cards, for example, beads, rhinestones, bows.
These cards are convenient to place on the table; no additional stands are needed. Next, the card needs to be decorated with decorative elements, beads, rhinestones, and flowers.
Don't overdo it with decorations, do it tastefully. Next, the signs need to be signed; you can do this yourself, or contact a photo salon.
You can also make the card in the shape of a heart. To do this, you need a red cardboard stencil of the desired shape.
Fabric seating cards
Depending on the style of your wedding, fabric place cards may be right for you.
Next, whatever your imagination tells you, the names of the guests can be embroidered or written with acrylic paint. You can insert cardboard inside the fabric to make the cards more stable.
Cards with photos of guests
Cards on a stand
You can make a stand in the shape of a flower, a pot of flowers, just a plant, use candles, glasses or even pine cones.
Candy-shaped seating cards
Wrap the candy in a net and tie the fabric at the top with a ribbon.
Interesting place card ideas
Instead of ordinary paper cards, you can come up with something unusual, for example, make cards in the form of:
This way, you will also give each guest a small present that will remind them of your wedding.
How to make a seating plan
The diagram clearly shows which table the guest is sitting at, he finds himself on the diagram, sees the table number and sits down at it in the hall.
When making a plan for who and where guests will sit, you need to take a few things into account. For example, older relatives should not be seated close to the stage or music speakers, as they will feel uncomfortable and noisy there.
How to make place boards and table plans with your own hands
Do you love handicrafts and are you good at it? Create your own guest plan and seating charts. Prepare a list and drawing of the location of tables in the room. Now you can get to work.
Place cards for weddings
The simplest rectangular signs
Even those who have never held colored paper in their hands can make such cards. In addition to simplicity, it is cost-effective and quick to create.
The simplest rectangular signs with your own hands
Materials for the creative process: - colored cardboard;
- scissors, pencil, ruler, double-sided tape and glue;
— decorative glitters, sequins, stamps, ribbons and other decorative elements.
Instructions:
— Cut the cardboard into rectangles.
— We fold each rectangle in half. After this, we bend 4-5 cm strips from the narrow sides. We fasten these bends with double-sided tape so that we get a stable triangle.
— We print out the names of the guests on paper and cut the sheets into small rectangles.
— We beautifully decorate the edges of the paper with curly scissors, glue the rectangles with names onto the cardboard using double-sided tape.
— We decorate place cards with sparkles, bows or any other way.
Similar to the name cards, numbers for the tables should be made. Only the size of cardboard for license plates should be taken several times larger.
"Seatings" on skewers and toothpicks
Place cards on skewers stuck into pots of flowers, fruits, sweets, cakes, etc. look quite creative.
"Seatings" on skewers and toothpicks
Materials for the creative process: - colored cardboard;
- scissors, glue, skewers or toothpicks;
— decorative glitters, sequins, stamps, ribbons and other decorative elements.
Instructions:
— We print out many templates for future “seating arrangements” on colored cardboard.
— We print the names of the guests separately on cardboard of a different color.
— We cut out all the details along the contour.
— Glue a toothpick into the center of a larger piece.
— We glue cards with the names of the guests on top.
We display our masterpieces in juicy fruit halves, candies or cupcakes.
Place the table numbers on skewers and place them in narrow vases in the center of the table.
Place cards with pasta decor
Small modest signs made of paper or cardboard can be decorated with farfalle pasta painted with acrylic paints. The cards are secured to the tines of the forks. Very simple, original and beautiful.
Materials for the creative process: - colored cardboard;
- acrylic paints and brushes;
— decorative glitters, sequins, stamps, ribbons and other decorative elements.
Instructions:
— We print cards with the names of the guests on colored cardboard.
— We decorate the edges with curly scissors.
— We color the dry pasta and glue them onto the cards.
— Insert the place card between the tines of the fork.
Additionally, on a large sheet of paper, draw a plan for the arrangement of tables, sign the names and decorate the space free from lists with colored bows.
Place cards, ideas
Place cards, ideas
Place cards that are attached to the edge of the glass are in fashion. These are all kinds of butterflies, doves, hearts. Small paper figures are simply cut out according to templates and placed on the dishes. Fruits with names carved on them also look very unusual. But this is done by figure cutting masters with a full arsenal of carving knives. When choosing a design for place cards, consider the theme of the wedding and the time of year. In the fall, use small pumpkins, beautiful leaves, and nuts. In summer - butterflies, floral motifs, etc. Follow the suggested recommendations and your wedding will be excellent.
Original seating cards - paper butterflies: template and tips for implementation
Like these ones! And when expanded, the page will look like this:
Dimensions are of course in millimeters.
At the end of the lesson you will be able:
As a rule, the list of conference participants is given in tabular form in a Word document. And the girls-managers begin to manually make pages according to the number of participants, on each page there is a sign, and then they copy-paste each name. It’s good if there are 10 participants, but if there are 150. But surnames also come in different lengths. What do you want to do with Konstantin Konstantinovich? After all, it won’t fit into a single line. This means we need to provide a line for the last name, a line for the first name, a line for the patronymic, plus a line for the rank or title. Therefore, the task arose: to place each word in the full name in a separate cell of the table. This is where Excel will help us.
We split the text in Excel into columns.
Step 1. Open the file “List of conference participants” and select the entire table
Method 1. Move the cursor to the upper left corner of the table → click LM on the square that appears:
Method 2. Move the cursor to the top of the left column → press the LM (the cursor has turned into a thick arrow looking down) → without releasing the LM , draw from left to right along all columns of the table:
Step 2. Copy the table
Method 1. Without removing the selection, click PM → from the context menu select the Copy command:
Method 2. Without removing the selection, click the Copy command (Home ribbon → Clipboard group of commands → Copy command):
By the way, did you notice that as soon as we selected the table, two new ribbons appeared, Design and Layout , united by the common heading Working with tables ?
Step 3. Open the Excel program. Here is your complete will:
- Select Excel application from the main menu
- Launch a shortcut from the desktop (if you have installed this shortcut)
- Starting the program from the start table:
Select the desired application from the main menu → click PM → select Pin to Start screen. As a result, you will see a large icon of the selected program on the home screen.
| Advice | Sequentially type on the start screen those programs that you work with most often. Shuffle them in the order you want (simply drag and drop the icons) and you will get additional time savings. This is very important if you work with a large number of programs at the same time |
Let's return to our list of conference participants.
Step 4. Select cell A2 (move the cursor to the cell → the cursor turns into a white thick cross → click LM ):
The cell address is determined by the column number (the letter “A”) and the row number (the number “2”). I highlighted the address line with a red rectangle. We’ll understand why we select the cell on the second line a little later.
Step 5. Paste the table from the clipboard:
It's okay if the table is ugly. Now we are faced with the task of dividing the full name into cells.
Step 6. Insert two columns:
- Move the cursor to the name of the column “C” → the cursor turns into a thick black arrow that points down → click LM . As a result, the entire column is selected
- Ribbon Home → group of commands Cells → command Insert → double-click LM by the Insert command):
Result:
Please note two things:
- New columns are always added to the left of the selected column
- A button with a formatting brush appears on inserted columns. When you click on this button LM , you are asked to select the format of the inserted columns: as on the left or as on the right)
| Advice | Do not neglect such tips - this will help you save a lot of working time, and therefore increase your productivity. |
Step 7. Distribute the text among the columns
- Select column “B” (move the cursor to the name of column “B” → the cursor turns into a thick black arrow that points down → click LM)
- Call the “Wizard for Distributing Text by Columns” dialog box (Data ribbon → group of commands Working with Data → Text by Columns command):
Step 8. We work with the “Wizard for dividing dough into columns” dialog box. Working with it is not easy, but very simple and consists of performing 3 steps. You just need to carefully read the information on this window.
Master Step 1 of 3:
We select the data format with delimiters, which has already been done for us by the Excel developers and click the Next button.
Master Step 2 of 3:
Select “space” as the delimiter character and select the “Count consecutive delimiters as one” mode. After all, it may happen that there are two spaces between the words, and then an additional empty cell will appear, but we don’t need this at all. I quickly made an example where I specifically put two spaces between the last name Baggovut and the first name Karl:
The result is unpleasant. But I digress.
Master Step 3 of 3:
All we have to do is click on the Finish button and see the window:
Conclusion: if there is data in these columns, then it is replaced with text distributed across the columns. I hope it is now clear why we made two additional columns? To ensure that information with titles and titles is not replaced by names and patronymics.
| Understand and remember! | When you distribute text across columns, existing information in adjacent columns will be replaced by the distributed text. |
Click OK and admire the result:
Step 9. Give each column its own name, we won’t invent anything, just call it Last Name, First Name, Patronymic, Title, Rank (click on the corresponding cell and type the word from the keyboard):
In fact, it doesn’t matter what you name the columns, as long as the names are different.
Step 10. Save the document (File → Save As command → select a save location → table name → LM on the Save button):
Where are they used?
At a celebration where many people will be present, seating cards are necessary. They are placed at each place at the table so that all guests know where they are sitting. This allows you to avoid unnecessary fuss at the beginning of the banquet, so that you can quickly move on to the main program of the event.
Butterfly seating cards can be made in different formats:
The last option is most often used, since the cards in this case look fresh and stylish. The butterfly can be made plain or with appropriate patterns, or you can cut out an openwork pattern on one wing. This will take the newlyweds more time, but in the end they will get an unusual and attractive option.
Important! These cards are suitable for all wedding styles. You can see other options in this article.
In the case of a classic celebration, this accessory will be appropriate in the summer and spring seasons, as it will be in harmony with nature. Butterfly-shaped seating cards will look good at a wedding in rustic or Provence style , since floral arrangements predominate in the decoration of the hall in these cases.
Table plates: what should they be?
Unity of style
The design of all signs should be in the same style of the wedding celebration. This is especially important if you decide to hold it in a certain original style. After all, the overall style is made up of the smallest details.
Sign size
Select the size of the signs so that they are not bulky and too bright, “jumping out” from the tables. But cards that are too small can get lost on the wedding table. That is, the size of the signs should be optimal.
Font on signs
Make sure that name plates on the table can be easily read by guests. There is no need to make inscriptions in some particularly sophisticated ornate font with shadows and monograms. This will create inconvenience for your guests, especially older people.
How to make it yourself using a template
First, the future newlyweds will need to choose a suitable sketch. To do this, you can find an image of any butterfly you like and transfer it using carbon paper or tracing paper onto a sheet to create a stencil. You can finish this version already or cut out additional patterns in the resulting blank, which will then be made on the main copies.
If this option is not suitable, then you can decorate the butterfly on a stencil with a simple pencil, dividing the wings into segments, so that you can then transfer the drawing onto cards. If you have a printer, the process becomes even faster and easier - the blanks are printed in the required quantity and cut out.
Cardboard or thick paper of the desired shade is suitable as a base. Butterflies can be plain or made from designer sheets with a pattern that matches the style of the wedding. If the butterfly will be attached to a glass, then the belly is trimmed symmetrically in two places so that there is no need to add additional elements.
How to make table numbers for a wedding with your own hands: master class
Making your own signs or other signs for numbering tables is quite simple. No special skills, tools, or materials are required. It is enough to use available means.
Cardboard cards
Classic cards can be made very quickly. The work will require the following tools and materials:
- a set of multi-colored paper;
- a cardboard sheet corresponding to the selected shade color;
- beads, rhinestones, stones, sparkles, sequins, or other decor;
- satin or brocade ribbons;
- regular, curly scissors;
- rulers, pencils;
- double-sided tape;
- glue.
The texture and density of cardboard and paper can be very different, just so that the craft does not fall apart.
The ribbon should match the color of the celebration concept.
The creation process goes as follows:
- cut out a square with sides 10 cm long from fairly thick cardboard;
- bend it in half using a ruler;
- print table numbers and names of invited guests on colored paper;
- carefully cut out the inscription from the sheet;
- glue it to the front surface of the card with tape;
- cut off a piece of ribbon to the required length;
- use matches or a lighter to singe its edges so that they do not unravel and look neat;
- fold it with a bow or in another way and glue it to paper;
- decorate the ribbon with rhinestones, beads, etc. as desired.
Colors are very easy to select as you work. The ends of the tape can be hidden if necessary by gluing paper on the back side of them. The resulting number is placed on the table.
The remaining material can be used to make signs with original inscriptions.
Placing numbers on bottles
To implement this option you will need:
- glass bottle for various drinks;
- brush with paint or paper to create a label;
- colored tape;
- fabric, leather or substitute;
- scissors.
The work is done like this:
- print paper labels containing table numbers or names;
- then they are simply glued onto the bottle.
You can also write a number with paint. To do this, the bottle is pre-painted in the desired color.
The container covered with burlap, leather (substitute), with painted or embroidered numbers looks original.
Numbers on the vase
A vase or a candlestick acting as a pointer looks impressive. To work you will also need to use:
- cotton wool with alcohol;
- self-adhesive film;
- spray paint;
- glue;
- scissors.
This type of decor is created in the following way:
- wipe the surface of the vase or candlestick with a cotton swab moistened with alcohol;
- cut out the required numbers or name from the film;
- glued to a vase;
- cover the entire front surface with paint;
- Only after it has completely dried do they tear off the sticker.
The reverse design also looks good: when the numbers are painted over, leaving a transparent background.
The work on producing the considered options for making numbers on wedding tables will take from 20 minutes to an hour. Fantasy is the basis of the process. The main thing is that what is created fits into the style of the celebration.
Master class “Table number”: Video
Watch the master class, which clearly shows how to make beautiful table numbers with your own hands without much expense:
You can also save money by making wooden numbers from the same materials as wedding signs.
Decor
Butterfly place cards do not require much decoration. If openwork patterns are carved on their wings, then additional decorative elements will only make the weightless appearance heavier. In this case, all that remains is to write the names of the guests on each card in ornate handwriting with curls.
If this design option is not suitable, you can outline the wing segments with a black or colored marker according to a pre-prepared stencil. Such a minimalist design will not look too simple; on the contrary, it will look much nicer than rich multi-colored combinations.
If the celebration is decorated in a specific shade, it can also be used to decorate butterflies. A thin ornament along the edges of the wings will look original.
In addition to this, you can use rhinestones if you want to create an interesting pattern on the wings. This option is suitable for a celebration in the style of glamor or Chanel. If you decorate butterflies with lace ribbons, you will create the perfect decor for a wedding in a vintage, shabby chic or rustic theme.
Place the text in a mirror image in the adjacent cell
Step 1. Move to the adjacent cell (click LM in the adjacent cell).
Step 2. Change the direction of the text and align it centered to the left:
Step 3. Copy the text, go to the adjacent cell (just click LM ) and paste the text into the adjacent cell.
Pay attention to how the text should be highlighted. The end of cell symbol is not included in the selection area. If you select the entire cell, then when copying you will copy exactly the cell with all the attributes. And when you paste from the clipboard, you will paste exactly the cell. So when selecting text, be careful - select only the text:
Step 4. View all entries (Mailouts ribbon → View results group of commands → view entries button):
Formatting text in a table
Step 1. Rotate the text in the cell 90° clockwise (select the text → Layout ribbon → Alignment group of commands → Text Direction button → click LM ):
Step 2. Align the text centered to the right (Layout ribbon → Alignment group of commands → Align center to right button):
Did you notice that the text alignment buttons relative to the cell have also rotated?
Step 3. Set the spacing for the Last Name-First Name-Patronymic paragraph.” To begin, select this paragraph (see Lesson 2 Selecting text information) - triple-click on this paragraph. Are you sure that the Shift+Enter key combination creates a new line, but not a paragraph? Let the spacing before the paragraph be 30 pt, and the spacing after the paragraph 42 pt. On the Quick Access Panel, I set the intervals I need by toggling the range buttons:
If you are not lazy, you can go to the Home ribbon → Paragraph command group → group button → and set the values we need in the Paragraph dialog box. But I really want to prove to you that working with the Quick Access Toolbar is profitable and convenient.
Step 4. Increase the font of the paragraph (select the paragraph again by triple-clicking LM → a floating panel appears. Select the font size of 36 pt and assign it a bold style:
You see - there is no need to go to the Home ribbon in the Font command group. It is these little things that make up my working style. If I can reduce the number of steps needed from three to two, great! And if instead of 5 actions I get the result with one movement of the hand - you can imagine how labor productivity increases with less labor costs!
Step 5. Now let's work on the title. We select the word “General” with two clicks of the LM → a floating panel appears, in which we select the font size of 24 pt: