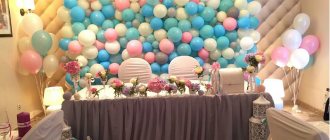
Balloons are considered one of the most versatile holiday decorations . It doesn’t matter where the event will take place: in a restaurant, on the street or at home. The most striking and standard way to create a colorful atmosphere at a wedding, birthday or banquet is a balloon arch.
Today, many options for such a design are offered by companies specializing in its manufacture, however, the sums for performing such work are not small, so for those who want to save money and celebrate a significant event in a fun, comfortable and colorful way, we suggest making an arch from balloons with your own hands.
How to make an arch out of balloons?
An arch made of balls can be of completely different colors. Classic white or a combination of white and red are the most common tones at wedding events , cheerful orange and bright yellow are used mainly at children's parties, birthdays or anniversaries, lovers of modern design stick to contrast, etc.
An arch made of balloons filled with helium looks very beautiful, but you can do without it; In both cases, the work does not require large financial outlays or any skills; even a beginner can cope with it. It is enough to purchase the necessary materials (balls, pipes for the frame, decorative elements), decide on the shape and color scheme and follow the instructions.
DIY balloon arch in the form of flowers
For the frame, you need to purchase metal-plastic pipes, for decoration, balloons of any shade and braid. From the available tools you will need: a centimeter, a knife or scissors and a cardboard box with two round holes (1st by 15 cm, 2nd by 21 cm).
Metal-plastic pipes must be of the following sizes:
- 2 pieces one and a half meters long with a diameter of approximately 26 mm (for racks);
- 4 pieces 3 meters long 75 cm with a diameter of 16 mm (for legs);
- 1 piece exactly 3 meters long with a diameter of 16 mm (for an arc).
Gallery: arch made of balls (25 photos)
Instructions
- We make a frame. We take short pipes and bend them so that we get legs for the arch. Then we glue them with tape to the posts, make an arc and later secure it in the same way.
- To make the frame heavier, we attach balls to the legs (we fill the balls with water so that the frame does not fall).
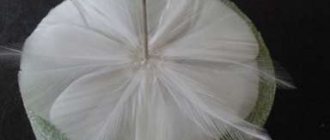
- We begin to inflate the first five balloons of the same color. Using a cardboard box, we form the dimensions (the size of all 5 balls should be 21 cm).
- Then inflate one ball of a different color (this will be the center of the flower) measuring 15 cm.
- Using braid, we connect all the balls, forming a flower out of them. The first part of the flower can be considered ready.
- Making the second part of the flower. Inflate the next 5 balloons of the same color and size as the previous balloons. In this case, making a core is not required, so we connect them without a core.
- To make our flower more voluminous, we connect the connected parts of the flower to each other.
- After this, we place the flower on the arch, passing it through a metal-plastic pipe (arch and posts).
- In the same way, we form the finished flowers (you can only change the color, the shape should be the same) and place them on the arch tightly to each other.
- By the end of the work, gaps will appear at the bottom of the frame, which must be filled with flowers of 4 balls (petals) measuring 21 cm.
- To give the arch a completely finished look, you need to place the flowers on the same plane. After this, you can consider the decoration of flower balls complete.
- For the base (frame) of the arch, you can use other methods, for example, making a design from twine;
- if you make all the flowers of the same type (for example, white petals and a yellow core), then the arch will turn out to be in the form of beads or pearls; looks original and great for a wedding.
Easy way
Of course, the easiest way would be to buy such an arch, but since we are talking about the fact that we can make it with our own hands, we will consider another, no less simple method.
First of all, we need to make the base for the arch. To do this, we will use a strong, rigid hose and small cinder blocks to secure it to the ground, in case the party is taking place outdoors. It is enough to arrange the blocks at the required distance, and secure the hose to them, additionally wrapping them with electrical tape for greater strength. To make the blocks more stable, they can be filled with gravel or sand.
If the party will be held in the house, you can use ordinary wire of medium thickness, it is quite stable, or even thick fishing line.
Related article: Clocks made from candies and other sweets: master class with photos and videos
Next, inflate the balloons (it doesn’t matter with helium or regular air). The balls should surround the arch on all sides, so first inflate about a dozen, attach to the base to understand how many more balls you will need.
And finally, it's time to tie the balls to the base. You can use the basic pattern of weaving the balls or tie them one at a time, the main thing is that the balls are close enough to each other, there should be no empty spaces.
Check out some photos of balloon arches for inspiration:
DIY balloon arch in the form of a spiral
To make a spiral arch with your own hands, you will need the following materials: thick fishing line, paper clips, compressor or pump, calibrator, scissors, hammer, decorative tape and strong balls of 2 colors.
Instructions
- Blow up two balloons of the same color and size and tie them together without using any strings etc.
- Then do the same with two balls of a different color.
- Place the connected flower-shaped balls on top of each other, then twist them together (you will get a tight “four”).
- Make several of these “fours”.
- We begin to attach the balls to the fishing line. Take the first “four” and tie a fishing line to it (wind through each ball and make several knots).
- Then do the same with the remaining balls, stacking them tightly and evenly on top of each other. Tie the next balls with the first “four” by twisting the fishing line, but no more than 2 times, so that the balls evenly fold into the grooves and form a color spiral.
- When all the balls are placed on the fishing line, decorate its base with ribbon (if desired, you can decorate the entire fishing line).
- After this, proceed with the installation of the arch. Drive the nails into the wall or door so that you can tie a fishing line around them in the form of loops. Carefully pass the finished garland through the loops and shape it into an arch; secure well.
Adviсe:
- do not overinflate the balloons or rub them so that they are free from cracks and do not burst; careful handling will save you from replacing deflated balloons and dismantling them;
- for decoration on the doorway, proceed from the calculations of 5-7 meters of the arch;
- For ease of fastening and transportation, it is better to make a semi-arch of 2 parts that can be connected during preparation for the holiday.
The simplest arch of balls on a rope
Making such an arch is not difficult. It is necessary to determine the color of the balls in advance, and the shape will be in the form of droplets. Also calculate how many balls you need to fasten together.
Inflated balloons of the same size must be tied one after another to a rope, leaving no gaps; you can alternate colors.
After all the balls are tied, attach the finished garland to the wall or door using studs in such a way that an arch is formed .
Adviсe:
- in this case, it is not necessary to use helium, balloons filled with air will also hold well, the main thing is to eliminate gaps;
- To be sure, you can connect the balls together with transparent tape.
Basic option
Of course, there are many different ways to weave balls together to create a garland, but first, let's look at the basic one. These are two elements, “two” and “four”, which together form the combination “two-four”.
Blow up two balloons of the same color without tying the tails.
To make sure that the balls have the same diameter, you can use a pan of the appropriate size. If the balls fit freely into the pan, you need to inflate them a little, but if, on the contrary, they do not fit, deflate them.
Now that we are sure that the balls are the same size, we need to cross them together, twist them and tie a knot.
For a two-color garland, you need to make a four from two pairs of balls of different colors and twist them so that one color is opposite the other, and the colors alternate in a circle. The following photo shows possible options for a two-color design of a garland of balloons.
Aerial arch made of rope, balloons and helium
The air arch is also considered the simplest due to balloons filled with helium and air in equal quantities, since they will balance and compact the structure. It turns out to be a beautiful cascade of balls. The only downside is that it is not designed to be placed outdoors.
Instructions
- Measure the length of the twine and cut it.
- Then we decorate the rope (we wrap the rope with corrugated paper) and secure the first end of the twine.
- We fill some of the balloons with helium and some with air; We attach them to our air arch from the end of the rope.
- When all the rope is in balls, firmly attach the second end of the rope.
Adviсe:
- It should be remembered that helium balloons can deflate after some time, so this design should be made shortly before the event so that all the balloons are the same size;
- In order not to get confused when making an arch in helium balloons and balloons filled with air, it is better to use two colors of balloons.
Materials needed
Before you start work, you need to stock up on the necessary materials. These include:
- Directly balloons. Decide whether the arch will be monochromatic or multi-colored, and also select matching colors. It is also important to understand how many balls you will need. On the street it is better to make large balls (30 or more centimeters); for indoors, balls measuring from 12 to 25 cm are suitable. Their number will depend on how large the arch you want to make, so it is better to stock up on a fairly large number of balls. It's better to have them in stock than to run to the store for more. On average, 20 large, 30 medium or 45 small balls are needed per meter of garland.
- Pump. You will have to inflate quite a large number of balloons, so you will hardly have to rely on your own strength. We advise you to purchase a special pump, which can easily be found in holiday supply stores or even in regular construction supermarkets.
- Fishing line, wire, hose. In general, this is what the garland of balloons will be held on. The material for the base depends on whether the celebration is being held outdoors or indoors. But in any case, it is also worth having such material in reserve.
Related article: Video on weaving from newspaper tubes for beginners with a master class