Issues discussed in the material:
- What is gel nail modeling
- Is it possible to do gel nail modeling yourself?
- How to do gel nail modeling
- What materials will you need to model your nails with gel?
- What are the disadvantages of gel nail modeling?
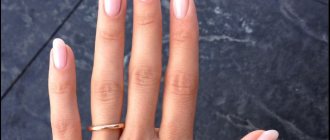
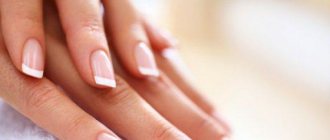
If the natural shape of the nails is not what a woman would like to have, it can be changed artificially using modeling. In this case, a material is used that is similar in chemical composition to the substance used in dental prosthetics. Gel nail modeling is a popular procedure among girls all over the world, as it is a reliable way to get the desired shape, length, and attractive appearance with decorative elements. However, every representative of the fair sex should understand that natural nail plates suffer due to external beauty.
Is it possible to do your own nail modeling with gel?
Increasingly, women are trying to do extensions and designs themselves. Some, in order to save money, buy gel for nail modeling, the price of which is much lower than services in a salon, others want to try themselves in a new creative endeavor. Can I do extensions myself? Of course!
Still, it is better to contact a specialist, since this process is quite complex and requires special knowledge and high concentration. As a last resort, you can undergo training in gel nail modeling. However, you cannot learn all the intricacies of the procedure, even after watching many videos and studying the instructions. And inattention during the process can lead to damage to the plate.
Read material on the topic: Black manicure with rubbing: simple and effective
Training in gel nail modeling.
Have you decided to learn the art of gel nail modeling?
Regardless of whether you learn from a good nail studio using their materials, or you are self-taught, it is very important to estimate the approximate costs of purchasing all the necessary materials and tools. I do not recommend that you settle on expensive, advertised companies at the beginning of your career; no well-known brand of modeling materials will help the inexperience of the master. Stick to mid-priced drugs. So, let's go through the list. List of materials for gel nail extensions: 1. UV lamp. It is best to take a regular 36-watt lamp with a timer. It costs 1200 rubles, in our store it’s 875 rubles, you don’t need to overpay for additional options (for example, blowing) and the stylish design of the lamp - I don’t see the point. 2. Brush for modeling nails with gel. This brush is flat, so you don’t need to overpay for natural bristles yet! 3. Files. In stores they are simply eye-popping, there is such a huge variety! Files vary in roughness level; this roughness is measured in grits. The 80x80 grit file is the coarsest and is used for filing only artificial nails. I don’t use it at all, it’s so rude. Then there are 100x100 grit files, which can also be used to file only artificial nails. And the 180x240 file is the most workable, it can be used to process both natural nails and bring artificial nails to perfection. There are files for 150x150 grit and 180x120. But I will focus on two 100x100 and 180x240, these are the ones you need to buy, you can even buy several pieces at once. Actively working craftsmen buy them in bulk, a couple of dozen at a time! Some nail designers have separate files for each client. As for the shape of the files, they come in straight and boomerang shapes. I prefer boomerangs. 4. Buff is a block of hard foam rubber coated with sandpaper. Can be used at the final stage of filing down an artificial nail. Buffs, like files, come in different sizes. I recommend 120x120x120. As you work, you will feel which buffs and files are more convenient for you to work with. 5. Pusher - a spatula for pushing back the cuticle or orange sticks. These sticks are simply an indispensable device not only for pushing back cuticles, but throughout the entire process of nail extensions and design. She can pick up rhinestones, draw dots, remove lint from a nail, and much, much more! 6. Manicure scissors for trimming nails. 7. A cutter is a simple tool for cutting tips. Another name for tip cutter. 8. Brush for removing dust from nails. 9. Tips. They come with a wide and narrow contact zone - the place of gluing to the nail. I prefer wide. You can check the quality of the tip by slightly bending it - if it is plastic, bends easily and there is no white bend strip left, then the tip is good. If the tip is hard, a fold line appears at the slightest bend, or it is completely broken - this is a bad tip! Please note that I say “tips”, not “tips”; many nail service professionals consider this a kind of attribute of professionalism when the master pronounces “tips” in the masculine gender! 10. Forms for nail extensions. I recommend forms with a wide gluing area. Narrow shapes often come apart during the extension process and distract from work! 11. Glue for tips. 12. Tweezers for clamping. It can be purchased at dental stores. 13. Disinfector for treating the hands of the master and client before the modeling procedure. 14. Lint-free wipes to remove the sticky layer. 15. Disposable towels. 16. Hand roller (convenient for the client, but in principle, at the initial stage you can do without it). Now let's get down to the preparations for nail extensions: 17. Nail Prep, the same Bonder - some masters neglect this thing, but I strongly recommend using it. It dehydrates the surface of the natural nail before extension and improves adhesion to the artificial nail.
18. Primer, they are acidic and acid-free. Acidic primers can cause a slight burning sensation in some clients (this is an individual intolerance), so I always use an acid-free one. Bottles with primer are usually called Primer, Bond, Ultrabond by manufacturers. Ultrabond is usually an acid-free primer. The purpose of the primer is to “adhere” the natural nail to the gel; it serves as a kind of primer. Forgetting to apply primer on your nails is like death! 19. If you have chosen a two-phase gel system, then you will also need Base Gel. This needs to be clarified with the manufacturers of the brand of gels you have chosen. Most modern gel companies create single-phase gels. 20. Directly transparent modeling gel. If you are serious, then immediately buy a large 50 ml jar. 21. Means for removing the sticky layer (some craftsmen replace it with regular alcohol). 22. Finish gel. Manufacturers call it different names, but most often the bottle contains the words “Top”, for example “Top Coat”, “Premium Top Gel”. After applying the topcoat, the newly modeled nails will reveal all their beauty, sparkle and shine! 23. Cuticle oil. Apply after completion of the modeling procedure to give a well-groomed appearance to the cuticle. In principle, you can stop there! We have everything for nail extensions with varnish. But I immediately recommend purchasing materials for French and other nail designs. 24. Camouflage gel is a flesh-colored gel (it comes in different shades to suit different client skins, from soft pink to tanned brown). 25. White gel for modeling a salon jacket. 26. Liquid ultra-white gel for painted French. 27. A couple of colored gels. You can take the smallest jars. 28. Acrylic paints. 29. Paint brushes (more on them in the next article!). 30. Various tinsel: sparkles, mica, marmalade, foil, rhinestones, etc. If you have questions, ask in the comments!
Gel nail modeling technologies
There are two classifications of extensions:
- on forms;
- on tips.
The forms are templates with gradations applied to them, which allows you to model your nails with gel without filing. They are convenient because they help to choose the appropriate length for each representative of the fair sex individually. This method is used most often when a woman has flat and wide plates or they are bent downwards.
As for tips, they are tips made of special plastic that imitate natural nails. In this case, the work is carried out with a ready-made base, so you need to select them with special care and very carefully. This is an excellent option for those representatives of the fair sex who either have trapezoidal nails or damaged, bitten, or broken nails. Women with oval or almond-shaped plates can use any technology.
Recommended articles on this topic:
- Men's pedicure in a beauty salon: strange or normal?
- Disposable pedicure files: advantages and disadvantages
- What files are needed for gel polish: making the perfect manicure
Modeling has the following advantages:
- Nails under the gel breathe and at the same time do not flake during growth.
- When cured under the influence of ultraviolet lamps, the risk of fungus is minimized.
- There is no need for lengthy surface leveling.
- The extended nail will not fall off, since the material used is similar to a natural plate.
- The gel gives your manicure shine without showing a yellow tint.
- You can even remove varnish from an artificial nail with acetone.
The negative aspects include the following:
- A burning sensation on the nails while the material hardens under an ultraviolet lamp.
- When removing a manicure, you have to file it down, which damages the plate.
- Modeling nails with gel on forms is more fragile than, for example, acrylic.
Regardless of the type of product chosen, the previous one must harden before a new coat is applied. Only in this case can a woman be sure that the result will last a long time.
Read material on the topic: What files are needed for gel polish: making the perfect manicure
Nail modeling with Brisa gel
A few years ago, American chemist Douglas Schoon argued that the future of the nail design industry lay in gels. Today this assumption is being translated into reality. Creative Nail Design Corporation created Brisa gel for its 25th anniversary.What is special about this gel? The new hypoallergenic material embodies all the best qualities of acrylics and gels: no odor, thick consistency (gel does not flow), transparency and color stability, low percentage of shrinkage (7-10%), softness when filing. “Fixation,” namely the formation of a dense surface layer in the rays of a UV lamp, allows you to create the desired shape and eliminates the inconvenience when working with problem nails.
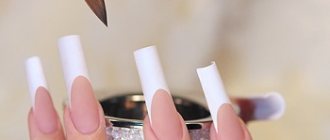
Modeling on tips
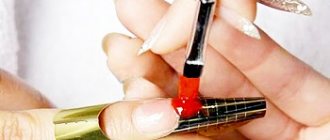
1. Preparing natural nails for modeling with gel is the same as when working with acrylic. It begins with filing the free edge and surface of the nails, degreasing and dehydrating them (photo 1) . Then the tips are selected, glued and filed (preferably transparent, completely permeable to ultraviolet radiation), and adhesive preparations are applied - usually gels that harden in the rays of an ultraviolet lamp. In our case, this is an air-drying liquid preparation, Liquid Bond (2) .
2. After applying and drying the adhesive substance, it is the turn of modeling preparations. Work with gel, as with acrylic, is carried out in sculptural areas. First, a thin layer of pink or clear modeling gel (Pink Sculpting Gel or Clear Sculpting Gel) is applied to all three sculpted areas of the nail. They cover the nail like regular varnish (3) . The edge of the coating should not reach the cuticle. Thanks to the sufficient viscosity of the Brisa gel, this is very easy to do. The modeling material does not flow under the cuticle and does not create a “step” that appears as nails grow.
When working with any gel, the order in which the procedure is performed is very important. The exposure time (exposure) to the rays of an ultraviolet lamp for complete hardening of this gel is two minutes. The lamp, specially designed for Brisa gel, is equipped with a two-position timer, allowing the master to easily apply the selected operating mode (10 sec., 2 min.). Another indicator signals the aging of the lamp, the end of its service life. This allows you to maintain the required level of irradiation, and therefore the level of nail quality. Working according to a specific scheme allows the master to reduce the modeling time to 1.5 hours. The first thin layer of base gel is applied to four nails of the client's right hand, excluding the thumb. While the right hand remains in the UV lamp, the same is done with the left hand. By removing the client's right hand from the lamp and placing the left one there, you can place a thin first layer on the thumbs of both hands and expose them to the UV rays at the same time.
3. Now you can start creating a stress zone. In order to perform it well, the bulk of the gel should be placed in the center of the nail. The sticky oxide layer does not need to be removed - it helps to bind the gel layers together even more reliably. Using rotational and translational movements, spread the sculpting gel from one side of the nail to the other. The position of the brush should always be parallel to the surface of the nail. This layer of gel should be on the second and third zones (it should decrease towards the sides and cuticle).
Using a brush, give the gel at the junction of the first and second sculptural zones a shape corresponding to the “smile” line, removing it from the free edge (4) . The gel is spread in this way on only two nails, after which they are placed in a lamp for 10 seconds to “fix” the top layer. During this time, it does not harden, but only becomes dense on the outside. This technique makes it possible to calmly work on other nails without fear that the gel will take a shape different from the intended one. Then the gel is spread on the other two nails, and all four are kept under the lamp for two minutes to completely harden. Now do the same with the other hand and separately with the thumbs.
3. Taking a small amount of White Sculpting Gel on your brush, spread it in an even layer on zone 1 in accordance with the “smile” line. You can touch it up with a brush dipped in Scrub Fresh, which is used to remove the sticky layer (5) . Apply white gel to the nails of two fingers and fix it for 10 seconds. Then, after applying the gel to the nails of four fingers, place them under a lamp to completely cure. Do the same with your thumbs. Do not remove the sticky layer from your nails.
4. Now apply a thin layer of clear gel on top of what has already been laid out. It will allow you to create the perfect shape by filling in small irregularities. To eliminate them, place a very small amount of transparent gel on one of its sides, pull out the gel fiber with a brush and, touching the other side, cover the unevenness. Due to its properties, the gel will create a perfectly smooth surface. (6).
After this, you can start working on the shape of the nail. To do this, remove residual stickiness, file down the free edge and surface of the created nail. It is not recommended to use coarse abrasive files to avoid cracks in the coating.
If you are satisfied with the result obtained, then, having removed the dust from the nails with a brush, you can begin to seal them and create a shiny protective film on their surface. To do this, apply Finishing Gloss to all four nails and set it in ultraviolet light. After the gel has completely cured in the lamp, remove the sticky layer from the surface of the nails and apply the oil to the cuticle and formed nails (7).
Strengthening natural nails with gels is similar to the above technique.
Working with Forms
To work with gel, it is better to use transparent forms that are completely permeable to UV rays. In this case, the polymerization process goes faster, which undoubtedly significantly improves the quality of gel nails. There is a little trick when putting on the forms. To prevent clients, especially inexperienced ones, from accidentally “smearing” the gel and to ensure that the nail is at a certain distance from the lamps, tear off one “ear” of the form and close it so that the lower parts are glued together overlapping rather than end-to-end. Then the glued “ears” of the forms will not touch the bottom of the lamp (photo 8, 8a, 9) .
After appropriate preparation of natural nails and putting on the form, as in the case of working on tips, an adhesive preparation and the first thin layer of pink or transparent modeling gel are applied to the nails. The scheme of work is the same: four nails of the right hand, then four nails of the left and thumbs.
When examining finished gel nails, one often notices “piles” on the sides and a “failed” middle, especially in the first zone. This is explained very simply. Due to its consistency, the gel flows onto the sides of the nail. This is especially noticeable if the nails are made on forms, less often, but this also happens when working with tips (10) . Obviously, for this reason, most masters prefer to model gel nails on tips. The operating technology described above will help avoid such restrictions.
In this case, the difference between working on tips and forms is only in laying out the stress zone, the border of which should be placed slightly below the intended “smile” line. The glued part of the tip automatically creates a slight rise in the first zone. This is not the case when working on forms, so the lift will have to be created artificially.
Take a pink or clear modeling gel, place it on the stress area, stretch it towards the cuticle and to the sides. Pull it slightly below the “smile” line and use a brush to form a mass of gel so that most of it lies in the middle of the nail and on the “smile” line (11) . Place two nails done in this way in the lamp for 10 seconds to “fix” the gel. After creating two more, place all four under the lamp for two minutes to fully cure. Do not try to put a large amount of gel on your nails at once. Firstly, bubbles may appear, and secondly, the nails will become very hot during polymerization. It is better to repeat this procedure two or even three times, depending on the condition of your natural nails. When repeating attempts, you should place the bulk of the gel being laid out not on the side surfaces of the nail, but in its center.
Then you should proceed to the first zone. Lay out the white gel in such a way that it overlaps the pink one lying below the “smile”. If the height of the pink gel is quite large (with very flat natural nails), then the first layer of white gel should be laid out before the pink one, as if leveling the surface (12) . The second layer should be placed along the “smile” line. This way the height of the first zone will be sufficient to create magnificent nails. Subsequent operations are carried out in exactly the same way as in the case of working with tips (13, 13a) .
By working with the new gel, you can expand the range of salon services and attract new clients. And this, in turn, will serve to increase the profitability of the salon and, ultimately, increase the earnings of the craftsmen.
Author: Galina ZELENOVA, author of the book “Nail Modeling” and the textbook “Modern Manicure”
Did you like the article? Share with your friends!
Similar articles:
- Lifting, or detachment of artificial material from the natural nail plate, is one of the most common problems in modeling and one of the main reasons for client dissatisfaction. Lifting can have a different origin. There is no…
“>Lifting and the reasons for its appearance
- One of the types of nail modeling is nail extensions. Translated from English, the word “tip” means tip. Tips are very similar to regular false nails, only they are made of special plastic, they can have a contact area and…
">Step-by-step nail extensions using tips
- Many clients and professionals believe: the thicker the artificial nail is modeled, the stronger it will be and the better it will wear. This misconception leads to breakage and an unaesthetic appearance of the hands of the owner of such nails. The free edge is, of course...
">Apex in artificial nails
- Gel nail extensions using top forms can be classified as express nail extension methods. The main advantage of this extension technology is the relative savings when modeling nails. During the procedure, the form...
">Nail extension on forms with gel
- Recently, gel has been gaining a strong position in the nail industry. At the same time, many questions arise. For example, why is gel becoming popular among craftsmen, because it is believed that in terms of strength and wearability it is worse than acrylic...
">Gel in questions and answers
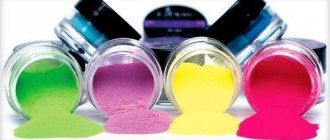
Types of gel for nail modeling
How the nail modeling gel will be used depends on which of the three categories it belongs to:
- Three-phase . The modeling process in this case consists of several stages. The first layer is necessary to ensure a safe connection between the plate and the gel. The second is the body of the nail itself. The third allows you to make it more durable, protect it from mechanical damage, and also give it a glossy shine.
- Two-phase . The first layer is aimed at high-quality adhesion of the plate to the gel, and the second is responsible for strength.
- Single-phase gel for nail modeling is universal, as it performs three functions simultaneously.
Read the material on the topic: White manicure with rubbing: ideas that you will want to repeat
The best brands of gels for nail modeling
Before you buy a gel for nail modeling, you need to decide what it should be - two-, three- or one-component. For those who decide to do extensions for the first time, it is best to choose a simpler option. Another criterion that must be taken into account is what kind of drying will be used - in an LED or UV lamp.
Depending on the brand of the product, polymerization can occur under different types of radiation. For example, from UV, bio and LED gels, the first two dry under ultraviolet rays in the appropriate lamp. Before purchasing material for nail modeling, it would be a good idea to study the reviews and recommendations of professionals. In addition, you should try each option and choose the one that suits you.
The most popular brands that beginners can use:
- Kodi.
- RuNail.
- MyNail.
- PNB.
- IBD Gel.
- Masura.
- Naomi.
- Formula Profi.
With these products you can create nails that are not inferior in quality to those obtained with salon gel modeling.
Read material on the topic: Burgundy manicure with sparkles - the radiance of a charming classic
Basic starter kit for gel nail modeling
In order for the extension procedure at home to be successful, you need to know how to use gel for nail modeling, as well as prepare certain materials and tools. They can be purchased individually or as a complete set.
For extension you will need:
- LED, UV lamp or a combination.
- Fraser with attachments.
- Gels for extensions (basic and camouflage).
- Acid-free primer.
- Base, finish.
- Nail files (artificial and natural), as well as a polishing buffer.
- Brushes (thin - for correcting angles and medium).
- Tips or shapes depending on what technique will be used.
- Degreaser/dehydrator.
- Lint-free wipes and liquid to remove the sticky layer.
- Clip-clamp for arch formation.
- Dust removal brush.
- Orange stick or pusher.
Each modeling system includes one or more types of gel, depending on which complex is used.
The densest of the three in texture is the base one. It is translucent and is used to form the base at the first stage of manicure.
Camouflage gel for nail modeling with a less dense, delicate texture is used for architecture at the stage of creating the form.
The easiest one is the finishing one. It is used at the final stage to consolidate the result.
Acid and acid-free primer - modeling is impossible without this product. It allows you to lift the nail scales and degrease the surface for more reliable adhesion to the gel. If acrylic extensions are carried out, then an acid version is used, and with gel extensions, an acid-free option is used. In addition, this product prevents the development of fungus and pathogenic microflora between the natural plate and the artificial material.
Read material on the topic: Stylish manicure in brown colors: ideas and solutions
Rating of gels for nail extensions
The modern market for nail extension products is filled with products from different brands, which differ in cost and quality. It should be noted that cheap materials do not always perform poorly in work, and even among expensive materials there are examples of not the best quality. Before choosing materials for work, you should consult with experienced craftsmen and read reviews about products from different companies.
If you need materials for extensions, there are only a few options for where to buy nail gel. Firstly, you can purchase it in a specialized store or professional salon, but this method is only suitable for residents of large cities. It is easier for masters from the provinces to order nail gel in one of the online stores in Moscow or St. Petersburg that sell materials for nail art. Such sites often offer lucrative promotions and discounts and promise free delivery by mail.
Formula Profi
One of the most famous manufacturers of gel materials for nail art is the Russian company Formula Profi. It only works on a three-phase system:
- model name: Gel base Formula Pro;
- price: 590 rubles;
- characteristics: 10 ml, odorless, liquid, neutral pH level, hardens in 90 seconds with a UV lamp, in 30-60 seconds in an LED lamp, depending on the drying power;
- pros: provides good adhesion of the gel base to the nail plate, odorless;
- cons: none.
In the catalog of this manufacturer there are three types of the second, main phase for nail extension using tips. They differ in shade, but they are all equally in demand among craftsmen:
- model name: Crystal Formula Profi Construction Gel transparent;
- price: 970 rubles;
- characteristics: 15 grams, thick and viscous, low temperature, polymerization time in a UV lamp 3-4 minutes;
- pros: easy to use, you can create a wide variety of manicure designs with it;
- cons: expensive.
In the Formula Profi system, a special topcoat is used to fix the construction gel:
- model name: Top gel Formula Pro without sticky layer;
- price: 720 rubles;
- characteristics: 10 ml, odorless, liquid, hardens in a lamp in 2 minutes;
- pros: gives a beautiful shine, is resistant to household chemicals, hides imperfections in the coating, does not require removal of the sticky layer;
- cons: high cost.
All season nail extension gel
Among the products of a famous American brand for gel nail modeling, it is worth highlighting one unusual product:
- model name: Hologram modeling UV gel Shimmer Gel from All Season;
- price: 1210 rubles;
- characteristics: 28 grams, transparent with small silver glitter, can be used as a second or third phase, dries in 120 seconds;
- pros: original, beautiful, multifunctional;
- cons: expensive.
French manicure goes with different clothes and always remains in trend, so many girls prefer to wear it every day:
- model name: Toning pink UV gel for French coat All Season Pinker Pink;
- price: 1148 rubles;
- characteristics: second phase, 28 grams, translucent, caramel, medium viscosity, polymerization time 3 minutes;
- pros: easy to apply, quickly leveled, does not form bubbles;
- cons: none.
- Inhalation for a runny nose - can it be done at home? Recipes for inhalation solutions for a runny nose
- How to remove wrinkles above the upper lip - products and procedures for women
- How long to cook shrimp after boiling. Shrimp cooking time
IBD
The well-known American company IBD offers a whole line of various materials for gel nail modeling. For example, a harmless primer that does not contain acids:
- model name: Acid-free gel primer IBD Bonder Gel;
- price: 800 rubles;
- characteristics: 14 ml, odorless, liquid, self-leveling, hardens in a lamp in 1 minute;
- pros: does not affect the structure of the nail plate, provides good adhesion, does not turn yellow over time;
- Cons: Suitable for professional use only.
As a basis for different types of manicure, you can use the transparent building UV gel from this company:
- model name: IBD UV Builder Gel Clear;
- price: 650 rubles;
- characteristics: 14 grams, odorless, self-leveling, medium viscosity, polymerization time in a UV lamp 30 seconds;
- pros: multifunctional, relatively cheap;
- cons: can only be dried under ultraviolet light.
The price of a gel for nail extensions is determined not only by its composition and company name, but also by the volume offered in a particular version. Large packages are cheaper, but are suitable only for masters who are constantly engaged in gel modeling of nail plates:
- model name: IBD UV French X-treme Builder Gel White;
- price: 1650 rubles;
- characteristics: 56 grams, odorless, thick, white, drying time in a UV lamp 4 minutes;
- pros: economical packaging, lays flat, does not spread;
- cons: takes a long time to dry, only for professional use.
Runail
Another well-known Russian company that produces materials for gel nail art brings good products to the market at affordable prices. They have ready-made kits that are in demand among beginning craftsmen:
- model name: Basic set for nail extensions with gel “Standard” from ruNail;
- price: 2499 rubles;
- characteristics: the set includes: UV lamp, three-phase extension system, acid-free primer, straight brush, degreasing and sticky remover, nail polish remover, nail file, sander, orange sticks, lint-free wipes, foil tape, cuticle oil;
- pros: cheaper than buying everything separately;
- Cons: For professional use only.
The product catalog presents different coating systems - single-phase and three-phase, as well as colored and camouflage:
- model name: UV gel camouflage pink ruNail;
- price: 360 rubles;
- characteristics: 15 grams, medium viscosity, self-leveling, polymerization time 3 minutes;
- pros: blends in with the natural color, masks minor defects;
- cons: dries only in a UV lamp, not very durable.
As for color products, the manufacturer offers a large palette of different shades, and their prices are very affordable:
- Model name: UV gel color translucent orange;
- price: 205 rubles;
- characteristics: 7.5 grams, high viscosity, orange color, dries in 60-180 seconds depending on the amount of product applied;
- pros: beautiful rich shade, colors can be mixed, inexpensive;
- cons: small volume.
Single-phase gel Jessnail
The world-famous cosmetics company JessNail offers only single-phase systems for gel coating of nails. Their simplest option is this:
- model name: single-phase gel profBar-Clear from JessNail;
- price: 202 rubles;
- characteristics: 15 grams, liquid consistency, dries in about two minutes;
- pros: cheap, one product replaces several bottles, suitable for beginners;
- cons: unreliable, can cause irritation.
The question of how much JessNail nail extension gel costs can be answered succinctly - very cheap compared to other manufacturers. For example, a natural single-phase system according to the catalog costs even less than 100 rubles:
- model name: JessNail single-phase natural gel;
- price: 90 rubles;
- characteristics: 15 grams, self-leveling, natural, pleasant shade, dries in 3 minutes;
- pros: very cheap, hides defects of the nail plate well;
- Cons: takes a long time to dry, there is a slight chemical smell.
In the catalog of this manufacturer there are several options for colored gel bases for French and other designs:
- model name: Single-phase gel soft pink Candy Rose from JessNail;
- price: 251 rubles;
- characteristics: 15 ml, self-leveling, above average viscosity, ideal for French manicure;
- pros: inexpensive, pleasant natural color, hides minor defects;
- cons: none.
Global
Gel bases for high-quality nail extensions are produced by another American brand called “Global”. They have both single-phase and three-phase systems for expansion:
- model name: Global Fashuon Clear Single-Phase UV Gel transparent;
- price: 799 rubles;
- characteristics: 30 grams, colorless, liquid consistency;
- advantages: does not cause allergies, easy to work, easy to file;
- cons: relatively high cost.
Professional craftsmen will find stained glass UV products of different shades useful in their work. Global sells them both individually and as a set:
- model name: Global stained glass gel set, 12 pieces;
- price: 1499 rubles;
- characteristics: 12 small jars with products of different colors;
- pros: beautiful, unusual, you can create different designs;
- cons: expensive.
Arched gel nail modeling: step-by-step instructions
- The free edge is sawed off to 1.5–2 mm.
- The nail is polished until the natural shine disappears.
- The surface is degreased with dehydrant.
- After drying, the plate is treated with a primer.
- The first very thin layer of gel is applied so that it does not get on the cuticle and skin.
- Nails are placed under an ultraviolet lamp for 2.5 minutes (the exact time is indicated in the instructions for the varnish).
- The shape is cut to fit the nail plate and installed on it.
- In order not to upset the overall balance, the bend should coincide as much as possible with the smile line.
- A thin gel substrate is made at the border of the mold and the edge of the natural plate (stress part).
Read the material on the topic: The most fashionable ideas for light manicure 2019
Technique for nail extension using camouflage
The extension procedure is carried out mainly in salons, but if you wish and follow all the rules for working with materials and equipment, you can perform extensions at home.
The entire procedure for working with camouflage gel is carried out in several stages:
- We prepare and treat hands and nails, that is, we carry out a standard hygienic manicure.
- Degrease the nail plates.
- Apply primer and cure it in a lamp.
- Next, prepare the artificial form and place it on the nail plate so that the center of the nail coincides with the center of the form.
- We put a certain amount of gel on the brush and distribute it evenly over the surface of the mold, starting from the middle and moving towards the free edge. At this stage, we model the required length and desired shape of the extended free edge.
- The formed fragment is polymerized in a lamp.
- Then we cover the natural plate with base gel and dry it. This is done for better adhesion.
- Apply the base coat again to the fragment and the entire nail, but do not dry it.
- Using a brush, pick up a certain amount of camouflage and place it in the middle of the nail plate. Using even smooth movements of the brush, we distribute it over the entire plate, trying to get no closer than 1 mm to the cuticle and ridges.
- After the material has been laid out on the surface, we place it under the lamp for 15-20 seconds. Then we press the gel with a special clothespin, and again send it to polymerize until completely dry.
- We remove the mold, the sticky layer, file the free edge, and sand the surface with a buff.
- If subsequent design and decoration is not provided, then apply a finishing coat, seal the end and dry in a lamp until the top is completely dry.
You can more clearly familiarize yourself with the technique of modeling and extending nails with camouflage material by watching the video:
Initially, camouflage gels were invented and developed to create the perfect jacket. An example of such a manicure is shown in detail in the video:
With the help of camouflage material, you can carry out not only the process of building up nail plates, but also carry out the procedure for strengthening them. You can learn more about the technique by watching the video:
How to correctly model French on forms
Next, let’s look at the technique of modeling nails with gel on French forms (photo above):
- Before processing the cuticle, the hands of the master and the client are disinfected.
- Then it is moved back, and the remaining skin is removed from the nail. After this, using a 180 grit abrasive file, the surface of the plate is cleaned.
- After degreasing, treatment is carried out with a bond and then with a primer so that the adhesion of the material and the natural nail is of high quality.
- Next, the selected shapes are fixed on the fingers, and a layer of base gel is applied to the nails. After this, the hands are placed under a UV lamp for two minutes for better hardening.
- When the surface is dry, camouflage gel is applied and the hands are again placed under ultraviolet light to cure for two minutes. At the client's request, the free edge is painted with colored or white material.
- Once again, the hands are placed under the lamp, after which a base gel for nail modeling is applied, a transparent powder with a similar composition is sprinkled on, and everything is dried. This operation is performed three times.
- After all procedures have been carried out, the required shape is given, grinding and polishing are carried out.
- At the last stage, the finishing gel is applied. This is done twice, and after each layer drying is carried out.
- At the end of the process, vitaminized oil is applied to the cuticle.
If all stages of gel modeling are carried out correctly, then artificial nails will be quite difficult to distinguish from natural ones. The described procedure takes a maximum of three hours.
This completes the modeling and you can admire the result.
Read material on the topic: Working with beauty salon clients: 5 golden rules from professionals
What is camouflage modeling nail gel?
Few girls have naturally healthy and beautiful nails. Mechanical damage and interaction with aggressive detergents do not improve the condition of the nail plate. To disguise minor imperfections and adjust the shape and length of nails, manicurists use modeling nail gel in their work.
Modeling gel is a solution of different consistency and shade that is used for extension and modeling of artificial nails. The gel is applied to the nail surface, distributed evenly, and then placed in a UV lamp. Thanks to this, the gel is securely bonded to the surface of the nail.
Benefits of camouflage gel
It is worth noting that camouflage gels are good at eliminating defects in the nail plate that become invisible. Basically, the color palette of gels is close to the shade of natural nails. Therefore, these are usually pastel colors such as beige and peach. Camouflage gel has its advantages, which include:
- The result is a smooth nail plate that looks natural.
- The stratum corneum of the plate is strengthened.
- Prevents the occurrence of fungus, as the gel contains antifungal properties.
- The coating is porous, so it is safe for the nail plate.
- Artificial nails are almost no different from natural ones.
- Long service life, with timely adjustments.
READ ALSO: How to file your nails beautifully and correctly
Types of modeling gel
- Manicure product has several varieties:
- single-phase coating;
- two-phase coating;
- three-phase.
The most common in use is single-phase camouflage gel. It often has a thick consistency and is used for base, top and modeling coatings. This material dries under the lamp in just 3-5 minutes.
Two-phase is not used so often, since the time of its application to nail plastic is approximately the same as three-phase. However, in this case the coating is not so durable.
Application of three-phase coating requires special training, as its consistency is liquid and can foam. To achieve the desired effect, several layers are applied, due to which the manicure becomes quite strong and becomes resistant to various damages.
Some camouflage gels require only 2 minutes to cure in a UV lamp. For example, this includes modeling nail gel EXPRESS BUILDER GEL. The product is transparent and plastic, which allows you to form a nail in a short time.
Why does modeling gel peel off from nails?
If the geometry of the artificial coating is not observed, the adhesion of the nail plate and the material is disrupted, resulting in peeling.
This may be for the following reasons:
- before modeling, a manicure was done, during which a cuticle softener was used, and its particles remained on the skin;
- during preparation, the pterygium was not fully protected;
- placing the material too close to the cuticle and sides;
- after the preparatory stage, the client or specialist touched the plate, as a result of which oil or moisture remained on it;
- using too thin or dry acrylic consistency during work;
- the presence of a small step between the gel and the natural plate due to the insufficiently thin layer of material at the cuticle;
- using ultraviolet lamps that are too old and do not dry the product completely.
The solution in this case is the following: when preparing the nail for modeling with gel polish, you need to make sure that there is no pterygium left along the lateral sinuses and cuticle, for which the skin must be carefully pushed back. After removing the shine, you should not touch the nail plate until the procedure is completed. Before applying the material, you need to check the surface: it must be sterile.
If modeling with acrylic is performed, then care must be taken to ensure that the balls are not excessively wet and do not spread over the surface. The fact is that this can cause air bubbles and deterioration of strength.
In addition, you need to make sure that the material around the cuticle and side ridges is reduced to nothing. To do this, touch the surface with your finger: you should not feel even a small step.
Read material on the topic: Manicure in gold color: features and options
How to remove overgrown nails after gel modeling
First you need to remove the length using the same method as in the case of removing acrylic nails. To trim the free tip, you can use nippers, a cutter, or scissors. It is impossible to remove to the very root, so as not to damage the skin under the plate.
To remove gel nails, you will have to spend quite a lot of time, since there is only one way - filing. Since the material used for modeling is quite durable, the file should have an abrasiveness of 80–100 grit.
Glass and metal tools are not suitable for this, since they will quickly become unusable and will be of no use. In addition, it would be useful to use a mask, since a lot of dust is generated during sawing.
Right-handers should start removing with their left hand, and left-handers should do the opposite. The file should be placed between the middle and thumb and pressed with the index finger. To make it less painful to hold, you can wrap your fingers with adhesive tape. While filing, you should try not to move, otherwise there is a risk of damage to the surrounding skin. Typically, it takes about 10 minutes to remove material from one finger. If you speed up the process, the nail will heat up.
How can you tell if all the material has been cut down? In order not to damage the natural plate, you need to stop from time to time, shake off the accumulated dust and wipe with a liquid intended for nail polish remover. As soon as you notice that there is not much material left, you should take a softer file (150–180 grit) and reduce the pressure.
At this stage, the gel may begin to peel off on its own, and here it is worth using an orange stick to speed up the process. A similar procedure must be carried out on all other nails, after which the removal can be considered complete.
In salons, the process of removing gel nails can be much faster, since they use a special machine that heats and softens the material.
You can learn about all the secrets of nail modeling, as well as how to properly apply the gel to subsequently create the desired shape, by watching the video:
Where to buy high-quality and professional files for nail modeling
Among the huge number of online stores offering manicure accessories, we invite you to our “WORLD OF NAILS”! You should choose our services because:
- “MIR FILOK” – own production of nail files.
- "WORLD OF FILES" is the main supplier!
- The showroom is located in Moscow.
- Delivery throughout our vast Motherland!
Why is “WORLD OF FILES” the best option for purchasing a product for you?
- Our store is built on our own production of saws. Thanks to this, you get: minimized cost of service, tested and confirmed product quality, fast production, attractive conditions for distributors.
- Our nail file is made only from materials that have repeatedly proven their quality (South Korea).
- Wide variety of product. Thus, a manicurist with any level of professionalism will be able to satisfy his interests.
- You can figure out which file is right for you. We carry out individual orders.
- Another advantage is the application of your brand logo on the working surface of the files.