Types of single-phase nail polishes
Single-phase nail polish comes in several types:
- Traditional enamel products. This is a colored coating in bright or pastel shades with a glossy sheen.
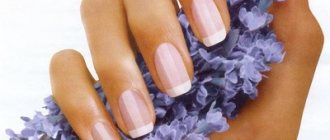
- Translucent. Used to give nails a natural and healthy look, they have subtle natural shades. Good for a plain manicure or a French manicure.
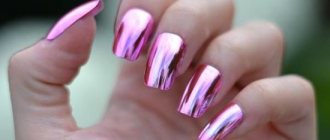
- Mother of pearl. There are juicy and light shades with a pearly shine.
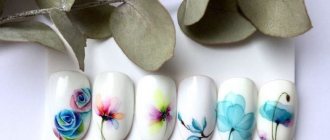
- With shimmer. These are gel polishes of different colors with small or large glitter. The shimmer can be silver, golden, or the same shade as the flower bed itself.
- Neon. As a rule, these are bright shades that look like enamel in normal lighting. But under the neon lamp they begin to glow.
- Thermo. These products change depending on the temperature, so the shades are lighter at the tips of the nails. In the cold the color will also be different than in the warm.
Advantages and disadvantages
The extension procedure using forms has both advantages and disadvantages. Most masters and clients prefer this method due to the following advantages:
- Unlike tips, it does not cover the main part of the nail, due to which most of the natural plate has access to oxygen.
- Artificial nails made on substrates are thinner and look natural.
- After mastering the method, you can perform it at home.
- Allows you to make any nail shape, as well as choose your own length
- Strengthens brittle tips on short nails.
- You can perform the correction procedure without the need to completely remove the extended layer.
- The cured gel polish beautifully complements the natural nail plate without a noticeable transition.
Among the disadvantages of modeling using forms, they note that the procedures are quite complex compared to using tips. Also, low-quality materials and poor application technique can significantly slow down the growth of nails and damage their structure. These shortcomings usually go away with the experience gained. If the rules for extensions on forms are strictly followed, there are no negative aspects.
Three-phase nail gels Led and UV
Formula Profi
- Odorless, with a neutral pH level;
- Polymerization time in a UV lamp is 90 seconds, in a LED lamp – 60 seconds;
- Includes base, clear builder gel and topcoat;
- Volume 10 ml;
- Price from 600 rub.
All season
- Modeling tinting gel, with glitter or hologram effect;
- Long polymerization time;
- High wear resistance;
- Volume 28 ml;
- The price of the construction gel is more than 1000 rubles.
IBD
- The base coat is acid-free, self-leveling, odorless, volume 14 ml;
- Sculpting gel is transparent, odorless, volume 14 ml;
- Polymerizes only in UV rays for 30 seconds;
- The cost of a three-phase line is more than 2000 rubles.
Runeil three-phase
- Camouflage or colored firming sculpting gel;
- Optimal ratio between price and quality;
- Self-leveling, medium viscosity;
- Polymerizes only in UV rays;
- Colored gels mix well;
- The volume of camouflage agent is 15 ml, color 7.5 ml;
- Price from 200 rub. for colored, from 350 rub. at the camouflage one.
Severina
- Three-phase system with camouflage sculpting gel;
- Consistency of medium-high viscosity;
- Allows air to pass through and does not overload the nail;
- Polymerizes in a UV lamp;
- Volume 15 ml;
- Price from 700 rub.
The best single-phase gels for nail extensions
Single-phase transparent gel Jess Neil
- Self-leveling;
- When applied correctly, does not require filing;
- Easy to model due to its liquid consistency;
- Maximum polymerization time in a UV lamp is 3 minutes;
- Volume 15ml;
- Average price – 300 rubles.
Single-phase gel Masura
- A wide range of colored biogels with deep warm shades;
- Contains a vitamin complex, calcium and protein to strengthen the nail plate;
- Hypoallergenic;
- Volume 15 ml;
- Price from 670 rub.
Single-phase gel Runeil
- Available as a single-phase and three-phase camouflage agent;
- It has medium viscosity and is easy to level;
- Suitable for aquarium decoration;
- Maximum polymerization time in a UV lamp is 3 minutes;
- Volume 30 ml;
- Price from 550 rub.
TNL extension gel
- Biogel, which strengthens the nail plate, adds shine to natural nails;
- A wide range of transparent and camouflage single-phase classic and premium gels;
- They have high wear resistance;
- Volume 15 or 18 ml;
- Price from 210 rub.
Global
- Strengthening inexpensive UV gel;
- Sheer or neutral pink or light pink shade;
- Average wear resistance;
- Requires leveling, filing;
- Volume 15 ml;
- Price 400 rub.
Main differences
What does single-phase application system mean? Simply put, this is a three-component product, which includes a base, color and finishing layer. With its help you can do a quick manicure, and such a bottle will take up little space in your cosmetic bag.
A manicure using this gel will last about two weeks. But not all nails accept it, and accordingly, the durability of the coating may be less. A trial application will determine if the product is suitable for your case.
What is three-phase gel polish? This product consists of three different bottles:
- base;
- color;
- fixative
The base coating has the same principle of operation as double-sided tape. At the same time, it strengthens the nail and holds the color well. The fixative performs the function of fixing the color and protecting it. The fixing layer can be matte, glossy or have a scent that remains on the nails after drying.
Three-phase gel is a suitable option for those who like to decorate their nails with stickers.
Step-by-step technology for gel nail extensions
Step by step gel nail extension
as follows. Stage
the first, preparatory, consists of disinfecting hands, removing
cuticles in any usual or convenient way. Nail surface
degreased for strong adhesion and then sanded to avoid
peeling. The edge of the nail is filed and given the desired shape. Each layer of gel
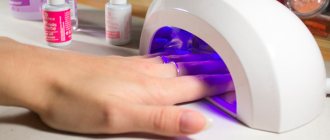
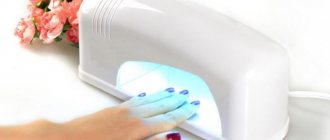
must be dried under a special ultraviolet lamp. And this,
in addition to its main purpose, it helps to avoid fungal infections in the future
diseases. There are three-phase and two-phase nail extension systems
gel. Gel extensions are carried out using a two-phase and three-phase system. Each of them consists of a certain number of components, which has its own purpose. For example, in a three-phase system, the first layer is responsible for adhesion of the nail plate to the artificial material. The second layer models the nail, and the third provides strength, creating a smooth, shiny surface. In a two-phase system, one component is used for modeling and adhesion, and the second for strength. There is also a single-phase system in which the gel performs all of the above functions.
Beautiful manicure, well-groomed nails
The step-by-step technology of gel nail extension involves applying two or three layers of gel, each of which is dried in turn under an ultraviolet lamp. Sometimes when drying under a lamp, a burning sensation occurs. Then the procedure is suspended and they wait until all symptoms disappear. The extension process ends with nail design. The entire gel extension process takes up to three to four hours and lasts up to two weeks.
From my experience, I know that a real professional master takes an hour and a half, and if there are complex patterns on the nails, it takes two hours. Correction, which is carried out after ten to fourteen
days after extensions, allows you to “forget” about manicure for a couple of months. Do you want the coating to last long? On the day of extensions, you should not do housework: washing dishes, hand washing, replanting flowers. Because all these things will have to wait until “tomorrow”, when the nails become “reinforced concrete”.
Gel extensions, like all cosmetic procedures, also have unpleasant consequences.
- Firstly, expansion is a rather labor-intensive and lengthy process that requires considerable costs, including financial ones.
- Secondly, nails under the gel do not “breathe” at all, which will subsequently require long-term treatment and recovery with the intake of vitamins and special procedures.
Step-by-step technology for gel nail extensions often causes unpleasant sensations, which depend on the threshold of sensitivity and professionalism of the artist. Despite the smooth and dense coating, gel nails are more fragile than acrylic nails. To avoid injury to the nail, you can cover it with a biosculpting gel, which half consists of natural resins, natural vitamins and proteins. The presence of such materials allows the nail to “breathe”, and after restoration, such nails look healthier and stronger.
154
Gel nail extensions - step-by-step instructions at Imkosmetik
Gel nail extensions - step by step! What are the differences between single-phase and three-phase extension systems? How to grow your nails yourself?
How to choose a gel for extensions?
Single-phase units are usually preferred by beginning craftsmen. But some remain faithful to them over many years of work. Grattol gels have a viscous structure and are convenient to distribute over the surface of tips or molds.
The pink opaque InGarden gel is perfect for a nude manicure; it is quite dense and does not show through.
Beige single-phase from Vogue Nails is also a great option for nude; it self-levels and perfectly models the nail.
With experience, masters, as a rule, switch to a three-phase extension system.
RuNail has perhaps the widest palette of building (modeling, sculpting) gels: the company has classic nude shades and bright raspberry, blue, green and purple.
For the base you can choose, for example, Kodi, and for the finish - Grattol with a sticky layer or Lianail, which is applied like a top coat and does not turn yellow after drying, which allows you to preserve the main color of the extended nails.
Gel nail extensions step by step
The technology for gel nail extensions in single-phase and three-phase systems is absolutely the same, only the gels themselves differ. Either you use a single phase gel for all three steps, or three different gels.
We carefully treat our hands with an antiseptic, paying special attention to the fingers and nail bed. We do a manicure in the usual way and polish the nail plates with a buff. We degrease the nails, then apply a bonder (dehydrator) and primer. We prepare tips or forms. We cut the tips to the required length with a tip cutter and sand them with a buff to get rid of the smooth surface, then glue them onto the nails
We secure the forms firmly under the nails; they should not move during the work. Apply the first base layer of gel. In a single-phase system it can be immediately colored, in a three-phase system it is usually transparent. We distribute using a brush into tips or shapes, creating the correct oval/rectangle, depending on the desired shape of artificial nails. Dry the layer in a lamp. Apply a modeling layer of gel. It should not be too thick and lumpy, you should strive for an even distribution. Dry it again in the lamp. We grind the surface of artificial nail plates, giving them the desired shape, length and arch. Remove dust with a nail brush or napkin. Then we apply the finishing gel and seal the ends of the nails. The last layer is also polymerized in a hybrid lamp.
Now you can complete the gel polish coating and design. If you decide to do without coating and nail art, you can apply softening oil to the cuticle.
PNB, Single-phase modeling gel
Single-phase and three-phase expansion system
| pros | Minuses |
| Single phase system |
|
| Three phase system |
|
Remember that the quality of work also depends on the skills and talents of the craftsman. Therefore, train and improve, and our tips for gel nail extensions will help you with this.
We wish you successful work!
Review from manunia_131:
It's a pleasure to work with him! It dries great in the lamp! The color is pleasant and delicate. Perfectly covers the transition (you can't see your nails). The regrowth is not very noticeable. When used correctly, detachments do not occur. There is no burning sensation when drying in the lamp. Full review here.
- manicure
- build-up
- gel extensions
- nails
- extension systems
Previous article Next article
Step-by-step application technique
Not all girls and women know how to properly create a manicure based on three-phase products. That is why you can find negative reviews in which representatives of the fair half of humanity say that the varnish does not last long, the coating quickly chips and cracks.
For proper use you will need:
- file for natural nails;
- buff or sanding file;
- LED, UV lamp (any of these options will do);
- orange sticks;
- cuticle oil;
- base, color and top coat;
- lint-free wipes for removing the sticky layer;
- primer and remover (degreaser).
First you need to do a trimmed or hardware manicure, trim or push back the cuticle with an orange stick. After this, give the desired shape to the free edge of the nail. Now you can start creating a durable coating.
The sequence will be like this:
- Sand the nail with a buff;
- Degrease the nail plate with a special product;
- Apply primer (if necessary). The composition dries quickly in air without the use of a lamp;
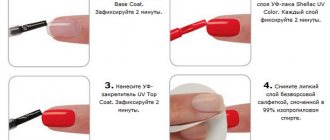
- Cover the nail plate with base, dry in an LED or ultraviolet lamp for 1 and 2 minutes, respectively;
- Apply the selected shade to your nails. Dry the coating in a lamp;
- If you want to get a dense color, you can repeat the procedure by applying the color composition 1-2 more times. Each layer must be thoroughly dried;
- Apply top coat. When distributing, be sure to seal the nail cut. This action will avoid chips and cracks in the coating during wear;
- The last step is to use a special cuticle oil.
The technique of applying gel polish is shown in more detail and clearly in the video below.
By following the step-by-step technique presented above, every girl will be able to create an attractive manicure in the shortest possible time. Many women do not know how to tell if the coating is completely dry. It is enough to strictly adhere to the manufacturer’s recommendations regarding the drying time of the varnish in the lamp. In this case, you will receive a durable coating that will last up to two weeks without chipping or cracking.
How is gel polish different from regular polish?
Regular nail polish is a colored coating that:
- It does not stay on the nails for long without chipping: from 3 to 5 days.
- Nail polish takes a long time to dry in the air: it is not advisable to touch anything for at least half an hour after applying it.
- Washable with nail polish remover.
Every girl has used regular nail polish at least once in her life and has a good idea of what it is and how to apply it. The variety of varnishes is simply huge: you can find special medicinal varnishes, and varnishes with various effects, for example, craquelure, matte, sand, magnetic and others, as well as varnishes with additions in the form of sparkles, shimmer, and so on.
Gel polish is a cross between regular nail polish and gel for extensions, which is why it has such a name. The main goal that was set during its development was to combine in it all the best properties of both coatings: that is, durability and color. And this, of course, was achieved!
- Externally, a bottle of gel polish differs from regular polish in that it is not transparent. The color is indicated either by a sticker or paint on the bottle. This is done so that the gel polish does not lose its properties when exposed to sunlight.
- For the gel polish to dry, you need to hold it for 2-3 minutes in an ultraviolet lamp or 30 seconds - 1 minute in an LED lamp.
- Due to the properties obtained from the gel, the wear time of the gel polish coating increases to 3 weeks.
- The technique of applying gel polish requires additional nail preparation: degreasing the surface, removing the gloss with a buff, and the mandatory use of a base and top coat for gel polish. Additionally, liquid may be required to remove the sticky layer, if any.
- The presence of additional materials and a lamp for applying gel polish makes this procedure more expensive, so many people prefer to have it done in a salon or by a specialist at home.
- Removing gel polish from nails is also more difficult; regular gel polish is not enough. It must either be soaked with a special agent or removed mechanically using a hard file or cutters.
Two-phase gel polishes
2-phase gel-based nail coatings are probably the rarest and not very popular. As you already understand, the system consists of two means. As a rule, this is a color coating and a fixer. It is even rarer to find a colored coating and only a base. Their advantage is that they are less labor intensive than 3-phase ones, but they also have a little worse wear and tear. The only most famous and well-proven one is VinyLux from CND, which lasts 7 days. Although it should be more classified as ordinary varnish, since it does not require a UV lamp, and the composition is far from related to gel varnish.
Pros and cons of single-phase gels
- A good result without unnecessary time expenditure.
- The application method excludes coating with a base and fixer. Therefore, you should not count on a long service life of such a manicure.
- During application, such varnish may drip, which causes difficulties when modeling nails.
- This product is not suitable for complex designs and decorations. The absence of a sticky layer does not allow you to show originality in the design of your manicure.
- Those with an elastic nail plate often experience cracking of the coating, so sometimes you have to additionally buy a fixer specifically for single-phase gels.
- Single-phase varnish does not dry out the nail plate and can be used even for weakened nails. However, this is not always good, because without the appropriate skills, nail modeling will not work.
- The finishing stage eliminates the formation of a sticky layer.
Three-phase gel
Three-phase gel requires a thoughtful, leisurely approach to decorating or extending nails. But at the same time it ensures high reliability and durability of the decor.
As the name implies, the structure of a three-phase gel includes three substances. The first is a bonding agent. It is applied directly to the nail plate and provides high adhesion to other materials. That is why the varnish lasts a very long time, and it is problematic to break it - unless, of course, it is applied in openwork patterns or does not lengthen the nail plate many times.
The second is modeling paste. It is characterized by increased viscosity and is intended directly for building up and creating a manicure shape. And finally, the third is decorative material. It is he who is painted in one color or another.
Three-phase gels are characterized not only by a relatively high complexity of application, but also by a long working time. But with them you can create a truly impressive manicure! Modeling paste in the hands of a master can take on absolutely any shape, it can be processed with a milling cutter and other tools, and the finished appearance depends on its tone - whether it will be colored uniformly or become opalescent.
However, the disadvantages of a three-phase gel are not limited to the difficulty of applying to the nail plate. It is also characterized by a high price! Therefore, this gel polish is not very suitable for home use - it is easier and cheaper to order its application at a manicure salon.
So, let's summarize.
Advantages
- High strength, reliability and durability. “Holds on” reliably and survives even strong mechanical impacts;
- Allows you to create truly complex and unique design solutions, including opalescent shades;
- Suitable for repeated lengthening of the nail plate - although, of course, the strength is somewhat reduced (due to the laws of mechanics, the “lever effect” and internal stresses).
Flaws
- Expensive compared to the alternative;
- Difficulty and duration of application;
- Requires highly qualified craftsmen and the use of special equipment.
Of course, the bonding agent and modeling paste are almost universal, and therefore suitable for use with various decorative varnishes, which somewhat reduces the price of the set. But at the same time, for many fans of home manicure, the cost of three-phase gels remains quite high.
How to choose gel for nail extensions
If you want to make even, smooth, beautiful nails, be sure to use only high-quality materials in your work. To ensure that your purchase is successful and you don’t have to listen to clients’ complaints about your work, you should consider some important points before purchasing:
Initially, decide which system will be convenient for you to work with - one, two or three phase. If you are just practicing extensions, take a complex single-phase UV gel
If you are already working at a professional level, try good three-phase systems. Pay attention to which lamp and at what power the product you choose hardens. It is better to choose materials that dry quickly in a UV lamp - these are easier and easier to work with, and they are usually odorless. Check what viscosity the composition you are going to buy has
Very thick materials will be difficult to work with, and liquid ones can constantly flow down the surface of the nail plate, complicating the modeling process. When purchasing products for gel nail art, choose certified products from trusted manufacturers. When ordering UV gel online, ask the seller whether he guarantees the quality of the product he sells, discuss in advance the possibility of a return or exchange if the quality of the product received is unsatisfactory. If you buy phases for extension separately, and not in a ready-made set, take materials from the same manufacturer, because they are designed for joint use and will combine better than products from different companies. Please note that one jar lasts a long time, so before purchasing, pay attention to the production date and maximum shelf life. Don't buy something that's only good for a couple of months, because most of it will just have to be thrown away. This is especially true for those who like to buy cosmetics at sales, where stale products are often sold.
Application: step-by-step instructions
The strengthening process takes more than one hour of work. Necessary equipment and tools for this:
- UV/LED lamp for drying material;
- primer/ultrabond;
- gel/polygel;
- color coating (gel, gel polish);
- finishing coating;
- manicure machine (milling cutter);
- set of manicure tools, brushes;
- degreasing/disinfecting products;
- napkins (lint-free).
Preparation for strengthening coating
This is an important stage on which the wear life of the material depends.
First, the nail plate is completely cleaned of the old coating (if there was any).
Next, the manicure begins, where the cuticle is carefully removed and the pterygium is cleaned. Manicure should be performed cleanly, using a device with cutters or manicure scissors.
Important. There is no need to make cuts both on the skin and on the nail itself, otherwise an allergy may occur when drying the material.
Using a soft file, the gloss is removed from the natural nail and given shape.
After a manicure, dust is removed from hands and fingers are disinfected
If your nails are naturally wet, use a dehydrator. The plate itself must be dry before coating.
Application of material
At this stage it is important to do everything correctly so that you don’t have to redo it
- Primer is applied to the prepared nail. It provides adhesion between the surface of the plate and the gel. It is preferable to use acid-free compounds so as not to damage the natural nail. The primer air dries for about 1 minute. After this, you should not touch your skin or hair with your fingers, because the nail plate is degreased.
- Then the base coat is applied in a thin, rubbing layer.
If the system is single-phase, then you can do without a base. The gel is placed on the plate in a small drop. Then, using a brush, the distribution begins with smooth movements. Applying the gel requires knowledge of the architecture of the nail plate. There should not be a lot of material near the cuticle. It smoothly, from thin, moves to dense, near the middle. At the tip of the nail the layer becomes smaller and the end is sealed. The same result is obtained if you turn the nail over, then the gel itself takes the desired shape. - When everything is lined up, the hand goes into the lamp to dry. The time is set differently: in UV - about 2 minutes, in LED - about 50 seconds. But here the power of the lamp itself is also taken into account. With this distribution, a durable structure is built; this coating can be worn for a long time. Correct technique eliminates detachments and chips.
- If unevenness is visible after drying, you can make a small filing to make the surface of the nail more even.
- Further, if desired, you can apply a color coating and create a design. The final step is to apply the finishing coat. It can be glossy or matte. All layers are dried in a lamp.
- At the end of the process, the coated nail is wiped with a cloth soaked in a special liquid to remove stickiness. In general, the handles are ready. The manicure is forgotten for several weeks.
Contact with water must be limited on the day of application (minimum 2 hours), the gel does not handle moisture.
Master class “Strengthening natural nails with gel”:
Step-by-step instructions for applying gel polish
Step 1. Preparing the cuticle
First of all, it is necessary to perform a manicure with cuticle removal using any method (hardware, file, classic or European). At home, the easiest way is to do a classic nail treatment: soften the cuticle with a special product and push it back with a spatula. After this, the dead skin is removed with cuticle nippers or manicure scissors.
Step 2: Sanding
Using a file or buff, you need to sand the surface of the nail plate. Excess shine is removed for better adhesion to the gel polish. You can also give your nails the desired shape using a nail file.
Step 3. Degreasing
Use a cotton pad or lint-free cloth soaked in degreaser to treat each nail. This is necessary so that the varnish coating lasts as long as possible. Next, you can additionally use a primer - a substance that improves adhesion. It is also called primer. If your nails are very thin or weakened, an acid-free primer is the only way to achieve a beautiful manicure.
Step 4. Apply base for gel polish
Before using colored varnish, the nail plate is covered with a base. Its function is to protect the nail from coloring pigments and create a bond between the primer and varnish. The base needs to be dried in a UV-LED lamp (about 30-40 seconds).
Step 5. Apply gel polish
There are a few important things to keep in mind when applying color coating. Each layer is made very thin to avoid bubbles or unsightly waves. Saturated shades should be applied in at least 2 layers. If the 1st layer is painted unevenly, it’s okay - this can be corrected by re-application. Each layer must be kept under a UV-LED lamp for 30-40 seconds.
Step 6. Apply top
When the coloring is finished, the finish is applied on top. The top coat is transparent and should be applied in a thicker layer. It also needs to be dried in a lamp. Insufficient drying time can lead to ruined manicure
How to use?
In order for single-phase gel polish to stay on your nails as long as possible, you need to know how to use it correctly. The more accurately the technology matches, the better the result will be in the end. If the work is of good quality, even after the nail plate has grown out, the gel will not begin to flake off or chip, and the nails will still look just as well-groomed.
It should be noted that the average time that experts recommend to wait between corrections is from 1 to 2 weeks. Considering that the operating time is noticeably shorter compared to three-phase materials, this is a completely satisfactory period.
Here are step-by-step instructions on how to carry out the procedure.
First of all, you need to pay attention to preparation. Hands are treated with an antiseptic solution, after which a manicure should be done
The cuticle is removed as much as possible, and the nails are given the desired shape and length. After this, using a nail file, the natural gloss is removed from the plate and it is thoroughly degreased. You can use alcohol as a degreaser, but it is better to use a special product.
Since applying a base coat is not required, we move on to working with gel polish. First, one hand is processed, all nails are covered with an even and thin layer of material, which after the procedure must be dried under a special lamp. How long you will have to dry your nails will depend on the power of the device. An LED device needs 20-30 seconds, while an ultraviolet lamp will require 2 minutes. The same manipulations are done with the second hand.
Next, a second layer of material is applied on top of the first and is also sealed in the lamp. Depending on the type of gel, a sticky layer may remain on the nails. If present, it must be removed using a degreaser. The manicure is ready, all that remains is to apply nourishing oil to the cuticle area and rub it in with gentle movements. If all points of the instructions are followed, a beautiful and even manicure will delight its owner for a long time.
Some masters prefer to use this material to extend nails on forms. This procedure is also easy to carry out, but it should be taken into account that you can only use classic lower forms.
The work flow looks like this: After antiseptic treatment of your hands, you should do a neat manicure, degrease the nail plate and apply a primer to it. Next, the form itself is applied. You need to ensure its maximum fit. If necessary, you can cut the base here and there. You can fasten it for guarantee using a regular stapler.
Next, you should carefully apply the first layer, as if rubbing it into the surface. The main thing is that the material does not come into contact with the skin, otherwise it will not be possible to avoid detachments. The marigolds are placed in a lamp and dried. After checking the surface for strength, apply the gel to the form and stretch it over the nail plate, giving it the required shape, and then dry it again.
In order for the gel to level out on the surface, you need to turn your hand down and then dry it immediately. Next, possible defects are corrected using a nail file. This material does not require a top coat, but it can be applied on top if there is a desire and you want to add a decorative effect, for example, to make your nails matte. After this, dust is removed from the nails and, if necessary, the sticky layer is removed.
Experts recommend always reading the instructions on the bottle of gel. It is there that you can get information about the drying time required for a particular material, as well as other important points. Generally speaking, the drying time for each layer is from 1 to 3 minutes.
Advantages and disadvantages of single-phase manicure products
Advantages
single-phase cosmetic preparations are undeniable:
- Instead of a base, gel polish and finishing product, you only need to buy a single-phase gel. This makes it possible to significantly save on the cost of a manicure.
- A thinner consistency, which makes it easier to distribute the product evenly over the nail plate. In contrast to three-phase systems, which, having a thicker and more viscous texture, require more painstaking application, as well as careful leveling.
- More suitable for use by inexperienced people than three-phase systems.
- Despite the fact that the use of a single-phase drug involves layer-by-layer application, the total thickness of all layers is less than when using three-phase systems. This helps to reduce the load on the nail plates, and they better tolerate gel polish coating.
- Single-phase products do not contain aggressive components, so they are ideal for use by people with sensitive skin.
- When using preparations of this type, the nail plates breathe, since the coating is not airtight.
Despite all the advantages of the innovative single-phase gel, it also has disadvantages:
- Due to the fact that during the manicure process a separate glossy layer is not applied, which performs protective functions, the wearing period of single-phase gel on nails is shorter than in the case of three-phase products.
- The advantage of the product is its liquid consistency, but at the same time it is a disadvantage that creates difficulties for novice masters and ordinary users. The single-phase preparation spreads heavily over the surface of the nail plate and is difficult to control. Therefore, the polymer often gets onto the cuticle and under the side ridges. A separate problem is the formation of the apex point or the so-called “stress point” - the highest point of the artificial nail, which bears the greatest load.
- Also, the use of a single-phase nail product limits the artist’s imagination and does not provide the opportunity to perform some designs. For example, it will not be possible to realize the idea of a manicure if it involves the use of three-dimensional figures and stickers.
Three-phase
The three-phase system differs from the two-phase system by the use of a final gel, which is necessary to remove the sticky layer. This gel speeds up the work process and performs a protective function against external aggressive factors.
In general, the sequence of working with three-phase gel polishes looks like this:
- We perform a manicure (shape the nails, remove and push back the cuticle), degrease the surface of the nails.
- Apply the base and dry it in an ultraviolet or LED lamp
- Apply the first layer of colored gel polish and dry it in a lamp. If necessary, repeat the application of colored layers, and do not forget to dry each of them well.
- Remove the sticky layer.
- Apply the top coat (finishing coat) and dry it again in the lamp.
The clear advantage of three-phase coating is its resistance to external influences and durability. You will need to update your manicure much less often. This effect is achieved by using a base and finish. They are the ones who hold together all the components of the coating with the nail plate as tightly as possible.
During the entire period of wear (and it lasts on average 3 weeks, and sometimes longer), the coating does not deform, and the original color does not fade.
And of course, all fashionistas will be pleased with the fact that when using multiphase systems, you can safely use all kinds of decorative elements in nail design; they will stick well, since they will be tightly sealed in the layers of coating.
The disadvantages of three-phase gel polishes include the financial side of the issue, since you will need to invest more money to purchase them. At one time you need to buy 3 bottles for coating instead of one.
It is also worth noting that only a professional master can cope with the manicure procedure using three-phase gel polishes, since its application is a very complex procedure that requires certain experience, knowledge and technique. If you are choosing gel polish for independent home use, it is best for these purposes to opt for single-phase products.
Please note that no matter which of the listed products you choose, you must pay attention to the quality of the material. And the easiest way to distinguish this is by smell - high-quality coatings do not have any sharp, unpleasant aroma
If there is no pungent odor, it means that the composition does not contain dangerous components that adversely affect human health.
After studying the information on the differences and features of single-phase and three-phase gel polishes, you can easily make a decision and choose one of the products.