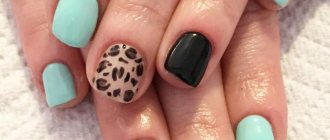
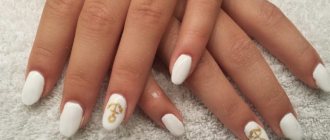
Nail extensions are a popular beauty procedure with which you can create the length and shape of your dreams and make your manicure even more elegant. You can also repair and strengthen your nails using extension materials.
Previously, the main material for extensions was acrylic, gel or biogel. And as the base on which it was applied, tips or forms were used. Then a new material appeared with many advantages, which quickly gained popularity among nail art masters. You can also work with it at home. This is fiberglass or fiberglass. This will be discussed in our article.
What is fiberglass?
Fiberglass (fiberglass) is a plastic material consisting of glass supplemented with chemical components. Used for extension, correction and strengthening of nails.
The material consists of glass fibers connected into a roll, tape or bundle. The individual fiber is very thin, but strong and flexible. You can find fiberglass of various lengths and thicknesses on sale. The thicker the material, the more durable it is, but less flexible.
Thicker fiberglass is suitable for nail extensions and corner extensions. It perfectly forms the free edge, creates additional volume and does not wrinkle when worn.
Thin fiberglass is more flexible, does not add volume, but remains just as durable. It is recommended for repairing extended nails, completing walls and reinforcing the architecture of the plate.
To work with various coatings and combine techniques, the master needs to stock up on both thin and thick fiberglass. If you count on the maximum extension length, one package of fiberglass is enough for about 40 nails.
In what form is the material sold?
Fiberglass can be found in three versions:
- Rolled (fiberglass) - densely spaced fibers rolled into a roll. Often used as patches for repairing or extending nails.
- Tape - the fibers are not connected to each other, but are simply distributed over the tapes, their ends are not sealed.
- Sealed - the fibers are folded into small tails and sealed at the ends for easy placement on the nail.
Multiforms for extensions 100 cm Roche Nail
Multiforms for extensions 200 cm Roche Nail
How to choose the right format for yourself? It all depends on what result you want to get and what methods are used. For standard techniques, it is especially convenient to use sealed fibers, since they do not get tangled with each other.
If we are talking about repairs or corrections, fiberglass and tape fiberglass will come to the rescue. When you need to strengthen a nail, repair a crack or a broken part, fiberglass in a roll is perfect.
Fiberglass in the form of ribbons is recommended for creating an arch, lengthening the free edge or strengthening the critical area between the tip and the natural nail. It can also be used as a local patch: to extend corners, restore broken edges, camouflage vertical or horizontal cracks, and correct chips.
We have already found out that fiberglass comes in several types and is used for various jobs. But what advantages distinguish it from other materials?
What are the advantages of fiberglass for nail extensions?
The technique of nail extension using fiberglass quickly gained popularity due to its many advantages.
- Easy to use Fiberglass is suitable not only for experienced craftsmen, but also for beginners. At the beginning of working with this material, of course, you will need to practice, but you will quickly get used to it and adapt to it. After all, there are not as many subtleties here as, for example, in extensions using forms, where you need to make sure that the “ears” do not come off and control the polymerization process.
- Saving time With fiberglass, the nail extension procedure is 20-25% faster. There is no need to waste time setting up forms, cutting them, etc. You just need to prepare the materials for all nails in advance, and you will quickly get results.
- Low price and cost Compared to molds and tips, fiberglass is more affordable and more economical in consumption. One meter of fiberglass is enough for approximately 3-4 full extensions on all fingers of both hands.
- Strength and flexibility Nails extended with forms do not always retain their original appearance for more than two weeks. But fiberglass is more wear-resistant, you can wear it for 3-4 weeks.
- The ability to create any shape By experimenting with the length of the fibers, you can get different shapes without substrates.
- Work without building the architecture of the nail The material fits perfectly onto the nail plate, repeating its curve and without sagging under the weight of the base.
- The ability to combine with any materials Fiberglass can be combined with almost any gels, except liquid ones, since they can spread.
- Ease of storage Fiberglass is not sensitive to temperature changes and exposure to sunlight, so it does not require special packaging. The material is also convenient for transportation, as it is quite compact and does not suffer from shaking.
- Naturalness Although fiberglass consists of many individual fibers, it is completely invisible under gel polish. Nails look neat and natural.
Nail extension with acrylic and gel: difference in technology
Nail extension with gel or acrylic is a hygienic and cosmetic procedure that is offered by almost all beauty salons. Not many ladies can boast of beautiful and strong nails. Unfortunately, the crazy pace of life, multitasking, and the environment lead to depletion of the nail plate.
Extended nails are not only beautiful, but also practical, because the varnish on them lasts up to three weeks. With gel or acrylic nails, women do not have to worry about the aesthetic appearance of their hands.
Disadvantages of fiberglass for nail extensions
Like any other material, fiberglass has disadvantages.
- Suitable only for straight nails Since the fibers completely follow the shape of the plate, they are not suitable for “pecking” (growing down) or “springboard” (growing upward) nails.
- There are health restrictions. Nail extensions using fiberglass are not suitable for clients with fungal nail diseases, bronchitis, oncology, chronic asthma, and if you are pregnant or lactating, you should first consult a doctor.
- A large amount of nail dust is generated. If you want to work with fiberglass, you cannot do without a vacuum cleaner or a manicure hood. When sawing fixed fibers, a lot of dust is formed, which is dangerous for the respiratory tract. To protect yourself and the client, you must have a powerful device. If the vacuum cleaner does not have high enough power, during operation you need to cover the sawdust suction area with a dry or damp cloth, so that after the procedure you can throw out particles of material that did not get into the bag and remained on the cloth.
- There is a risk of an allergic reaction. Cases of irritation or itching are rare, but caution should still be exercised, especially if the client has sensitive skin.
- You need skill and accuracy. Although the material is easy to use, you need to get used to it. With little experience, the fibers can get tangled and create unevenness during laying on the nail.
And yet, fiberglass has noticeably more advantages than disadvantages. But, despite its versatility, fiberglass is not used as an independent coating. We already mentioned above that it can be combined with various materials. Let's see which ones.
How to extend nails at home without gel and acrylic for children
To please a girl with beautiful nails at home, you will need:
- tips and glue;
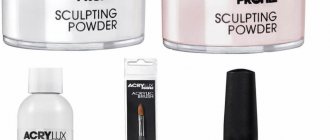
- glue powder;
- activator.
The process of attaching tips is standard. When everything is fixed on the nails, you can carefully apply glue to their surface in a thin layer and dip your nails in powder. This should be done alternately for each finger. After powder has been applied to all the tips, you need to coat them with an activator. Despite the fact that this method is quite fast (it only takes 30-40 minutes), the nails look beautiful and neat.
What to combine fiberglass with?
Fiberglass can be safely combined with any nail plate design products. Porous fibers are well impregnated, and when polymerized they form a perfectly smooth fabric.
- Fiberglass + classic varnishes or weekly gel varnishes Usually these materials are combined when the plate needs to be strengthened or repaired before coating, to be sure that the nail will be safe and sound.
- Fiberglass + gel polish or shellac Gel polishes with fiberglass are used when nails are fragile and thin. Since both materials are durable and flexible, the manicure is durable but light.
- Fiberglass + biogel This combination is suitable for clients with health restrictions (allergies, bronchial asthma). Using biogel with fiberglass overlay, you can level the surface of the nail and strengthen it. As a result, you get more well-groomed, healthy nails, and their growth also improves.
Fiberglass in general allows you to reduce the costs of the master, but to work with it you need to purchase certain tools and accessories. However, if you have been interested in the field of nail art for a long time, most likely you already have much of the list of materials.
What materials are needed to work with fiberglass?
To do high-quality fiberglass nail extensions at home, you will need the following materials:
- Lamp for manicure - you need a powerful device that can fully dry both UV and LED coatings.
- Manicure hood or vacuum cleaner (the more powerful, the better).
- Manicure machine with a set of cutters for preparing nails for extension and subsequent removal of coatings.
- Tweezers or clips for nail edges and arch design.
- Buff for removing gloss from the surface of a natural nail.
- Durable nail scissors or nail clippers for lengthening fiberglass (use professional tools that you will not use on skin or nails).
- Brushes for laying out gel material and applying decorative coatings under the cuticle.
- Bases and tops (for gel technology), as well as fixers and bases for design with gel polishes. If you have clients/friends who prefer regular polishes, it's worth purchasing suitable bases and topcoats.
- Lint-free wipes for removing dispersion and maintaining cleanliness in the workplace.
- A gel remover that is also suitable for removing fiberglass from the nail.
- Acid-free primer to improve the adhesion of materials to the surface of the natural nail.
- Orange sticks for distributing fibers across the width of the nail.
- A set of files for processing nails, cutting off excess material and correcting the length of the free edge.
- Degreaser, dehydrator, disinfectant (antiseptic).
- A set of gel materials: use builder gels to model the arch and lengthen the free edge, medium-viscosity gels to create volume, as well as materials with self-leveling properties to achieve a flawless nail look.
- Gloves are a mandatory attribute of our work! Since fiberglass contains glass, its small particles can penetrate the skin, causing irritation.
Once you have the necessary materials on hand, it's time to figure out how to work with fiberglass.
How to extend nails with tips
Extension with tips at home:
- Disinfect the tool.
- We prepare the tips. Selecting the thickness of the natural nail, we lay out the artificial ones in front of us.
- The tips are given the required shape using a file.
- Use a spatula to push back the cuticles.
- We remove the length of the natural nail, as well as the natural shine, with a buff file.
- Next, the nail plates are treated with cutasept and dehydrant.
- The glue is applied in small quantities, carefully distributing it over the nail.
- Having applied the tip, we make sure that everything is done correctly, and press the artificial one tightly against the natural one, holding it for some time.
- Having attached all ten plates in this way, apply the primer. For gel technology there is also a bonder. The latter is dried in ultraviolet light for about two minutes, no more.
- At the last stage, we form the nail with building material. If we work with gel, it should be dried under an ultraviolet lamp.
When your nails are ready, you can trim them with a file and apply the finishing polish.
Step-by-step instructions for working with fiberglass
To make it easier for us, we will divide the procedure for nail extension with fiberglass into three stages: preparatory, main and final.
Preparatory stage
At this stage, we prepare the nail plate for the procedure.
- We remove the old coating.
- We perform hardware or classic manicures to give your nails a beautiful shape.
- We treat the nails with a buff or a file to lift the scales to improve the adhesion of the materials.
- Degrease and dehydrate the nail.
- Determine the length of the free edge. When extending onto fiberglass, it is recommended to leave a short length of the free edge without cutting it down to zero. This will make working with the gel easier. However, this option is not suitable for fingers with a pronounced pad.
- We apply the primer, wait for it to air dry, and cover the nails with a thick gel base or a thin layer of thick gel.
- Using technical scissors or wire cutters, cut pieces of fiberglass to the required length. It should start from a point just above the apex of the nail and end at least half a centimeter from the free edge. This way we will protect the nail from breakage and soft tissue injuries. And when adjusting the length, the cut pieces will be visible and will be easy to collect on a napkin.
Important!
The material must have a sticky layer on which the fiberglass will be leveled. Apply with rubbing movements, leaving 1-2 mm from the cuticle.
Main stage
- Using tweezers, place a fiberglass blank on an undried layer of thick gel or base just above the apex. Using an orange stick, we level the fiber so that it fits as tightly as possible to the nail, without voids between the individual fibers. The area of the side bolsters and the free edge require special attention here.
- Now let’s make sure that the surface is perfectly flat and that we haven’t forgotten to leave a margin for nail growth (a small indentation from the cuticle) to avoid detachments and breakage of the plate during the regrowth process. Dry the nail in a lamp.
- Carefully coat the entire length of the free edge with a thin layer of modeling or camouflage gel, paying special attention to the side rollers and the place of the step. We try not to put pressure on the hanging fibers. Before polymerization, we check whether all fiberglass fibers are united into a homogeneous dense layer. If there are delaminations, iron them until the gel and fibers become one.
- Use tweezers to cut off excess length. If we are making an oval shape, we remove the corners; if we are making a different shape, we immediately dry the material for 10 seconds in a lamp.
- We form the volume and arches using a construction gel. We try not to thicken the free edge of the nail when laying out the gel. We mask the relief formed by the threads, coating the inside of the nail, and smooth out the transition where the fiber is applied to the nail. Remember about the side areas of the nail and the end. Use your fingers or clothespins to press the free edge of the nail, forming a beautiful arch. We send the nails to dry in the lamp.
Important!
Cut the fiberglass over the napkin, not over your palm! If particles of material do get into your palm, do not squeeze, blow or rub it. Go to the sink, without turning your palm over, turn on the water with your other hand and rinse the area where the cut fibers have fallen. Try not to get your nails in contact with water. After wiping your palm, check under the lamp to see if there are any remaining glass residues.
Final stage
- To get rid of excess thickness, we process the surface and edge of the plate, moving in one direction. We use a glass file or a cylinder cutter. Cardboard or metal files are not recommended, as their grainy texture may cause microdamage on the nail.
- We have already obtained the desired length and shape, now we remove the sawdust with a lint-free cloth moistened with a degreaser. Next, if we do not plan to cover our nails with gel polish or classic polish, we apply a top coat for gel materials on the outer and inner surfaces of the nail. Don't forget to seal the end. Using a thin brush, carefully distribute the top coat into hard-to-reach places. We send the nails to the lamp.
Advice:
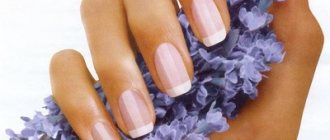
If you want to create a French design on fiberglass, cover the fiberglass fibers in the smile area with a white shade of gel, and the nail bed with your chosen shade of pink, beige or soft peach.
Now you know how to extend nails using fiberglass. But there is one more important stage. After 3-4 weeks the material will need to be removed. How to do it right?
Removing fiberglass
The method of removing the material depends on what the fiberglass is coated with.
- If this is a gel for extensions, we cut it and the fibers with a cutter.
- If your nails are covered with gel polish, choose a special remover for shellac, i.e. We resort to soaking.
- If soaking is not suitable for our gel polish, we choose the hardware method of removing the material.
Read more about removal methods in the article “How to remove gel polish at home?”
So, fiberglass is a convenient, economical and multifunctional material. It goes well with various gels and varnishes and lasts a long time. Anyone can learn to work with fiberglass; you just need skill and a little practice. And, if you want to master this and other extension techniques to perfection, to become a real pro in the nail industry, we are waiting for you at manicure courses at ParisNail school!
Tools
For this operation at home you will need:
- cuticle spatula;
- file For acrylic – 80 grit, for gel – 100 grit;
- tips and glue;
- brushes For acrylic - natural and drop-shaped, for gel - flat artificial;
- If molds are used, tweezers will be needed.
It is important to stock up on disinfectants. Nails must be thoroughly cleaned and disinfected before artificial nail extensions are applied.
