What is acrylic and how does it differ from gel?
Both gel and acrylic are polymers, the only difference is that they harden under different conditions and acrylic withstands temperature changes much better. The materials used for polymer manicure were borrowed from dentistry, where they were tested for strength and ease of use.
The acrylic extension system consists of powder and liquid monomer, which is also called liquid . liquid – liquid.
A feature of the monomer is a sharp and rather unpleasant odor, so craftsmen working with the polymer must take care of a special hood. It is better to do acrylic manicure at home in a well-ventilated area. There is a monomer with a moderate odor, but, judging by the reviews, this system does not last as well.
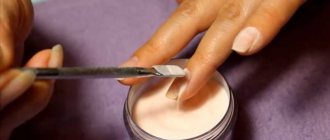
When working, a special brush is moistened in the liquid and then dipped into the powder. It is saturated with liquid and turns into a dense plastic drop, which, using the same brush, is applied to the nail plate and leveled with trampling and stretching movements, giving it shape. This must be done quickly, as the polymerization process is underway and the acrylic hardens into a solid plate.
Acrylic gives unlimited possibilities for three-dimensional design. It is easy to repair and completely remove if necessary.
Unlike acrylic, gel polymerization occurs in an ultraviolet lamp. The gel does not have such a pronounced odor. There is also a hybrid of these two materials - acrylic, which combines all the advantages of both.
The choice of acrylic or gel will be dictated by the conditions in which the artist works, as well as his skills and experience. Working with acrylic requires greater skill, speed in small movements and a workstation equipped with a hood.
Also, the client may prefer one or another type of material due to the unpleasant odor of acrylic or the presence of an allergic reaction.
Are extensions harmful to natural nails?
This question is asked by all the girls who are interested in the extension procedure. The answer is clear - acrylic extensions are safe if the work is done well by a professional.
The nail consists of more than 120 layers of keratin plates. For better adhesion, the master removes the top 2-3 layers with a file to avoid detachments of the artificial material. Keratin plates are dead cells. Their removal is painless, and as they grow back, these areas also go away.
Acrylic can be removed with a special liquid or by sawing it off. Both after the first and after the second procedure, the nail plate quickly returns to its original state.
Contact an experienced professional to reduce the risk of cuts and material detachments due to poor quality work when doing extensions. These are the ones that can lead to damage to the nail, but not the acrylic itself as a material.
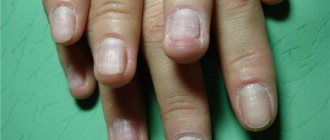
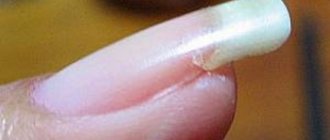
What do natural nails look like after removing acrylic ones? Adhesion to extensions may somewhat affect the appearance of natural ones, but with proper polishing and additional coating, for example, a strengthening base, the nails will look healthy and well-groomed. It will take 3 to 6 months until they are completely renewed.
Nail care after extensions
You not only need to know how to add acrylic nails at home, but also how to care for them afterwards. They require adjustments every two weeks to maintain a beautiful appearance. You should carefully care for the cuticle, get rid of excess skin in a timely manner so that it does not spoil the entire effect of a beautiful manicure. Nails grow in two weeks, so they need to be filed.
When you decide it's time to remove your nail extensions, you should treat them with nail polish remover to get rid of them. Next, you need to trim it short with scissors. To remove the acrylic coating, you will need a special liquid for this. It is necessary to maintain the nails for several minutes in this liquid. Orange tree sticks are easily removed by liquid acrylic.
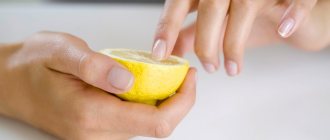
After this, your nails will require a little work. Use special restorative substances that will care for them and promote their health to restore the outer layer. Glycerin, oils, aloe, vitamin are great for this. Chamomile baths soothe the skin and promote rapid recovery. It is better to let your nails rest for a while and do not use varnishes or any other substances with acetone, and do not file them.
What you need for acrylic extensions: a selection of materials for beginners
With good preparation and the availability of all the necessary materials and tools, the procedure will take 2-3 hours. If you are a beginner or do your nails for yourself, you should first practice working with the material so as not to redo the work and avoid the most common mistakes, chips, marbled areas and spreading of acrylic.
To perform the procedure at home, a novice master will need:
- Acrylic powder: translucent, camouflage and white if you are planning a French manicure;
- Monomer/liquid - liquid for polymerization;
- Small container for monomer with a wide bottom - for easy rinsing of the brush;
- A medium-sized brush for forming acrylic drops and basic work with the material;
- Small brush for treating the cuticle area;
- Files and buffs for natural and artificial nails;
- Tweezers-clamp for forming a natural bend of the nail plate from the middle to the tip - arched shape;
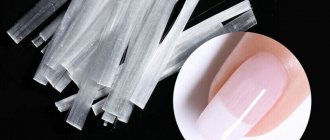
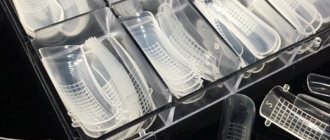
- Tips, disposable or reusable, or disposable paper forms to create a structure;
- Degreaser, dehydrator;
- Primer to improve the adhesion of natural and artificial nails;
- A device with a basic set of cutters, if you have practice working with it;
- Varnish and materials for design at the final stage.
Step-by-step instructions with photos
To make it easier for you to imagine the whole essence of the process of creating an artificial nail, we will provide step-by-step instructions for acrylic nail extensions.
- Disinfection. Nail extensions, like any other cosmetic procedure, require preliminary disinfection using special disinfectants.
- Correction and polishing of the nail surface. Using files designed for natural nails, their length is adjusted and the top smooth layer of the nail plate is removed.
- Then The nail plate is polished using a buff to remove natural shine, varnish residues and household alkalis from the surface of nails. When working with a buff, you need to be extremely careful and careful, as you can damage the nail. Starting from the cuticle, move towards the free edge of the nail.
- Clean your nail from excess dust using an antistatic brush.
- After treating your nails with files, you need to degrease with special liquids.
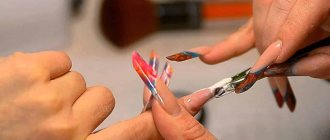
- The construction material for nail extensions is acrylic powder, which in its structure resembles fine powder. Wet the tip of an acrylic brush in monomer and dip it into acrylic powder .
- Immediately apply the resulting or workpiece.
- If you use tips, then the ball is applied at a distance of 2-3 mm from the cuticle, and if you use forms, then first the tip of the future nail is formed, and then the uncovered part of the nail plate. We align the nail with a brush so that the middle is thicker and the layers at the edges are a little thinner.
- When using the mold, after the polymer has dried, it is removed . Next, use files for artificial nails with an abrasiveness of 80/80 or 100/100 grit to give the nail the desired length and shape. If there is a need to remove excessive thickness and unevenness of the extended nail, then use a file with an abrasiveness of 120/180 grit.
- As a final step, treat the artificial nail with a buff.
Acrylic extension procedure step by step
Modeling is a procedure for changing the shape and length of a natural nail plate using artificial materials.
Analyzing the skills of the master or your own skills if you are planning a procedure at home will help you choose gel nail modeling or acrylic modeling. As well as the technical capabilities of the workplace (the presence of an extractor hood, a vacuum cleaner) and simply personal preferences, yours or the client’s.
How to prepare for extensions:
Both in the salon and at home, preliminary preparation of the nail plate for extension with an acrylic system will be required.
- A manicure is performed to remove the cuticle and remove the pterygium;
- The surface is filed with a 180/240 grid file to improve adhesion to the artificial material and avoid peeling. Please note that only the shine of the nail is removed so that its surface becomes matte;
- Dust is removed with a brush;
- Nails are treated with a dehydrator/degreaser;
- Acid or acid-free primer is applied.
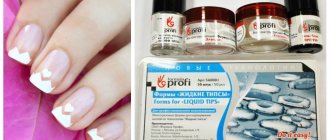
Let's move on to working with the acrylic system. There are several modeling techniques - on forms and on tips - disposable and elastic reusable.
What is better to choose depends on the professionalism of the master, his work experience and personal preferences, his own or the client’s. The easiest way for beginners is extensions using disposable tips. You just need to choose the right size of the ready-made template form, and then attach it to the nail and fix it on top with acrylic.
Let's consider the procedure for working with tips or template blanks in a step-by-step manner:
- Select the tips according to size, file the edges if necessary
- Arrange the blanks in the order of gluing for ease of use
- Cut the length of the nail to 0.5 mm and file the edge
- Before extensions, the cuticle is removed and the pterygium is removed using hardware cutters.
- A trimmed manicure must be done a couple of days before the planned extension.
- The nail plate is prepared in accordance with the preparation procedure described above.
- The edge of the natural nail in the adhesion zone and the edge of the tip are treated with a special glue, which comes with the tips or is purchased additionally.
- The template is applied at a slight angle and fixed for 15 seconds. There should be no gaps, bubbles, or distortions in the fixation area
- Using a tip cutter, the excess length is removed and the edge of the artificial nozzle is shaped with a file, not only in shape, but also the thickness of the ends is removed so that the acrylic later looks neater and more natural. The thickness at the joint is removed, and irregularities in the area of the side rollers are also removed
- The top of the tip is sanded
- Now you need to moisten the brush in monomer, squeeze 50% on one side, and pick up a ball of powder with the other side
- Place three balls, one large in the central, stress zone, a second small in the growth zone, and a third on the free edge of the nail. Smooth out using a pressing motion from the center to the edges.
- If the brush “catches” the material, it is recommended to moisten it in monomer
- Having completed the application, you need to look at the work from the side: the shape should resemble a crescent with the most convex part in the stress zone of the middle of the nail
- Repeat for all nails
- Next, the thickness and shape are filed
- Use a file to remove excess thickness from the side rollers, along the length and at the ends
- The length is polished by a grinder
- The base and colored varnish are applied, and the design is made as desired.
When modeling on a form, the steps are the same, only acrylic balls are laid out on a disposable form and adjusted with a brush. Next comes classic filing.
Required materials and tools
Whatever nail procedures you perform, you cannot do without auxiliary products. It is advisable to purchase all materials from trusted sellers so as not to waste time and money.
- Acrylic Powder. Can be purchased immediately as a set.
- Liquid. It may also be called liquidity. Needed to dilute dry powder. It does not change the shade of acrylic. The composition contains plasticizers that add stickiness and remove dust.
- Flat brush.
- Degreasing agent. Needed to clean your nails and increase adhesion to the material.
- Buffs and files. Useful for grinding.
It must be said that acrylic powder is not cheap. This can be intimidating for newbies. However, by purchasing just one jar of dry acrylic, you can complete not one, but several coatings. In the end it will be quite economical.
Common disadvantages and mistakes of acrylic modeling
Forewarned is forearmed! Knowing the most common mistakes will help you take these nuances into account in your own work and avoid disappointment. Among them:
- Sawing of the nail plate at the preparation stage . This will lead to pain and interfere with comfortable work with acrylic material. It is only necessary to slightly remove the natural shine before degreasing and dehydrating
- Incomplete removal of the cuticle and pterygium before extensions is the main cause of chipping and detachment
- Incorrectly selected shape and modeled arch , which can lead to detachment and increased trauma of the nail plate during impacts and stress on artificial nails
- Untimely correction , when the cuticle zone and the middle stress zone shift to the edge, and the edge of the nail begins to “peck”. Such nails can be broken along with damage to your own. Recommended intensity of correction – every 3-4 weeks
- When correcting, you do not need to completely remove the old material . If there are no detachments, it is enough to cut down the overgrown areas, remove excess thickness and apply new material
- Acetone should not be used when caring for acrylic nails.
- You cannot cut acrylic nails with scissors and tongs - remove excess only with a file.
Which acrylic modeling option would you choose for yourself, shapes, tips? What do you think is the most difficult thing about modeling for beginners and beginners? Share with us in the comments.
3.1 / 5 ( 68 votes)
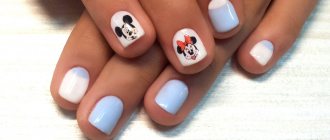
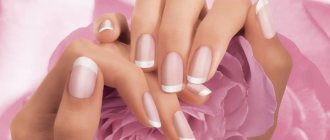
French acrylic design
French acrylic manicure is in great demand among women and girls. Due to the fact that acrylic nails will have to be worn for 3-4 months, the chosen design must match any outfit.
We recommend reading:
- Minimalist manicure: 145 photos of top ideas for fashionable and beautiful manicure designs
Shellac manicure: design options, design features and application technology (140 photos)
Classic manicure: application technology, types and video lessons for beginners (100 photos)