Vintage and unique items are always in fashion. They not only add zest to the design, but also have a certain appeal. But, unfortunately, truly ancient interior items are quite expensive. Therefore, you can try to make artificially aged furniture yourself. For example, a DIY chest.
To create an original chest, you can use various materials: foam, wood, cardboard, fabric, newspaper tubes, etc. In terms of shape and purpose, such furniture can also be used for a variety of purposes. This could be a chest-table or chest of drawers, a pirate chest for toys or a miniature chest for jewelry. In general, you can use it however your imagination desires. We will look at just a few options.
From cardboard
As a base, you can use absolutely any cardboard box that fits the intended dimensions. To make a chest like a “real” one, you will need:
- Cardboard box.
- PVA glue, scissors, centimeter.
- Cardboard.
- Wallpaper or fabric.
- Leatherette.
- Baked clay.
- Napkins or thick cotton threads.
- Wooden legs or plastic bottle caps.
- Black and gold acrylic.
- Sponge.
So, step-by-step instructions for creating a chest from a box:
- To make the lid a semicircle, you need to draw parallel lines on the inner lid of the box with something blunt (for example, a pencil). After this procedure, it will obediently take on a semicircular shape.
- For the side parts, you need to cut 2 semicircles (the diameter is equal to the width of the box). Next, these parts are covered with wallpaper and teeth are left on the sides for subsequent connection with glue to the lid of the chest.
- The inside of the box is covered with fabric or wallpaper.
- The side parts are glued to the lid.
- The entire chest blank is covered with wallpaper.
- Handles are attached to the sides.
- Straps are cut out of leatherette and glued on top of the chest using PVA.
- The baked clay is rolled out to two millimeters thick and intricate patterns are cut out. Next, such parts are baked (not for long, since they are thin) and glued to the decorative product.
- Threads from napkins (twisted) or twisted thick cotton threads are glued to the chest according to the planned pattern. You can braid them and cover the opening part of the chest with them.
- Glue the legs.
- We cover the outside of the entire product with black acrylic.
- We dip the sponge in “gold” and with a light touch we cover the entire chest with “gold plating.”
This handmade antique chest will be an excellent part of any interior. It will add originality and luxury to any room.
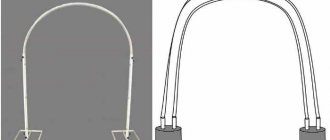
Lid
To make the chest lid beautiful, it is best to make it not from plywood, but from boards.
In order not to cut chamfers and tongues on each board, it is best to make it on transverse ties. Thus, the lid will not only look beautiful, but will also be more reliable. The design of such a cover is very simple; you just need to screw the cover on the inside using self-tapping screws of the appropriate size.
Click to enlarge
To secure the lid, overhead hinges are used, and in addition to them, shock absorbers are used so that the lid opens and closes smoothly. A chest made in this way will be very easy to handle and will not create noise, which is important in the bedroom.
Step-by-step instruction
The process of making a wooden chest with your own hands:
- First you need to prepare the material - the board is cut to size and planed.
- A quarter is made in the workpieces using a milling cutter.
- A box is assembled from the prepared boards.
- Using a router, a quarter is prepared for the bottom.
- The bottom is assembled and attached to the box using self-tapping screws and glue.
- Semicircular ends are made for the lid. After them, the lid is “assembled”.
- Hinges for opening the lid and other accessories for decoration are attached.
- Wooden legs are prepared and attached.
- The surface of the manufactured chest is structured with a metal brush.
- The entire product is covered with paint, and after drying, with a primer.
- To reveal the texture of the wood, sand it.
- The remaining fittings are attached - brass corner plates, metal strips for the edge of the lid and on the corners, handles.
- The entire chest is varnished.
If working with wood seems overwhelming, you can replace it with plywood, which is easier to cut. Even professionals in their field, before starting to manufacture such original furniture, draw up a detailed drawing of the chest and try to adhere to it throughout the manufacturing process.
If it is difficult to make markings directly on plywood or wood, then you can use paper patterns of the future model of the chest, which are applied to the wood and traced according to the template. This method will help avoid disproportion in details.
What do we need
To make our product you will need the following tools and materials:
- Jigsaw;
- Hacksaw;
- Self-tapping screws;
- Screwdriver;
- Hot melt adhesive;
- Paint brush;
- Construction gun for hot melt glue;
- Clamps;
- Emery cloth;
- Wood glue, paint, varnish;
- Masking tape.
We also take prepared wooden boards for the future chest. It is important that the material is properly dried, so it will serve for a long time and will not crack.
Pirate chest
All children, and adults too, simply adore sea pirate parties. What are pirates without a hidden treasure chest? But in order to find the hidden treasure, you must first make that same pirate chest with your own hands.
For this chest idea you will need:
- Beer cardboard (sold in specialized scrapbooking or printing stores).
- Glue "Moment".
- Knife for office.
- Ruler.
- Silver cardboard.
- Nail brads (can be found in the same stores specialized in scrapbooking).
- Unnecessary disk.
- Brush.
- A pen that no longer writes.
- Office paper A4 size.
- Unusual furniture handles for decoration (can be purchased at a hardware store).
Decoration using volumetric technique
Design using volumetric technique is one of the most creative and unusual methods. After painting and complete drying, you need to select stencils and shade for application. To work, you will need a special paste and a palette knife - a spatula for applying primer. Place the stencil on the wall surface. Using a palette knife, apply the paste in thick strokes. The larger the layer, the more voluminous the drawing will be. After application, remove the stencil. Drying time depends on the material used for painting. The chest, decorated using three-dimensional techniques, is ready.
Many owners needlessly throw away antique pieces of furniture. By following simple tips, you can transform an old chest with additional decor. This piece of furniture will decorate any home.
Subscribe to our Social networks
Making a chest with your own hands: master class
Necessary:
- The bottom of the future chest is cut out of beer cardboard (size 18×12) - 2 pieces, walls (size 18×8) - 2 pieces, walls (size 11.7×8) - 2 pieces, lid (size 18×19.5) . To make the sides of the lid, you need to circle the CD, cut out the resulting circle and cut it in half.
- On the lid blank we draw parallel lines with a ruler at a distance of approximately 2 centimeters (the latter will be approximately 3 centimeters). Using a handle, the workpiece is slightly folded into a semicircle so that the cardboard is slightly bent and takes the desired semicircular format.
- 2 strips are cut from an A4 sheet, each 4 centimeters in width, and folded in the middle. Cut out half of each strip with teeth. These paper strips are used to glue all the lid blanks together in the future.
- We connect all the parts of the pirate chest with our own hands using three centimeter strips of office paper, bent lengthwise. The manufacturing process does not end there.
- We make boards for our chest with our own hands. To do this, we cut strips of beer cardboard 3 centimeters wide, trying to ensure that they are not the same. Strips of approximately 19 centimeters are cut in length, i.e. 1 centimeter more than the length of the chest itself as reserve for bevel.
- To achieve the effect of a “slightly rotten board”, lightly cut off the side edges of the strips and corners.
- The “boards” are glued into place. The second bottom is also glued to cover the unsightly places where the sides and bottom are fastened.
- The workpiece is painted brown. After drying, black paint is applied to the sections to imitate rot. The edges of the boards are also slightly tinted black.
- From silver cardboard we cut out strips 2 centimeters wide and in length corresponding to the length of the lid and all three sides of the base box. We use brown and black paint to imitate dirt and rust on iron, smearing the cardboard with paint. After the paint has completely dried, insert the brads at approximately the same distance from each other and glue the strips to the workpiece.
- Loops for the lid are cut out of the same silver cardboard. We make them dirty and rusty using the same method as the previous stripes, and glue “studs” for decoration. After the paint has dried, we connect the lid to the box with these fasteners using glue.
- Decorative handles are glued in place of the lock in the middle and on the sides of the chest.
Jewelry chest manufacturing technology
To make an old-style chest yourself, you do not need special knowledge or a lot of time; the creative process is based on several stages.
To implement them and obtain the planned result, you must follow all recommendations from experienced craftsmen and designers:
- the choice of idea is based on one’s own taste and preferences, taking into account the intended purpose of the craft;
- depending on your own skills and abilities, you need to select the right materials and tools;
- special attention is paid to the selection of the method and method of fastening the individual elements of the future chest;
- correctly selected accessories and fittings make it possible to significantly increase the decorative value of the craft;
- technologies for interior and exterior design involve the use of different finishing materials.
Based on these tips, you can choose an idea, decide on the theme of the chest design and begin implementing your plans.
At each stage, you don’t have to limit your imagination, because the most daring experiments help you get an ideal and excellent result that can amaze even a master.
Stages
How to make a chest chest? This can be done in several steps:
- Two identical rectangles are cut out of a pine board, which are then rounded at the top. These two side walls are attached to the base with wood glue and nails.
- The pallet board is cut according to the size of the chest and attached to the side walls with nails. For better and more reliable joining, the parts are coated with glue and then sanded.
- The edges are sanded.
- The entire surface is covered with stain and varnished.
- Hinges are attached to allow the chest to open.
- Attaching all iron elements (handles, latches, etc.). To avoid cracking the wood, it is better to drill all the pilot holes before screwing in the bolts. Before drilling, it is recommended to make a mark first.
- Identical straps are cut out of leather or leatherette, which are attached to the chest equidistant from the edge using a hammer and copper nails.
- The inside of the chest is lined with red felt. It is attached with glue. It is better to use spray glue.
Side walls
It is best to start making a wooden chest from the side walls. Below you can see a drawing of the side wall and the dimensions of the parts you need to make to fold it.
There's really nothing complicated here, just follow the instructions and use quality dry wood. Be sure to monitor the depth and width of the tongues (grooves) for the liners. You can make them in many ways, but the best way is to use a simple hand router. The most important thing is to use a cutter of the appropriate size and side stops that will allow you to make even grooves. It is best to clamp the workpiece itself in a vice while working, since otherwise you simply will not be able to hold it in your hands.
It is important that when the side wall of the chest dries, on its inside, you will need to make tongues for attaching the bottom and side walls. Since the entire structure is held on by glue, so as not to spoil the appearance of the product.
You may be interested in: How to make a canopy over a bed with your own hands