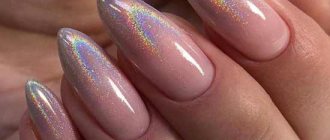
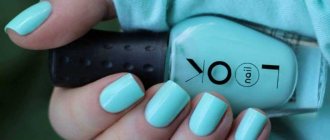
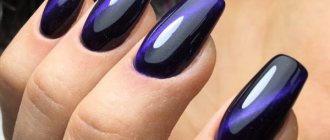
Artistic design with acrylic paints on nails never goes out of style. At the same time, it is not necessary to run to an expensive salon and look for an artist. You can learn to work with paints yourself and create real masterpieces on your nails.
To do this, you should understand what types of acrylic there are, learn and try the most popular application techniques and listen to the recommendations of the masters.
Benefits of using acrylic paints
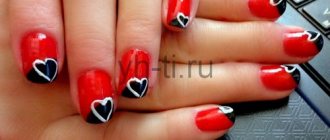
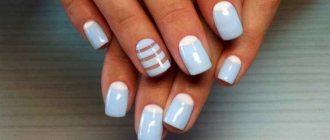
Nail designs with acrylic paints are very popular. They are made by both professional craftsmen and amateurs. These paints make it possible to work on various surfaces and combine patterns and colors.
Advantages of colorful acrylic coating:
- wide color palette;
- paints can be mixed until the desired shade is obtained;
- has no smell;
- non-toxic;
- economical (low material consumption);
- both natural nails and extensions are used as a basis for drawing;
- if flaws arise during work, they can be removed with plain water;
- inexpensive - a set of excellent quality paints will cost 400-690 rubles.
Any girl can purchase such paints and paint her nails on her own.
Drawing flowers - simple instructions for beginners
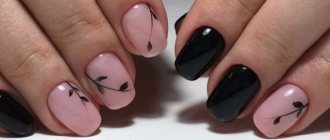
Flowers are a universal option both for the first design and as a nail design for a special occasion. You can start with a simple drawing of black and white flowers. The choice of technology depends on your preferences and skills.
- Prepare your nails by applying base;
- Apply black varnish, it will be the background for the drawing. Let the varnish dry completely;
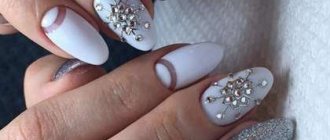
- Using a thin brush, draw the outlines of flowers on each nail;
- Paint the middle of the flowers;
- Add additional elements of the design: thin lines from the petals, dots (they can be done with a dots or a thin brush);
- In the middle of the flower, on the petals and lines, you can add silver or another color, making the contours more noticeable;
- A fixative or clear varnish is applied on top.
In conclusion, we invite you to watch a video dedicated to nail design using acrylic paints.
Types of paint
Acrylic dyes come in matte and glossy.
They are also divided into two types:
- Thick. They go on sale in jars. Before use, they need to be diluted with water.
- Liquid. Immediately ready to use. Sold in tubes. They are more convenient - they can be mixed. It is best to purchase tubes individually and periodically replenish stocks of flowers, which are used up faster.
Designers, using a variety of shades, matte or gloss, create real masterpieces on the fingers of their clients.
What you need to create a manicure
You don't need any special tools to paint with acrylic on your nails. To do this, just purchase several brushes of different thicknesses. Brushes with thin and elastic bristles are ideal - they make it possible to apply clear and thin lines. We must remember that the designs on the nail plates are a kind of miniatures.
When purchasing acrylic for work, it is not necessary to immediately buy a huge palette; it is better to choose the main one for yourself. It can be 6-12 colors. Among them must be white and black - these paints will be used up the fastest. It is better to immediately purchase white tubes or jars “with a reserve”.
Transitional tones can be easily created by mixing colors yourself. An experienced master can create up to 2000 shades.
You will also need a palette for mixing paints. If it is not included in the kit, then at the initial stage a regular jar lid or a piece of plastic will do. In the future, you can purchase a professional one.
Stages of work when creating a manicure using acrylic painting:
- removal of old coating;
- removing or pushing back the cuticle;
- grinding the surface of the nail plate;
- giving the nail length and shape;
- degreasing the nail plate;
- applying the main (base) coating;
- creating a nail design based on a pre-selected sample or creative inspiration;
- applying a fixative.
After use, brushes must be thoroughly rinsed with water and dried.
Every good manicurist who paints nails has samples of his work that are offered to clients to choose from. This greatly simplifies the work and increases the speed of drawing. But clients can also offer their own ideas for decorative coating.
Application technique
Acrylic paints are diluted with ordinary water. You can work with them in any manner and technique. For example, miniatures can resemble works in oil, watercolor or gouache.
The composition can be diluted to a transparent or translucent state - it all depends on the final task. Each nail design artist has his own style, and original designs emerge from under their brushes. But there are several basic application techniques that can be easily combined.
Oil painting
Oil painting with acrylic paints on nails is one of the most popular techniques and is used most often. The point is that nail art masters do not dilute paints and work with a very thin brush. Strokes come in different shapes, sizes and textures.
The end result has the effect of an oil painting. Most often, work is done with several colors along the edges of the nail or the image is stretched over the entire surface. The manicure looks very bright.
It is the oil technique that is used for painting three-dimensional objects attached to the nail plates. This is a favorite sculpting technique with modeling acrylic powder or a special gel composition, with the help of which entire bouquets are created on the fingers. Finished three-dimensional objects are brightly painted.
Gouache painting
Gouache is a bit like oil painting. The difference is that paints require dilution.
In a drawing, layers of color often overlap each other. It turns out to be effective, although somewhat rough. There is no charming airiness that attracts other techniques. However, errors in work are less noticeable, and flaws in painting can be easily covered up with a new layer.
These patterns are very reminiscent of those used in the production of communist propaganda posters in the twenties of the last century. They are bright, clear and concise.
In gouache painting, paints that give a matte surface are often used.
Watercolor painting
The paints are diluted with water until translucent and applied layer by layer. As with watercolor painting, transparency is key. This technique makes excellent transitions within a picture or background.
However, the difficulty is that even when painting using a dry technique on paper, watercolors take some time to dry. Acrylic “sets” almost instantly. Water slightly slows down the hardening process, but the master needs to work very quickly.
Sliding
The slide technique requires mixing structural gels and acrylic paints. At first, this mix looks whitish. But there is no need to worry - after drying, the paint will take on its real color. The manicure turns out juicy and bright. Experienced artists manage to create deep shades and complex gradations of color.
This technique requires experience as you need to know how to mix acrylic and gel to get the desired shade. An interesting “aquarium” design is performed using the sliding technique.
Glaze
Glazing is a very ancient technique. The famous Mona Lisa by the Italian master Leonardo da Vinci was painted in a similar manner. In fact, it was he who developed this complex technology.
Its peculiarity is that almost transparent layers of paint are applied to each other. After drying, the effect is amazing. Skilled artists create smooth, delicate patterns with almost imperceptible transitions. The designs on the nails come out very elegant and voluminous. They are transparent almost to the very base.
Acrylic is diluted in water and applied to the nail plate with tiny strokes. The goal is to achieve color shifts by working with many shades. And this must be done as quietly as possible. Be sure to wait until the previous layer dries.
But there is a big drawback - such a manicure takes longer than usual and requires good practical experience and mastery of drawing techniques.
Nail painting techniques
There are several basic techniques for working with acrylic that allow you to create a unique design:
- you can apply impasto paint without diluting it - in this case it will give a gouache effect;
- oil technique involves voluminous strokes, similar to strokes of oil paint.
- diluted paint gives the effect of watercolor, but the technique is very different. Traditional transparency is achieved by working with the background and layers, since acrylic dries very quickly;
- glazing - application in thin layers. Ideal for acrylic, but quite difficult to master;
- sliding - mixing paint and structural gel. This technique is not suitable for beginners; it requires a lot of experience working with acrylic, but it gives an impressive result in terms of color saturation.
But it’s better to start by working with slightly diluted paints, gradually mastering the intricacies of working with acrylic.
Review of popular manufacturers
When purchasing dyes, it is best to opt for trusted manufacturers. You can check with your manicurist what brand he uses and choose a similar option.
Products from Chinese and domestic manufacturers are on sale. It is better to buy them in specialized stores.
Severina (Severina)
This is a product of a Russian company. It has good quality and a very wide range of shades, there are even metallics and ones that glow under UV light. You can assemble your own palette. The average cost of one tube is 105 rubles. The necessary set will cost about one and a half thousand.
Planet Nails
The product is produced in tubes, the country of origin is China. It features bright, rich colors and dense texture.
This is a very economical option: a set of 24 tubes of 12 ml will cost 415 rubles. But there is a drawback: if the design is complex and a large layer of paint is applied, it may crack.
Lady Victory
Some of the cheapest paints. A set of 12 colors will cost 360-390 rubles. You can even find 18 shades on sale. Suitable for nail design at home. But professionals prefer to take other options - they note problems with the durability of the coating.
Oumaxi
An inexpensive palette for nail design from this Chinese manufacturer can be purchased for 300-390 rubles.
There are even fluorescent and metallic colors available in soft, non-metallic tubes. Masters note that they are dense, with a bright pigment and fit very well on the nail, even in one layer.
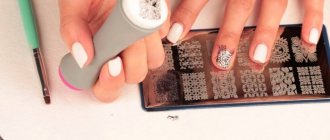
They are also used in the stamping technique - this is a method of applying a design using special plates, a kind of nail stamps.
Irisk
These sets are not cheap. One tube costs about 40 rubles. The material is excellent for working with both natural and artificial surfaces. It is dense and the color is rich. Requires additional topcoat.
Masters categorically do not advise using French paint on artificial nails with this paint: the surface will crack and come off.
At the initial stage, you can buy a ready-made offer: one such set contains 12 colors. Each tube has a volume of 20 ml. The set will cost 1219 rubles.
Recommendations
Acrylic paints are very economical, but dry quickly. In order for them to last for a longer time, several rules should be followed.
For acrylic you need:
- comply with the storage conditions specified by the manufacturer;
- check the expiration date before purchasing;
- squeeze out of the tube in small portions.
Acrylic in tubes still dries out over time - then it is diluted with water, just like in cans.
To independently master nail painting techniques at home and surprise others with small masterpieces, you should listen to the advice of professionals.
Recommendations from nail design specialists:
- The hand should lie motionless. To do this you need to choose a convenient place.
- When painting, do not press the brush with force. Masks should be lightweight.
- For beginners, it is better to choose designs that are easy to perform.
- First, the outline is drawn, then it is shaded.
- If a complex pattern is taken, then it must be performed on one finger. The rest are made of simple overlapping fragments.
- Another fashionable trend: they take one finger of each hand and draw two overlapping scenes on them. And on the rest - just a monochromatic coating.
- A special fixative is applied to the finished miniature to fix the design.
If errors occur during the drawing process, excess layers of paint can be removed with water. To do this, use a regular cotton swab.
After work, you should not leave acrylic on the brush. It will be almost impossible to wash.
Beginners are advised to practice on plain paper. Try mixing and applying paints, work with painting patterns, study the results of applying paints to each other.
Step-by-step instructions for use
Now let's look at detailed instructions on how to use gel nail paints. In this example, we described working with gel paint for coating with gel polish.
- Apply a base coat to the prepared nail and dry for 2 minutes in a UV lamp.
- Then we cover the nail with colored gel polish and dry it for 2 minutes in a UV lamp.
- If necessary, apply another layer of colored gel polish.
- We cover the nail with top coat and also polymerize it. Remove the sticky layer from the top, if there is any.
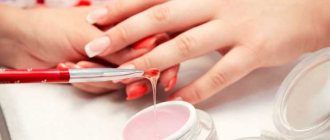
- Open a jar or tube of gel paint of the desired color and put the required amount on the brush. For painting you need to use special brushes for nail design. We looked at which brush is intended for what here.
- Let's start drawing. If the design is complex, we recommend drying each element separately in a UV lamp. Gel paint should be dried in a UV lamp for 2 minutes, in an LED lamp for 30 seconds - 1 minute.
- Depending on the need, cover the nail with topcoat and dry it as well.
How to remove gel paint from a nail coated with gel polish? To do this, you must first file off the top coat and pattern, then remove the gel polish with your usual special product.
