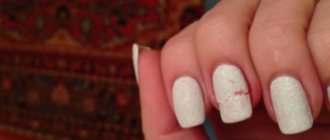
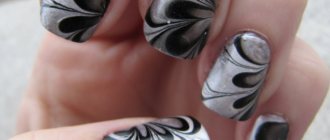
Features of the profession
The profession of a manicurist is considered to be purely feminine . The activity requires the performer to have excellent fine motor skills, good color perception and a penchant for painstaking and creative work. For women it is much easier. But in the modern fashion industry you can also meet male craftsmen.
The beauty of nails is impossible without health and well-groomed nails . Contrary to popular belief, a manicurist not only covers nails with varnish, applies designs and decorates them. His responsibilities include performing many other tasks that require certain knowledge and skills:
- The master must understand modern nail fashion . To do this, constantly improve your skills by attending special courses and master classes.
- Modern services include relaxation and spa treatments, massage. Therefore, knowledge about the technology of their implementation is required.
- The master will need the ability to draw to realize his artistic vision.
- In addition, the basics of color science will be useful for preparing varnishes of different shades.
- A specialist must have knowledge about the properties of different materials that are used as decorations.
- Knowledge about materials for nail extensions is now important . The master must not only perform the procedure efficiently, but also teach the client how to properly care for false nails.
- He must know the structure and properties of nails and skin in order to recommend effective ways to care for them. You also need to know the properties of the means intended for its implementation.
- A good specialist must have the basics of dermatology to identify various diseases of this part of the body. Therefore, you will need knowledge about the specifics of working with problem nails.
- The master is also required to comply with the rules of sanitation and hygiene , as well as know how to provide first aid in case of injury.
And finally, the work involves communicating with people, therefore, you will need the basics of psychology and professional ethics .
BASICS AND IMPORTANT ASPECTS OF THE WORK OF A NAIL MASTER: LEARNING WITH IRISK PROFESSIONAL
Every nail artist, especially a beginner, wants to be a professional in his field and delight his clients with only ideal work done professionally, with a sense of taste and knowledge of the latest manicure trends. And today we will help you with this: we will analyze the appearance of the master, the main mistakes in working with materials and preparing nails for applying coatings, as well as the causes and consequences of their occurrence, together with a technologist from the Irisk Professional brand. These lessons will help newbie craftswomen replenish their knowledge base, and experienced nail fairies will help them remember the useful nuances of a particular work process. We wish you pleasant viewing!
Master class “Types of top coatings and how to choose them correctly.”
Video author: @irisk_pro
Top coatings for gel polish manicure vary:
- according to consistency - liquid, medium and thick.
Thick finishes are used to smooth or strengthen the nail plate.
- according to elasticity - soft, elastic and hard.
There is a simple way to check your top according to the “elasticity” criterion: apply a drop of material to a plastic bag, polymerize it, and try to bend it. If it bends, the top is soft, but if it bends with emphasis and then, perhaps, breaks, it is elastic. In the case where the sample, like glass, immediately breaks, you have a hard material in front of you. You need to know what your finish is in terms of elasticity in order to choose the right fixer for the characteristics of the client’s nail plate. If you apply a soft top on a soft, non-reinforced plate, it will come off from the ends. And if a hard top is applied to a soft plate, it will crack.
- by shade: tops are either yellow or blue.
If the top does not turn yellow on light shades, then it will turn blue on dark ones, no matter how transparent the material may seem at first glance. There are tops that go with almost all colors. However, in any case they will have some kind of shade. Accordingly, yellow topcoat cannot be applied to pastels and white/light shades. And tops with blue are contraindicated as a finish for black and dark gel polishes. If you choose the wrong top, for example, apply a blue top to a burgundy shade, then over time (after 1-2 weeks) it will appear purple. The blue of the topcoat appears very clearly, for the most part, long after the design has been created and can become an unpleasant surprise for its owner.
- by the presence or absence of residual stickiness.
Despite the fact that the current development of nail materials shows a great demand for tops without stickiness, nail artists should not completely abandon finishes with residual dispersion. Such materials hold nail decor well, especially sliders, rubs and transfer foil. Tops without a sticky layer are best applied to gel polish in one layer. Since this material does not have additional adhesion, like sticky topcoats, the second layer of such a coating can simply slide off the first, or spread into the sinuses of the nail and under the cuticle.
The main problems when choosing the wrong topcoat or not following the technique of working with finishing materials:
I. Cracks in the stress zone. The reasons for this phenomenon are as follows:
- incorrect selection of the base and finish duo - the client is given a movable soft base, and the design is fixed with a hard top;
- the nail plate is not reinforced (movable), but the design is fixed with a medium-hard topcoat or a hard fixative;
- A hard elastic gel polish is applied to the soft base (the color coating cracks under the top layer);
- Poor drying of gel polish.
II. The top coat does not adhere and slides off. This phenomenon may be caused by:
- the top is not completely dry in the lamp or is not dried for the allotted time;
- there is no adhesion of the top material with the coating or decor on which it is applied (for example, if you cover the rubbing with a top without l/s, then there will be no adhesion and the top will come off);
- using a topcoat without l/s - when such a coating is applied in two layers;
- movable/unstrengthened nails or too soft a base was used.
III. Loss of gloss in the top coat. The reasons for this phenomenon may be the following:
- the top is not dry. This mainly happens with non-sticky topcoats that were dried too quickly than recommended, or were applied in too thick a layer;
- features of the top (the material after polymerization has poor gloss due to low-quality raw materials or incorrect formula;
- the use of aggressive liquids (do not forget that you should not use gel polish removers to remove the sticky layer).
IV. Gel polish color fading. The main reasons for this phenomenon:
- used acid base/top for gel polish; a top coat without UV filters was applied;
- shortcomings in the formula/composition of the color gel polish itself.
You can choose the top gel polish design coating from the Irisk brand that is suitable for your nail art on our website using the link.
Master class “Can a master work with one base?”
Author of the video: @irisk_pro
All bases for gel polishes are divided into three types: soft, elastic and hard. They are checked using the same method as tops. Many craftsmen are looking for a product that would suit as many clients as possible in order to somewhat reduce their costs for purchasing materials. One solution is to search for a so-called universal base that will suit all types of nails and nail plates. Most often, this type of gel polish base refers to elastic rubber base coats. However, with this product there are possible nuances and difficulties, for example:
- On long nails, such material shrinks even with very high-quality alignment;
- Without preliminary strengthening (even not on long nails), when working with such a base, the nails may break in the stress zone, since elastic bases cannot provide proper strengthening to the nails, unlike hard materials;
- Elastic universal rubber bases should not be applied to sawn nails (cloth nails), mobile or thin nails without first strengthening them. This is fraught with large detachments on the free edge of the nail plate. Such a base is not suitable for curling, pecking (growing downwards) nails, as well as nails with sagging sides. When worn, these types of nails also often experience peeling of material at the tips and stress area;
- The formation of detachments when using a universal elastic base is also possible if a primer is applied to the nails before it, which was not allowed to dry well.
Thus, soft bases will be worn well in pedicures, on very short nails, and on static nails of medium length.
You can choose a convenient base for creating a design with gel polishes from the IrisKay brand on our website using the link.
Master class “Why is pastel applied poorly?”
Author of the video: @irisk_pro
The video presents the product: Irisk Elite Line Gel Polish No. 101.
Both experienced manicurists and beginners quite often encounter the fact that the pastel gel polishes chosen by the client are poorly applied, and subsequently dry poorly and cause problems when worn. What determines the success of wearing pastels well and how to work with these materials correctly? Let's consider the main points of creating designs with these coatings:
- The quality of the manicure and base alignment. If the alignment is done incorrectly or not done at all, and the preparation of the nail plate for applying the coating is done poorly, it will be extremely difficult to lay the pastels without any problems without bald spots and dips. This applies not only to pastel shades, but to all colored gel polishes in general;
- The brush in the gel polish bottle itself: it should be as smooth, soft, springy as possible and better long than short;
- Consistency. Liquid, poorly pigmented and poorly self-leveling, too thick pastel will not fit well on the nail. It is best to check the bottles and the consistency of the material in them right in the store, or test the material and “tame” it before starting to work with a specific color;
- Application and hand movement. The master's movements with a brush on the nail plate should be soft and gentle, without any pressure. The brush should lie completely on the nail. Alignment of pastels always occurs with light movements. Intermittent and torn movements will ruin not only pastels, but also other colored gel polishes, even if the angle of inclination is maintained. If your material still lies unevenly, then you can help yourself with a thin brush, especially for the nail plate in the area of the side ridges and at the cuticle;
- Amount of material and properties of the lamp. UV lamps are slowly losing their position, and hybrids are entering the everyday life of nail artists. Using this equipment, it is much easier, faster and more pleasant to dry densely pigmented pastels with high quality than with the previous generation of lamps. It should also be taken into account that if you decide to apply pastels very thinly and in several approaches (due to the peculiarities of the formula of the products themselves), this procedure will take you much longer than the client can expect. But if you apply too large a layer of material, it will simply not dry out (no amount of lamp power will help), or it will drain and may wrinkle in some places.
You can replenish your arsenal with beautiful and wearable pastel gel polishes from the Irisk brand, as well as select brushes for them to make laying out the material easier, on our website in the “Gel Polish” and “Tools for Material and Design” sections.
Master class “Consequences of stress on the nail plate.”
Video author: @irisk_pro
Strengthening natural nails has a positive effect on their health and growth, especially in terms of counteracting the harmful effects of the environment. A constantly strengthened nail receives less stress on the nail bed and, accordingly, grows better. If you stop strengthening your nails and caring for them, the nail bed will begin to shrink and expand as self-defense from mechanical injuries, household work and other influences. Let's look at the main reasons for this regression:
- Uneven load on the nails (over-wearing of the coating and incorrectly built architecture of the nail plate with nail materials). As a result of these mistakes, there is a constant load on the stress zone of the nail, which leads to the formation of cracks and brittleness of the nails;
- Lack of strengthening and alignment of the nail plate: when the nails are left to themselves for a long time (not strengthened, not painted or protected from external influences), the nail bed gradually shortens and widens in order to avoid damage in the stress area. It is equally important not to neglect leveling when performing manicures with gel polishes. If you skip this stage, the client's nails may be seriously injured during the process of wearing the coating and growing the nail plate itself;
- Improper removal of gel polish material: sawing, regular removal of coatings with aggressive liquids, self-removal/tearing of the coating. All this leads to a decrease in the length of the nail bed, its thinning, deformation and the occurrence of various aesthetic defects of natural nails.
Master class “Ways to strengthen the nail plate.”
Video author: @irisk_pro
Natural nails, regardless of their length, need to strengthen the stress zone so that the design and the material itself last longer and the nail plate does not break. There are 2 methods of strengthening: simple and quick, and more painstaking and time-consuming:
- Acrylic powder or silk. These materials are suitable for strengthening thin, mobile, weakened and sawed nails of medium and short length. Silk is not always suitable for a long nail plate, as it needs to be strengthened with hard materials;
- All types of hard materials: gel/acrylic with monomer/polygel/hard bases. These methods are suitable for long and medium nail plates, pecking nails, and sagging corners. But they are not suitable for sawed, weak, mobile nails.
You can choose and select all types of necessary materials for strengthening nails of any length using the following links: acrylic, silk, gels for strengthening and extensions, monomers for acrylic powders, polygels.
Master class “Streaks. Main reasons".
Author of the video: @irisk_pro
A nail artist with any experience is not insured against the formation of material leaks when performing nail extensions or design. In order to minimize or completely avoid this undesirable phenomenon, it is necessary to know the main reasons for the formation of streaks. These include:
- The quality of the hardware or combined manicure: unraised cuticle, not removed glues (heavily stuck cuticle), poorly cleaned pterygium, or dust poorly removed from the sinuses and lateral sinuses of the nail;
- Physiological features of the structure of the client’s nail and periungual skin: a flat roller and a close matrix zone will not allow performing the popular manicure using the “under the cuticle” technique. For this type of client, the coating should only be applied butt-to-cuticle to avoid streaking;
- Strong tension on the skin when applying gel polish: pressing on the cuticle area after painting the area of the side rollers and vice versa also provokes spreading of the material and the formation of streaks;
- Features of the texture of the materials: too liquid gel polish requires fast work in the cuticle area and slower and more careful work on the nail plate itself. With this material, the cuticle area should be the last place to work. Running can also be caused by some gels and gel polishes, the formula of which becomes thinner under the influence of strong heat (for example, in summer);
- A thick or hard brush in a bottle of material: such a brush gets dirty and touches the cuticle area when applying gel polish. If the master has similar materials in his arsenal, then it is best to apply gel polish to hard-to-reach areas not with the original brush from the bottle, but with a thin brush for painting nails.
In order to perfectly apply color under the cuticle in 1-2 thin layers, there are several simple and useful life hacks:
- You should not repaint the base under the cuticle (you need to leave a margin of 1-2 mm), this will not affect the durability of the design in any way;
- It is better to apply the color under the cuticle in only one layer;
- We always cover the space under the cuticle last.
- The cuticle should be pushed back every time we cover the nail;
- The client's finger should always point down to prevent the gel polish from running;
- In the cuticle area, it is necessary to apply a strictly minimal amount of gel polish.
Streaks always provoke the further formation of detachments. If you do not notice material that has flowed into the cuticle area or side ridges, and it has dried in the lamp, you can try to cut it out. But this must be done as carefully as possible, especially if the gel polish gets on the skin, so as not to damage it. It will be easier to completely erase large streaks and apply the material again than to try to remove them with an orange stick.
You can select the necessary equipment and tools for hardware and combined manicure on our website in the sections “Machines and Devices” and “Tools for Manicure and Pedicure.”
Master class “Cuticle cuts.”
Author of the video: @irisk_pro
Cutting the nail plate, unfortunately, is a fairly common occurrence in the practice of novice manicurists. They provoke many undesirable consequences for the health of natural nails, due to which you may have to give up beautiful and long-lasting nail designs for a long time. The main reasons for the formation of cuts include the following:
- Quality of the cutter: it must be smooth and smooth, without bumps or protruding abrasive particles;
- Incorrect angle of inclination of the cutter when working: the cutter should be positioned in space strictly parallel to the nail, and not vertically or at an acute angle;
- Strong pressure, a large number of movements in one place. Do not put too much pressure on the cutter, especially when working in the cuticle area. If the craftsman has a new cutter of good quality (and has not become dull), there is no need to make a large number of passes in the same place;
- Dust that is generated when working with the nail plate can get into the subcuticular space. It must be removed with a brush, not a cutter. If you use a cutter, the delicate zone of the nail in the cuticle area, with areas of the nail that have not yet had time to harden, may be damaged (cut rings are formed);
- Sticky cuticle: When the cuticle is lifted, it can put pressure on the cutter, causing cuts. It is necessary to work with this complex type of cuticle very carefully so as not to injure the client: lift the cuticle with an orange stick and remove it with nippers. And already in the second round, perform hardware treatment of this area of the nail;
- A deep manicure cannot be done on every client, due to the individual characteristics of the nail plate and periungual skin. And if you try to do it, you can also make cuts and even cause injury to the matrix area.
The consequences of cuts are very disastrous:
- Thinning of the nail plate resulting in the nails constantly breaking. Nail breakages in the stress zone are especially painful when the cut area grows into this area;
- Burns from the material when drying in a lamp;
- Onycholysis (requires long-term treatment or finding a paraesthetic manicurist for diseased nails);
- Deformation of the nail bed: requires a very long process of growing the nail. If deep cracks have formed in the matrix area, it is extremely difficult to restore the nail and it is not always possible to return it to its original form;
- Infection/fungus (can settle in the area of the damaged part of the nail plate).
Master class “Why tools rust.”
Author of the video: @irisk_pro
During work and as they wear out, manicure tools primarily rust at the joints and fastenings. Under no circumstances should you work with a rusty cloth - it is unsafe for both the master and the client. The following aspects influence the occurrence of rust:
I. The quality of the metal and alloys from which the tool is made.
Cheap instruments have rather soft metal. It does not withstand aggressive solutions well, since its alloy does not contain components that increase resistance to preparations for sanitary treatment and disinfection. In addition, low-quality metal will not hold an edge well and will not provide long service life.
II. Disinfection process.
- You cannot disinfect a rusty instrument with a clean one. Rust will migrate from the “sick” instrument to microdamage to the metal on the “healthy” one;
- Be careful about the quality of the disinfectant solution. A very aggressive liquid, which contains chlorine or aldehyde-containing liquids, will irreparably damage metal of any quality. You should not choose too cheap solutions that can damage even the highest quality instruments;
- Check the solution for acidity (Ph balance) before use. The desired acidity of the solution for metal tools is 7-9 Ph;
- Prepare the disinfectant solution correctly: we always select the maximum concentration of the starting drug and the minimum time for keeping the instruments in the finished mixture. This will preserve the quality of the metal in your tools longer. All cooking parameters should be taken from the manufacturer’s instructions and strictly followed;
- Don't forget to rinse your instruments well after disinfection. Wash especially thoroughly those areas of tools that are most susceptible to rust formation, since they are the areas where moisture evaporates the worst. Ultrasonic washers can make the craftsman’s work as easy as possible at this stage of tool processing;
- Post-disinfection treatment: if you lubricate the fastening points with oil (to prevent the mechanisms from rusting), do not forget to rinse it off thoroughly;
- Drying tools: wet metal after washing off the disinfectant solution from its surface should not be immediately placed in dry heat (this leads to darkening of the metal and the formation of rust).
There are two ways to save rusty tools:
- Chemical: various anti-rust solutions. After such cleaning, the tool must be re-sharpened if the working cutting surface has been processed;
- Mechanical: produced with metal brushes, buffs, files. It is best to trust this process to professional craftsmen who sharpen tools (they have special polishers that will polish the metal). A non-professional can damage the tool, which will lead to even more rust damage in the future.
Organize your process of caring for manicure instruments correctly with the help of high-quality preparations for treating instruments and certified disinfection equipment.
Master class “Protection of the manicurist.”
Author of the video: @irisk_pro
A nail master, as a representative of the beauty industry, must use a set of personal protective equipment in his work to take care of his health and to comply with sanitary requirements when performing manicures and pedicures. When working, a manicurist should always have:
- A cap to protect yourself (from dust, subsequent possible allergies, seborrhea, skin fungus) and clients (from your hair);
- Mask/protective shield. It is advisable to wear both at the same time to also protect yourself, your eyes and your skin from dust;
- Uniform (apron). It should cover your arms, armpits and décolleté. You cannot work in the clothes you wear (street clothes, casual clothes). Also, it cannot be washed together with everyday clothes and at low temperatures;
- Gloves. You should always protect the skin of your hands to avoid developing dermatitis and allergies. Be sure to also wipe gel polish bottles and brushes, especially if you touch them with bare hands.
In the office and on the desktop, the client’s master should meet:
- Hoods (dust collector, vacuum cleaner);
- Rest for the client's hands. This is not obligatory, but very useful for the posture and health of the master: this way you will slouch less, your lower back will get less tired, and there will be no problems with vision.
Also, such a useful habit as wiping working brushes and bottles with materials at the end of work will have a positive effect on the health of the master and the appearance of his workspace, so that particles of liquids and gel polishes do not settle on the skin and do not provoke contact dermatitis.
We wish you professional success and grateful clients along with materials, devices and tools of the Irisk brand!
Pros of the profession
One of the main positives of the profession is that it is in great demand . The demand for these services is growing rapidly. Since a person’s desire to be beautiful is one of his basic needs, a good manicurist will not be left without work.
It is convenient that the manicurist independently chooses the place of work . He can provide his services both at home and in a beauty salon.
The next positive side of the profession is working on a flexible schedule . Providing services at home, the master independently chooses a time convenient for him. In most salons, procedures are done by appointment. Consequently, the number of clients also depends on the desire of the specialist. In addition, this work can even be combined with another profession as a part-time job.
It is also important that the training period is relatively short . Basic courses, where basic skills are acquired, last about three months. You can improve your knowledge and skills already in the process of work.
The advantages include the opportunity for career growth . Over time, you can take part in competitions, exhibitions, even open your own salon or start teaching and share your experience.
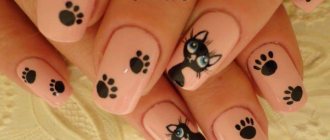
The big positive is the opportunity to realize your creative potential. Doing something with your own hands, seeing a person’s joy and gratitude is priceless.
In this profession, communication with people is inevitable. Therefore, the communication skills acquired in the process will be useful everywhere.
Where to go to study to become a manicurist
Where to go to study to become a recognized professional and sought-after specialist? It is logical that you should enroll in a manicure school. But how to choose it among the variety of options presented? We have prepared some tips depending on the type of study you prefer - full-time or part-time.
Full-time manicurist courses
As soon as you google your cherished question, you immediately fall into a stupor, because at least a million links with various promotions, discount offers, recognizable names and even unrealistic promises of further employment will appear before your eyes. Well, it's time to turn off your emotions and resort to the cool voice of reason, as well as carefully reading our effective tips:
- Don’t be fooled by the school’s big name or the teachers’ promises. Also, don’t “peck” at a bright picture from an advertisement. Carefully study the reviews for a particular course, and also carefully study the quality of the work of both the teacher and his students. This will be the best indicator of training effectiveness;
- choose only proven courses with a name and numerous reviews. In Moscow, courses from the biotech manicure school have proven themselves well. The main area of training is hardware manicure and pedicure. Hurry up to sign up using this link and get a -20% discount on the full course!;
- number of students. Not only those released from the school, but also the number of students in the stream. It is best to choose medium-sized groups, since it is then that the teacher will be able to pay maximum attention to each student. If your budget allows you, then you can pay for individual lessons, but the prices for such pleasure will be radically higher;
- pay attention to the base. These can be courses on classic manicure, European care, as well as hardware manicure. The same goes for designs. For the first time, it is quite enough to be able to perfectly coat your nails with gel, make a French manicure and simple designs;
- get the most out of your classes. Do not hesitate to ask and receive clarifications, work on mistakes and be interested in step-by-step techniques, this is the only way you will reach the top and will not regret thoughtlessly spending money;
- Be sure to request a certificate with wet stamps and signatures, having checked its validity with several potential employers in advance.
Now you know where it is most profitable to start searching for a school. We are confident that with proper motivation, perseverance and attentiveness, you can become the best in the course, and then the best in the profession.
Online training
Self-study is the path for disciplined and responsible young ladies who know how to competently manage their personal time and resources. It requires endurance, accuracy, constant development of new skills and consolidation of the results of efforts in practice. Most often, self-training at home consists of video tutorials on manicure, which you can watch at any time convenient for you. On the Internet and on YouTube you can directly find a huge amount of information in free and free access. The main thing is to systematize it efficiently, take notes and actively use it in real life.
Material saving
It is important to learn how to save manicure material. Even small supplies such as cotton pads and napkins are valuable for large volumes of work. Determine the consumption of a particular material for any client. For example, for one person you should have approximately 2 napkins, 1 wooden stick, 1 dose of cream, etc.
Do not use excess materials when building up, applying varnish and removing the coating. Everything should be in moderation. Extended gel nails that are too long and thick will eventually have to be filed off. Applying a thick layer of varnish not only leads to overspray, but also reduces the wear life. The artificial turf will not come off faster if you drown it in liquid.
Cons of the profession
A significant disadvantage of being a manicurist is that you will first have to spend a lot of money to purchase the necessary materials and equipment. To work from home, this will certainly be needed, but many salons also require specialists with their own tools.
Another disadvantage is the amount of earnings . It will directly depend on abilities and hard work. By doing your work efficiently, you can expand your client base and get regular customers. This will bring good profits. Otherwise, everything will be the other way around.
Another disadvantage is sedentary work. This body position adversely affects the spine and muscles.
The disadvantage is that you often have to deal with aggressive chemicals . Inhalation of vapors from varnishes, solvents and other substances has a negative impact on health.
Distinctive features of a nail professional
It is hardly possible to recognize a good master at first glance. But if you watch his work, you can be sure that this is a nail professional. What separates a pro from a beginner?
- Responsible attitude towards hygiene. Files should ideally be disposable; if not, the master uses liquid to disinfect them. The manicurist works only with gloves. He takes the tools out of craft bags. The hand bath has a layer in the form of a bag or bag.
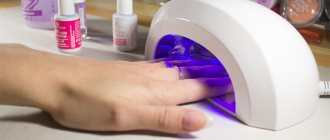
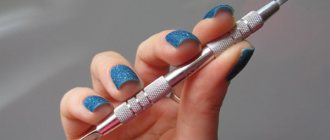
- Use of professional equipment: from a manicure vacuum cleaner to safe lamps for drying artificial material.
- Working on brands of the same brand. A specialist in his field uses bases, varnishes and topcoats of the same brand when performing a manicure.
- Ability to perform any type of manicure: classic, unedged, hardware. The ability to select the type of service to suit the situation distinguishes a true professional.
- Limited use of cuticle oil. Amateurs usually use it liberally. A professional master prefers not to overdo it with any means and tools for work, and strives to do without oils.
- Easy removal of old coating. No products with acetone. No metal tools to remove material from your nails. Even hardware equipment only finishes up to the base.
- Accuracy and speed of coating application. The ability to quickly apply cuticle coverage comes with experience.
In addition, there is professional ethics, the ability to communicate with the client, and additionally sell him your services. Yes, there are other ways to distinguish a professional from an amateur. But these are the main ones. If something is wrong, there is no need to talk about skill.