Making a treasury for a wedding with your own hands is not that difficult. To do this, you need some tools and materials - their availability and range will determine how beautiful and neat your work will be.
You also need to take into account that the “cash register” of a young family should be in the same style as the design and some details - the young couple’s glasses of champagne, champagne, a wish book, a fireplace, etc. The minimum requirement for the design of the treasury is a neutral decor that will not look foreign in relation to other items.
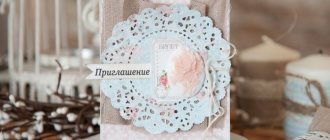
Round treasury
Another “quickie” option, because a Raffaello box is perfect for such a treasury, however, for a full-fledged “treasury” you will have to use two boxes, or glue two components of the box together.
Another option, with a simple lid, can be made by shortening the top lid from the Raffaello box, or you can make it yourself.
Editor's choice: Wedding without bride price, traditions and rituals
To do this, you need to cut a strip of 20 by 50 cm from thick cardboard (the dimensions can vary arbitrarily). This strip is glued together, a base is cut out for it, with allowances for gluing, which must be cut with fringe. Glue the base to the side.
The lid is made in a similar way, but the width of the strip will be no more than 10 cm. A slot is made in the center of the lid. Both the lid and the side of the box are decorated.
Wedding box
Such a treasury is easy to make due to the fact that the improvised means from which it is made are very common in everyday life.
To make such a treasury, you can use an old cardboard box of good quality. These usually come from expensive dishes or electronics.
Also buy special paper for packaging, which is sold in stationery or packaging stores and studios.
Stock up on decorations. They will be various beads, bows and other decorative elements. You can choose them to suit your taste.
KNOWLEDGE BASE: DIY decorations for wedding car handles, how to make stylish accessories
Treasury for a wedding - chest, master class
A fairly common form of wedding cash register is a box with a convex “blown” lid, in which there is a slot for money. There are a lot of decor options, and they are limited only by your individual requirements. This thing can be made from a box of a suitable size, or you can make it yourself from scratch. A mini master class will help you understand the details.
To work you will need:
- Glue Moment “Crystal” or “Gel”
- Pencil, ruler, scissors, non-writing pen
- Large cardboard 100cm by 70cm
- Paper for decoration, decorative elements - flowers for scrapbooking, braid, half beads, etc.
- Scheme - presented below
First step. Cut out a template from thick cardboard. Draw all the folds with a non-writing pen - this is called scoring. Make a slot for envelopes. Fold carefully along the folds
Editor's choice: Wedding procession, design ideas. Photo review
Second step . Cover the outer sides with scrapbooking paper or fabric. Next you can glue the chest together.
The third step is decor. Photos with decoration options for inspiration:
DIY wedding treasury: master class (photo)
A little more and the most important stage in your life will come - the wedding. Your friends and family will want to share this holiday with you. There will be many gifts, congratulations, laughter and tears of joy. The question arises: where to put wedding gifts? You won’t hold it in your hands, and the guests themselves should see that you appreciate the attention. Choosing a gift is a difficult matter. You never know whether you will please the newlyweds or not, so guests give a certain amount of money in an envelope. A long time ago they came up with such a wedding accessory as a wedding treasury. Previously, these were decorated bottles, but now everything is changing, so many ideas are appearing and, most importantly, the desire to surprise those present at the celebration, to do something different from everyone else. Having attended weddings or flipped through the pages of magazines, we can see that many chests for money have now been invented: heart-shaped, round treasury, cake-treasury, house-treasury, or just square chests. You can see examples of the treasury of young people for a wedding by watching this video.
DIY wedding treasury
Let's look at examples of what types of family treasury there are for a wedding.
1) The simplest and at the same time elegant will be a wedding treasury in the shape of a circle. A round box with a slot for money is decorated with various ribbons, brooches, flowers, lace or rhinestones.
2) Wedding money chest - heart. Your treasury will contain not only money, but also love.
3)My home is my fortress. A treasury in the form of a house will protect your well-being and prosperity.
4) No one would have thought that a sweet dessert could be an excellent accessory for your wedding. Flowers and bows will serve as an excellent decoration.
Such a variety of treasury for a wedding will not only surprise, but also leave positive emotions and memories.
The theme of your wedding must coincide with the selected accessories.
What accessories and fabrics will help decorate your chest?
— Lace will make the product delicate and expensive.
— Satin ribbons will add elegance.
— All kinds of rhinestones and beads.
— Chests decorated with bows or flowers will look very cute and beautiful.
— Modeling or drawings will highlight your creativity.
— Chiffon will add lightness and airiness.
A great idea would be to stick a joint photo of the bride and groom on such an accessory. You can write a poem, come up with and embroider the name of your family’s “bank”.
There are a lot of master classes on making a wedding treasury with your own hands.
You can see one master class below.
Master class with photos
Materials you will need:
— Tapes;
— Cardboard from which the chest is made;
— Decoration of the treasury: beads, bows, rhinestones, lace, flowers, etc.;
— Box (we have it from under glasses);
- Scissors;
- Glue;
- Compass;
— Paints would be a good addition.
Step No. 1. You choose the box from which you are going to make a “bank”. We have this box of glasses. A shoe box can also be a substitute.
Step No. 2. Cut off the top part. The side part should look higher.
Step #3: A glue stick will help you here. With its help, you begin to cover the front and back of the box with cardboard (cardboard color is white).
Step No. 4. There should be a lot of cardboard, because... then you will need to bend it to make a semicircle. On the side parts we draw semicircles (with a compass) and start cutting.
Step No. 5. Bend it over and carefully begin gluing the cardboard to the opposite side.
Step No. 5. Take glue and apply it to the end of the side part. For best effect, keep for 5 minutes.
Step No. 6. Make a slot with a knife. Guests will throw money into this slot.
Step No. 7 – Decor. You need to glue the tape with glue (this way you can hide places that didn’t turn out very well).
Step No. 8. To get an aesthetic look, take the lace and cover the slit.
Step No. 9. Let's start drawing. The drawing should be neat. If desired, you can decorate with beads, sparkles or rhinestones.
Step No. 10. Attach a bow. Color - choose yourself.
Ready. We have such a nice treasury for the newlyweds for their wedding.
Wedding accessories play an important role: they set the mood and color of the wedding. The holiday will end, you will return home tired but happy. You don’t need to look for gifts; such a simple but pleasing product will help you with this. By doing something with your own hands, you can not limit yourself, create and learn something new. And accessories made by you personally will become a great memory in the future. You will show them to your children and grandchildren, share your experience and relive this day again. Let your fantasy never end and your life be bright!
Do-it-yourself treasury-heart for a wedding
The wedding treasury option, beloved and sought after by many couples, as a symbol of love, is quite simple to make.
Much simpler than the same chest. The cutout can be located in the very heart, or on its side, but in this case these edges should be straight, but not convex, since the treasury will stand on one side, and on the other there will be a slot for envelopes. A small master class.
To work you will need:
- Thick cardboard (beer), watercolor paper, newspaper for template
- Pencil, ruler, scissors, meter tape
- Glue Moment “Crystal”
- Paper for scrapbooking, or fabric - in a word, everything for decoration, braid
Editor's choice: Musical fairy tale for a wedding, tips for organizing
First step. Fold the newspaper in half, draw a drop and cut it out. The heart template is ready. Transfer it to cardboard and cut it out. Using a centimeter, measure the length of the edge of the heart - this will be the length of the side. Determine the width arbitrarily, but add centimeter margins to it for gluing, and cut these allowances with fringe or teeth. Glue design paper onto this strip in advance. Try it on your heart, mark the location of the slit and make it.
Second step. Glue the heart together. Cover with paper. Decorate the slots and joints of the cardboard with braid.
Third step. Decor! The best option is a ribbon encircling the heart, plus a small bouquet that duplicates the bride’s bouquet. This design can be made in any color and will fit perfectly into any wedding style.
Money box for a wedding
Features a removable lid. It will be more difficult to make such a treasury with a cylindrical shape. And the most romantic option is a heart-shaped box.
- A good shoebox will work as a base.
- Cover the inside with paper.
- Take a large piece of silk or satin fabric. Its size must correspond to the full size of the box with a margin.
- Glue the pieces of fabric, wrapping the box with a gun.
- Hide the leftovers with a piece of tape or cut them off.
- The lid can be covered with decorative paper to match the color of the fabric.
- Make a slot similar to the hole found in any piggy bank.
- Decorate the resulting product. These can be contrasting small details that shine beautifully on the fabric in which the product is wrapped.
KNOWLEDGE BASE: Making a wreath for the bride with your own hands
For example, this option is very sophisticated.
Cinnamon – Sri Lanka (main photo)
We associate this spice with Christmas baking and winter evenings, but the truth is that it originates from the tropical country of Sri Lanka. In this country, cinnamon is widely used in medicine and cooking. Sri Lanka supplies 32.9% of this product. In 2021, she became richer by 136.4 million euros.
A real estate market expert told us what time of year is best to buy a home
Does size matter: what do Russian women think about men’s salaries?
Good acquaintances and big money: is it worth working as a massage therapist in Russia?
Round treasury
A round treasury is even easier to make than a square one. A cake box is suitable for it, which is covered with paper inside and out and decorated with various decorations: ribbons, bows, rhinestones, etc.
If you cannot find a suitable box, then you can make it yourself.
To do this, a strip is cut out 20 cm wide and 40–60 cm long, depending on the size of the treasury. The strip is glued together, a base is cut out for it, which is also glued. A lid is made in the same way (only the strip should be much narrower), in the center of which a slot is made.
Editor's choice: Wedding gift for the bride: how to choose and what to give
Such a box is decorated by analogy with other forms of treasury - the decor depends only on the imagination of the manufacturer himself.
Wedding coffers in the shape of a heart can also be considered round. An interesting version of such a heart can be obtained if it is made from an insulating material called isodom, the thickness of which should be at least 10 mm. Two hearts are cut out of it (top and bottom parts) and a side panel, which is glued between the two parts.
Then the resulting form is covered with red cloth, and lace is placed on top of it. The work on making such a box is completed by decorating it with flowers, ribbons, and rhinestones. The main thing is not to forget to make a slot on one side of the heart for the envelope.
A wedding treasury can become one of the most striking wedding accessories with a little imagination. And when it is made by loved ones or the newlyweds themselves, it then becomes a touching reminder of an important event in life.
Treasury-heart for a wedding with a hinged lid
Modern weddings are thought out from top to bottom. The times when money was placed on a tray as a gift are irrevocably gone. In order to present a cash gift in an envelope, modern wedding planners use such an attribute as a wedding treasury.
Beautifully decorated chests become a repository of cash investments in the family budget of the young.
Let's try to make a heart-shaped treasury for a wedding with our own hands. The size of the heart-treasury is 27 cm in height and 37 cm in width.
For the base you need to prepare:
- insulating material “Izodom” 10 mm thick;
- red satin fabric;
- white openwork fabric (guipure) - slightly larger than red fabric;
- beautiful white braid 1.2 cm wide;
- Velcro contact tape (for attaching the “window” for removing money)
For decoration:
- red satin ribbon 1.2 cm wide or ready-made roses;
- white tulle;
- beads of different sizes, red and white.
Tools:
- glue gun;
- ruler;
- scissors;
- sewing needle;
- tailor's pins;
- regular white and red threads.
READ ALSO: The fate of the wedding bouquet: what to do with flowers after the wedding
Having printed and cut out 2 heart templates (each on an A4 sheet), use tailor's pins to attach the paper heart to the isodome and cut out 2 such blanks.
[justified_image_grid ids=”1804,1805"]
Additionally, we cut out a circle with a diameter of 14 cm; this will be a decorative “cover” for the hole in one of the hearts. Izodom is a very good material, one of its disadvantages is the wavy surface, so some parts are not quite the correct shape.
You also need to cut out the sides for the treasury - 9.5 cm wide. The length of the side is 110 cm, but it is better to cut off a strip with a margin, so that it is better to cut off the excess later. In one of the hearts (it will be the outside of the treasury), you need to cut a circle with a diameter of 10-11 cm (so that your hand can fit freely through).
We cut the sides into 2 parts and begin to glue them with a hot gun to the heart with a window, moving from the top of the heart to the bottom.
We repeat the same with the second part of the side panel, very carefully connecting the joints of the two parts.
READ ALSO: Bridal bouquet made of artificial flowers: types and options
Now we glue the second heart, without a hole. Izodom is a very good material, it bends remarkably well and can take any shape.
We cut off the protruding parts, align all the joints that look ugly.
Now we make a slot for throwing envelopes with congratulations and money - on the upper part of the side panel on the left. The cutout size is 10.5 cm by 2 cm. Check that the envelopes fit freely into this slot.
[j[justified_image_grid ids="1810,1811"]p>
The next simple step is to cover the entire treasury with red fabric. We cut out the hearts and sides, glue them with hot glue, then cut a window and a slot for envelopes (unfortunately, there are no photos of these steps, but they are simple).
Now you need to glue the openwork fabric on top of the red fabric. Fold the fabric in half, pin the paper templates using tailor's pins, cut out with small allowances and get 2 hearts.
We cut out the sides from guipure - a strip 110 cm long and 10.5 cm wide. We pin all the parts to the base with red satin and begin to sew by hand with a seam over the edge.
READ ALSO: Magic in a hat box: picturesque Flower Box
Hand stitching allows us to adjust the tension of the fabric, and excess can be trimmed off while stitching. This is what should happen in the end.
[jus[justified_image_grid ids="1815,1816"]
We cut out a “window” hole and a slot.
We decorate all the seams, as well as the slot-slit, with a suitable braid, carefully gluing it with a hot gun.
We also cover the lid with red satin, and on top with guipure. We glue the satin completely, and the guipure only on the sides. We decorate the side with white braid using glue.
We will attach the cover to the window using small strips of contact tape glued to the edge of the window and the underside of the cover.
We hide the ugly edges of the window behind white taped tape.
At our discretion and capabilities, we decorate the lid and slot (for example, with roses, which can be made from satin ribbons using our master class).
[justi[justified_image_grid ids="1824,1825"]p>
A beautiful treasury for the wedding is ready!
DIY wedding money chest
Since this is a treasury for money, then it is quite logical to make it in the form of a chest. The shape itself will decorate the interior, and the exterior can be decorated in various ways. To make it you will need cardboard, glue, scissors, and a ruler.
Editor's choice: What to give for a wedding inexpensively: ideas and recommendations
The main stages consist of the following points:
- using a ruler and pencil, mark the template on cardboard;
- cut along the main lines, the upper part is bent in a semicircle - this is the lid, a slot is made in it for envelopes;
- the entire product is glued together - the shape of the chest is ready.
After this, the chest should be decorated.
There are several possible ideas here:
- cover with colored or velvet paper;
- decorate with foil, then the chest will take on the appearance of being made of metal;
- paint it in any color or apply wedding-themed designs (connected rings, hearts, initials of the bride and groom).
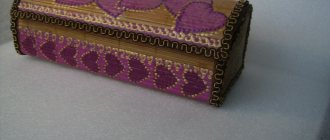
The chest is decorated by gluing ribbons, strips of lace, artificial flowers, rhinestones, and bows.
Treasury-box
If the box has a hole for an envelope, then the top lid of the box opens to place the envelope there. Boxes can be of different shapes, including heart-shaped or oval. The easiest way to make a box is from a shoe box, since it has a ready-made opening lid.
Editor's choice: Golden wedding scenario: remembering traditions!
The step-by-step instructions for making such a treasury are as follows:
- the inside is covered with paper;
- the outside of the box is decorated with silk fabric, the corners are decorated with ribbon;
- Artificial flowers and rhinestones are attached to the lid.
Wedding treasury house
It has recently become especially popular to use the shape of a house in the form of a treasury. This symbolizes the common life of the family, common living space. This type will be especially relevant if you are planning to move to a new home.
Treasury in the form of a house
- Make a suitable drawing and pattern
- The roof of the house must be retractable. To do this, the easiest way is to glue it with tape to the base. This will make it easy to open and close. Do not forget to step back two millimeters from the protrusion for easy sliding.
- Cut and glue all the parts
- Prepare windows and doors for the future house. To do this, you can use wooden inserts or your own photographs. Pieces of brightly colored plastic material and other available materials.
- Paint the product with decor, ribbons, beads and pieces of fabric.
KNOWLEDGE BASE: Wedding album design - scrapbooking, technique lessons
How to make a treasury for a wedding with your own hands
Preparing for a wedding is a troublesome, exciting event. With all the fuss, brides often prefer to think through some little things on their own, for example, the treasury for the wedding day. Possible options for making crafts depend on:
The treasury is a modern attribute of a wedding banquet. In fact, this is a disposable item, but after the event it is used for memorabilia, so such a craft must be made of high quality (from thick cardboard or an old box). If long-term storage is not important, then you can take designer cardboard of lower density (200-250 grams/m2). The shape and size of the treasury for money depend on capabilities, imagination and the availability of free time. Such a product may look like:
The style of the product is festive. The treasury is decorated with ribbons, guipure, lace or beads, rhinestones, beautiful appliqués and stickers left over from things. Flowers can be made from ribbons and paper yourself. The treasury should not be pretentious or overly loaded with details. Conceive the product so that it fits into the overall style and concept of the holiday. Involve friends and relatives in developing the design. Study the master classes below to create an original attribute for your wedding.
Money box
A family bank for a wedding must be reliable. To do this, prepare the following materials:
You will need tools:
The main stages of making a wedding treasury:
Money chest
A DIY wedding treasury can be in the shape of a chest. To cut the money chest, use the tools from the previous master class. In addition to materials for decoration, purchase:
Money box for a wedding
Less common than a chest or box, a do-it-yourself treasury for money for a wedding takes the form of a box. This product differs from a chest in that it has a removable lid and a cubic shape. Heart boxes, round, cylindrical or oval in shape, are more difficult to make. Here are detailed instructions for making a wedding treasury box:
DIY money box for a wedding
How to make a wedding treasury with your own hands in the form of a box? The retractable model is a little more complicated, but no less interesting. Main manufacturing stages:
Wedding treasury-house
If you don’t like a treasury in the form of an ordinary casket or box, try making a house for money for a wedding with your own hands. To make the product, use the following instructions:
Making a wedding treasury
Multi-colored wedding - what is it? And this means - the wedding will be blue, no red, but maybe orange! Young couples are increasingly choosing bright colors and inviting guests to play with them. So they suggested to me - to make a treasury for a wedding in orange style, it’s an interesting idea, we’ll try