Design and layout of a wedding photo book
Computer technology allows you to create almost any design for a wedding photo book. Don't know what you want? You can always look at examples online or from your photographer and figure out your desires.
First of all, you need to decide in what order and what pictures you would like to see in the album. Currently, several standard options have been formed, however, you can always make your own changes to them.
Ideas for posting photos:
- The progress of the wedding is “in order.” This method of posting photos is the most common. The book begins with pictures of the bride and groom in the cathedral, and then follows the script. The last photos are usually with a wedding cake or with fireworks in the background;
- Love story. This kind of album covers a wider range of the couple's relationship. The book begins with the first photographs taken together, followed by the engagement, the exciting moments of pre-wedding preparation, the wedding day itself, sweet honeymoon days and, like a happy ending to the album, the pregnant wife;
- Wedding books can include photographs of the newlyweds’ parents, close friends and witnesses;
- The album will gain special energy if you include the wishes of loved ones in it;
- The most striking moments should be given more space in the wedding book. For example, highlight one or two spreads of photographs from the exciting moment of marriage, the wedding, the first dance of the newly-made spouses, or the removal of the veil.
Afterwards, it’s worth thinking about the style and background for the wedding book. Albums made in the style of a wedding celebration and in the same color scheme will look good. Moreover, the cover of a wedding book must set the desired mood.
Photographers suggest paying attention to the following design options:
- Retro style;
- “Like in a movie”, especially this style of book is suitable for photos from a themed wedding based on your favorite movie;
- A touch of humor;
- Tender mood;
- Thematic design, for example, a book in a nautical style or in orange shades, will emphasize the theme of the past celebration.
In order for the photographs and the album to complement each other, it is worth understanding in advance what you want to see in the future in the family archive
It is important to decide on the theme of the book in a timely manner in order to prepare the necessary accessories for a wedding photo shoot and take appropriate photographs.
Various samples of wedding photo books once again prove that there are no limits to professional imagination and talent! The newlyweds are required to have at least minimal knowledge of what they want, and experienced photographers will certainly offer suitable ideas for designing the cover and the colorful spreads themselves. Don't know where to find true masters of their craft? Catalogs of wedding services on the pages svadebka.ws are always at your service!
- 22 photos
How to store
A wedding album made using the scrapbooking method requires a special type of storage: since its cover has voluminous parts, they can be accidentally damaged during storage. An excellent solution to this problem would be a cover sewn to the size of the album, packaging made of paper, or a box (look at the photo). They are also slightly decorated: for example, it is recommended to sew flat patterns on the cover and cover the box with fabric or paper.
You can purchase or order a unique scrapbook album. But it would be better to make it yourself, putting a piece of your soul into it, because a wedding album is the bright history of a family from the moment of its inception. This activity will require a lot of time and perseverance, but the result is worth it: the memory will last a lifetime.
If you have experience in creating such crafts, or interesting ideas on this issue, leave your comments, they will be useful for other readers.
Original photo album ideas: capturing life
Digital technology provides us with a wealth of photographs from all walks of life. It's nice to show your friends a photo album you created with your own hands, the ideas of which were suggested by life itself.
Here are some interesting stories:
- "Best moments of the year";
- "I love this city";
- "My hobbies";
- "Me and my cat";
- "Men in my life";
- "A house and a garden";
- "Cool selfies."
Good quotes for a photo album. You can print them on a printer or write them with a gel pen on colored stickers.
Review your digital photos, choose themes with a similar theme. Think about what and how to decorate your photo album. Any items from home will do: scraps of lace, buttons, colored paper clips, dried flowers.
It’s interesting to make several photo albums with your own hands in the style of diaries. Such a photo album-diary is decorated with simple stickers, often with statuses from the Internet.
The covers of self-made photo albums are decorated with “all sorts of things”: openwork knitting, straw, collages of small photographs. Vintage albums are decorated with items from “grandmother’s chest.”
Made by the hands of the newlyweds
Taking into account the tastes and preferences of the young, scrapbooking should be a photo report of the wedding day.
On the title page there is a photo of the bride and groom. The following are the main events of the day:
- preparing a couple for marriage;
- children's photographs of the future wife and husband;
- general view of the ceremonial wedding departure;
- wedding ceremony, exchange of rings, kiss;
- photographs of memorable places with the laying of wreaths and flowers;
- photographs of close relatives, friends invited to the wedding;
- interesting shots of the wedding feast (competitions, rituals, ceremonies).
A do-it-yourself wedding photo album allows the newlyweds to use existing joint ideas, the order of arrangement of photo documents, the design of pages, certain features of the album, and use the style inherent in the wedding ceremony. You can invite a professional designer and use an original design technique - use ribbons, beads, sparkles, foil.
Original ideas
When creating a photo album with your own hands, design ideas depend only on the flight of your imagination. Mini-albums that you can carry with you are especially popular.
Photo albums can have any shape. It is not at all necessary to use a standard square or rectangular one. You can create a kind of vignette that will unfold.
Experienced craftsmen or beginners who do not shy away from difficulties can make a photo album-box. In this case, it will take much more time to create, but such an album will be a wonderful gift and interior decoration.
There is nothing difficult in how to make a photo album with your own hands, but it is important to choose the right placement of all the details so that they fully convey the emotions from the photo.
Memory saving feature.
Often photographic materials are stored in a specially designed album, independently made using all kinds of memorable accessories.
Make and design an album with your own hands (the popular name is “scrapbooking”) - create an exclusive copy of a photo album, preserve memories of past unique moments in life for many years. Artistically decorated, with the wishes of family, friends, and relatives, it becomes the only witness to long-past events.
One of the most memorable events is a wedding - the beginning of a life together for loving people, a joy for relatives. The captured joyful moments of the wedding will excite the participants of such an event for many years.
At the end of the celebration, the question often arises of how to make a wedding album in order to most fully reflect such an event.
Composition: learning to design photo albums
Selecting beautiful photos and stocking up on decorations is not all you need to create a photo album with your own hands. All elements must form a visual unity.
Each sheet is filled out according to scrapbooking rules:
- select the semantic center of the page;
- choose a harmony of shades for photographs, inscriptions and decorative details;
- choose decoration that matches the meaning of the photo;
- balance the proportions of large and small parts;
- make bright accents;
- do not overload the page with decorations;
- outline the triangle “photo – title – signature”;
- place an odd number of details on each page.
Create contrast from one large element and several small ones in the opposite corner. For example, at the bottom right there is a large snowflake, at the top left there are three small stars.
DIY scrapbooking photo frame: instructions with photos
You need:
- cardboard;
- paper;
- textile;
- glue;
- scissors;
- brads;
- machine and thread;
- padding polyester
Process of creation:
- Measure the photo and transfer the dimensions onto the cardboard using dots. Lay 1 cm deep into the rectangle on each side. Then draw a larger rectangle 4 cm so that the smaller one remains in the center.
- Cut it out, attach padding polyester and cut it to shape.
- Place padding polyester on the fabric and a cardboard frame on top.
- Wrap and glue, or better yet, sew.
- Carefully cut the center diagonally and wrap it inside, then glue it.
- Cut out another frame from paper, like from cardboard. Then cut out a whole rectangle 0.5 cm smaller than the size of the photo frame.
- Prepare 3 smaller rectangles of cardboard for the stand. Make a fold line for each one. Glue them together.
- Attach the stand to the lid using brads.
- Attach brads with arrows to the paper frame along the edges.
- Glue the frame to the back of the finished version.
DIY notepad using scrapbooking technique
You will need:
- sheets;
- clamps;
- glue;
- cardboard;
- decorations;
- ruler;
- lavsan sliding threads and needle;
- fabric tape;
- stationery knife.
Algorithm of actions:
- Measure out the required number of A4 pages. Remember that you will get twice as many since they are folded in half. If necessary, you can line each sheet manually or print ready-made ones.
- Fold the sheets in half like a book, iron the fold line, secure with clamps and place under the press in the form of a pile of books.
- After pressing, align and fasten the clamps vertically.
- Measure the spine and divide into equal parts, then cut.
- Sew the binding of each stack and connect them together with fabric tape.
- Then apply a generous amount of glue or silicone sealant, compress with clamps and leave to dry.
- Cut out three pieces of cardboard: one for the spine, the other two for the endpaper and backdrop. Cut 0.5 cm more of the glued sheets.
- Lay out the cover unfolded as you would like it to look. Then glue using fabric and glue.
- You can make the cover soft or hard by covering the cardboard with paper or fabric.
- Glue the first sheet to the inside of the endpaper and the last to the back.
- Decorate your notebook however you like using decorative elements.
How to design an album using scrapbooking technique
First of all, you should select photos for the wedding scrapbook. Remember that you should not try to post all the pictures; choose only the best, most successful photographs. Put aside those that have cropped faces, bad angles, or identical poses. You can first process electronic photographs, adjusting them to the overall style of your wedding scrapbook: trim excess, change size, add accents, blur the background, add saturation, brightness, discolor, age, etc. Pre-processing makes it possible to make photos suitable for an album.
Don't limit yourself to just portraits, because landscape photos can describe the weather on your wedding day, photos of premises can describe the location of the event, photos of details can describe certain emotions. This approach will help you clearly remember the celebration in the future. Don't just use a static photo, add emotions, action, movement. This will make your wedding album more lively and interesting. If you don’t know how to place a photo, use ready-made templates in scrapbooking master classes.
The next step is to decide on the location of the pictures.
Particular attention should be paid to the first page, as it sets the theme and tone of the wedding album. Pictures on one page must be related to each other, for example, they can display one event from different angles, in a sequence of actions, one moment, or be taken in the same color scheme
Select the main photo, highlight it with colors or increase its size, and complement it with others that are related to it.
Don't forget to leave space for comments and notes on the page. Arrange the pictures page by page in chronological order, or highlighting them by details, moments, participants. For example, a wedding album can begin with the cathedral of the newlyweds and end with a banquet, or each page will be dedicated to a specific character: parents, bride, groom, guests, witnesses.
The next thing to consider are memorial notes and headings: these will add a lot of life to your wedding album, so be sure to use them. You can limit yourself to short captions with a place, date, convey emotions, write a story with detailed details that you would like to remember, and pass on to others. Memorable notes can be applied in different ways: using archival pens, markers, stencils, stamps, ready-made letters, magazine and book clippings, embroidery, machine stitching, appliqué.
The correct composition is of no small importance. Ideally, the page contains small, large, and medium elements. Together they create a harmonious picture that is pleasant to look at. First place pictures on the page, different elements, try moving them until the result satisfies you. Use horizontal, vertical, angled, circular, spiral, etc. layouts to add movement. The main colors of the composition should be repeated in decorative elements.
Scrap is known for its wide range of details that create a mood. Such elements will tell more than words. In your wedding album you can use the following details:
swallow - positive changes, success, hope; a pair of butterflies - marital happiness; rose - earthly passion, heavenly perfection, the mystery of life, beauty, grace, sensuality, passion; pearls are a symbol of innocence, purity, and a penchant for solitude; a pair of doves is a symbol of eternal love and fidelity; heart - spiritual wisdom, prudence of mind, love, understanding, alms.
Materials and tools for work
- miniature scissors;
- simple hole punch;
- knife-cutter;
- pencils;
- paints;
- markers;
- glue stick;
- curly scissors;
- figured hole punch;
- Double-sided tape.
- paper;
- cardboard;
- cover material;
- fur, leather, lace, beads, chains, etc.
Decorative details play an important role in the original design. These are any interesting things found at home or in a scrapbooking store.
Performance technique
Anyone can make a simple, beautiful and original craft. A ready-made album or creativity kit can be found on sale. But even in its design there is room for imagination, a sense of humor and taste.
Before starting work, it would be a good idea to draw a layout by hand, plan out the pages, and sketch out the design. This will help you save money without buying unnecessary materials, which are quite expensive. And time will not be wasted on a labor-intensive process.
When creating an album, it is better to design each page separately and only then attach them into a single whole. It's more convenient to work this way.
How to make a photo album for scrapbooking with your own hands step by step.
So, first of all, you need to stock up on terracotta and imagination. If you can’t imagine what scrapbooking should look like, you can look at the photos on our website. We provide a variety of options for creating a photo album at home so that you can see examples.
First of all, you need to stock up on the materials necessary for creating scrapbooking. You should not save on goods, because the more and more beautiful elements you buy, the better your photo album will look.
Don't forget about beautiful ribbons, beads and other accessories that will help you make a truly unusual photo album.
By the way, dried flowers and other herbarium options would be an excellent option. So, you will get a photo album in vintage style. By the way, brown paper, like parchment, is perfect to enhance the effect. Try decorating with cute messages written with wax crayons, and don’t forget about stickers and special stationery glitter.
Many scrapbooking creators use sewing machines, and although this tool is not always necessary, you can use it to create beautiful additions in the form of stitched ribbons. By the way, stamps have been especially popular lately. They are suitable for drawings on paper, but only a few pieces are enough.
Now let's move on to the process itself. So, after you have prepared all the necessary materials, it is worth starting the initial process.
1.First we need a sheet of thick paper, which we must divide into approximately 12 equal squares. To create truly even squares, use a ruler and pencil.
2.Now you need to make cuts on opposite sides. Cut without reaching the end, leaving one square on the side.
3. Three strips need to be glued together, and then our future scrapbooking needs to be folded like an accordion. Thus, you will get a kind of book, which you need to seal either with double-sided tape, or use single-sided tape, and glue beads or other beautiful accessories onto it.
Now you have a ready-made photo album in which you can save all your memories and pleasant impressions.
As for the content: your imagination is not limited here. Use the decorating items we listed above and also add Polaroid photos.
By the way, for brighter scrapbooking, use colored tape. It allows the photo album to look unusual, beautiful and original.
The cover is usually decorated with lace or any fabric that you find at home, so it all depends on your imagination and various ideas.
Manufacturing of cover and binding
Let's talk about the technology of making a photo album without going into details.
The album cover is most often made of thick cardboard and covered with colored paper or trimmed with fabric. A padding polyester is placed under the fabric to give the cover volume, and then stitched along the edge using a sewing machine.
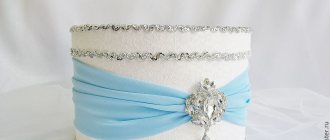
Soft cover with ribbon
Soft cover in scrapbooking style
Video - Soft cover for the album. Scrapbooking
The pages for the album are made of thin but dense cardboard, which is covered on both sides with scrap paper, paper wallpaper, and printed sheets with patterns and ornaments.
Double-sided scrapbooking paper
Set of paper for scrapbooking with foil
Scrap paper
It is most convenient to use special sets of scrap paper. In them, all the sheets are selected according to tone or theme, which greatly simplifies the work, but allows you to make each page different from the other.
Set of paper and stickers
Stickers for scrapbooking
The album is bound in different ways. The simplest is to assemble the pages and cover onto rings or lacing. For this purpose, holes are punched along the edge of all elements at the same level, into which eyelets are inserted using a special installer.
Holes for stitching sheets
Eyelets
Prices for hole punchers
DK-008 for installing eyelets
If the album has a lot of voluminous decor, this weaving method will not work - it will wrinkle. You need to make sure that there is free space between the pages. In this case, the easiest way is to do as described below.
| Step, no. | Description |
| Step 1 | We cut rectangles from cardboard for future pages. |
| Step 2 | From the same cardboard we cut out strips the same height as the pages and 3.5 cm wide. |
| Step 3 | We mark each strip along the ends, making marks at a distance of 1.5 cm from the edges. There should be half a centimeter between the marks. Using a ruler, we crease the strips, drawing a line with pressure using a knitting needle or the blunt side of a knife from one marking point to the opposite. |
| Step 4 | We bend the blanks along the marked lines and cut off the corners. |
| Step 5 | Glue the first page to one of the wings of the strip. |
| Step 6 | We glue the second page to the second wing, and the next strip to it on the reverse side. |
| Step 7 | Continuing in the same order, glue all the pages together. |
| Step 8 | Cut out a rectangle from cotton fabric or thick gauze. It should protrude 1-1.5 cm beyond the binding on all sides. We coat it with glue and glue it to the binding. We do not glue some of the fabric on top and bottom yet. |
| Step 9 | We fold the fabric inward at the ends, glue a bias tape folded in half to it, and then glue it to the binding. |
| Step 10 | For the spine, cut out a rectangle from cardboard, 3 cm wider than the binding and several millimeters longer than it. |
| Step 11 | We bend 1.5 cm on both sides. Mark the inside of the spine, dividing it into 0.5 cm strips equal to the distance between the pages. All folds are made after creasing the lines with a knitting needle. |
| Step 12 | We decorate the spine and fit it to the binding. |
| Step 13 | Apply glue to the folds of the fabric and the wings of the spine and glue them together. |
| Step 14 | On the other side, we glue the cover to the spine and the protruding edge of the fabric, and then glue it to the wing of the connecting strip on the first page of the album. We do the same with the back cover. |
| Step 15 | We glue the endpaper to the inside of the cover to hide all the unsightly fastenings. |
Technique methods.
Much attention must be paid to the cover, which will preserve the contents for a long time. The binding and cover must be well connected - fastened, stitched
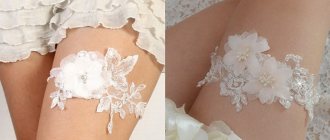
The cover is made of natural, artificial leather, velvet. A joint “photo” of the bride and groom is attached to it. Can be used with a metal clasp to ensure photos don't fall out. A photograph decorated with velvet and lace looks luxurious
The binding and cover must be well connected - fastened, stitched. The cover is made of natural, artificial leather, velvet. A joint “photo” of the bride and groom is attached to it. Can be used with a metal clasp to ensure photos don't fall out. Decorated with velvet and lace, the photograph looks luxurious.
Scrapbooking styles
In the process of scrapbooking development, some features have been developed that define a person and time. When making albums, several styles are used:
- false vintage (Vintage), when the age of photographs is artificially increased and they are decorated with antique objects;
- European, distinguished by clarity, rigor, and the absence of different design elements;
- American, using stamps, stickers, and various decorative elements;
- shabby chic, using exclusively old things (buttons, frayed ribbons, lace, worn-out photos);
- simple, clean. A single text font, square photos and other decorations for scrapbooking are used;
- free-spirited, preferring handmade headings, a combination of different colors;
- Mixed Media – the use of various styles, in addition to American and European.
Other directions:
- The color of Marsala is a predominance of natural shades of dark red, a palette of scarlet roses. You can cover the cover with fabric in these colors.
- The direction of ivory is design in shades of ivory and the predominance of cream palettes. You can also insert items in these tones between photos of the newlyweds.
- Marine style - decoration with shells, pebbles and other attributes of the sea. Drawings of sea fish and other inhabitants of the depths. You can cut out the divers and insert the faces of the newlyweds into them. A bonus page, which will open down 2-3 sizes to the bottom; in this space various inhabitants of the deep sea will be depicted, with the faces of the guests glued on.
- Provence - floral shades of lavender. Decoration with flowers and twigs. A very romantic destination. The predominance of natural shades of nature.
- Chicago is a destination in the style of American gangsters of the 20s. In addition to thematic photographs from the holiday, you can insert black and white photographs of America in those years, as well as add the inscriptions “Wanted” or “Wanted” and insert photographs of the newlyweds.
- The Great Gatsby is a pompous and luxurious destination. The cover can be decorated in expensive leather and sprinkled with expensive perfume. You can also insert a bookmark made of expensive materials.
- Shabby Chic is a vintage yet rustic style. Worn covers made from old materials are welcome. Inserting photographs of old items will be a good decoration.
- Boho Chic is romance that goes over the edge. It is welcome to add a herbarium of flowers, as well as cuttings from the material of the bride’s outfit. The following shades are suitable: ruby, purple, sapphire and blue.
- Tiffany - luxury and luxurious retro. Based on the film, this direction is considered a classic. You can decorate the pages with stills from the film or drawings in the color of azure turquoise.
- Rustic is a natural style. Decorate more with natural objects: flowers, twigs, wood, fabrics, straws and other attributes.
By time of year:
- Spring period. Snowdrops and other early flowers are suitable for decoration. A pale green tone would be nice.
- Summer period. The predominance of green shades on the pages. Decoration with drawings of flowers and herbariums.
- Autumn period. The pages can be decorated in golden shades, and you can also paste in a herbarium of tree leaves. Drawings of fruits and vegetables.
- Winter period. Decoration with tree branches and drawings of winter animal species. Decoration in white and blue colors.
Master class on creating scrapbooking wedding albums
When studying the technique of wedding scrapbooking in detail, you need to know that there are many different styles of this type of creativity. Everyone can find and do something that reflects their tastes:
- Vintage style.
- Heritage style.
- American style.
- Shabby chic.
If you are a romantic and creative person, then a shabby chic wedding scrapbooking album will suit you. This style is considered royally honorable with a claim to aristocracy. To create a unique and worthy cover for your album, consider this master class.
We perform all actions in order:
- When making the cover, it is necessary to measure the thickness of the album folio. Then cut out the desired size strip for the middle of the cover. We mark out future folds using an embossing stick or a nail file.
- We attach the binding strip to two identical cardboard sheets and glue them together. We have the base for the cover ready.
- On the outside, we glue padding polyester onto the cardboard blank to make the cover soft.
- We try on a pre-selected piece of fabric on the cover. Then apply glue thickly to the inner cardboard binding along the edges of the cover. We apply the fabric and stretch it tightly on all sides, tucking the edges inward, placing them on the glue. Be careful and try not to overtighten the fabric and distort the entire album.
- To disguise the glued edges of the fabric, we glue a beautiful lace ribbon.
- We attach ties made of thin lace or satin ribbon to the side.
- After the base has dried, we begin to decorate our scrap album. We carefully glue thin lace onto the fabric cover, and on top you can decorate it with an openwork napkin or a pre-sewn lace mini-glove of the bride (to visually indicate the purpose of this album).
- In the center you can place a photo from the newlyweds’ wedding in a vintage style. We will glue three-dimensional flowers in the corners, suitable for the “shabby” style, and below you can decorate with birds, butterflies or Cupid’s angels.
- To finish the work, you can use light shades of scrapbooking ink and apply intricate patterns using special stencils.
- Now your personalized wedding scrapbooking album is ready to be filled with memorable photos. They will delight you and your family with warm memories of your wedding day for many years to come.
Wedding album using scrapbooking technique: master class
Let's get started, take the binding cardboard, glue strips of double-sided tape and glue it, as in the photo, along the edges.
Now we glue the padding polyester to the binding cardboard. Take the fabric. The smaller part of the cover will be mint, and the larger part will be blue with roses. We measure and cut the fabric, and then steam it well and iron it. We cut the lace in half and it will be located between the sewn pieces of fabric.
We sew the fabric together and again iron it thoroughly at the joints. Turn it over, place the binding cardboard on top and apply glue stick to the corners.
Wrap it nicely and glue it. Now we spread the top and bottom and wrap it again. Then we tighten the sides well, but not too tightly, and glue them.
We cut off pieces of tape and glue them inside the covers onto strips of double-sided tape.
Now we apply the lace on the inside, top and bottom, on the back side, too, using double-sided tape. We sew both blanks along the edges.
Now we cut off a rectangle 11 by 15 cm and try it on the front side of the cover. We place cotton flowers along the edges under this rectangle. We sew this rectangle along the edge.
For interior decoration, we glue rectangles from background printouts measuring 20.5 by 29.5 cm onto both sides of the cover. Glue them in and put them under the press for a while. We spray the chipboards with pink spray so that the inscription has a pearlescent tint. We also leave them to dry. We take the printed leaves and cut off the excess along the edges, the pages inside are 20.5 by 29.5 cm in size.
Glue the chipboard onto the cover. We install three eyelets with the help of an installer.
We make a mark on the pages inside and make holes on all the pages.
Assembling the album into rings. We dress the corners in metal.
Now we glue the decorations, as in the photo, and tie bows on the rings. It turns out this is the most delicate cover design in mint blue with pink decorations. The photo album is completely ready, you can give and delight the young couple
Thank you for your attention and good luck everyone!
| Comments to the news “Do-it-yourself wedding album using scrapbooking technique. Master class step by step with photos” already 0:
Interesting on the web:
E-book “The best handicraft master classes.”
After that, click the “Get book” button.
"Masterclasses" 2011-2017
. All articles on the site are copyrighted, copying is strictly prohibited. In case of partial citation, a direct indexed link to the “Masterclasses” website is required.
Attention! It is forbidden to use expressions in the form of obscene and insulting. HTML tags and URLs are not allowed
Family album design options
A family album should reflect not only history, but also the spirit of the dynasty. It is important to select the most important memorable photographs.
- "Little Dad with Young Grandfather";
- "At the wedding table";
- “We’re having a baby”;
- "For the first time in first class".
Beginners should try their hand at creating a small album with their own hands - 15-20 pages. You can decorate the inside of the family album with scanned documents and maternity hospital tags of newborns.
Ideas for creating a page about your sailor grandfather in stages:
- trim the “Pearl Turquoise” paper backing along the edges with scissors with a wavy edge;
- make the title “Across the seas, across the waves” at the top;
- highlight the name with strips of decorative tape depicting fish;
- Place a vintage photograph in the center;
- Attach a small anchor to the lower left;
- opposite, put a sticker with the inscription “Black Sea Merchant Fleet, July 1979.”
A young mother can make a photo album of her newborn with her own hands. Children make albums as gifts for their parents. Another popular type is a wedding photo album. Making a family album with your own hands becomes an exciting joint project.
The simplest DIY album
To gain first experience, we offer a simple master class. It describes the standard algorithm of actions. You can make your own adjustments by replacing materials and using various decorations.
Materials and tools
For a simple homemade album we may need:
- thick cardboard;
- paper;
- cover material;
- soft lining material;
- tape or cord;
- scissors;
- hole puncher;
- stapler;
- paper cutting knife;
- ruler;
- scotch;
- glue stick or PVA;
- pencils, markers, paints.
Cover design
- The cover is based on pieces of cardboard the size of the album pages or a few millimeters larger.
- Soft lining material is cut out to the same size.
- Glue it to the cover.
- The top layer of the photo album is cut out with a hem allowance of 0.5 cm or more.
- The finishing material of the cover is glued along the perimeter of the cover from the inside. The sections are sealed with a sheet of cardboard or thick paper.
- The second part of the cover is done in a similar way.
The base is covered with decorative fabric, artificial leather or suede, and designer paper. Decorate to your liking.
Binding
You can connect the album sheets with or without binding. The first option is more labor-intensive, the second is very simple.
Holes are made in the album sheets at equal distances using a hole punch. Thread a ribbon or cord through the holes and tie the ends. You can use special split rings of a suitable size. For a homemade album, two or three of these clips are enough, but you can make more.
If desired, make an album with a classic binding.
- To fasten the sheets together, use narrow strips (3 cm) of a texture denser than the main pages. They are bent in half lengthwise. Carefully, as evenly as possible, glue the pages to the edges of the strips.
- The result is a booklet, the number of sheets in it is limited only by your desires. If you take the stripes in contrasting colors, you will get a very impressive design.
- For binding, the folds are glued with a thin cloth or gauze.
- For aesthetic reasons, a piece of braid or narrow tape is laid along the upper and lower edges. It will cover up sloppy folds.
- A strip of dermantine or thick fabric is glued on top. This will be the spine of the album. The cover is glued to the edges of the spine.
- The entire assembled structure is placed under a press until the glue dries completely. This must be done so that the product does not warp.
- The photo album is ready. All that remains is to decorate it, paste a photo, decorate it and come up with funny captions.
Decoration
All kinds of decorative elements are used for decoration: beads, rhinestones, lace, fur, artificial flowers, pieces of leather, curly pendants, decorative tape and much more.
For beginners, ready-made page templates are recommended - sketches with a ready-made layout of pictures, recommendations for color, materials and decor. As you gain experience, you will definitely develop your own taste and style and will create not according to prompting, but according to personal inspiration.
Try this unusual type of creativity, and you will understand how sweet it is: on a quiet, cozy evening, sit back on the sofa, unfold an album with photographs and immerse yourself in the magical world of memories.
Beginning of work
As mentioned above, scrapbooking requires a minimum of tools, but as you become more passionate about this type of creativity, you may need additional materials.
All the necessary materials and tools that will be useful for a beginning needlewoman
Let's list them all:
- Paper is the main element in scrapbooking. In this type of needlework, special durable cardboard is used as a base, and decorative paper with illustrations or ornaments. For those who are taking on this business for the first time, it will be convenient to use ready-made sets of several types of sheets that match each other in style and color.
- The second thing you can’t do without is scissors. Scissors can be any kind, the main thing is that they are sharp - the paper must be cut evenly, the edges must remain smooth.
- Double-sided tape is a very convenient thing for scrapbooking. When you need to glue voluminous or simply large parts, it is indispensable. The strength of the connection is superior to glue and does not leave dirty marks; it is a pleasure to work with.
- In some cases, you cannot do without glue. For example, when you need to add small details.
- Hole punches are a functional thing, and in some cases, a decoration tool. Sometimes you just need to connect several pages, this requires holes. And sometimes decorate the sheet with carved patterns.
- Stamps. With them, making beautiful inscriptions is as easy as shelling pears.
- Cutter or utility knife. Cutting a cardboard sheet in half or trimming a photograph with scissors is unlikely to work out neatly; here you will need a stationery knife, or even better, a cutter.
- And finally, a variety of volumetric decorative elements. Without them, a handmade postcard or album will be no different from ordinary store-bought items. Scrapbooking supply stores are simply eye-opening. Buy a few individual decorative parts to get started. And if you decide to engage in this craft seriously, it is much more profitable to purchase goods in bulk.
Volumetric decorative elements visually resemble a 3D picture.
When you have decided on all the tools and elements, it’s time to choose a place to work. Good lighting of the workplace and sufficient free space are important for scrapbooking.
Necessary materials for work
It is better to remove everything unnecessary from the table so that nothing gets in the way of your hands and small details are not lost.