They say that people pay attention to their hands first. The color of nail polish, rings, watches, the shape of nails - you immediately get a general impression of a person. No matter how expensive the jewelry, a bad manicure will ruin everything, but well-groomed hands will elevate you in the eyes of your interlocutor. Therefore, everyone who takes care of themselves takes care of their nails. If going to beauty salons is expensive or you don’t have enough time, you can learn how to do a hardware manicure at home.
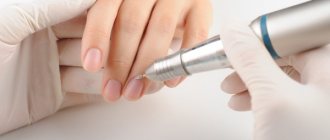
Hardware manicure is a manicure technique in which the master processes the cuticle and nail plate using a milling machine and cutter attachments. The device can perform all stages - from removing the old coating to polishing the cuticle.
How is it different from other types of manicure?
From the classic (cut) in that all manipulations take place on dry skin, and not on wet, steamed skin. Therefore, you will not need baths, towels or special salt - you will save time and eliminate the risk of infection through these means.
From the combined fact that the master works only with the device. The cutting of the keratinized layer of the cuticle is carried out with a cutter, and not with scissors or nippers. It's faster and safer.
It is for its non-traumatic nature and safety that masters and clients fell in love with hardware manicure. But these are not all its advantages. Let's tell you more about them.
Cuticle care
The skin has the ability to regenerate and, as a result, grow on the nail plate. This spoils the appearance of the manicure, as it becomes rougher and becomes noticeable to others. It is very important to take care of the cuticle not only after a hardware manicure, but also constantly. To this end, manufacturers of many cosmetic brands have produced a huge number of products that help soften, remove and moisturize this area.
It is very important to steam the cuticle for safe and effective treatment; rough skin is less susceptible to various manipulations. Various baths or special cosmetics are suitable for this. Next, you need to push back the skin that grows on the nail plate using an orange stick or a metal pusher. After which the cuticle must be cut with nippers and moistened with oil. Both specialized products and any natural oil from the pharmacy are suitable for this purpose. To maintain a neat appearance, you can push back the cuticle with your nails after each shower - at this point it is completely steamed, and this procedure takes only a few minutes.
Pros and cons of hardware manicure
Advantages
- Safety. Low risk of injuring the client, especially if he has thin skin and close capillaries, and low risk of infecting the client, since the procedure is sterile.
- Long lasting effect. Thanks to the even cut made by the cutter, “trash” and burrs do not appear on the cuticle. When performing a deep manicure, the cuticle grows more slowly, hands look well-groomed and beautiful longer, so correction can be done after 3 - 4 weeks.
- Convenience. For work you will only need cutters. There is no need to wrap your nails in foil to remove gel polish, or soak your hands in a bath to push back the cuticles and clean off the pterygium.
- Painless. Despite the fact that many clients are frightened by the sound of the device and the ultra-fast revolutions, such a manicure does not cause pain if the technician works correctly.
- Economical. Investments in the purchase of a machine and cutters will pay off in the first month of work if you plan to become a master. You will not need to spend money on regular sharpening of scissors/tweezers, cuticle softener (remover) and other products.
Flaws
In fact, there are few of them if the master has enough experience, knowledge and qualifications. It will be difficult for a beginner at first; he can damage the nail plate and injure himself or the client. The main disadvantages of this technique:
- the difficulty of performing a manicure for a novice master. Therefore, in many schools, they first teach classical and combined manicure, and only then - hardware;
- unpleasant or painful sensations if the procedure is performed by a beginner;
- not recommended for thin nails that are “rags” or neglected rough nails.
For which clients is a hardware manicure suitable?
- For those with rough, fast-growing cuticles.
- For those who are often injured by masters using scissors/tweezers during a classic manicure.
- For those whose nail plate has a dull color.
- For clients who have problematic nails: brittle, flaky, uneven.
- For everyone who values speed and high quality in manicure.
Note!
If the nails are affected by fungus, there are cuts, wounds or inflammations, then the client cannot undergo a hardware manicure.
What a beginner needs for a hardware manicure: a list of everything
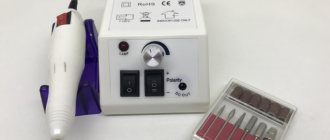
Manicure machine
For home use, a medium power device up to 45 W is suitable. For example, Nail Drill ZS-601. It has a smooth speed control from 0 to 35,000 rpm, which is carried out using a knob on the front panel of the device or a foot pedal. The direction of rotation of the nozzles is selected using a switch. There is a removable plastic holder for the router handle and holes for the cutters. Suitable for all stages of hardware manicure. Does not vibrate, works quietly. But it does not withstand long daily loads, so you should not use it for work - only for home.
Nail Drill ZS-601 35000 rpm/45 W
For professional use, you should take a closer look at a more powerful model – up to 65 W. The hit of all masters is Strong devices. For example, Strong 210/107 II has a rotation speed of up to 35,000 rpm. Equipped with a cooling system and ready to work continuously for 12 hours. If it overheats, it will automatically turn off - this guarantees a long service life. Lightweight and compact, so it won't take up much space on your desktop. The case has a convenient pen stand. Thanks to the collet mechanism, you can change attachments in a matter of seconds. During operation, neither the handle nor the device makes loud noises, vibrations or trembling due to four bearings.
Manicure and pedicure device Strong 210/107 II without pedal with bag
Cutters for hardware manicure
Mills are attachments on the device that are used to perform manicures. Depending on the material, they are divided into several types.
Ceramic ones are suitable for preparing the nail plate, treating difficult areas of skin and nails, removing dead skin, calluses, removing gel polish or artificial acrylic nails, as well as for grinding down thick nails. They are expensive, so they are usually not included with the device for home use.
Metal (carbide or alloy steel) are used to treat nails and cuticles. They can, for example, clean off the pterygium and open the pocket. They differ from others in that they do not file off the skin or nail, but cut them off, forming fine dust. Therefore, the master should always protect the respiratory system with a mask. Metal attachments polish the skin well, can file off the hard coating on the nails and remove length. Typically, masters use such cutters for most stages of manicure.
Diamond cutters are needed to process sensitive skin and thin nail plates. Using them, the master can level the nail, smooth out unevenness, polish the ridges and prepare the nail for coating. A large nozzle will remove the callus.
Combined (silicon carbide) are suitable for home use. You've probably heard about “sand caps” - these are disposable attachments for bullet cutters. Combination cutters cannot be sterilized.
For each stage of manicure, you need to select cutters according to the shape depending on the purpose.
- Cone – for removal of pterygium and initial treatment of the lateral sinuses.
- Ball - for cutting the cuticle.
- Bullet – for polishing ridges and proximal folds.
- Corn - for removing old gel polish coating.
- Flame - to open the pocket and remove the pterygium.
- Needle – for treating the lateral sinuses.
Pusher or orange sticks
These tools are needed to push back the cuticle - this helps open the pocket during manicure to create a coating “under the cuticle”. The pusher has two sides: a spatula for pushing back the cuticle and a hatchet for removing the pterygium.
The good thing about an orange stick is that it has a more delicate effect on the skin, and after a manicure it can be disposed of, which ensures sterility. The pusher is more effective, but must be processed and sterilized after each client.
Note! To disinfect and sterilize instruments you will need an ultrasonic cleaner and a dry heater.
Ultrasonic bath CD-7810(A) 50 Watt CODYSON 750 ml
Dry-heat cabinet GP-10 MO
Files for hardware manicure
You will need files of different shapes and abrasiveness. To choose them, you first need to pay attention to the grit. This is the number of abrasive grains per 1 square meter. cm. The higher the value, the more sputtering grains per 1 square meter. cm and, accordingly, the softer the file.
Interesting! Modern manufacturers produce metal bases on which disposable replaceable files are glued - this is convenient, sterile and safe. But if you choose nail files for home use, it is better to buy classic reusable files.
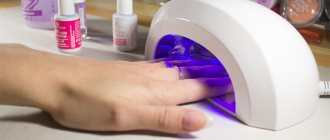
Manicure hood (vacuum cleaner)
An extractor hood (vacuum cleaner) is a special device that sucks up fine dust that is harmful to the respiratory system. Can be built-in, portable and floor-mounted.
- Built-in hoods are mounted into a manicure table and covered with a grill for safety. This is convenient because... At the beginning of a hardware manicure, the master only needs to press the power button.
- Portable ones are suitable for home use and for those craftsmen who value mobility and simplicity. This hood is easy to replace if it breaks and can be placed on the table in a way that is convenient for you.
- Floor vacuum cleaners are stationary structures of impressive size. They are installed in showrooms and are valued for their high power and efficiency. The ventilation unit is located inside the device, and the hose is supplied to the technician’s workplace. Nowadays you rarely see such a vacuum cleaner, because... it is bulky, takes up a lot of space and does not look aesthetically pleasing.
Note! The hood bag must be emptied and cleaned regularly. For convenience, there are replaceable disposable bags.
Other tools
Buff is a special file in the shape of a block. Used for polishing the nail plate to remove irregularities, pterygium residues and clean the surface before applying gel polish.
A dust removal brush will come in handy when performing a hardware manicure to clean the nail plate.
An antiseptic (disinfectant) must be applied before any manicure to clean and disinfect the skin of your hands and nails. During the manicure itself, you will also need it for degreasing, disinfection and dehydration.
Oil or cream will help consolidate the results of a hardware manicure, moisturize and soothe the skin. You can view the manicure cream here and buy cuticle oil using this link.
Hand and nail cream with keratin, tea tree oil and silver Green Professional Domix 500 ml
Cuticle oil Peach IRISK 15 ml
The basic set for hardware manicure has been assembled, now you can begin the process itself.
Criteria for choosing devices for manicure
Hardware manicure (training for novice specialists sometimes takes place on a self-purchased device) is closely related to understanding the criteria for choosing a device.
The first one is power. For personal use, you don’t need a very powerful milling cutter, so you should pay attention to models with a stated power of at least 35, but not more than 50 W. However, if the specialists are visited by at least 5 clients every day, then you should pay attention to models with a power of 100 watts or more to reduce the procedure time.
The second is the number of revolutions. Models with up to 20,000 rpm. suitable for home use. If the number of clients is more than 5 people per day, you should choose a device operating at 35,000 rpm. and more. In cases of professional manicure, the machine must have a speed of 45,000 rpm.
The next criterion will be the provided cutters included in the package. It is very good if the device is equipped with a starting list of basic attachments.
In the best case, you need to include among them:
- For treating rollers and cuticles.
- Nozzles for grinding work.
- Nozzles for polishing the nail plate.
- Attachments for working with keratinized skin.
The devices also differ in the method of clamping the nozzle. There are 3 types in total:
- manual;
- semi-automatic;
- auto.
Inexpensive models for home use use a manual clamp that secures the working part of the tool when tightening the washer. A more expensive device will be equipped with a semi-automatic method of fixing the nozzle when the lever is tightened. And the most expensive devices come with an automatic clamping system that locks the nozzle immediately after its installation.
Working tools for performing hardware manicure are equipped with a brushed or brushless motor. The difference is that a brushed motor is designed to last for several hundred hours, while a brushless motor lasts for several thousand.
A machine with a brushless motor will cost more, but it is quieter than its counterpart with a brushed motor, and is distinguished by the quality and durability of its design. Devices with a commutator motor, despite their shortcomings, can handle a home manicure quite well.
The last selection criterion is related to the fine dust released during operation of the machine. To reduce its amount, you can choose a model of the device with a vacuum cleaner built into the countertop, equipped with a retractable tray for quickly cleaning the filter from accumulated sawdust. If a vacuum cleaner is not provided at all, you can purchase it separately complete with a stand, dust collector and filter.
Step-by-step instructions for hardware manicure
Step one. Preparing the skin of the hands.
Treat your hands with antiseptic.
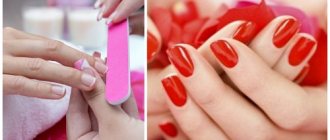
Step two. Shape sawdust.
Using a file, give your nails the desired shape: almond, square, oval or squaw. Maintain symmetry and check the accuracy of the sawdust. To do this, compare the nails on both hands in length and shape.
Step three. Preparing the nail plate.
At this stage we will need a pusher. Use a spatula to push back the cuticles on all nails, and then use a hatchet to clean off the pterygium.
Important!
Work carefully, do not make sudden movements and do not put pressure on the cuticle and nail. The pusher should lie almost parallel to the nail plate.
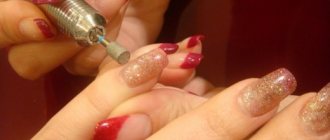
Step four. Hardware manicure.
Prepare in advance all the necessary cutters for manicure; they can be placed in special holes on the front panel of the device.
Remove the pterygium and lift the cuticle using a cone cutter. First, pass the device in one direction, then press the reverse button and process the nails in the opposite direction. The optimal number of revolutions at this stage is from 15,000 to 17,000 rpm.
Replace the cutter with another needle-shaped one. Treat the lateral sinuses, cuticle and lateral ridges.
Attention! To avoid making a cut, all cutters must be placed parallel to the nail plate.
Now replace the cutter with a “ball”. Use it to cut the cuticle. Movements should only be on the skin, do not touch the nail, so as not to injure it. Smoothly repeat the shape of the hole with the cutter, do not be afraid to turn your finger over in a way that suits you. The cuticle should be cut off in one thin strip. Do not hold the cutter in one place for more than 3 - 5 seconds, otherwise you will leave a cut.
Replace the cutter with a bullet grinder. Treat the side ridges and cuticles. The rotation speed of the cutter at this stage should be no more than 7 thousand rpm.
Step five. The final stage.
Lightly buff the nail plate using a buff – a couple of strokes in one direction is enough. Brush off excess dust and treat your nails with a degreaser. This completes the hardware manicure. Afterwards, you can start covering your nails with varnish/gel polish or moisturize your hands with cream and lubricate the cuticles with oil. Read more about applying gel polish in the article “How to apply gel polish?”.
Hardware cuticle processing technique
As mentioned above, the nail care procedure should begin with the treatment of the cuticle. This task is performed as follows:
- Applying a special softening agent to the cuticle.
- Shifting the cuticle towards the lateral skin folds using a wooden stick. Orange sticks are usually used for such purposes. If they are not there, you can use a plastic tool.
- Processing the side parts of the cuticle with a diamond cutter. When performing this task, it is important to ensure that the rotation speed of the nozzle does not exceed 8000 rpm. Otherwise, the skin may be seriously damaged.
- Detachment and slight lifting of the cuticle above the nail using the same cutter. During this operation, the nozzle should not touch the nail plate.
- Replacing the cutter and installing a cone-shaped nozzle (other shapes can also be used). With its help, the cuticle is partially removed.
- New cutter replacement and installation of a bullet-shaped attachment. It is used to grind the cuticle. If there are calluses or rough skin near the nail, they can also be removed with a larger attachment.
At this point, the work with the cuticle is completed and the processing of the nail plates begins.
Common hardware manicure mistakes
Work on damp skin. This is how the cutter catches and tears the cuticle. Do not steam your skin before the procedure!
Incorrect selection of technology. If your nails are in too bad a condition, then the device will not work for you. You will have to use a combined technique. If you try to treat the cuticle and nail plate with a device, you risk injuring the client.
Speed too high. For beginners in hardware manicure, it is better to work at medium speeds up to 15,000 rpm, so as not to make a cut and damage the skin.
Incorrectly selected cutter abrasiveness. Nozzles with a blue “belt” are suitable for rough cuticles, and with a red one – for thin and sensitive ones.
Hardware manicure at home is not as complicated as it seems! But only if you have been trained and have special knowledge. Otherwise, you risk damaging your nails and developing diseases.