Issues discussed in the material:
- The need for nail correction
- Types of correction of extended nails
- Gel nail correction
- Acrylic nail correction
- Correction of nail plates using tips
- Frequency of correction of extended nails
Well-groomed, beautiful nails are an important part of any woman’s image. Modern cosmetology offers many options that will help you create the desired manicure. If your nails are not naturally perfect, your option is extensions. With its help you can easily give your nails any shape. However, do not forget that after a couple of weeks, correction of nail extensions will be required.
Many people mistakenly think that this procedure is harmful and leads to splitting, increased brittleness, or even nail fungus. Such information is far from the truth. So that you are not overcome by doubts, read our article - it clearly describes the achievements of cosmetology and the safe conditions for correction.
The need for nail correction
The nail correction procedure is a sequential stage of manicure, which begins 2-4 weeks after extensions.
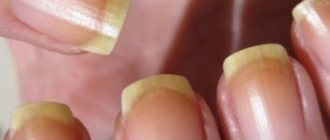
Nails grow on average 1–2 mm per week, but this varies from person to person. Some women have a higher growth rate, others have a lower growth rate, depending on their metabolic characteristics. When nails grow a few millimeters, the manicure does not look as neat and beautiful as on the day of the extension procedure, the pattern shifts, and the top coat wears off. Recommended articles on this topic:
- Therapeutic manicure to maintain healthy nails
- Nail polishing file: what is it for and how to use
- Cheap manicure files: how to choose a quality tool
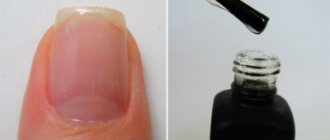
An overgrown nail hole also spoils the overall appearance of the hands, since there is no decorative coating on it at all. To restore the manicure and give the nails a well-groomed appearance, the extensions are corrected. You can resort to it if you need to repair one or more broken or cracked plates. Correction of nails after gel extensions may be required earlier than 2–4 weeks if the procedure was performed with low-quality materials, the manicure technology was violated, or the artist turned out to be poorly qualified.
Correction of acrylic nails
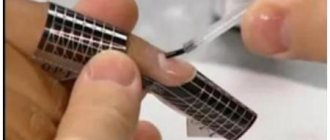
Before correcting extended nails with acrylic, it is important to prepare all the tools :
- A file with a huge grain (wide, optimally 100x100);
- Cap for monomer (a product is collected into it to avoid overconsumption);
- Powder;
- Degreaser, primer;
- Acrylic;
- Brushes and pipette.
You can use ordinary alcohol or any alcohol-based tonic as a degreaser - they have identical functions. Also, before correction, the old varnish is removed, and the nail is slightly filed.
Step-by-step instructions for beginners with a video on how to correct nails with acrylic:
Video: Correction of gel nails (nail design lessons) Video
Many modern ideas for correcting acrylic nails include the use of gel polish. It certainly looks hefty from the outside (if the right length and shape are chosen).
Types of correction of extended nails
Depending on the complexity, there are three types of nail extension correction procedures:
- Simple. The fastest in terms of execution time. It only involves the restoration of small cracks and painting over the nail pattern. They resort to it only if the coating has been slightly damaged.
- Average. Involves re-application of extension materials onto the client's nail. Thanks to this, the overgrown hole is processed, and the manicure is given a beautiful and well-groomed look.
- Complex. If the nail was broken or subjected to significant mechanical stress, the extension procedure will have to be performed again. Usually it is only required for one or a few nails. But in any case, this is the longest and most complex type of correction, thanks to which the nail is restored to its original appearance.
Correction is a necessary procedure that should be repeated periodically if you are extending your nails. However, in order not to bring your manicure to a critical state, you should treat your nails with care, avoid mechanical damage and exposure to aggressive chemicals.
Procedure for correcting nails with gel polish
Correction after nail extensions with gel polish is carried out in four stages:
- removal of old coating;
- giving nails the correct shape;
- cuticle treatment;
- applying gel polish.
First of all, you need to remove the old coating from the nail plate, but this may cause some difficulties. At home, they use a special liquid, cotton wool and foil. Some people file off gel polish with a regular file, but this can cause serious damage to the nail. Manicurists remove the coating with a milling cutter. It allows you to quickly and safely treat your nails.
In the process of sawing off the top layer of the coating, fine dust is formed. Once in the respiratory tract, it settles in the lungs, which can provoke the development and exacerbation of chronic diseases and allergies. To ensure that there is clean and fresh air in the master’s office, and the health of clients is not endangered, it is necessary to use special equipment - a desktop or built-in vacuum cleaner.
After removing the old coating, you can move on to the next stage of correction - shaping the nails. This is done with a special attachment for a router or a regular file. Then a softening agent is applied to the cuticle, gently moved and removed. After completing the preparatory stages, you can begin to extend your nails with gel polish. This procedure includes the application of a degreasing liquid, a camouflage layer, and a modeling transparent layer, which must be dried in a lamp. Next, the nails are polished and colored gel polish, decorative elements and finish are applied. Each layer is also dried in a lamp.
Step-by-step instruction
Nail correction with gel at home.
At the very beginning, it is important to remove the old polish and get rid of the cuticle, that is, do a classic manicure. If there is no experience in nail correction, then the cuticle is removed after all manipulations are completed. Otherwise, you can deform the base and make it sensitive. Below are step-by-step instructions on how to correct extended nails:
- Removal of the old gel layer and careful processing. Nail polish remover is taken and applied to the surface of the plate. The old layer where there are defects or peeling is removed with a file. The overgrown area near the base must be leveled with the level of the overgrown nail. There should be no air remaining under the gel, which subsequently leads to premature destruction of the material.
- The nails are given the necessary shape and length to create a new layer.
- Use a soft brush to thoroughly remove dust. The surface is carefully treated with a degreaser.
- To perform the procedure at home, single-phase material is perfect for beginners. It will help reduce correction time and simplify the task. When using a single-phase gel, there is no need to incur additional costs because it is quite liquid and easy to form. For more understanding, it is recommended to watch the video tutorial for beginners below.
- Coating nails with primer. This is a binding liquid that is used as a primer.
- Applying the first layer. It should be as thin as possible. After application, the nail is dried in an ultraviolet lamp for five minutes.
- When applying the second layer, it is necessary to fill all the areas that were cut out with the material. Drying time – 14 minutes (depending on the lamp).
- After complete drying, sawing and sanding is done using a hard file. At the end, the surface of the nail is degreased and dried.
- Applying the finishing layer and drying it in an ultraviolet lamp.
It is important that each layer is dried correctly. In this case, artificial nails will last a long time and will delight you with their attractive appearance. The end result will be a perfectly flat and smooth surface.
As you can see, the correction can be done at home, the main thing is to follow each step from the instructions step by step.
For French
Sometimes there is a need to correct a gel jacket; the following video tutorial for beginners will tell you about the features of this type of correction:
Gel nail correction
When correcting after nail extensions with gel polish, the following materials are used:
- degreaser;
- sticky layer remover;
- cuticle softening composition;
- modeling gel;
- antiseptic;
- acid-free primer.
Read material on the topic: Types of files for pedicure - proper care of feet
Also for correction you need the following set of tools:
- polishing buff;
- non-woven napkins;
- orange stick or pusher;
- special cuticle scissors and nail clippers;
- UV lamp;
- brushes;
- gel files: 100/100, 150/180 grit.
The procedure for correcting nail extensions with gel polish includes the following steps:
- Degreasing and disinfection of devices and nails, removal of varnish.
- Pushing back the cuticle with a pusher.
- Processing nails with a file and filing off the gel where it lags behind the nail plate. Aligning the transition from the regrown hole near the cuticle to the part of the nail with the old gel to obtain a smooth surface.
- Applying a primer to prevent the development of infection under the nail plate.
- Treat your nails with a polishing buff and remove any remaining old gel. Apply a new gel to the entire surface of the nail plate and dry it under a special ultraviolet lamp.
- Removing the sticky layer after drying. Processing nails with a file to give them the correct beautiful shape. Correction of irregularities. Uniform application of the base gel coat. More gel is applied to the transition area from the extended nail to the natural one to ensure the strength of the coating.
- Final correction of the shape and possible flaws with a file. Ensuring the preservation of the base coat until the old gel layer.
- Cleaning nails from dust with a brush.
- Nail decoration, design creation (french, drawing, etc.).
- Apply top coat and dry it under a lamp. To achieve a perfectly smooth finish, a polishing buffer can be used.
- Apply oil to the cuticle and side ridges of the nail.
How to correct extended nails
If you do not want to contact a specialist, and you are confident in your abilities, then you can restore your manicure yourself at home. You will definitely need to order or buy in the online store all the necessary materials and tools. Nail correction at home is justified from a financial point of view if you do it regularly. The main advantages of this solution are that you can make corrections whenever you want and help your friends.
Those who are interested in how to correct nails should first watch the lesson or read the step-by-step instructions with photos so as not to spoil the manicure. In addition to modeling material, you will need to purchase a UV lamp. To simplify the process, you can buy a manicure machine, the only drawback is that you need to learn how to use it and understand the sets of attachments. You don’t have to buy the most powerful router; you definitely don’t need a professional one. Its cost is relatively low, and you will use it for a long time.
- Yogurt in a slow cooker
- PCR analysis - what is it: how and where to take it
- Cupcake Recipes
Correction of extended nails with gel
This is one of the material options that is used for extensions and modeling. Correction of gel nails involves the use of specific materials that you will have to purchase yourself. For the procedure you need to have:
- degreaser;
- gel;
- modeling gel;
- liquid for removing the sticky layer;
- acid-free primer;
- antiseptic;
- cuticle oil.
This is the most minimal set for correcting extended nails with gel. If you used a single-phase gel for the first time, you can use it for correction. In the case of a three-phase procedure, any system is suitable. Next, you need to have a minimum set of tools that will help you do everything easily and quickly:
- lint-free wipes;
- buff for polishing nails;
- Ultraviolet lamp
- pusher or orange sticks;
- brushes for modeling nails with gel;
- gel files, suitable for 150/180 and 100/100 grit.
- nail clippers for cutting cuticles or blades;
- artificial nail clippers.
Below is a step-by-step description of how to correct gel-based nails. It is very similar to the procedure when working with acrylic. The instructions consist of the following steps:
- Degrease, disinfect hands, tools, remove varnish and paint from the plate (it is better to use products without acetone).
- Use an orange stick to lift the cuticle.
- Using a nail file, correct the shape, first file off those parts of the gel that have begun to lag behind. Then, in the place where the old coating begins at the cuticle, remove all the gel, you should get an imperceptible transition to the natural nail.
- Treat the surface with primer so that the infection does not get under the nail, remove excess with a towel.
- The smooth part of the regrown plate is cut off using a buff. Next, the hole is immediately filled with gel and dried with a UV lamp.
- When the material dries, you need to remove the sticky layer and form the correct shape. Use a file to immediately correct any unevenness, if any. The base layer of gel is applied evenly over all parts of the plate. A little more material is needed for the stress zone (just above the middle of the nail), but do not overdo it. Then dry the material again in a UV lamp.
- Then you need to correct the shape, smooth out defects and unevenness using a nail file. Be careful not to accidentally wear off the base layer to the old coating.
- Remove dust regularly with a brush.
- Before applying the finish, you need to make the desired design (drawing, French).
- Next, apply the finishing coat in one layer and dry under a lamp. To make it smoother, then apply a buff.
- You need to treat the side rollers and cuticles with nourishing oil (rub in like a cream).
Correction of acrylic nails
This type of artificial material is very popular among girls. Correction of nails with acrylic is carried out according to a similar algorithm, as with the option described above. To ensure everything works out correctly, you can use the instructions described below:
- Treat your hands and work surface with a disinfectant.
- Remove the varnish layer with a non-acetone product.
- Treat cuticles with a softening agent. After 2 minutes, use a wooden stick/spatula to remove the pterygium from the natural plate.
- Remove any remaining product using a lint-free cloth. File down the free edge with a nail file and set the desired shape. It is necessary to cut down 2/3 of the thickness of the material.
- Remove shine from the natural nail for better adhesion of the plate to the acrylic.
- Treat the peeling areas with a fine-grain nail file.
- Next, you need to treat the part where there is no acrylic using a degreaser.
- Treat the nail plate with a primer, which connects the keratin of the natural part with the artificial material.
- Run the simulation. Make sure that the acrylic is applied evenly over the entire area and does not penetrate the skin or into the lateral sinuses. Extension brushes should only be made of natural bristles; do not press too hard when applying.
- Then place your hands under a UV lamp for 2.5 minutes.
- Apply special oil to the cuticle.
Nail correction with shellac
This is a new type of coating that is easier to apply and lasts as long as gel/acrylic ones. Nail correction with shellac is carried out in two ways: with or without complete removal. To carry out the procedure, a standard set of instruments is used. Correction of gel polish is carried out according to the following instructions:
- It is recommended to treat nails that are too dry using a special activator. it consists of essential oils and water, apply it to the sides and keep for 5 minutes.
- Use a pusher to pick up the shellac polish. Carefully remove the coating; this is easier to do using the same activator.
- Using a nail file, give the regrown edge the required shape.
- Next, get a manicure or use a special gel to soften the cuticle and push it back.
- Clean the plate with a nail polisher until a shine appears. This step cannot be skipped; then it will be easier to remove the layer if necessary.
- Degrease the surface.
- Coat the substance that replaces the base and finish, dry it under a lamp.
- Select a shade of shellac, apply one layer to the surface, and dry.
- Then another layer, and again you need to dry it.
- Apply finishing coat last and let dry.
- Apply cuticle repair serum.
Nail correction using tips
This procedure is similar in its algorithm to working with gel extensions. Restoring sealing, updating the coating, replenishing modeling materials, giving an aesthetic appearance - all this is the correction of nails using tips. Below is an algorithm for acrylic technology:
- Saw off the overgrown tips with a reversible nozzle and process to a thin substrate.
- File the surface of the nail with a 180 grit file, smooth out the transition from the tip to its own plate.
- Use a spatula to push back the cuticle.
- Use a diamond attachment to perform a hardware manicure.
- Degrease, disinfect the nail, wipe with a napkin (dry).
- Apply a small amount of acid-free primer at the base of the tip.
- Lengthen the nail bed with camouflage acrylic and shape using a brush.
- Model the cuticle growth area and apex with matte, one-time powder.
- Next, you should compress the stress area.
- Use a clothespin to secure the clamp.
- Model the free edge of the nail with white acrylic. You can put it on two tips at once.
- Form the free edges with the base of a thick brush.
- Use the drum attachment (reversible) to file the tip of the nail.
- Treat the inner, longitudinal arch in the same way.
- File the cuticle and apex area with the “corn” attachment.
- Use a 100 grit file to file down the nail plates.
- Sand the inner arch of the nail using the reverse corn attachment.
- Use a carbide tip to treat the hyponychium area (where the inside of the nail comes into contact with the skin).
- Treat the outer and side parts with a 100 grit file and remove dust.
- Coat the inside of the loose tips with finishing gel without sticky salt.
- Cover the outside with gel too.
- Keep your hands under the UV lamp for 2 minutes.
Acrylic nail correction
Correction after acrylic nail extensions is performed in several stages:
- Treating hands, tools and work area with antiseptic.
- Removing nail polish with liquid without acetone.
- Treating the cuticle with a special softening agent. Subsequently pushing back the cuticle from the nail with an orange stick.
- Removing remover with a non-woven cloth. Giving your nails a beautiful shape. Removing 2/3 of the thickness of the old material.
- Degreasing the nail for better adhesion to acrylic.
- Processing of exfoliated areas with a fine-grained file.
- Applying a degreaser to the natural part of the regrown nail.
- Treating the regrown edge with a primer.
- Nail modeling. Uniform application of acrylic, preventing extension material from getting under the cuticle and side ridges of the nail. This action is performed with a special natural bristle brush without excessive pressure.
- Drying the material in an ultraviolet lamp for 2.5 minutes.
- Applying oil to the cuticle.
Important details. Modern extension materials have a number of disadvantages: acrylic can cause allergies due to its pungent odor. After hardening under an ultraviolet lamp, extension gels become flexible and do not hold the shape of the nail well. The problem can be solved by using polygel, or acrylic, when carrying out correction after nail extension, which ensures the hardness and strength of artificial materials.
Nail correction with gel and acrylic at home
Correction of extended nails - systematic updating of the structure of the artificial part of the nail, improving the appearance of the manicure.
In this article we will tell you how correction is performed correctly, and video lessons will help you update the structure and shape of gel or acrylic nails at home. To make artificial nails last longer, make the first correction 15-20 days after extensions. The original beauty of the artificial part is restored and the natural nail plate is strengthened. First, we will look at the general principles of nail plate correction, and then we will talk in detail about the features of nail correction with gel or acrylic at home. It is necessary to restore the shape of the nail (it grows and loses it), and reduce its length. Often the nails on the index fingers grow downward. It is necessary to raise the beak tip so that the manicure is even. Specialized attachments will help improve the condition of the inside of the nail. Features of gel nail correction: The skin of the hands must be disinfected, and the strip of natural nail on which the gel is planned to be applied must be degreased. Using a spatula, carefully push back the cuticle and file off 50% of the outdated gel with a rough nail file. We try to file down the part of the nail that has grown near the cuticle so that the fresh gel adheres better. The nails of each hand must undergo a series of processes before the procedure: disinfection, primer, bonder, ultraviolet lamp. Next, we correct the nails with gel. Apply a couple of balls of gel (up to 3), drying each ball with a lamp for several minutes. The initial layer is thin, then the thickness increases. When there is enough gel, remove the excess with acetone. All that remains is to file the nails to give them the desired shape. A coarse file is used, and then a fine file. Correcting gel nails at home is no more difficult than doing their initial extension. The difference is small - now you need to cut the nail as short as possible, file it and, after treating it with a primer, stick on the tip. Special nippers will help you adjust the length of the tip, and a nail file can easily achieve the desired shape. After correction with gel, your nails will look great and will not break or peel. Features of acrylic nail correction: The nail is filed, especially carefully, on the line between the natural nail plate and additional material. Next, degrease the nail and cover it with a compounding consistency so that the liquids do not end up on the mucous membrane or cuticle. Place the acrylic on the nail plate, creating a shape identical to the natural one. Then we give the masterpiece time to harden (about 4 minutes). Then we file and polish the surface of the acrylic nails until they shine. We repeat the entire procedure for each nail. Many women prefer, after the procedure of nail extensions with gel or acrylic, to constantly maintain their shape, size and general appearance for a long time, rather than constantly visiting a beauty salon, removing old artificial nails and re-doing extensions. Below you will find training master classes for beginners, with the help of which you can keep your manicure elegant for a long time at home. Now let’s take a closer look at how to correct extended acrylic or gel nails at home. Step-by-step instructions will help you make the correction correctly and flawlessly, and your manicure will look as if you had your nails done in a beauty salon again!
Now you know how to correctly correct nails with gel at home, what materials and tools you will need for this procedure.
Video lessons with step-by-step tips from professionals answer the question of how to correct extended nails at home. VIDEO MATERIALS: To the main page
ALSO FIND OUT...
| Comments | Add new | Search |
Children's Portal: Home Page
3.26 Copyright (C) 2008 Compojoom.com / Copyright (C) 2007 Alain Georgette / Copyright (C) 2006 Frantisek Hliva. All rights reserved."
Related materials:
- Exfoliation is known to help get rid of dead skin cells using abrasive scrubs and cosmetic exfoliants. On the hair...
">Peeling the scalp at home
- My little daughters are 5 years old and I love experimenting with different options for styling braids, twists and curls on their long hair...
">Easy hairstyles for kindergarten for girls 3-5 years old
- A properly executed hairstyle for competitive ballroom dancing is an important element of the aesthetic appearance and unconditionally adds charm to the stage…
">Ballroom and ballroom-sports hairstyles for girls 10-14 years old
- When a girl gets ready for school early in the morning, she is faced with the task of choosing a suitable hairstyle that can be done quickly enough before going out...
“>How to quickly create a beautiful hairstyle for a schoolgirl
- Are you the mother of a beautiful baby aged from one year to seven years? Then you know very well how difficult it is to come up with beautiful hairstyles for…
">How to make a child's hairstyle for a girl from ponytails and braids
The following materials:
- If you are going to have your nails extended with gel or acrylic for the first time, then before performing the procedure, be sure to read the information on how to…
“>How to properly remove gel or acrylic nails
- The technique of nail extensions is constantly evolving, and crystal nails can easily be considered one of the most exquisite decorations for women’s fingers…
“>Crystal nails. Gel extensions and crumbs for design
- If soft and brittle nail plates do not allow you to create a fashionable nail design, then arched gel modeling will help strengthen them, give them freedom…
“>Video lessons on arched gel extensions and photos of different nail shapes
- Every modern woman strives to give her nails a beautiful, graceful shape in accordance with the fashion trends of the current season. Nevertheless, …
“>Square, round or almond nail shape. Gel for extensions
- If you have short and not very strong nails, but you want to temporarily create a chic manicure on long nails under an elegant evening dress, then...
">Step-by-step video and photo lessons on gel nail extensions
Previous materials:
- In this material we will look at the most popular methods of nail extensions at home and talk about what materials are needed for a particular sp…
“>Learning how to do nail extensions at home. Photo, video MK
- Many Bebi.lv visitors are interested in how to extend nails with acrylic at home and ask to post visual photos and video tutorials with step-by-step training on…
“>Acrylic nail extensions. Photos, videos for beginners
- In this material you will find useful tips on how to perform a modern manicure at home, and video training on nail extensions using...
">Gel nail design. Home extensions, photo and video MK
- Many women are not always able to grow beautiful, long and strong nails, so some of them use false nails. One broken length...
“>How to extend nails with gel at home. Photo, video MK
Correction of nail plates using tips
Correction after nail extensions using tips (special artificial overlay plates) involves restoring the integrity of the coating, modeling the shape, and giving the manicure a beautiful and well-groomed look.
How to properly correct nails after extensions:
- Overgrown tips are cut off with a milling cutter, and the nails are processed down to the base.
- The nail plate is filed down, creating a smooth transition from the tip to the natural nail.
- The cuticle is moved with an orange stick.
- A hardware manicure procedure is carried out using a diamond cutter attachment.
- Nails are degreased, disinfected, and wiped with a non-woven cloth.
- A primer is applied to the base of the tip.
- The nail bed is lengthened by applying camouflage acrylic gel using a special brush.
- Light pink powder is applied in the transition zone from the tip to the natural nail.
- Crimp the nails in the stress area.
- The clamp is fixed with a special clothespin.
- White acrylic is applied to the free edge of the extended nail.
- The ends of the nails are filed with a router using a special “drum” attachment.
- The inner curve of the nail is treated in the same way.
- The cuticle is processed using the “corn” nozzle.
- Nails are filed with a file with a hardness of 100 grit.
- The arch of the extended nail is treated from the inside with a “corn” attachment.
- The side and outer zones are filed. Clean off the accumulated dust with a brush.
- A top coat without a sticky layer is applied to the inside of the nail plate.
- Gel is applied to the outside.
- Dry the nails under an ultraviolet lamp for 2 minutes.
Frequency of correction of extended nails
Many people wonder how often they need to correct extended nails.
There can be no clear answer to this. It all depends on individual characteristics, such as the rate of nail growth, fragility, and susceptibility to mechanical stress. It is also important what field you work in and whether your work activity involves the use of household chemicals. On average, the correction procedure after nail extensions should be carried out once every three weeks.
If your nail growth rate is low, you take good care of your hands and wear protective gloves when necessary, you will be able to make corrections less often. If by nature your nails are weak and brittle, and you have to do a lot of manual work, which negatively affects the condition of your manicure, then correction after extensions will have to be done more often. Over time, you will determine the frequency that is optimal for you. This will help you make an appointment at the manicure salon on time.
Nail extensions are a current and popular beauty service. It is worth remembering that it requires correction after a certain time, which is advisable to do in the salon. However, correction of gel and acrylic nails can be done at home if you are careful and patient about this procedure.