Dry manicure at home: the essence of the process
This type differs from the traditional one in that a bath is not taken immediately before the ritual. A special feature of the session is the extension of the durability of the varnish due to the lack of contact with liquid. After all, due to steaming, the nails acquire a flat shape, and after complete drying, they return to the usual bend of the plate. Due to such deformation, the coating can easily crack. Traditionally, this type of nail art is classified as untrimmed, because during the manipulations the cuticle is not damaged, and with repeated repetitions, it stops growing altogether. Exceptions are combined options and individual characteristics of human nails.
If your nails are brittle and your skin is naturally sensitive, you can care for your hands up to twice a week at home. To do this, you just need to purchase a set for dry manicure and allocate 20 minutes of free time.
How to do it right
Doing a dry manicure at home is not at all difficult. But experts advise first going to a salon and getting a professional trimmed manicure. Only after this the unedged method will effectively maintain the condition of the hands. But at the same time, it should not become a one-time event dedicated to an important event, but a permanent procedure, otherwise there will be no benefit from it.
For the first time, it is better to get such a manicure in a salon.
At the very beginning, you need to make preliminary preparations.
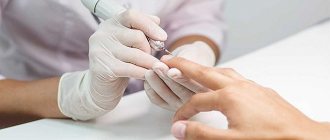
- To remove hangnails, you need to prepare nail clippers. But not the old rusty ones, but sharp and high-quality ones, so as not to spoil the nails themselves and the skin that makes up the periungual bed.
- You will need two nail files, with a thick and a thin abrasive material. A thick nail file is needed to create the basic shape, and a thin nail file is needed to finish the final sanding of the edges.
- You will also need an orange stick or simply a metal spatula from a manicure set. These tools will be used to process the cuticle.
- You need to prepare cotton pads and soft cellulose napkins for work.
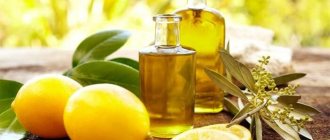
- You can’t do without a nail polish remover. Experts recommend giving preference to products that contain extracts and oils that facilitate additional nail care. You can also use napkins with special impregnation. For fragile and weakened nails, you need to choose a product that contains moisturizing and nourishing components.
As for cosmetic preparations, you should have a special set for dry manicure
.
- For unedged manicure, you need to use special preparations to remove the cuticle. In addition to the previously mentioned fruit acids, they also contain aloe extract, vitamins and additives that have a mild peeling effect. This will give a triple result: softened cuticles, their removal and growth inhibition. If the cuticle does not come off on its own, it can be removed with a stick or spatula. It is especially convenient to use the product in the form of a felt-tip pen, which can simultaneously soften and push back the cuticle.
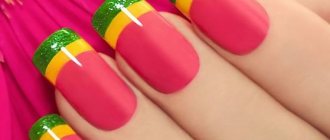
- Base varnish or base is a transparent liquid with a pinkish tint. This product is needed if a richly dark varnish is applied. It will protect the nail plate from the aggressive colored pigment contained in the varnish and causes yellowing of the nail over time (this could be observed by everyone who used varnishes). A base containing vitamins, calcium or proteins is especially useful.
- Safe nail polishes.
- A scratch-resistant fixing varnish that can protect the nail plate from other mechanical damage and make the color of the varnish richer.
- A pencil with corrective properties for eliminating blemishes, the core of which is impregnated with nail polish remover. This is a useful thing, but can be replaced with a simple cotton swab, pre-soaked in nail polish remover.
On topic: Butterflies on nails. Butterfly nail design
After preparing cosmetics, spatulas, files for dry manicure
and other tools, you can begin to perform the manicure itself.
First, the nails are prepared: a day before the procedure, the remnants of the old varnish are removed, which will allow the nails to rest and breathe a little.
The nails are given the required shape, and first it is straightened: a rectangular shape is easier to process, and the nail plates are also less damaged. Nippers and a thick file are suitable for this work.
Using a smaller file, the nails are completely formed. If, after running along the edge of each nail with your fingertips, the edges are smooth, the files can be put aside.
The felt-tip corrector can easily be replaced with a brush dipped in nail polish remover
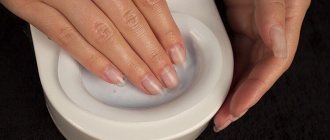
After these steps, you can begin removing the cuticle. A cuticle softener is applied: the thin skin of the nails is covered with liquid for 5-7 minutes. Then, using the blunt edge of a wooden stick or spatula, the cuticle is carefully lifted and carefully moved to the edge of the periungual bed. Then the product is finally removed and the remaining skin on the nail is removed with the sharp edge of the stick. The nail plates are thoroughly cleaned of the remaining drug with a cotton swab dipped in milk or lotion.
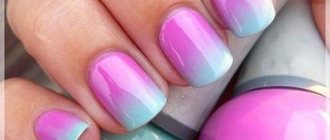
The base is applied to the nails: a drop of it is placed in the middle of the nail and evenly distributed with a brush over its entire surface. After the base has dried, decorative varnish is applied.
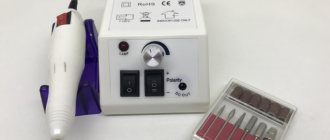
Dry hardware care option
Dry hardware manicure is a type of European unedged manicure. In this case, the cuticle is gently freed from dead cells, remaining intact. Based on the principle of operation, the device resembles a drill. The essence is the effect of a machine with rapidly rotating attachments on the tip. The difference between this session and a regular hardware session is only in the absence of steaming the nails before the start of the ritual.
Procedure execution diagram
- Clean your nails with nail polish remover without acetone.
- Soften the cuticle with the emulsions included in the kit. Push it away with an orange stick.
- Holding the device like a pen, perform the session only on dry skin.
- Do not press the device with the rotating attachment tightly to the surface of the nail bed. This persistence can lead to injury.
- The medium abrasiveness of the nozzles is designed to remove “dried out” areas of the skin of the hands and the side rollers of the fingers.
- The nozzle in the form of a small ball cuts down excess cuticle.
- Low-cut attachments are designed to remove dried calluses on the palms.
- Polish the surface of the plate, touching it only with the edge of the nozzle. For polishing, you can use the sponge attachment from the set.
- After finishing the treatment, apply nourishing cream to your hands and lightly massage your palms.
- After finishing the massage, apply it to the varnish, it is better if it is bio-varnish, because this coating has less effect than others on the quality of the nails.
Useful recommendations for hardware care
- Be sure to keep the nozzle at an angle of 45 degrees.
- Start processing in the center, moving towards the edges. Do not keep the attachment in one place for a long time to avoid damaging the nail.
- A mechanical file for dry manicure should rotate at low speeds. This way you will avoid damaging the record.
- Hardware care at home is recommended to be carried out by amateur machines for home use. Professional devices require experience and skill.
Dry combined manicure
For comprehensive care of the nail plate and hand skin, any woman can take advantage of a symbiosis of cosmetic procedures. This type of nail care does not injure the cuticle, but it is possible to trim dried calluses and side ridges on the fingers.
Disadvantages of combined nail art
- Increased time spent.
- The need to master several techniques for their successful application.
- Increasing the required tools.
- Searching for an algorithm of actions that is optimal for your nails.
Combined manicure technology: classic and European
To combine the two most optimal options, you will need:
- orange stick;
- metal spatula (pusher);
- nippers and scissors;
- cuticle remover;
- files of varying degrees of hardness;
- buff for polishing plates;
- cuticle oil, cotton pads.
Instructions for action:
- Use an iron spatula to push back the cuticle.
- Apply remover to the root of the nail and wait 10 minutes.
- Clean cuticles with an orange stick.
- Wipe the surface of the nail plate with a disinfectant.
- Using scissors or nippers, clean the lateral periungual areas of the skin, removing irregularities and hangnails.
- Polish the surface and give your nails the desired shape with a hard nail file.
- The final touch is to apply varnish, you can use El Corazon Varnish, it has healing and nourishing effects.
Before mastering how to do a combined manicure, you should do each of its component parts separately several times.
In order not to embarrassly hide your hands behind your back when the attention of a stranger is drawn to your hands, we suggest the most acceptable method of hand care - dry manicure. The procedure has already won thousands of fans around the world with its gentle effect and amazing results.
Classic (edged) manicure
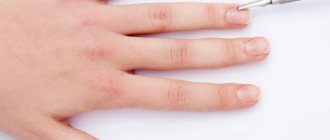
The main difference between a classic manicure and all others is that it is performed manually, without the help of a machine (milling machine). The nails are shaped with a file, and then the fingers are dipped in a bath of warm water for about five minutes, after applying a composition to soften the cuticle to the skin. When it gets wet and becomes more pliable, the master begins manicure: he pushes back the cuticle with a special tool - a pusher, and then trims it with scissors or tweezers and removes burrs.
The downside is that with this method it is easy to injure a person, especially if the cuticle is thin and almost invisible, and the blood vessels are located close to the skin.
Who is it suitable for?
For those with a pronounced elastic cuticle that grows greatly, as well as for those who value the speed and accessibility of the procedure.
Who is not suitable for?
People with sensitive skin around the nails or mildly dry cuticles. And for those whose capillaries are very close to the skin.