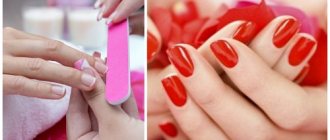
What is an unedged manicure?
It is also called European. This method of hand care is considered safer than the classic one. The bottom line is that to remove the cuticle, they do not use cutting tools, but special means that dissolve it.
You may be interested in: Manicure machine: reviews, review, instructions
All other procedures that an unedged manicure involves are standard. This includes shaping the nails and polishing the plate, as well as varnishing. If desired, it can be a decorative or medicinal product.
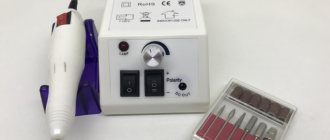
Cutters for hardware manicure for beginners
Milling cutters vary in material, shape, diameter and hardness.
For beginners, it is recommended to use ceramic tips. They are quite soft, which means they are safer. But there is also a drawback - such cutters quickly become unusable.
Experienced craftsmen use diamond bits. With their help, you can treat the free edge of the nail, side ridges and cuticles, and remove rough skin.
Milling cutters come in various shapes. Each of them is intended for a specific area of work, but many can replace each other:
- “olive”, “bud”, “oval” - used to remove cuticles and treat side ridges;
- “ball” and “flame” also cope with this task;
- a “needle” is needed for treating cracks and side ridges, for rounding the corners of the nail, as well as for removing gel polish;
- a straight and truncated cone helps remove detachments and smears of gel polish, and also polishes and grinds well;
- a reverse cone, in addition to the above, creates a smooth edge of the nail;
- rounded cylinder - designed for processing side ridges and polishing the nail before extensions;
- straight cylinder - for modeling the free edge of an artificial nail, treating calluses and corns.
The hardness of the nozzles is determined by the colored notches that the manufacturer applies to the base. The classification principle is simple: the darker the color, the higher the hardness. It is not difficult to guess that the black and blue stripes will mean a high degree, and the red and yellow ones will mean a low degree.
During the procedure, we recommend using hard attachments first, gradually moving to medium and soft ones.
The small diameter of the attachments is intended for manicure, and the large diameter is intended for use during the pedicure procedure: with the help of such cutters it is easy to remove calluses, corns and other aesthetic imperfections on the feet.
Planet Nails, Manicure and pedicure device Orbita Smart
Manicure and pedicure device for treating nails.
(154)
RUB 11,050
RUB 11,050 Buy
Milv, Watermelon Nail Oil, 15 ml
Strengthening nail oil with mastic tree resin.
(17)
200 rub
200 RUR Buy
Difference from classic manicure
The European method is based on the use of a softening gel, which allows you to delicately treat the cuticle. Classic edged manicure is the complete opposite. For this technology, craftsmen use wire cutters. This tool cuts off excess cuticle. Hence the appropriate name.
You may be interested in:Beautiful summer manicure for a teenage girl
When performing a classic manicure, accidental cuts and wounds are possible, which increases the risk of infection. That is why you need to choose a master especially carefully.
With an unedged manicure, cutting tools are not used, which significantly reduces the risk of injury to the cuticle and damage to the integrity of the skin. In addition, disposable orange sticks are used for processing. This allows you not to worry about sterilizing your instruments, as is the case with a classic manicure.
Advantages
- Safety. Because there are no cutters, there is no chance of cuts.
- No redness due to the fact that the cuticle is not injured.
- Simplicity. If you have the necessary tools, it is easy to perform an unedged manicure at home.
- Rapidity. If you choose the so-called dry method, you won’t have to steam your hands. Accordingly, less time will be required for the entire procedure.
- Durability of the coating. With dry processing, the varnish applied after a manicure will last longer.
How often should you do an unedged manicure?
Skin regeneration occurs differently in each person. It depends on the general condition of the body. However, in any case, an unedged manicure needs to be done less often than a regular manicure - about once every 2 weeks. For delicate skin, treatment once a month will be sufficient. So just watch your hands. They themselves will tell you that it’s time to repeat the procedure.
However, in any case, an unedged manicure needs to be done less often than a regular manicure - about once every 2 weeks.
Advice! To prevent your skin from becoming stained after removing bright nail polish, apply any cream, preferably a rich cream, to your hands before the procedure.
Flaws
You may be interested in:Nail shapes for manicure: regular, square, almond, oval, round, sharp
Delayed effect. To achieve a decent result, you will have to be patient. An unedged manicure at home is unlikely to give you immediate results. Especially if the cuticle is hard.
You need to be patient, carry out several procedures, and only after that will you be able to understand what effect an unedged manicure can give at home.
We do a European manicure
European manicure can be done quite quickly, since the technology for its implementation is very simple. You will need a minimum of tools, skills and time to get your nails in order. The process of how to do a European manicure is presented more clearly in the video. It can be divided into several stages:
- Finish the free edge of the plate with a glass file. For these purposes, a universal file is suitable, but if the length needs to be removed significantly, then two files of different degrees of abrasiveness may be useful. The use of metal tools if you decide to do a European unedged manicure at home, as in the video, is unacceptable. In this type of processing, the ideal shape of the plate and its free edge is very important, and therefore the sawing process should be given the maximum possible time;
- If necessary, apply cuticle remover. You need to keep it on your nails for exactly the amount of time indicated in the instructions. The time cannot be reduced, as the processing will be ineffective. But you shouldn’t increase it either, as this can cause significant harm to the health of the nail plate, as well as the skin of the pre-nail ridges;
- If you have passed the stage of using the remover, then simply apply a little special product to the cuticle and wait a while. During this period, the cuticle will become more elastic and soft, and it will be easier to move it. However, many of those who have chosen an unedged European manicure and know how to do it correctly use the remover constantly to simplify the process and increase the time between treatments;
- Gently push the cuticle towards the nail fold using an orange stick. Now remove any excess product from your hands using a napkin. Wash your hands thoroughly, especially if you have used a remover;
- Give your hands a light massage and massage a nourishing cream into them.
Below is a video that explains what a European unedged manicure is and how to do it at home. With its help, you can avoid such common mistakes as using metal tools when processing, tilting the file at an angle other than 90 degrees, as well as filing on wet nails, which is a significant mistake and negatively affects the health of the nails, etc.
[yandex3] [google3]
Adviсe
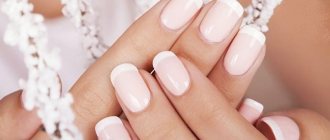
Having understood the essence of the method, it is easy to guess who this method is suitable for. An unedged manicure, the photo of which is presented in the article, is ideal for girls with thin skin. If the capillaries are located close to the surface, the classical method is undesirable. High probability of cuts.
European manicure involves delicate care, without the risk of skin damage.
Girls who have rough cuticles can also switch to the untrimmed method. However, you need to be patient. The effect will be cumulative. Only after several procedures will you be able to boast of a well-groomed cuticle.
How to do an unedged manicure?
There are several ways to do it.
- Dry does not require steaming. Simply cleanse the skin and apply a special product that can soften the cuticle. Dry manicure is ideal for brittle nails.
- Wet is recommended for ladies who have burrs, cracks and other damage. Before performing a European manicure, take a bath with special oils and lotions. They not only soften, but also nourish the cuticle at the same time.
- The hot method involves heating a special lotion or cream to 50 degrees. An electric bath is used for this. The hot method is most often used in spa salons. Recommended for brittle, dry nails or problematic cuticles.
Necessary tools for unedged manicure
First of all, you should purchase disposable sticks for working with cuticles. They can be wooden or plastic. The latter often have a silicone tip, making this tool very convenient to work with. It can also be used several times, disinfecting before each use. In turn, wooden ones are considered a more budget option. Therefore, they are perfect for beginners. But still, you should not use the same orange stick more than twice.
The next thing without which it is impossible to do this type of manicure is a liquid to soften the cuticle. There are quite a large number of such funds. But we still recommend choosing those that contain fruit or lactic acids. Also pay attention to the fact that the composition contains essential oils or plant extracts. Due to this, they have a gentler effect on the cuticle and do not harm the nails.
The next thing to choose is nail files. Pay attention to glass and ceramic ones, as they do not injure the nail plate. In addition, they are durable, which is good news. To treat the surface of your nails, also purchase a special buff or polishing file. They help get rid of unevenness.
And of course, you should definitely purchase various cuticle care products. This could be a hand and nail cream or a special oil. Choose what you like best.
Preparation
Even before you start performing an unedged manicure step by step, it is recommended to treat your nails a few hours in advance to give them a little time to “rest” and recover.
It is necessary to remove the old coating using vitamin nail polish remover, which does not contain acetone.
Particular attention here should be paid to nails that have been painted with gel polish. You will need:
- cotton pads;
- special liquid;
- some foil;
- wooden sticks or pusher.
You may be interested in: Geometry on nails: step-by-step application instructions, fashionable manicure, using a template and giving your nails a beautiful shape
You should also be patient. The procedure is not quick.
First you need to file down the top so that the liquid penetrates better. Cotton pads soaked in it are applied to the nails, then wrapped in foil. Exposure time – 10–15 minutes. After this, the remaining shellac is scraped off with a pusher or stick.
If you have to do an unedged manicure, it is important to know that the skin of your hands should remain dry.
If you choose the wet method, after the steam bath, be sure to blot off excess liquid with a napkin. It is also recommended to wait about ten minutes before starting treatment so that the beneficial substances are absorbed.
By the way, an aroma bath can be performed more often than an unedged manicure procedure. This will make the cuticle and nail folds softer, and at the same time whiten the plate.
Wet manicure
A wet manicure begins with washing your hands, followed by a warm hand bath (this manicure is called wet or maceration), which softens the cuticle and has a soothing effect on the skin of your hands in general.
You can apply a special composition to soften the cuticle and oil to nourish the nails on and around the holes. The softened cuticle is pushed back with a manicure stick. Usually they use either orange wood sticks or special pencil-like pumice sticks. If the cuticle is not removed in this way, then it is cut with special scissors. Since damage to living tissue can lead to infection, the formation of panaritium, and hangnails, precautions must be taken. All instruments must be treated with a disinfectant solution or treated thermally.
What will you need?
In order to perform a high-quality unedged manicure, you need to prepare the following products and tools in advance:
- Cuticle softener. It is recommended to choose bottles with a narrow spout. This will make it possible to apply the material most accurately and economically.
- File. Allows you to give your nails the desired shape. Choose files designed for natural nails. After all, European manicures are not done on artificial ones.
- An antiseptic is useful for cleaning your hands before leaving. This will destroy germs.
- Orange stick. Useful for processing cuticles. You can use a pusher instead.
- Cuticle oil. Necessary to protect delicate skin from aggressive softener.
- Napkins. Will be needed to remove excess product.
Step-by-step instruction
After careful preparation, you can start performing unedged manicure at home step by step. The algorithm is as follows:
- To protect the cuticle from the harmful effects of the softening liquid, you need to use oil. It is available in pencils or bottles. Choose the option that is most convenient for you. Apply a thin layer of oil to the cuticles and leave for a while, allowing it to be absorbed. Rub the remaining product into the skin.
- Now you need to use a cuticle remover. If you look at a photo of an unedged manicure at home, you can understand that the gel is carefully applied to the cuticle. In this case, you need to try not to touch the rest of the skin.
- It takes a certain amount of time for the product to take effect. There is no universal advice. You must read the instructions carefully. All cuticle gels differ in composition and, accordingly, exposure time. Each manufacturer has its own recommendations.
- After waiting the required time in accordance with the instructions, you can begin processing the cuticle. First, the remaining gel must be wiped off with a napkin so that it does not interfere with processing.
- Using a wooden stick, you need to remove excess softened cuticle, simultaneously pushing back the skin and giving a neat shape to the nail hole.
- The final stage will be the application of a nourishing cream, since the nails and the skin around them have been exposed to an aggressive agent, as well as coating with varnish - decorative or medicinal.
After carrying out the procedures described above, every lady will be able to enjoy the magnificent result of an unedged manicure.
Transition
There are many opinions on how to switch from a trimmed manicure to an unedged one. This process, in any case, requires quite a lot of patience. In addition, for quite a long time, your plates will look completely imperfect. Therefore, it is better to make the transition on vacation or during the holidays, that is, when the perfection of a manicure is less important to you. The most appropriate transition would be according to the following scheme.
Now to perform a manicure you will only need orange sticks, a file, cuticle oil and a cuticle remover. You will only need the remover for the first time; in the future you can refuse it. It is also important to remember that the basis of an unedged manicure is care, and therefore you need to regularly do hand baths, light hand massage and moisturize your hands with a nourishing cream. It is also good to use cuticle oil, which will moisturize and make it softer, and also slow down growth. At first, manicure should be performed according to the following scheme:
- Processing the free edge, sawing it off;
- Applying remover;
- Elimination of cuticle residues.
https://youtu.be/0Z3db6eyUWw
At the very beginning of the transition, you may not even need orange sticks, since you can handle it with just a cuticle remover. It is better to apply it before removing the manicure polish. This will help protect the plate from the aggressive effects of the acids included in its composition. If the cuticle is too thick and the use of the product does not bring noticeable results, then it can be moved. It will look less neat.
After some time, the cuticle will wean itself from mechanical action and removal with scissors. After this, it will significantly slow down its growth, since its accelerated regeneration is caused by the activation of the defense mechanism. In combination with the fact that you systematically nourish and moisturize it, it will become thinner and you can refuse to use a remover.
Which varnish should I choose?
When deciding what product to cover their nails after treatment, many girls have doubts. Which is better: regular varnish or shellac?
The last option has gained particular popularity. And it’s no coincidence. After all, shellac can last for several weeks. However, as the nails grow, the coating loses its appearance and needs to be replaced. But this doesn’t stop some: they are able to wear the same polish for longer than a month.
Shellac after an unedged dry manicure is the ideal solution. Due to the absence of a steam bath, the nails are not exposed to moisture. This allows you to wear the coating longer without fear of detachments.
If you prefer regular varnish, be prepared that it will be less durable. The base coat and top coat will extend the durability. They are applied before and after colored varnish, respectively. Aerosol drying can also be used. A special liquid sprayed onto the nails after applying the polish will speed up its drying and protect it from damage.
How long does the effect last?
A high-quality unedged manicure can delight its owner for 5–7 days. After this, you will have to perform the treatment again so that your nails maintain a well-groomed appearance.
If the cuticle was too rough before switching to European manicure, at first you will have to use tweezers to achieve the ideal result. However, after several procedures this need will disappear. Over time, you will be able to use only the cuticle softening gel and enjoy the amazing results.
Making a hand bath with bath salts
Before you begin an unedged manicure, you must first soften the cuticle. To do this, take a small container, pour hot water into it, immerse your hands and hold for 5-7 minutes. You can add sea salt to the bath. It will make the skin softer and more hydrated. Another secret ingredient that oriental beauties use to care for their hands is olive oil. It perfectly strengthens nails.
Cuticle care
Even after performing an unedged manicure, you need to continue to care for your cuticles to maintain the effect. You can select and regularly use special products. They are usually designed to slow down cuticle growth. This way you can enjoy your perfect manicure longer.
Among additional measures, experts recommend doing housework with gloves to prevent contact of delicate skin with aggressive household chemicals. This is another way to extend the longevity of your manicure.
It is equally important to prevent the skin from drying out. It must be protected from wind and frost. This advice is especially relevant in cold seasons.
The most important thing is not to neglect regularity. No matter how carefully you take care of your cuticles, they will still grow over time. Timely treatment will allow you to maintain the effect permanently. In addition, the more regularly you perform an unedged manicure, the more pronounced and longer the effect will last.
Where to do it: with a specialist or on your own?
Not every girl wants to perform manicures and other beauty treatments on her own, preferring to visit beauty salons. However, there are not always positive reviews of unedged manicures performed by a professional. Some people encounter unprofessional employees, others are dissatisfied with the result or durability, etc.
That is why, increasingly, many ladies prefer to master the intricacies of unedged manicure and perform it themselves. This approach definitely has some advantages. Having mastered the technology of European manicure, every girl will be able to perform the procedure without visiting a specialist. This will allow you to spend less time and money.
Reviews
Girls who switched to unedged manicure are usually satisfied. Among the advantages are low trauma and speed of execution. There is no need to steam before a European manicure, which saves time.
The unedged method is so simple that you can master it yourself.
Those who expect to get a perfect result right away remain dissatisfied. However, European manicure has a cumulative effect. The true result can only be assessed after several procedures. Not everyone has the patience. Also, this method is not suitable for ladies with rough cuticles.
Knowing all the technology, mastering an unedged manicure is not difficult. However, you should be patient and the result will not be long in coming.
Advantages of an unedged manicure - how to switch from an edged manicure to a manicure without cutting the cuticle?
To begin with, it must be said that all of Europe has long switched to unedged manicure, and not only the fair sex, but also men.
Handles look more natural and well-groomed, without burrs, wounds, redness and inflammation around the nail, as usually happens after a classic trimmed manicure.
All types of manicure - pros and cons of each, reviews and tips for choosing