Issues discussed in the material:
- Structure of nails
- Basic rules for strengthening nails
- Vitamins and nutrition to strengthen nails
- 10 ways to strengthen your nails at home
- 5 tips on how to strengthen your nails yourself if they peel
- TOP 5 special products for strengthening nails
- Gel nail strengthening
- Benefits of gel coating for strengthening nails
- Features of gel nail strengthening technology
- Strengthening nails with acrylic powder
- Beautiful manicure + nail strengthening
- Final recommendations for strengthening nails
You can strengthen your nails yourself, and not only special products and coatings are suitable for this, but also baths made at home. However, in order for the chosen method to really bring a positive result, you need to know the structure of the nail, as well as the reasons for its fragility.
Understanding such things will tell you what means to use in a given situation. After all, if a girl has problems with the cuticle, nail strengthening compounds will clearly not help solve it. In this article we will take a closer look at what affects the condition and health of nails.
Structure of nails
Nail plates perform a protective function. They are designed in such a way that they do not have nerve endings or blood vessels. More than 60% of the nail tissue is occupied by keratin, which is arranged in layers (120 in total). The nail plates also contain:
- 15% water;
- 15% fat lipids;
- 5% sulfur;
- trace elements: P, Ca, Mg, N, Fe, Ba, Mn, Zn.
In the matrix, that is, in the base hidden under the skin, there are specific epithelial cells that form the transparent nail plate. Its strength is determined by hereditary factors, and also depends on how a person eats. If at birth the baby receives a high content of cysteine from the mother, then the strength of the nails should be maintained for life. But it happens that the plate becomes thinner. If this happens, you need to find out why, take measures to eliminate unwanted consequences, and start strengthening your nails at home.
The white lunula is another significant component. It is located at the base and looks like a semicircle. Due to its increased vulnerability, lunula needs extremely careful handling.
The cuticle is located at the junction of the matrix with the nail plate; these are areas of high density skin that protect the growth zone from foreign particles and infection. The cuticle passes into the pterygium (on the plate in the area of the lunula). If it grows strongly, then the nails look short and unkempt, and the polish does not adhere well to them. The sides of the nail are surrounded by lateral ridges - when the skin dries out and is poorly cared for, burrs appear on them.
By the condition of the nail plates you can find out whether a person has health problems. People have used similar methods for identifying pathologies since ancient times, when medicine did not yet have advanced technologies and computer diagnostics. Unhealthy nails indicate, in particular, a deficiency of vitamins and microelements.
A concave central part of the nail often signals that the body is low in iron. The presence of psoriasis can be suspected by multiple pitting. Transverse stripes on the nails may indicate infectious diseases (measles, smallpox, rubella), and longitudinal stripes may indicate intestinal disorders.
Recommended articles on this topic:
- Therapeutic manicure to maintain healthy nails
- Nail polishing file: what is it for and how to use
- Cheap manicure files: how to choose a quality tool
Nail color is also a marker. Blue plates indicate heart disease, and yellow plates indicate liver disease. A lunula that is too large can be found in people suffering from tachycardia, while a lunula that is too small or completely unnoticeable can be found in those who are susceptible to neuroses. Taking antibiotics often provokes the appearance of yellow-brown spots on the nails. If the level of red blood cells in the blood is exceeded, the nail plates may acquire a rich pink tint.
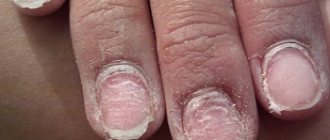
Lamination can occur in smokers and indicate the need to get rid of a bad habit; in non-smokers it can be a sign of fungal infection.
White spots indicate a deficiency of zinc and calcium - you need to add fermented milk products to your diet.
Basic rules for strengthening nails
- Constant use of decorative coating and liquid for its removal makes nails dry, thin and brittle. These definitely require restoration. Please note that during the period of treatment and strengthening of nails, it is prohibited to apply colored varnish - only special transparent one.
- Train yourself to do any housework that involves interacting with water or household chemicals while wearing gloves.
- Before you begin any manual labor, treat your nails with a special coating that protects them from chipping (as a rule, this is a transparent base with useful components).
- Try to moisturize and nourish the skin of your hands and nails every day with a cream with natural ingredients, rub special oils into the plates and cuticles.
- You should not grow a nail plate that is so soft that it easily bends when touched - it is better to trim off the free edges and allow the nails to get stronger. Over time, you will see that new ones grow stronger.
- Use mostly glass files, forget about rough metal ones, and try to move the tool not in different directions, but only in one while filing.
- To strengthen and grow your nails, take multivitamins - you need to take them in courses.
- Don't forget to get a manicure regularly (classic edged or combined hardware).
Vitamins and nutrition to strengthen nails
Like the rest of the body, nails need nutrients, vitamins and microelements. To provide them with everything they need, it is important to ensure that the diet is balanced. It has been noticed that the use of gelatin contributes to the rapid growth and strengthening of nails. Eat more dishes that contain it (jelly, aspic, jelly, pudding), and your nails will become healthier and stronger. By the way, such food is also good for joints, bones and hair.
You should consume dairy and other products rich in calcium to keep your nails strong - this element is very important for them. It would also be useful to take a course of calcium supplements with vitamin D - in this combination the element is absorbed better than in its pure form.
If white spots have formed on the nail plates, a lack of calcium, sodium and magnesium can be suspected. Food that contains these elements can help in this situation. Magnesium, for example, is found in sprouted seeds and bran of wheat, legumes (beans, peas, lentils), walnuts and pine nuts, pumpkin and sunflower seeds, and chocolate.
Calcium is found in carrots, green salad, spinach, nuts, sunflower seeds, raisins, dried apricots, pumpkin, and white cabbage.
Fresh vegetables and herbs, corn flakes, lard, salted herring, fish roe, cheese, and cottage cheese will help replenish sodium reserves.
If your nails are brittle, your body may be lacking protein. It is worth strengthening your diet with protein foods, and the condition of your nails will change for the better, as will your skin. Proteins help improve the smoothness and elasticity of the skin.
Even if you are trying to lose weight, do not exclude foods containing fats from your diet - due to their deficiency, your nails begin to flake and break.
To keep your nails healthy and beautiful, you need:
- vitamin A - for strengthening (butter, liver, carrots, tomatoes are rich in it);
- vitamin E – for nutrition (it is contained in sunflower seeds and vegetable oil);
- B vitamins - for better growth (found in cabbage, yeast, egg whites, sprouted wheat);
- silicon - to increase elasticity and strength (available in vegetables);
- iodine – for rapid growth (a lot in sea kale and spinach);
- sulfur – for proper formation and protection from inflammation (found in cabbage, cucumbers, onions).
TOP 5 special products for strengthening nails
Store counters and pharmacy shelves are replete with a variety of nail products that help strengthen, grow, and improve appearance. How to make the right choice?
We bring to your attention five products that were recognized as the most effective in 2020 (according to reviews of nail specialists and online shoppers):
- CND RescueRXx Daily Keratin Treatment, about 550 rub. This keratin mask with active ingredients (jojoba oil, vitamin E, keratin protein) and vanilla aroma can quickly restore weakened nails.
- "Horsepower". Mega nail strengthener with diamond chips, average price 300 rub. Helps strengthen the nail plate, making it thicker. The product contains not only vitamins, but also calcium.
- “Belvedere”, antifungal varnish, no more than 200 rub. Improves nails thanks to silicon, keratin, vitamins and coral extract. Among other things, it eliminates fungal diseases.
- Emulsion “Argo”: “Riciniol-K + Riciniol-N”, 270 rub. A dual-action castor oil-based product designed to care for cuticles and nails. Permanent use as a base for manicure or as an independent strengthening coating is allowed.
- Mineral paste Masura NI, 800–1200 rub. Has a leveling and light whitening effect. The composition contains keratin, marine peptides, and pearl crumbs. The product can be used as a coating alternative to shellac.
Important! Some of these products may seem too expensive, but it should be borne in mind that they are used sparingly and one package lasts a long time.
And most importantly, with the help of such restoration you can really make brittle and peeling nails healthy again.
Sally Hansen - nail strengthener: how to use
According to the manufacturers, the varnish
The Sally Hansen company produces various products for restoring and healing nails
used to cure brittle, weak and peeling nails. This product gives the nail plate hardness , strengthens it and prevents delamination. The special composition of Sally Hansen compacts and, as it were, “seals” the edges of the nails. Long-term protection and excellent growth will be provided to you.
Before applying the product, nails must be thoroughly cleaned of varnish and grease . The product is applied like a regular varnish. Pay special attention to the edges of the nail . After applying one coat, let the varnish dry and then repeat the procedure. Used by Sally Hansen either as a stand-alone product or as a base coat for any varnish.
Gel nail strengthening
Nowadays, strengthening nails with gel is in great demand. Under gel polish, nails are protected from mechanical damage. This current procedure helps keep your hands looking well-groomed for a long time. If you wish, you can master this nail technique yourself, but professionals who strictly follow the technology will do a better job.
Strengthening nails with gel has the following advantages:
- Safety. Any injuries during the procedure are excluded.
- Long lasting results. You can forget about scuffs, chips and scratches - the impeccable condition of your nails will remain for 3-4 weeks.
- Convenience. Compared to extensions, for example, the procedure takes much less time.
- Space for creativity. The gel gives freedom of imagination: you can use it to create drawings, exclusive designs with sparkles and rhinestones, and use ready-made stickers and patterns.
- Nail restoration. Gel coating not only protects, but also allows you to grow your nails to the length you like.
- Possibility to change the shape of the nail. Square shaped nails can be transformed into almond shaped nails - all you need is a fine abrasive file.
- Moisturizing the cuticle. Gel strengthening involves caring not only for the plate, but also for the cuticle and allows you to do a traditional trimmed manicure less often.
- Nail alignment. Thanks to the gel, the nail plate smoothes out, becomes thicker and denser.
- Price. You will pay less for gel strengthening than for extensions.
If your nails are fragile and peeling, strengthening them with gel will help restore their beauty and well-groomed appearance. But if the cause of fragility is a deficiency of vitamins, it is necessary to strengthen the nails from the inside, after first consulting a specialist. This comprehensive approach will ensure the impeccable condition of your hands.
Why have my nails become weak?
There can be many reasons for the deterioration of nails:
- this includes wearing gel, shellac or gel polish for a long time;
- lack of vitamins and minerals in the body;
- mechanical damage to the nail plate (unsuccessfully removed shellac, for example);
- hormonal changes (pregnancy, for example);
- low-quality nail polishes and so on.
You will determine for yourself why your nails have become weak, and we will help you cope with the problem of weak nails, regardless of the cause of this problem. The only case in which our advice will not help is a situation with severe external damage to the nail, when the nail was crushed by something, pressed, and so on. In this case, it is better to wait until a healthy nail grows. And we will handle everything else with you!
Benefits of gel coating for strengthening nails
The gel covers the nail like a strong frame, protecting it from negative external influences. With such a strengthening layer, you don’t have to worry about your manicure while washing dishes, cleaning or cooking. Although the gel coating makes the plates more dense, they still remain plastic. As a result of strengthening nails with gel polish, the length and shape of the plates do not change, as with extensions; the coating is applied to the surface in the same way as conventional varnishes.
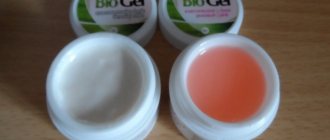
Often after extensions, women complain that their nails have become thin and have begun to flake. The problem can be solved by strengthening the plate with biogel. Compared to regular gel, it has an additional property - the ability to heal nails. Protection and restoration are provided by the gentle and flexible structure of the product. Biogel is applied in a thin layer and removed using a special solution for removing gel polishes. The appearance and condition of nails improves significantly after 3-4 applications.
Strengthening nails with biogel has a number of advantages:
- natural nails respond well to the drug due to its hypoallergenicity;
- nail improvement tasks are solved effectively;
- Even pregnant women can use the product (for safety reasons, many of them refuse to have a manicure);
- Removal occurs quickly and does not harm the nail plates.
Methods of strengthening
Nails need strengthening before coating and after its removal. Experts advise carrying out the procedure step by step for an effective result.
To strengthen, effectively use the following means:
- Biogel.
- Acrylic Powder.
- Special base.
The main means for strengthening remain gels and biogels. These are different products that differ in composition.
Biogel is durable and elastic, it is easy to remove. Gel is both hard and brittle material. It is used for natural marigolds. When applied in a thin layer, it becomes an excellent base for creating drawings and patterns. The composition is completely safe. An additional benefit is cuticle care.
Biogel has a natural composition and promotes healthy nails, but in case of serious damage it is useless, like other cosmetic strengthening products. This product is used quite often because it can be used even by those who suffer from allergies.
An important disadvantage of biogel is its instability to external factors . Does not tolerate high temperatures, cleaning agents, or liquids containing alcohol. This vulnerability creates additional inconvenience. When cleaning, be sure to wear gloves, otherwise the coating will be damaged.
Acrylic powder is very popular. The peculiarity is to extend the life of the manicure. But only the varnish coating is strengthened. The powder does not affect the condition of the nails.
A special base is often used . It is applied in several layers. Allows the varnish to lie more evenly and strengthen the nails.
Features of gel nail strengthening technology
Gel can be used to strengthen both long and short nails. The latter also need good care, especially if there is a desire to grow them. The gel will be the best assistant: it will restore the structure of the plates, improve their condition and growth. Thanks to the gel, even short nails are visually transformed, looking fashionable and bright.
The process of strengthening nails step by step:
- Hand disinfection before starting work.
- Preparation of nails (sanding with a buff, carefully removing the cuticle, giving the plates the desired shape), facilitating an even coating with the material.
- Degreasing the surface and coating with a primer for reliable adhesion of the gel to the plate.
- Apply a thin layer of base followed by drying for 2-3 minutes in a lamp.
- Coating the nails with gel after the base has dried on them, evenly spreading over the surface. Each nail should be thoroughly dried under a UV lamp for 3 minutes.
- Removing the sticky layer from nails.
- Giving your nails the final shape using a highly abrasive file. To achieve perfect smoothness, a buff is passed over the plate again.
- Applying colored varnish or decorative elements (optional).
All! You can enjoy the natural and attractive appearance of your nails for about a month (depending on how quickly the growth occurs).
To consolidate the result, it is advisable to minimize hand contact with water on the day of the procedure and perform household chores only with gloves. After about 14 days, the plate with the gel will grow back, and you will be able to see where your nail is and where the coating is. You will need to make a correction: the master will remove the entire old layer of gel (this will take about 15 minutes) and cover them again with a strengthening composition.
Application: step-by-step instructions
The strengthening process takes more than one hour of work. Necessary equipment and tools for this :
- UV/LED lamp for drying material;
- primer/ultrabond;
- gel/polygel;
- color coating (gel, gel polish);
- finishing coating;
- manicure machine (milling cutter);
- set of manicure tools, brushes;
- degreasing/disinfecting products;
- napkins (lint-free).
Preparation for strengthening coating
This is an important stage on which the wear life of the material depends.
- First, the nail plate is completely cleaned of the old coating (if there was any).
- Next, the manicure begins, where the cuticle is carefully removed and the pterygium is cleaned.
Manicures should be performed cleanly, using a device with cutters or manicure scissors. Important. There is no need to make cuts both on the skin and on the nail itself, otherwise an allergy may occur when drying the material. - Using a soft file, the gloss is removed from the natural nail and given shape.
- After the manicure, dust is removed from the hands and fingers are disinfected.
- If your nails are naturally wet, use a dehydrator. The plate itself must be dry before coating.
Application of material
At this stage, it is important to do everything correctly so that you do not have to redo it.
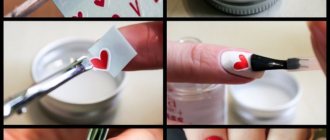
- Primer is applied to the prepared nail. It provides adhesion between the surface of the plate and the gel. It is preferable to use acid-free compounds so as not to damage the natural nail. The primer air dries for about 1 minute. After this, you should not touch your skin or hair with your fingers, because the nail plate is degreased.
- Then the base coat is applied in a thin, rubbing layer.
If the system is single-phase, then you can do without a base. The gel is placed on the plate in a small drop. Then, using a brush, the distribution begins with smooth movements. Applying the gel requires knowledge of the architecture of the nail plate. There should not be a lot of material near the cuticle. It smoothly, from thin, moves to dense, near the middle. At the tip of the nail the layer becomes smaller and the end is sealed. The same result is obtained if you turn the nail over, then the gel itself takes the desired shape. - When everything is lined up, the hand goes into the lamp to dry. The time is set differently: in UV - about 2 minutes, in LED - about 50 seconds. But here the power of the lamp itself is also taken into account. With this distribution, a durable structure is built; this coating can be worn for a long time. Correct technique eliminates detachments and chips.
- If unevenness is visible after drying, you can make a small filing to make the surface of the nail more even.
- Further, if desired, you can apply a color coating and create a design. The final step is to apply the finishing coat. It can be glossy or matte. All layers are dried in a lamp.
- At the end of the process, the coated nail is wiped with a cloth soaked in a special liquid to remove stickiness. In general, the handles are ready. The manicure is forgotten for several weeks.
Contact with water must be limited on the day of application (minimum 2 hours), the gel does not handle moisture.
Master class “Strengthening natural nails with gel”:
Strengthening nails with acrylic powder
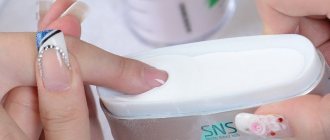
Acrylic was once used exclusively for nail extensions, but now it is also used to strengthen them and increase their strength.
Acrylic is loved for its efficiency, long service life and safety for health. The material is practically invisible on the nails, but with such a coating they look healthy and well-groomed. Plates coated with acrylic remain flexible, which allows their owners not to feel discomfort. Acrylic nail strengthening does not interfere with the performance of usual household chores - you can clean the apartment, play with children, work in the garden without fear of ruining the coating.
True, there is a nuance. Acrylic powder should never be used on nails affected by fungus. The material does not allow air to pass through, which contributes to the spread of infection.
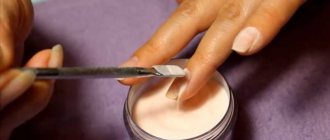
The application of acrylic powder should be done by a professional nail artist; this cannot be done on your own - the material quickly hardens in air. Another feature: acrylic (with the exception of expensive varieties) has a strong odor. Therefore, it is necessary to use a medical mask during the session or constantly ventilate the room.
Read material on the topic: Types of files for pedicure - proper care of feet
The coating is difficult to remove with chemical compounds, so you will have to remove it at home by sawing it off. Manipulation requires extreme care, otherwise you can harm the nail plates.
When it comes to correcting overgrown or accidentally damaged areas of the nail, acrylic requires much less time and effort compared to gel coating.
It must be borne in mind that acrylic nail strengthening has no therapeutic effect. As soon as you cut off the coating, your nails may become brittle again, so for prevention it is necessary to restore them using various procedures, for example, baths with salt and iodine.
How to strengthen nails with acrylic:
- A manicure is first done (the cuticle is removed, the nail is filed, degreased and coated with primer).
- A base layer is applied to the plates (without drying).
- Acrylic powder is poured over the base in a thin layer (carefully blown off or shaken off before drying).
- The final stage is applying a base with a camouflage effect (in 1 or 2 layers, depending on whether or not the subsequent design will be gel polish).
Beautiful manicure + nail strengthening
Manicures with glitter are very popular now.
Masters achieve the desired effect using all kinds of rubs, crystals, sparkling powder, gel polishes with glitter, etc. One of the methods will help solve two problems at the same time: get a beautiful, up-to-date manicure and strengthen your nails. This is the best option for those with very thin and flexible nails (on such nails, the gel polish usually cracks at the edges, and the coating often chips or peels off entirely). Fashionable design plus strengthening of nails under varnish allow you to forget about the listed problems. Recommendations:
- In order for the coating to be dense, but retain flexibility (this protects against cracking), you need to use a rubber base and top for work;
- glitter should be finely dispersed;
- It is advisable to sprinkle glitter on the base and not use gel polish - the manicure will be more delicate and will not look bulky due to the abundance of layers;
- For everyday manicure, it is better to use beige or white glitter.
How the procedure is carried out:
- First, a classic manicure is done on the nails with a base layer applied. A rubber base is ideal. The layer should not be too thick, but also capable of absorbing glitter evenly.
- The glitter should be finely dispersed; if the manicure is done at home, the Born Pretty brand is suitable.
- In the photographs, the glitter resembles acrylic sand, but in reality it is much more beautiful and shimmers when the light hits it.
- The glitter is carefully poured onto the undried base, then the nails are dried with a lamp (a little longer than usual). The coating will dry better if the layer of glitter is not thick - they must be carefully blown off before using the lamp.
- The final stage is to fix the glitter with a top coat in 2 layers (the excess is first cleaned off with a manicure brush).
So, the 3 golden rules for healthy nails are:
- Do not cut your nails with scissors. Remove the length of your nails only with safe files: crystal or laser;
- Always apply medicated products as a base coat. Do not apply varnish to “bare” nails, only to the treatment base. If you use shellac, then the day before applying shellac or gel polish, treat your nail with restorative nail wax.
- take salt baths and constantly use special nail oil.
What to do if you need to strengthen your nails URGENTLY?
Well, if the situation requires immediate intervention and your nails need help urgently, then let's get down to business right now and very soon we will get the first results!
