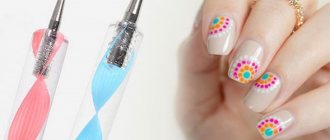
Easy drawings
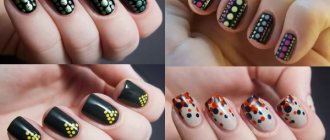
You can easily do easy drawings at home. These are simple lines, dots that form a pattern, as well as polka dots or simple images of fruits or animals. To create dots, you can use a regular match, and to draw monograms, a brush with fine bristles. Use acrylic paints for drawings. It will be easier for you to work with them than with regular varnishes.
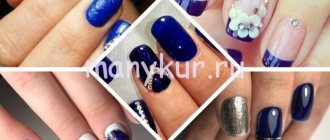
Art painting of nails with acrylic paints
Acrylic paints are the most popular material for painting nails, although this design can be done with varnishes and gels. The positive qualities of such material consist not only in the presence of a wide palette of colors and the correct consistency. The main advantage of acrylic paint is the speed of its drying, the ease of correcting the image with water and the inability of the paint to crack or lose shade.
Required materials and tools
To decorate nails with artistic designs, any master needs a set of different brushes, a wide palette of acrylic paints, water and a place to apply a new design. For beginners, it is also recommended to take an example of the required image in order to be able to study step by step the process of creating a drawing, and then reproduce it on the nails. Don't worry about an incorrectly applied stroke; it can be easily corrected with a thin brush dipped in water.
Execution steps
First of all, to create a beautiful design on your nails, you should draw a background. To do this, it is better to take a classic, matte varnish in a pastel shade. A bright color can also be used here, but in this case the entire pattern should be contrasting. Let's consider the stages of performing artistic painting with an abstract design on women's, short nails:
- We clean the cuticle from the nail hole and give the nails the desired shape using a nail file.
- We polish the plate with a special file, degrease the nails with a special product or nail polish remover so that the design lasts a long time.
- We apply a colorless base so that the nails do not absorb the color of the varnish.
- We paint the plate with any bright varnish.
- We wait for complete drying, prepare acrylic paints, brushes, water, napkins.
- We begin artistic painting with the nail on the ring finger. Here the drawing should be the most intense: with white acrylic we draw the contours of the butterfly, put a series of dots, several wavy lines.
- On other nails we draw similar elements, but not exactly the same as on the first nail. It is better to decorate the little finger and thumb only with wavy lines, dots, without butterflies.
- We take a bright shade of acrylic paint adjacent to the background (if the base is soft yellow, then prepare a bright lemon color or other) and apply several strokes that create the appearance of flower leaves.
- We cover the nails with transparent varnish or a special fixative.
Nail design with acrylic paints
- How to cook delicious rabbit
- How to find a phone using a SIM card if it is lost
- Zucchini caviar with mayonnaise and tomato paste for the winter
Medium drawings
Medium-sized drawings will require some skill and steadiness on your part. Such prints most often include feathers, light openwork, floral motifs, and images of flora. Such universal designs can decorate any nails: short, medium and long. A marble print will look quite original and can perfectly decorate any shape of nails.
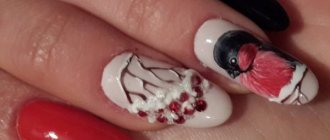
Complex drawings
Complex drawings can only be completed by a professional who has artistic skills. Here the master can delicately draw animals, birds, space, complex openwork, colorful flowers. Complex drawings turn out very realistic. Sometimes it seems that the flower on your nail is really real. This is a very interesting choice for creating a luxurious manicure.
Landscapes
Landscape drawings are also classified as complex types of drawing. After all, here the drawing itself is carried out in detail, and the background of the nail coating itself is also harmoniously selected. It is in this tandem that a landscape manicure will look perfect. You can choose your own landscape design for each season, which will allow you to always keep up with the times.
Training cards for painting nails
Learning how to paint nails is very easy with the help of training cards. They look like children's coloring books. It is worth practicing on them for some time in order to gain experience in drawing and master different techniques for applying paint with different types of brushes. Such cards will help you “get your hand.” After drawing a pattern on paper a dozen times, you can easily transfer it to your nail. Many manicure masters achieved their skillful technique with the help of such cards. Thanks to practice, you don’t need to be an artist from birth in order to beautifully paint your nails. It will take hard work and perseverance, a little practice, and you will be able to paint your nails with your unique design.
Funny drawings
Funny drawings have a humorous, sometimes even childish character. Most often they are multi-colored, colorful and quite bright. The master can depict cute minions, cheerful SpongeBob, and other cartoon characters on your nails.
Funny drawings are thematic in nature and if you are not a positive and courageous person, then this type will definitely not suit you. You can decorate one or all nails with this design. But be careful not to overload your manicure.
Chinese nail painting technique for beginners
The Chinese nail painting technique is very unique. When working with it, first of all, it is necessary to visually imagine the drawing process - petal by petal. To obtain a beautiful result, the nail is covered with one layer, using a special tool, onto which several layers of paint and different colors have been previously applied. The effect is amazing. The pictures seem to come to life on your nails.
Required materials and tools
You will need:
- Acrylic paints. It is preferable that the base of such paints be water and silicone. With the help of such paints, it will be easy for you to draw beautiful designs; the paints are viscous and thick, lay evenly and easily on the nail.
- Brush. It's best to have several, in different sizes. Professionals work with expensive professional brushes, but if you are a beginner who likes to paint nails, a few artificial brushes will be enough for you. There are different types of brushes - brushes, liners, fan brushes, flat brushes and angled brushes. They are used to apply a variety of lines and designs.
- Sticks or skewers for drawing small circles and dots.
- A jar of water.
Execution steps
It is best to purchase artificial false nails and practice the technique on them, and once you have a good hand, start painting on your nails. Prepare all the necessary materials, you can try to copy the first drawings from pictures, and only then you can give free rein to your imagination.
For example, you can familiarize yourself with the stages of drawing a Chinese rose:
- You will need three colors of acrylic paints: white, black and red, as well as a wide brush. First of all, we dip the brush in red and then in white paint and, using a small amount of water and a palette, shade the paint to obtain pink highlights.
- We make a stroke in the shape of a rounded droplet, lowering the left side. This is the first petal of the future flower.
- Make the second stroke side by side, but slightly higher than the first. This is the second petal.
- We make two more petal strokes of a similar shape, but slightly larger in size, perpendicular to the previous two.
- To complete the flower shape, add a couple more petals in the empty spaces, selecting the required size for them.
- Using a thin brush and black acrylic paint, we outline the edges of the petals and add small strokes. It will be very beautiful if you paint a couple of unopened buds on several nails.
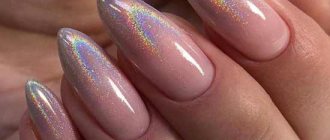
Stylish drawings
Stylish drawings are always made in minimal quantities. Most often, masters use them to highlight one nail, thereby placing increased emphasis on it. This type of manicure is considered a stylish option that can suit you for any occasion.
Tools and materials
Good acrylic paints, gel paste or thick gel varnishes are suitable for painting. You can create a drawing using a thin artistic brush, needle or orange stick.
It is best to contact a professional master who will beautifully transfer any design to your nails. A wide field for creativity allows you to generate endless design options.
But you can also paint your nails yourself at home if you have drawing skills. Before applying to the nail, you can first practice with pressure, the amount of paint and experiment with brushes on tips. If you can’t draw out some elements the first time, then you need to start with simple curls. Any print will look beautiful.
Fruits
Very juicy and “tasty” fruit designs are especially important to choose for the summer season. They are bright, colorful and with such a manicure you will not be bored. On your nails there may be slices of lemon, orange, watermelon, kiwi, lime, as well as a variety of berries.
Japanese nail painting lesson for beginners
Recently, Japanese motifs have become very popular in nail design. Sakura blossoms and various hieroglyphs look very harmonious on neat nails. Such beauty can be created using acrylic paints. This is not quite a simple nail painting. Let's look at her technique in more detail.
Japanese motives
Required materials and tools
- Acrylic paints. The more colors you have, the more varied the designs you can bring to life. We need pastel, pink, lilac shades. Contrasting designs on medium-length nails look beautiful.
- Brushes. Different sizes.
- A jar of water and paper towels. If you accidentally draw an extra line, using a brush dipped in water, it can be easily removed from the nail.
- Base and sealer, white varnish.
Execution steps
Applying a Japanese pattern
- We check the readiness of your pens for drawing. A neat manicure should be done, nails should be polished and straightened, and also degreased.
- Apply a light pink varnish to the transparent base. This will be our background.
- Use lilac acrylic paint to make chaotic strokes over the entire surface of the nail. They should be of different lengths and directions.
- After wetting the brush in water, we smear the lilac lines with it. We get a beautiful blurry pink and lilac background.
- We draw the sakura branches with black acrylic paint; they should be directed in one direction on all nails.
- Use a skewer to place dots on each branch using pink acrylic; these will be buds. Next, we draw flowers with a brush using the same paint.
- We draw along the contour of the pink flowers with a thin brush with white paint. It will make the flowers voluminous and more contrasting.
- Let's draw the core of the flowers with a rich pink color. It will add even more volume to the buds.
- We complete the drawing of cherry-sakura flowers with a yellow dot. Imagine what it looks like in nature; the picture should show a similar image.
- Add a few leaves in a soft light green color. Do not overdo it with the quantity; two or three leaves on one nail are quite enough.
- For contrast, use black acrylic to draw the edges of the petals of large flowers.
- If there is a lot of empty space left on the nail, put several dots in white, as if the effect of sakura petals falling in the wind.
- Apply finish to your nails and dry thoroughly. Your masterpiece is ready.