What is dots?
For several years now, manicures performed with such a simple tool as “dots” have been extremely popular. There are several reasons for this:
- ease of use (no need to have artistic talent);
- minimum time spent (several minutes);
- You can create drawings of any complexity using just dots.
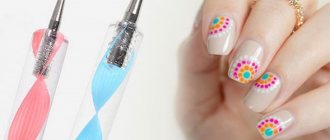
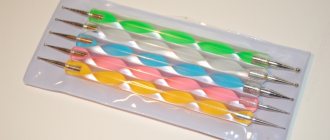
Thus, dots are a manicure tool for creating patterns on nails.
Outwardly, it looks like a crochet hook only with a steel ball at the end, which is how the dots got its name.
Secrets of using Dots
The most important secret is that there is, in fact, no secret. It is most likely simply impossible to come up with a simpler device for painting on nails.
You should draw with this particular ball; all other elements of the dots are purely a matter of convenience, while the size of the ball really plays a role.
Once again, we draw your attention to the fact that even a person who has picked up dots for the first time will be able to perform a manicure without any problems.
If you don't want to guess what size dots you will need, purchase a special set that includes one handle and many tips that can be easily changed from one to another.
How to use Dots?
Even a child can master the technique of drawing with dots.
But, first, it is advisable to practice on one of the volunteers or on plastic tips in order to “fill up” your hand .
Decide how it is more convenient for you to hold the handle of the tool; the brush should not be tense. Then dip the tip of the dot into the varnish and simply place dots.
When you learn to control their size and they turn out clear and neat, then you can begin to implement your manicure ideas. At the same time, do not forget about the sequence that should be followed:
- First of all, prepare your nails: adjust the shape, polish, remove or push back the cuticle.
- Apply a base that will protect the nail plate from pigmentation and extend the life of the manicure.
- Cover your nails with colored or clear polish and wait until it dries completely.
- Take a palette (you can use anything for this purpose - even a tea saucer), drop a little varnish on it or dilute acrylic paint to the desired consistency.
- Dip the tip of the dot into varnish/paint. Try to coat the “ball” with varnish evenly.
- Place the main points that will serve as the “framework” for your drawing. Hold the tool at a right angle to the nail plate, then the dots will be smooth and beautiful.
- Make sure that the paint on the palette does not dry out and renew it on time.
- Add the remaining "secondary" dots to complete the design. As a rule, these points are smaller in diameter.
- When the drawing is ready, wait until it dries and cover your nails with colorless varnish.
- Get the tool in order - remove any remaining paint from its surface using a cotton pad and nail polish remover.
- Enjoy your new manicure!
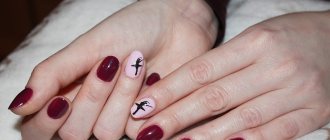
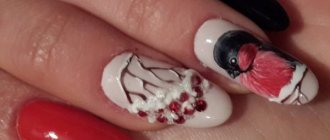
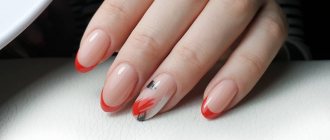
Red manicure with dots, photo
Red polish is a classic color for manicure. He gives the hands a special femininity and always speaks of the lady as a passionate person. One of the most successful dotted manicures is white polka dots on a red background. He always looks very advantageous and attractive. This manicure can easily be called summer. It should be combined with the same elements in the wardrobe and image, complementing:
- scarf or handkerchief
- hair tie
- dress
- beads and bracelets
- red lipstick
- shoes in the same style
red manicure with blue dots
red manicure with white dots and rhinestones
red manicure with small and large dots
very feminine red jacket with polka dots
Simple designs on nails
Fans of minimalism (and just lazy people) can opt for simpler designs. They do not require much effort, but at the same time they look very impressive.
With the help of dots, you can decorate your manicure with dots and circles of different sizes, commas, curls created from dots decreasing in descending order.
You can also create geometric patterns from dots of the same diameter.
Here are some simple options for nail art using dots:
Option one:
- Cover the nail plate with black varnish.
- We wait until it dries.
- We spread white paint on the palette.
- Dip the dots into it.
- On the free edge of the nail we place many white dots of various sizes.
- After the drawing has dried, apply the finish.
Option two:
- Cover the nail plate with beige or light pink polish.
- We wait for it to dry.
- We spread white paint on the palette.
- Drawing French.
- We wait until it dries.
- Using dots, we make two rows of white dots immediately behind the “smile”.
- After drying, apply the finish.
Of course, you can experiment with colors - choose them to suit your mood and style.
What can replace dots?
If you don’t have a tool at hand, then you should think about how to make dots for nails with your own hands. It is not difficult and does not require much time. The tool can be a hairpin with a ball at the end, or one of the “bristles” of plastic massage combs. The smallest diameter dot can be created using the refill of a ballpoint pen that has run out of ink. Some craftsmen put a bead on the tip of a toothpick; this method helps to select the required diameter of the circle.
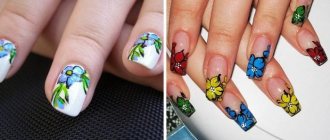
Drawings of flowers
With the help of dots you can easily create a “floral” manicure .
The easiest way:
- First, coat your nails with a base color and let dry.
- Then we place five dots-petals of a contrasting color.
- Place another point (color of your choice) in the middle of the resulting flower.
- Using this scheme, we draw the number of colors we need (of different sizes).
- After drying, cover the nails with a transparent top coat.
More complicated way:
- Cover the nails with the base color and wait for it to dry.
- Using dots, place petal dots on the free edge of the nail (use several colors). It should turn out so that the “petals” seem to overlap each other.
- We arrange the core points.
- After drying, apply the finish.
To create a more “atmospheric” manicure, flowers can be “diluted” with all kinds of curls.
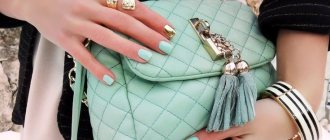
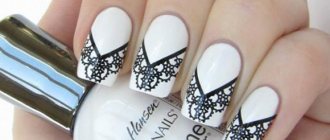
White manicure with dots, photo
White varnish is the best base for applying any tones and colors. Both light and dark shades go well with white. White polka dots will look just as good on any dark nail polish color (or even bright one). The neatest pattern is one that consists of small peas, so try to choose a tool with the smallest ball diameter.
white dotted manicure options
white manicure with large black dots
white manicure with multi-colored dots
original white manicure with dotted snowman pattern
delicate manicure with a pattern of multi-colored dots
Design for short nails
It is worth remembering that on short nails it is better to place the design not horizontally, but along the nail plate . This will visually elongate the nail.
Diagonal patterns are also acceptable.
You should not put too “fat” dots - they will not add length to short nails and will make the composition heavier.
Schemes of drawings
The final result will depend on how you arrange the dots and what colors you choose.
To be convinced of this, just look at the photographs.
* By choosing three shades, you can perform a manicure with a transition of color and shape . At the tip of the nail we place darker and larger dots (2 rows), then - lighter and smaller dots (2 rows) and, directly at the hole, we use the lightest shade to place the smallest dots (2-3 rows).
* A discreet manicure can be achieved by painting black polka dots on a white background.
* Bright circles on a black background will not leave anyone indifferent!
* If you apply smaller ones to larger circles (in the background color), you will get rings.
* An interesting pattern can be created by simply connecting the dots with straight lines.
Thus, we see that there are a great many ideas for nail art using dots. It all depends on your imagination and perseverance . Don't be afraid to experiment and always be original!
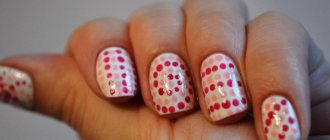
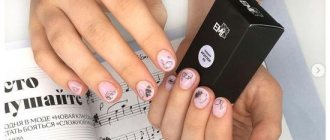
Pink manicure with dots, photo
Pink manicure is always distinguished by its special femininity and tenderness. When making a bitmap, you should decide on the color policy of the design in advance. Pink nail polish goes best with:
- white
- black
- blue
- beige
- burgundy
It is best, of course, to choose a light base and draw pink dots on it, but pink can also serve as a base color on which you can draw white and black dots. You can decorate such a manicure with fixative varnish, silver or gold sand, and rhinestones.
pink spot manicure
Contrasting pink and white polka dot manicure
avant-garde dotted manicure in pink tones