What is dots
Dots for nail design (how to use is described below), or dotter, is a tool for creating designs on nails. It looks like a pen with a small metal ball at the end.
Most often, dots are made double-sided, with two balls of different diameters at different ends.
What is it needed for
Initially, dots were created to make polka dot manicures. This is evident from the name. After all, “dot” translated from English means “point”. In addition to points, they are comfortable drawing straight and curved lines, making contours and painting the space inside them.
Dots are easy to use to create military or leopard print nail designs. With proper skill, they can be used to paint openwork lace and other complex patterns on nails.
Types of instruments
The only significant characteristic of the dots is the diameter of the ball-tip. The size of the picture depends on it.
All dotters are divided into three groups:
- With a small ball. It will allow you to draw thin lines, draw an outline or put a small dot.
- With a medium ball. It is used for drawing various details of the picture: the centers of flowers, curls, small dots.
- With a big ball. This tool is useful for filling an outline with color or for drawing a large pea.
It is better for a beginner to start with two dotters: large and medium. Most often, dots are made double-sided. Therefore, it will be enough to purchase only one tool, choosing the most suitable tip diameters.
Rating of the best
Dotter is a very simple tool. Therefore, the brand does not play any role. A tool ordered through a well-known Chinese resource will work the same as one purchased from a specialized nail art store.
Below is a rating of seven reliable dots sellers on a well-known purchasing resource:
- Shop3187002 Store.
- Makeup Store.
- Stylish Bueaty Store.
- MintSun.
- Beautifully Store.
- Born Pretty Co.,Ltd.
- BeautyLadyNailArt Store.
For those who are just starting to paint on their nails, one double-sided dot with balls of different sizes will be enough.
Those who want to achieve perfection in nail art will need a set of several tools. As a rule, the set includes 5 dotters with different tips: from smallest to largest. A variety of sizes will allow you to bring to life the most intricate patterns.
Don't miss the most popular article in the section: How to draw monograms on nails step by step for beginners. Instructions with photos.
What can replace dots?
This tool can be purchased at any specialty store or ordered online. The prices are affordable for everyone, but if you want to do a dotted design right now, replace the dots with a hairpin, a toothpick, or a pen that no longer writes. This, of course, is not so convenient, but it is quite acceptable. Without much effort, you will get a new dotted pattern on your nails and add some flair to your usual design.
Options for replacing dots
How to use Dots: step-by-step instructions
Dots for nail design (step-by-step instructions explain how to use to make a spectacular design) can be used at home:
- To draw a dot, you need to carefully put varnish on a metal ball and press it to the nail plate.
- To make a line, you need to draw the dots in the desired direction along the nail. The varnish should be applied carefully so that the excess does not form blots. It's better to start with straight lines. After several experiments, you can switch to waves, zigzags, steps. At the end, the line always fades out because there is less varnish left on the ball. The slower the dots moves, the less pronounced the attenuation is. When painting slowly, the paint is used more evenly.
- The most convenient way to fill the space inside the outline is with strokes, drawing parallel lines located close to each other. This will give you a smooth and uniform texture.
- While painting, you should regularly wipe the tip with a soft cloth or cotton pad to remove particles of drying varnish.
Drawing with dots is similar to drawing with a regular pen. You just need to monitor the amount of varnish on the ball. If there is not enough of it left, the pattern will not be visible. Excess can lead to unsightly blots.
The thickness of the lines and the size of the dots depend on the diameter of the ball. For a beautiful manicure you will need dots of at least two sizes.
It is convenient for small ones to draw lines and small dots, and for large ones it is convenient to make large peas and fill large areas inside the contour.
Dipping dots into a bottle of nail polish is inconvenient. It's so difficult to regulate the amount of polish applied. In addition, there is a high risk of staining the handle, and then all the objects lying nearby. It is more convenient to use a palette. You can make it yourself from a sheet of paper or a piece of foil, or buy it at an office supply store.
When drawing with dots, you must not forget about the following rules:
- Before starting a manicure, you must apply a base;
- if the plans do not include mixing colors, each layer should dry well;
- When the drawing is finished, be sure to cover it with topcoat.
Using dots, you can make a dotted pattern - an analogue of ombre.
You just need to put peas in a row, gradually changing the tone of the varnish from light to dark or vice versa. The easiest way to do this is by diluting the selected shade with white varnish.
Drawings on nails with dots at home
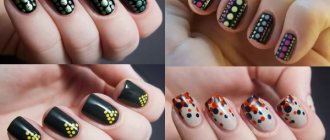
With the help of dots you can create interesting drawings even at home. The simplest option for decorating nails is dotted patterns. It all depends on imagination and the desire to stand out; photos will help you navigate when choosing a dot pattern.
How to draw simple dot patterns with dots
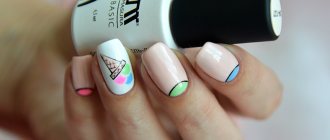
The simplest pattern that can be made using dots is dots or polka dots. To do this, you will need at least two shades of varnish: for the main coating and for the design. The dots can also be made in different colors, but it is not advisable for beginners to use more than 3-4 colors. It will be very difficult to draw peas beautifully and neatly.
Simple nail design, which is most convenient to use with dots
Colors can be:
- Contrasting. The safest option is white with any trendy shade.
- In one color scheme. Then one polish should be pastel and the other bright. For example, pastel and bright yellow, powder pink and fuchsia, sky blue and blue, peach and bright orange.
Dots for nail design (how to use to create a dotted manicure is described in detail below) is suitable for creating any image:
- Treat nails: move cuticles, shape, polish.
- Apply the base coat in one layer and let dry.
- Apply the base varnish in one or two layers. Dry each layer well.
- Place a drop of dot varnish on the palette. Dip the dot tip into the polish and gently press onto the nail. Repeat for each intended pea.
- Let the drawing dry.
- Top with finishing coat.
The dots can be the same or different sizes. For identical peas, you need to add varnish each time. If you draw several elements in a row, each subsequent point will be slightly smaller than the previous one. This makes it convenient to draw a “fading” series. And the easiest way to vary the size of the peas is to take dots of different sizes.
Spot manicure: drawings and patterns on nails, step-by-step guide
Using Dots is not difficult. How to create a dot design correctly, how to use dots so that the result exceeds all expectations?
Dotted manicure with dots is quite simple to perform and involves applying various patterns and designs using a special device. Applying varnish using dots is not at all difficult, the main thing to take into account is that each subsequent curl or dot turns out thinner and smaller than the previous one, as the paint on the ball decreases.
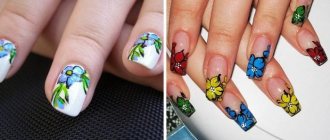
With the help of dots you can create a bright nail design not only on long, but also on short and very short nails. You can draw any patterns of regular and irregular geometric shapes, create a polka dot manicure, decorate with French dots, draw flowers on your nails, or create a design in oriental colors. Below are step-by-step instructions on how to decorate a plate with a simple polka dot pattern.
- First stage! First, you need to do a basic manicure - clean and degrease your nails, trim the cuticles, adjust the shape, and apply a base coat to your nails.
- Apply base - this will be a clear or colored polish, depending on what kind of manicure you decide to do.
- Choose the varnish with which you will draw patterns, pour a small amount into a special container or simply onto a flat surface. Dip the dots into the varnish and start drawing the chosen pattern. Move from the middle of the plate to the sides, as shown in the photo, so when creating a drawing you will make fewer mistakes.
- Wait for the pattern to dry and apply topcoat to seal the result.
- The final stage: do not forget to wipe off the varnish from the dots using a special liquid, and then rinse it with warm water.
How to replace a tool at home
You can choose an alternative to dotter from household items. This can be any object with a small rounded tip: a toothpick, a cotton swab, a needle, a pin eye, a match, a knitting needle or crochet hook, a hairpin, a ballpoint pen that has run out of ink.
An effective and inexpensive tool is the dots, which is convenient to use at home to create an original nail design. Although it can be replaced with improvised means, with dotter the patterns are more accurate.
It is better to start painting on your nails with a simple dotted manicure, gradually moving on to more complex compositions - geometric patterns, flowers or lace.
Article design: Svetlana Ovsyanikova
