French
A French jacket with a pink or beige top has long become a nail art classic. The jacket is superbly overlaid with the image of light feathers, which, depending on the preferences of the nail designer, can be bright or pastel colors, flat or embossed.
Choosing a color
The final result and the effect that the design creates will completely depend on the color of the web. Every master should have a viscous gel paint in his arsenal of nail decorations. It is universal and will suit any base. However, the colors of the material may vary. Today there are standard black and white, blue, gray, metallic, delicate and bright shades. Masters are inclined to believe that everyone should have white and black cobweb colors. They create accents, as well as a base from which you can create many looks.
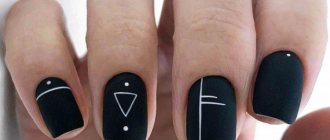
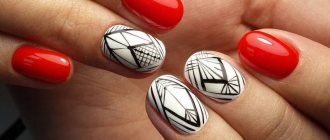
Black
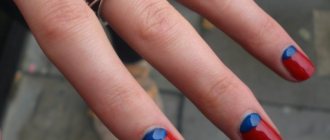
Every master should have a black web, as it sets the base and is combined with all base colors. Dark threads will create a spectacular contrast against a light background.
White
Masters are inclined to believe that everyone should have white and black cobweb colors. They create accents, as well as a base from which you can create many looks.
Red and burgundy
The color of passion and love. On nails it can look both gentle and bold, depending on the execution and idea. It occurs quite often in design.
Beige
A delicate color that has become especially fashionable this year. Suitable for everyday style and will create a pleasant mood.
An unusual color for the material, which is why it is often called exclusive. Perfectly accentuates any design.
Nude
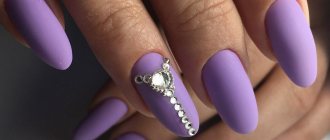
The case when the color does not catch the eye: laconic and elegant. Just what a beautiful lady needs. A nude manicure with a spider web in a matte top will emphasize the tenderness of its owner.
Blue
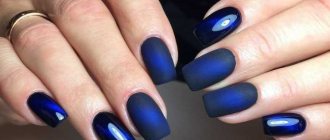
A deep and incredibly attractive color that is especially suitable in winter. However, even in summer this option will look gentle and cute.
Pink
A gentle color for real girls that will add color to even everyday wear. You can safely use it as a background; the color goes with almost everything.
Green
Unusual, bright and bold: green is not often used for design. However, why not dilute this world with bright colors?
The color of nobility, which fits perfectly with delicate colors, sparkles and rhinestones.
Silver and gold
Festive sparkles will complement any design: from New Year's to everyday. Sparkling particles create a magical mood, so these colors will not leave anyone indifferent.
Bright colors are currently in demand: metallic, neon. They can create a bright and original manicure with a minimum amount of material. And delicate shades look especially good on women's hands. Girls are increasingly trying to do a nude manicure with accents, as it fits any dress code: be it the workplace or pleasant gatherings with friends.
Having several multi-colored materials in your arsenal, you can create a design to suit the taste of anyone who wants to get a manicure. And if you decorate the web with rhinestones, foil or sparkles, you can get the perfect New Year's manicure
It is important not to limit your imagination, but to give it the opportunity to run wild. Trends of the last year allow for the introduction of creativity and the author's imagination into nail design
Gradient
Feathers are also appropriate on nails with soft, gradient color transitions. A two-color gradient is traditional, but 3-4 shades look good together with bright peacock feathers.
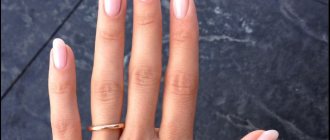
Nude beige
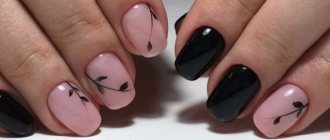
A nude manicure captivates with its simplicity and sophistication. It is suitable for those who identify feathers with lightness and tenderness. Feathers in calm tones look great on nails with a pastel beige finish. Black designs on nude manicure make it brighter and more creative.
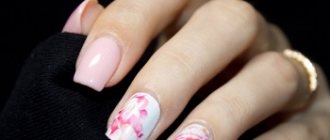
Nude pink
A nude manicure with a pink top looks simply amazing. This design will appeal to soft, feminine people. A wonderful addition to a romantic look will be the image of light feathers on soft pink nails.
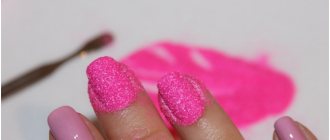
Pink manicure and glitter feather
If you're looking for a cute feather manicure for every day, we recommend choosing something a little more relaxed. For example, a soft pink pastel design with one feather on the ring finger.
Making such a pen is as easy as shelling pears. All you need is glitter and black gel polishes and a brush with long, fine bristles. Do a classic manicure with gel polish, as described above, and get to work.
For this design, the feather starts from the top edge of the nail. Then it goes to its base. In this drawing there is no base of the pen and the lines come from one point. When the feather is ready, dry it in a lamp and cover it with a layer of gold glitter, applying a thin layer of it on top of it. A gentle manicure with a feather is ready!
Rhinestones
Feather manicure can be decorated with shimmering rhinestones made of crystal, glass, ceramics, plastic or acrylic. The main thing is that the rhinestones harmoniously complement the feathers, and do not overshadow them with their shine.
Glitter
You can diversify your feather manicure with glitter. Glitters and shimmers enliven the image on the nails, coloring it with sparkles of all colors of the rainbow. The sparkling coating is applied both to the design itself and to areas of the nail plate that are free from the design.
Step-by-step guide to creating a feather manicure
Before you start decorating your nails, you need to prepare the necessary materials, namely:
- base coating;
- beige varnish;
- artificial or natural feathers;
- manicure scissors;
- tweezers;
- finishing varnish.
Editor's Choice: Pastel Nail Polish: The Best Color Trends to Try This Summer
Even if you have no experience working with feathers, you can get amazing results by performing all the steps in this order.
- First of all, you need to prepare your nails for applying a new coating. This stage involves removing old polish, removing cuticles, adjusting the shape of the edge of the nail and polishing the surface of the nail.
- After this, you need to apply a base coat to the nails, paying special attention to the edges of the nails. This will prevent the coating from peeling off. Dry your nails well under a lamp.
- Cover your nails with beige gel polish without drying it.
- Using tweezers, place the feather on the nail, trying to do it as carefully as possible. Press it carefully so that there are no un-glued areas.
- Using well-sharpened thin scissors, carefully trim off the excess part of the feather and dry your nails under the lamp.
- Apply the finishing polish to your nails, without pressing the brush too hard, and dry this layer. To complete the process, treat your nails with a degreasing agent.
It is worth noting that both the color of the varnish and the color of the feathers can be very different; the process of creating such a manicure is so simple that anyone can handle it.
Editor's choice: Manicure with gel polish at home: how to quickly and correctly do the procedure yourself?
Types of feathers
For bright people who are not afraid to experiment with their appearance, a manicure that imitates peacock feathers is suitable. Below are several striking options for this design.
The image of feathers of ordinary birds looks more restrained and laconic on the nails. They can be recommended to romantically minded, sophisticated people.
Color options
This type of manicure looks great in both calm tones and bright multi-colored designs. It all depends on the specific situation, taking into account the occasion and attire accompanying it.
Nails coated with black or chocolate brown varnish with golden feathers painted with a thin brush look stylish and at the same time discreet.
A great option for a romantic summer manicure is pink and blue feathers on a white background. This design is more suitable for young girls.
Editor's choice: Yellow manicure: color combinations and design options
The image of a peacock feather looks most advantageous on nails coated with green varnish of a lighter shade than the feather itself. When drawing the “eye”, it is recommended to use blue and gold varnish.
Another good option is to use blue varnish to create the background. A peacock feather and any other feathers, including those painted using stamping, look beautiful on it.
Continued story
The image can be positioned so that a thin fluffy feather starts on one nail and ends on the other. Together, both parts should merge into a single picture.
Real feathers
You can take a real feather and “seal” it between layers of gel polish on one of your fingers. And cover the rest of the nails with beige color, without any frills. A manicure with real feathers looks very realistic and elegant.
Feather manicure ideas
In order to further diversify the already unusual design, you can add a variety of decorative elements to the manicure, for example: rhinestones, sparkles, bouillons, etc.
It is worth experimenting with shades of varnish. Feathers look different on each new background. If, for example, the feather is black, then it will look great on a white background.
It is necessary to adhere to the basic rule, if the feathers are drawn by hand - you must try as hard as possible to ensure that the feathers are similar to real ones. By the way, painted fluffy feathers look very impressive. They are more beautiful and have a natural appearance.
In general, this type of design opens up many different options for creativity, because coming up with something new is very interesting.
If we talk about the style in which feathers can be used, then it’s definitely a boho manicure. It includes images of various magical elements, such as dream catchers, the sun, ancient signs and feathers themselves.
Feathered
Some nail designers place images of birds and their feathers on adjacent nails. Owl, peacock, parrot, dove - these and some other birds are most often found on the nails of modern fashionistas.
dream Catcher
Indians make amulets from feathers that protect sleeping people from evil spirits. The image of this item with light, airy feathers looks great on nails. This unusual and refreshing design is suitable for young ladies.
Here are some more interesting design options.
A light, feminine, exciting manicure with feathers is liked by many fashionistas. With proper care, it can be done at home. Smooth lines, sophistication, harmony and originality - these are the main features of a feather manicure that you will definitely like.
- Author: Cloud
Rate this article:
- 5
- 4
- 3
- 2
- 1
(3 votes, average: 1 out of 5)
Share with your friends!
Peacock Nail Art Ideas
Peacock nail designs can look different
To make a beautiful peacock manicure it is important:
- Decide on a technique for its implementation that can best reflect the essence of your personal style - bright feminine or, conversely, strict business using a more muted palette of shades.
- Take into account your own experience in nail art in order to easily implement your plans with your own hands - do not immediately take on a complex sketch before you have mastered your hand.
Here are the most interesting ideas for peacock manicure:
| Photo | Description |
| Idea 1. Water technology (or liquid stone) Allows you to get an unusual three-dimensional design with bright multifaceted iridescent shades. To do it yourself you will need:
| |
| Idea 2. Unusual color scheme A free interpretation of feather nail art allows you to get a unique design with the most suitable palette. He is characterized by:
| |
| Idea 3. Ethnic technique It makes it much easier to draw feathers with your own hands, allowing you to get a lighter, airier and more stylish design. Can be executed:
| |
| Idea 4. Patterns on the free edge or middle of the plate The design is more sophisticated and versatile for feminine looks. This technique allows:
| |
Idea 5. Patterns on transparent nails:
Camouflage polish is best suited as a background. | |
Idea 6. Colorful ombre:
| |
| Idea 7. Design “story” Allows you to create a real living story on your nails by drawing different elements on each nail. You can use ready-made stickers, the price of which does not exceed 300 rubles. |
Peacock design for beginners in 7 steps
Let's try to make a simple peacock manicure with our own hands, suitable for all beginners:
| Photo | Instructions |
| Step 1 Apply a camouflage coating (transparent, flesh-colored or milky). | |
| Step 2 Draw a neat straight line with a brush diagonally, closer to the free edge of the plate. | |
| Step 3 We draw several more thin short strips in a semicircle from the outer edge of the main strip. We use the same shade of varnish. | |
| Step 4 Using another shade of varnish, draw several lines on the opposite side of the main line. | |
| Step 5 Use glitter varnish to highlight the main line, creating volume and texture to the design. | |
| Step 6 We fix the design with a colorless topcoat. |
Peacock stamping design
Detailed instructions will tell you how to reduce design time using a special kit:
| Photo | Instructions |
| Step 1 Apply colored varnish as a background. | |
| Step 2 Paint the area of the plate with the desired pattern with a different shade of varnish. | |
| Step 3 Use a scraper to move along the plate. | |
| Step 4 Using a stamp, we “capture” the design from the plate. | |
| Step 5 Transfer the design from the stamp to the nail. | |
| Step 6 Using dots we apply dots of a bright shade. | |
| Step 7 Apply a lighter shade of varnish over the first dots. | |
| Step 8 Using a thin dot tip, place dots of a bright shade between the first two, creating a kind of pattern corresponding to a peacock feather. | |
| Step 9 Complete the peacock manicure with a transparent fixing gel. |