Craquelure on nails is a technique for creating artificial cracks. This idea for a manicure came to us from France. Stylists borrowed this image from ancient paintings painted on canvas. Previously, paintings curled, and over time, cracks formed on the canvases, reminiscent of cobwebs. This is the craquelure effect. Do you think it’s difficult to create such an original design with numerous cracks and cobwebs? Not at all. Any girl can do such a manicure; you just need to know what materials are used to create the “crackle”, “crack” or “craquelure” effect.
Features and secrets of designing a “cracked” manicure
The craquelure effect can be created in two ways: using special enamel marked “craquelure” or “crackle” or using casting foil.
The main secret to the perfect cracked nail design is the right combination of colors. For craquelure manicure, only 2 colors of enamel are often used. It is from their successful and correct combination that the effect of cracks is obtained.
Girls who decide to make a craquelure nail design for the first time are recommended to use “crackle” polish in white or black. They are universal, so they will be combined with any shade of varnish.
To create an original nail design, stylists advise experimenting and instead of the usual vertical application of “crackle” coating, make it horizontal, circular, or diagonal.
Step-by-step process for creating a cracked manicure
To make a manicure with a craquelure effect you will need a minimum set of materials:
- base coat;
- colored shellac without any additional effects (plain);
- crackle varnish;
- fixative
Let's start creating a vintage nail look:
- Apply base coat to prepared nails and dry.
- We apply colored enamel in 1 or 2 layers and also dry it.
- Cover the plate with one layer of craquelure. It should be taken into account that a thick layer of enamel will make the cracks large, and a thin layer, on the contrary, will create graceful lines.
- Apply a layer of sealer.
An unusual way of craquelure manicure with foil
Crackle polish and manicure foil are not the only ways to achieve the effect. There is another unusual method to get a craquelure effect on your nails. For it you will need regular foil (from a chocolate bar or for baking) and two varnishes of different colors.
Cover your nails with one polish and wait until dry. Apply a second one and immediately press the crumpled piece of foil onto your nail. Remove it. Some of the varnish will remain on the foil, and some will appear in the form of cracks. To level the surface, after drying, apply a layer of colorless varnish or sealer.
It is worth noting that the listed methods give different results. Try them all to find the one that suits you best.
Craquelure effect using casting foil
If you were unable to buy shellac with a craquelure effect, then you can go the other way - create a design for cracked nails using casting foil. Its main difference from regular manicure foil is that it is matte. Making nail designs with foil is no more difficult than with varnish:
- Apply base coat and colored shellac to your nails.
- Without removing the sticky layer, take the casting foil and press it onto the nail with a matte surface. The movements must be fast, and the position of the foil must be changed each time.
- Apply topcoat and dry nails in a lamp.
By the way, to create a craquelure effect, you can use several colored strips of foil. The result will be a non-standard, expressive image.
Craquelure design in calm and colorful colors
If for an everyday look you need to choose shades of varnishes that are in the same color scheme, then for weekends, vacations, and holidays, stylists advise trying on bright looks. Moreover, a craquelure manicure in this case will look good on both short and long nails.
And for everyday life it is better to choose calm shades in the same color scheme, for example, lilac with purple, blue with dark blue. Various options with classic varnishes are also allowed: black, white, gray.
The everyday crackle effect should be created on short to medium length nails. It is not necessary to cover all nails with crack varnish. You can, for example, highlight one nail and paint the rest with basic shellac. Or make only fragments of crackling on the nails.
Craquelure varnish: step-by-step instructions
- Now we cover the nails with a base coat of polish. Its function is to protect the nail plate from the negative effects of varnishes. It also prevents nails from splitting and drying out. Of course, applying it is not necessary for a beautiful manicure. This is only necessary for the health of your nails.
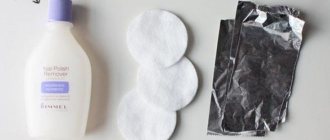
- First, degrease the surface of the nails with nail polish remover.
- Let the base dry thoroughly, after which we apply the base varnish on the nails, the color of which you have chosen in advance. It is he who will be visible in the cracks.
- Let the varnish dry and apply craquelure varnish. Again, wait for it to dry completely.
- The last stage of creating our manicure is applying transparent varnish. It is needed as a fixative. This will keep your manicure in perfect condition for a long time.
- Additionally, in the craquelure technique, a finishing layer is necessary to create neat and beautiful cracks. Otherwise, you may get the effect of a sloppy and peeling manicure.
Imitation of reptile skin on nails for extravagant girls
The craquelure effect on nails simulating python, crocodile, and turtle skin is simply and realistically done using crack varnish. This look may seem daring to many, but it looks amazing, especially if the manicure complements the wallet or snakeskin handbag.
This design is chosen by bold, original individuals who strive to surprise others.
Craquelure, reminiscent of reptile skin, is suitable for themed parties. The main thing is to skillfully combine the selected shades of varnish, as well as select the appropriate outfit and makeup.
Remember! In everyday life, such a bold design will look defiant and even vulgar.
Necessary materials for gel manicure with foil
You can perform hygienic preliminary procedures using any tool convenient for you. Some people make do with a regular set, while others need equipment. Do what you feel comfortable with, but in any case, get your nails in order before applying the coating.
And to make craquelure on your nails using gel polish, we will need the following:
- file and polishing buff for natural nails;
- degreasing agent;
- base (for example, Structure);
- varnish that does not match the color of the foil;
- manicure foil;
- fixative (Brilliance or any equivalent);
- a product to remove the sticky layer after the last drying (for example, Purify);
- orange stick;
- tweezers;
- nail scissors.
Of course, a special lamp for drying gel polishes is a must-have equipment. And those who have just started learning to work with this material definitely need a watch (if the lamp does not have a built-in timer).
Types of craquelure varnishes and their features
In the nail industry, there are 2 nail coatings in the cracking style:
- Spider coating.
- Fence craquelure.
Spider is different in that when applied to the nail, an interweaving of thin threads is created, reminiscent of a cobweb. The texture of this coating is thinner than that of fence craquelure, so the lines are more elegant.
However, most often fashionistas use fence craquelure. This shellac covers the nails with obvious, large cracks.
Why choose craquelure nail polish? Because the vintage style (antique effect) has been trending for several years. French stylists do not intend to remove craquelure designs from the nail industry.
After all, marigolds that resemble the crackling of porcelain, pieces of furniture, and paintings look original and stylish. And with a skillful combination of colors and the correct manicure technique, you can create an interesting design that allows any girl to remain individual, spontaneous, and original.
As you already understand, cracking nail polish is easy, and craquelure shellac or casting foil will come to the rescue. This vintage nail design deserves attention, because, firstly, the nails look original and stylish, and, secondly, any girl can do a manicure at home.
With our step-by-step process for creating a cracked nail polish effect, secrets and tips, as well as unique photos, you can create a unique and fashionable nail look.
