- Manicure from a specialist: cheap
A modern woman often has almost no free time - she needs to do everything at once. However, no matter what, we all want to look beautiful. An important condition for this is well-groomed nails. Let's figure out how long it takes to create different types of manicure and how much it all costs, because time is money 
The duration of the process is proportional to its type. Thus, step-by-step stages take different periods of time depending on whether we do the procedure ourselves or whether it is performed by a master. Moreover, it is important to take into account the presence/absence of design (art painting, for example), removal of old coating, soaking of nails and other factors.
Time
Main stages of manicure
Yoko, Cuticle scissors, Y SN 101
Professional scissors for processing cuticles.
(95)
980 rub.
We'll order soon
Planet Nails, Buff 4-sided Mylar, 180/180
Buff for polishing natural and artificial nails.
(36)
55 rub.
55 RUR Buy
ruNail, Pusher with a hatchet, RU-0152
Pusher with a stainless steel hatchet.
(100)
135 RUR
135 RUR Buy
Below we present the traditional stages of manicure and the average time spent on them:
- if necessary: removal of the previous coating, which is affected by its layer, solubility, solvent quality, “age”. Usually the top is cut off before soaking (5-10 minutes), then the remaining material is removed. The complete removal process takes from 15 to 30 minutes;
- complete preparation of nails with treatment of the cuticle and pterygium - at least 30-40 minutes;
- applying the base - 5-10 minutes;
- drying the base in a lamp - from 30 seconds to two minutes (depending on the type and power of the device used);
- applying gel polish to the nails of both hands - 5-10 minutes;
- drying the color coating - 30 seconds-2 minutes;
- applying the second layer of color - 5-10 minutes;
- applying top coat and drying - all together for 5-10 minutes;
- removing the sticky layer - 1-2 minutes;
- treatment of cuticle with oil - 1-2 minutes.
IRISK, Orange sticks “Triangular”, 90-100 pcs.
Orange wood sticks for manicure and pedicure.
(54)
170 rub.
170 RUR Buy
TNL, Boat file, gray 100/180
Professional file for artificial and natural nails with two working sides, each of which has abrasiveness.
(62)
26 rub.
26 RUR Buy
Milv, Good bye cuticles remover, 100 ml
Professional product for softening and removing cuticles.
(125)
220 rub.
220 RUR Buy
On average, the total duration of the procedure is an hour or two. If the work is performed by a professional (and uses a “high-speed” lamp), it usually lasts no more than an hour, provided that the master does not create super complex decor. Usually, the most time is spent on hand painting and design with rhinestones, but using sliders or film can reduce the duration of a manicure.
Do-it-yourself manicure at home
If you do a manicure at home yourself, the time spent on the process increases by 1.5-2 times. Because, for example, while the nails of one hand are drying in the lamp, the master uses this period to paint the nails of the second hand. When we create beauty alone, it is, of course, impossible to do this.
Manicure with regular polish
If we use traditional varnish (not shellac), then the duration of the manicure is longer, since if drying gel polish takes a maximum (!) 2 minutes, then drying regular polish (including base and top) takes up to five minutes. Let's add this time to the list above.
What if you get nail extensions?
If you build it up, then add about 4 minutes per nail to the announced total time (40 minutes in total). During this time, a professional usually removes the old coating, adjusts the length, arch and gives the final shape. Of course, the time increases if the nails are problematic and require additional treatment.
Cost of manicure
A manicure with gel polish costs from 500 to 3000 rubles from different masters. But where does such a range of prices come from? Let's figure it out.
Manicure from a specialist: cheap
The low cost of the service is always due to the following factors:
- the master is a beginner and is gaining experience, attracting with the price;
- there is a promotion going on in the beauty salon;
- the master uses cheap and low-quality materials.
There are also craftswomen who work from home. Their services usually cost around 700-800 rubles. But there is a danger here: such “handicraftsmen” do not always follow the rules of instrument hygiene. A client blinded by profit can become infected with fungus, hepatitis and other diseases through unsterile equipment.
Manicure from a specialist: expensive
Ideally, the high cost (2000-3000 rubles) of a manicure in a salon is due to the highest qualifications of the master and the use of premium quality materials. But, unfortunately, this does not always happen, and the girl leaves the salon with a streaky coating that runs under the cuticle.
What to do? And it is undesirable to go to “cheap” masters, and “expensive” ones may not live up to expectations. We recommend going to trusted professionals whose reputation is confirmed by numerous reviews and examples of work.
Do-it-yourself manicure: starter package and its cost
Recently, girls are increasingly buying lamps and materials for doing their own manicure. Firstly, “if you want it done well, do it yourself,” and secondly, it will save both time and money. What is required for the starter package and how quickly will it pay for itself?
IRISK, Lint-free Super-absorbent wipes, 600 pcs, White
Non-woven soft absorbent wipes.
(43)
230 rub.
230 RUR Buy
TNL, Nail degreasing and sticky remover, 100 ml
Liquid for degreasing the nail plate and removing the sticky layer.
(44)
127 RUR
We'll order soon
Planet Nails, UV Tunnel Rose Lamp, 36W (electronic)
Lamp for polymerization of gel polishes and any UV materials.
(28)
RUB 1,010
RUR 1,010 Buy
List of required items:
- scissors for removing cuticles (from 200 rubles);
- file (from 100 rubles);
- a metal pusher for pushing back cuticles or an orange wood stick (from 150 rubles);
- sanding block (from 40 rubles);
- cuticle remover (from 200 rubles);
- lint-free wipes (from 55 rubles);
- disinfectant liquid (from 70 rubles);
- UV lamp (average 1500 rubles) or LED/hybrid (average 2000-3000 rubles);
- dehydrator (from 170 rubles);
- primer (from 115 rubles);
- colored gel polishes, base + top (from 1000 rubles per set);
- liquid for removing gel polish (from 80 rubles);
- cuticle oil (from 60 rubles).
JessNail, UV/LED SUN X Lamp, 54 W, white
Professional touch lamp for polymerization of materials with ultraviolet LED technology.
(124)
RUR 2,222
RUR 2,222 Buy
Grattol, Bonder Dehydrator, 9 ml
A preparation for disinfecting and degreasing nails before applying artificial coating.
(161)
200 rub
200 RUR Buy
ruNail, Non-acid acid-free primer, 15 ml
Acid-free primer for gel systems.
(102)
196 RUR
196 RUR Buy
So, let's count. In order to start doing manicure at home yourself, we will need approximately
3,740 rubles. A little more expensive than one trip to a premium salon. Tools and materials will last for a long time; you only need to purchase additional color coatings or design elements (optional).
The starter package will last for at least six months, taking into account the fact that you will do a manicure once every 2 weeks. So, in this case, the cost of a self-manicure with gel polishes turns out to be approximately
a little higher than 300 rubles.
More information about the technology of applying gel polishes at home can be found here.
Kodi, Base and Top Set, 12 ml
Rubber base and top for gel polish.
(144)
RUB 1,150
RUR 1,150 Buy
Severina, Liquid for removing biogel, gel and artificial nails 300 ml
Liquid for removing biogel, gel and artificial nails
(75)
194 RUR
194 RUR Buy
Super-resistant Shellac manicure for the active lady
How many thoughts does a woman have when planning a vacation away from home? All girls are concerned about the issue of external attractiveness. After all, you really want to remember your vacation with joy, looking at beautiful photos. Therefore, when setting off on a long-awaited trip, sophisticated ladies prepare in advance. A practical and comfortable hairstyle solves part of the problem. What about nails where the polish only lasts a few days? If you're worried that this little thing could ruin your vacation, try getting a shellac manicure.
Until recently, the procedure for long-lasting manicure was available only to clients of beauty salons. Today it can be done at home. For this you will need a Shellac kit. How much does it cost? At the time of publication of the article, the price of the basic set (color varnish, base and top coat) on the website of the official dealer of the CND company is 1,730 rubles. To this should be added the cost of a UV lamp, but we’ll talk about that later.
The procedure does not damage the nails, and it consists of the step-by-step application of three unique coatings. Each layer is polymerized in a UV lamp. Don't confuse Shellac manicure with gel polish. Their execution technology is similar, but there are some differences. So that you can study in more detail all the intricacies of shellac, choose your own nail design and find out whether such a manicure is harmful, we have prepared informative video lessons and informative photos for you.
Advantages and disadvantages of shellac
When choosing a particular product, women are always concerned about certain points. Let's answer the most popular questions asked by girls who decide to purchase a shellac kit.
- How long does a manicure last? Beautiful nails will delight you for at least 14 days. The coating does not crack, and the color does not fade in the sun. The manicure lasts 2-3 weeks, after which the shellac layer is removed, and it is very important to do this correctly.
- Is it difficult to apply the coating at home? The varnish hardens only under the influence of UV rays, so before immersing your fingers in the lamp, you can correct any defects. Video tutorials will help you master the technique of applying shellac, and you will easily create a spectacular design.
- Is shilak manicure harmful for nails? The original CND coating does not spoil the nails, but on the contrary, strengthens them. Why may Shellac manicure not be suitable in some cases? This happens extremely rarely and is associated with individual intolerance to the components, which is expressed in thinning and splitting of the nails.
- How long does the whole procedure take? The first time you apply Shellac you will need to do it for about an hour. In the future, 30 minutes will be enough for you to perform a manicure.
- Is it difficult to remove the coating? The procedure is quite simple. Under the influence of a special product, the varnish is crushed, after which it is easily removed from the nails with an orange stick.
- Can shellac be applied to those who are prone to allergies? The varnishes contain no dibutyl phthalate, toluene or formaldehyde. Shilac can be used without fear, as it is hypoallergenic and even odorless.
- Should I buy a Shellac set for personal use at home? The cost of the kit may seem too high to you. Believe me, such procedures in salons will cost you much more. In addition, at home you can create your own nail designs, turning your ideas into reality. Your hands will always look like they do on the cover of a magazine. So why not buy it?
What do you need for Shellac manicure?
To make shellac at home, you will need the following set of tools and materials.
- Ultraviolet lamp (36 W).
- Nail degreaser.
- Base coat (base).
- Colored shellac.
- Top coating.
- Nail file and polishing buffer.
- Orange stick.
- Lint-free wipes.
- Shellac remover.
The power of the UV lamp must be at least 36 W, otherwise the layers of varnish “will not set” and the shilak manicure will not work. Such a device costs about 1500-2000 rubles, if we are talking about budget models, which will be quite enough for you. The degreaser can be purchased along with the Shellac manicure kit. At home, it will be replaced by regular medical alcohol.
We recommend that you purchase colored varnish, base and top coats from the CND brand. You will ask why? The fact is that only the official manufacturer guarantees the quality of its product. You can buy cheaper analogues offered by third-party companies, but be prepared to encounter pitfalls. By saving a little, you may not get the result you expected.
It is better that all three phases of shilak are of the same brand. Their roles in creating a manicure are interconnected. The base coat prepares the nails for the procedure. Essentially this is the foundation of colored shellac. The top layer, in turn, protects the manicure from damage.
You will need napkins or cotton pads to remove the sticky layer at the final stage. They must be lint-free, otherwise you will have to remove the coating and reapply it. To avoid unpleasant alterations, follow all the recommendations and tips described in this article.
Performing shellac manicure: step-by-step instructions
Step 1. Preparatory activities
The first thing you need to do is get your nails in order. Treat the cuticle using the cuticle or European method. Finish the free edge with a nail file. If your nails are thin, opt for short tips to prevent chipping and cracking of the finish. Next, using a buff, you need to polish. A few strokes will be enough - do not polish your nails to a glossy shine. Your main task is to remove all microcracks that could be on the nail plate. You can see the result of proper polishing in the photo.
The next step is degreasing the nails. At home, you can use regular medical alcohol. It should be applied immediately before starting the procedure! Why is this so important? Your manicure may be unsuccessful if, after degreasing, you accidentally touch the nail plate. Any grease stains will prevent the coating from attaching securely.
Step 2: Base Layer
Apply base coat to oil-free nails. Shellac materials have a liquid but sticky consistency. This makes the process of covering your nails a little more difficult. Don't worry, you will adjust over time. The main thing is to try to apply the varnish in a very thin layer, remembering to seal the tip. It will take time to master this skill. Don't hesitate, it's worth it.
After applying the base coat, place your fingers in a UV lamp for 10 seconds. Please note that its power must be at least 36 W, otherwise the shellac will not polymerize properly.
Step 3. Colored shellac
Start covering your nails with colored shellac, as in the photo. If possible, apply the polish closer to the cuticle, then the manicure will look neater. Place your fingers in a UV lamp for 2 minutes. If the layer of varnish is too thick, then under the influence of ultraviolet radiation the coating will “wrinkle” and the manicure will have to be redone. Do you want a brighter and more saturated color? Apply a second layer, then dry your nails again in a UV lamp for 2 minutes.
Step 4: Finishing Touch
Apply top coat to your nails. Place the polymerization fingers in a UV lamp for 2 minutes. Now you have to remove the sticky layer. Use a lint-free cloth soaked in alcohol to wipe the surface of your nails. Apply nourishing oil to your cuticles and treat yourself to a pleasant massage. Manicure is ready!
When making Shellac for yourself, it is very important to strictly follow the execution technology. The coating, which is applied correctly, will not crack or damage the nails in the future. We invite you to watch a useful video. Popular beauty blogger Irina will give you lessons on applying Shellac coating at home and tell you how long such a manicure lasts on your nails.
Two weeks have passed... How to remove Shellac?
Have your nails grown long and is it time to take off your shellac? We'll tell you how to do it right.
Prepare a special shellac remover (containing acetone), a small piece of foil and a cotton pad for each finger. Soak a cotton pad in the liquid and apply it to your nail. After this, wrap your finger with foil, as shown in the photo. Repeat the procedure with all nails. After 10 minutes, open the first finger and try to peel off the coating with an orange stick. If the polish doesn't budge, reseal the nail and wait another 10 minutes. Repeat the procedure until the coating comes off easily.
Manicure with Shellac coating from the official manufacturer is not harmful and has a general strengthening effect on the nails. However, when carrying out the procedure constantly, the hands sometimes need rest. After every second removal of shellac, the nails must be restored. This requires at least a week.
Rub nourishing oil into the nail plate daily. At home, pamper your hands with lemon juice baths. Citrus helps strengthen nails. Don't forget to moisturize and nourish the skin of your hands with creams. To restore your nails, try a hot manicure. Pleasant relaxation and excellent results are guaranteed to you. In just one procedure, your hands will acquire a healthy and well-groomed appearance, as in the photo.
Bright ideas for long-lasting manicure
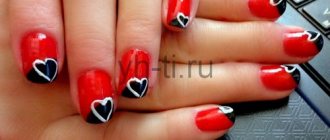
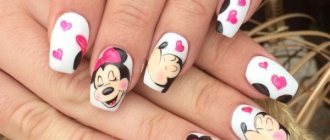
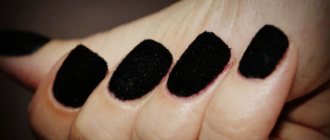
Since Shellac manicure lasts a long time, it is very important to come up with a design that you won’t get tired of even after 2 weeks of wear. This is especially true for women who like to experiment with their appearance. Many girls mistakenly believe that covering nails with shellac is only possible in a single-color version. In the photo you can see how elegant and stylish monotonous shades look on nails.
In fact, when choosing shilak as a coating, you are not limited to any framework. Thanks to the rich color palette of varnishes, you have the opportunity to create a unique and vibrant design. How many patterns can be applied using a thin brush or stamping! How about decorating your nails with sparkles and rhinestones, like in the photo? Such a huge variety of options will allow you to bring your wildest ideas to life. Due to the fact that Shellac lasts for a long time, you will have time to thoroughly enjoy the result of your efforts.
Are you interested in the possibility of a long-lasting manicure? Do you want to get interesting ideas and see beautiful compositions? Then be sure to check out the topic about shellac manicure design, where we will present to your attention a collection of magnificent photos of nails with Shellac coating.
By tradition, we invite you to watch a video that will help you consolidate your acquired knowledge. A visual manicure lesson, presented in video format, will put everything into perspective and answer all your questions. Enjoy watching!
homemanicure.ru
