Design Features
Fluffy manicure is most often done in salons using a special device - a flocider. The device is filled with small fibers made of wool, acrylic, viscose, synthetics (flock). Under pressure, the pile flies out of the device and, as it were, “drives” the fleecy coating into the varnish base. For home use, you can find a flocider in modern professional stores.
The first velvet manicure kit was released by Ciate in 2012. The founders are considered to be nail art designer Sam Beidle and the founder of Velveteen.
There is also a special ready-made velvet varnish coating, which is applied in several layers. However, both flock and flock coating cost a lot and are not easy to find on the open market. For the same reason, only a few nails are often decorated in this way, completely covered with velor, or embossed in the form of a design.
The feeling of suede on nails can be achieved using acrylic spraying, which has a lower cost and is more common on sale. A manicure with velvet powder or sand is easier, faster and cheaper, but the effect of cashmere is in no way inferior to flocking.
For manicure with velvet sand, powder or flock, only gel polish is used. Regular varnish dries quickly and does not have sufficient layer thickness for a cashmere coating. The villi simply will not be able to gain a foothold.
Not used for velor manicure and top coat, so as not to cover the fluffy effect.
How to do a corduroy manicure
To create a velvet design on nails we will need the following:
- Special velvet powder, also known as flock,
- Varnish to match the powder,
- Brush. What you need for a velvet manicure
You can purchase a set of velvet nail powders in different colors. The cost of such velvet for nails is very different, for example, on Ebay one bottle costs about $1, in other places the price of the same corduroy varies from 50 to 150 rubles. The most expensive can be called the Ciate Velvet Manicure set - about 650 - 850 rubles. The Ciate brand is known for its unusual and very high-quality nail products; in particular, it produces sets for the “caviar” manicure, which was already mentioned above. By the way, the invention of corduroy manicure is the merit of Ciate. The brand's creative director, Charlotte Knight, created this wonderful nail design through trial and experimentation with textures.
Ciate Velvet Manicure Set
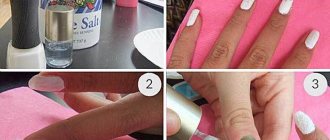
So, now let’s talk about how to do a velvet manicure step by step.
- Paint your nails with background polish.
- Apply a second coat of polish to each nail, one at a time.
- Immediately sprinkle the nail painted with the second layer of varnish with velvet powder and press it with your finger or a stiff brush.
- Use a brush to remove excess velvet.
How to do a velvet manicure at home (step by step)
You don't need to do anything else. If desired, you can apply a base under the manicure, but you cannot apply a fixative, otherwise there will be no “fluffy” effect.
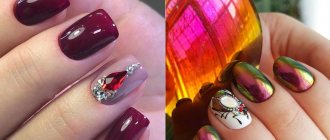
Corduroy manicure: design options
Nail powder
Colored velor on nails
Velvet nails
Please note that it is better not to wet nails decorated with corduroy on regular varnish, especially with dyes. So, for example, a drop of coffee will leave a not very beautiful stain, which can only be removed together with varnish. In addition, it is better to refrain from playing with pets, because... Hair sticks very strongly to velvet manicure.
Advantages and disadvantages of velvet spraying
Velvet manicure undoubtedly has more positive aspects than negative ones. The disadvantages, although with some stretch, include:
- the procedure and materials for “real” flocking are expensive (however, you can always find alternative options that do not detract from the effect);
- requires a flocider (although you can do without it);
- Experience and skill are of no small importance (but desire and patience are more important);
- It is performed on gel polish (you can try it on regular one, but you will need to apply at least 3 layers of varnish. And such a “design” will take a very long time to dry).
A salon manicure costs about 1,000 rubles, while a home procedure will cost around 300 rubles.
The list of advantages is much longer:
- Due to spraying, the manicure becomes stronger and lasts longer, up to a month;
- makes it possible to create various patterns and three-dimensional 3D images;
- can be either matte with a velvet effect or glossy, similar to a sugar coating;
- modern materials allow you to perform a velvet manicure yourself at home;
- does not require a top coating, which reduces the cost, simplifies the procedure and execution time;
- provides a huge selection of colors;
- suitable for any style of clothing and for any event;
- the length and shape of the nails do not matter;
- the velvet covering can be additionally decorated with rhinestones or other decor;
- stylish, impressive and very beautiful.
As you can see, there are quite a few prerequisites for trying to paint your nails in velor style. But, like any other manicure, it requires preliminary preparation.
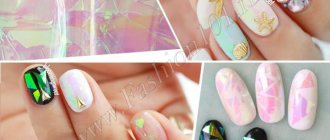
Options for creating a suede effect
Ideas for velvet manicure
- No matter how fashionable a velvet nail design may be, if you constantly make it monochromatic, then after some time you will no longer like its appearance. If you want to diversify this trendy manicure, then try to bring something of your own into it.
- Don’t be afraid to experiment, because despite some statements, colored flock goes well with all types of varnish, rhinestones, sparkles and patterns. The best part is that wearing such nail art will not require any special care. You can easily do your usual work without fear that the velvet covering will be damaged or peel off.
Velvet manicure purple French
Types of velvet manicure:
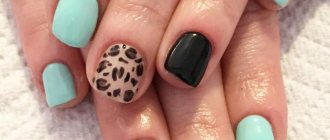
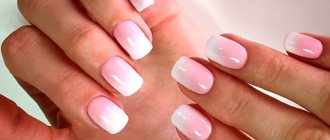
- A la French . To begin, apply a light cream polish to your nails and let it dry. Then apply a pure white varnish coating (in the form of a half-nipple) to the very tip of the plate and cover it with the same white flock. If you don't like the white color scheme, then you can replace it with cream or peach
- American. This manicure involves the use of natural pastel shades, without any sharp color combinations or transitions. The only thing you can afford in this case is literally a couple of the smallest rhinestones anywhere in the corner of the nail
- Spanish. Suitable for women who are not afraid of bright color combinations. To make this nail design you need to stock up on at least three different flocks. In this case, velvet powder of different colors is applied to the nail plate in separate strips, slightly layering each other. Strips can be placed both horizontally and vertically
- Lunar. This type of manicure appeared in the twenties of the last century. But modern women also did not give up wearing it; moreover, they began to use colored flock to apply it. This design involves highlighting not the top part of the nail, but a semicircle placed near the cuticle. In order for such a manicure to turn out beautiful and delicate, its lower part should be painted with ordinary matte varnish, and the other should be treated with colored flock
Preparing for flocking
Those who do manicures on their own have already mastered the training using other techniques. For those who prefer salons for nail design, preparation will also not take much time and will not be difficult.
- Prepare a nail bath with moderately hot water. You can add soap solution, sea salt, soda, iodine, herbs, essential oils. This will not only soften the cuticle, but also strengthen and brighten the nail plate.
- We lower our hands for 10-20 minutes.
- Use an orange stick to push back the cuticle or do a classic manicure with nail clippers.
- We file down the free nail edge to the required length and shape, and carefully polish the surface with a block or buff.
- We remove all irregularities and roughness with a soft nail file.
- Lubricate the cuticle with cream or oil.
- After absorption, degrease the nail with the usual product (nail polish remover with acetone is suitable).
- Apply the base and dry under a lamp.
- Apply the required number of layers of gel polish of any color, drying each layer under a lamp.
We do not dry the last layer, but move directly to the velvet coating.
Velvet sand designs on nails
Velvet designs on nails
- If you dream of beautiful and original painted nails, then velvet sand is exactly the material that will help you bring all your ideas to life. But keep in mind that this technology for applying drawings requires maximum precision and perseverance, because sometimes in order to create a truly original ornament you need to spend a lot of effort and time
- But if you are not afraid of such difficulties, then stock up on flock of different colors, varnish and thin wooden sticks and get to work immediately. Try creating a subtle cable knit with a velvet cover, or create a feminine openwork design and decorate it with sparkling rhinestones in different colors. This manicure always turns out to be very delicate, so it goes well with almost all women’s outfits.
- If you wish, you can draw daisies, roses or irises on your nails, apply bright abstract lines, or simply make a popular French manicure. But, perhaps, velvet flock looks best in combination with the so-called liquid stone technique. These nails look so luxurious that sometimes you can’t take your eyes off them.
Instructions for applying velvet coating
There are ready-made kits for velvet manicure on sale. The materials may vary slightly, but basically they are:
- flocider (possible without it);
- flock/acrylic powder/sand spraying;
- base varnish;
- metal backing or sheet of paper for nails;
- brush with long dense bristles;
- stencil for drawing or designing part of the nail.
Application techniques differ slightly.
Application with flocider
- Flock is poured into a special compartment in the device.
- If the previous coat of varnish is dry, you need to apply another one. Do not dry!
- Place your finger on the metal plate.
- Turn on the flocider. Villi will begin to fly out of it under pressure, “driving” into the varnish. Using a flocider ensures stronger adhesion to the varnish, so the manicure lasts longer.
- Dry the coating under a UV lamp for the required time.
- Sweep away any remaining loose fibers with a brush.
- Design all nails or selected fragments in this way.
When using a flocider, it is advisable to wear a protective (or medical) mask to avoid flying fluff getting into your eyes, nose and mouth.
Velvet varnish
In this case, the prepared nails are painted with a special varnish with bristles. Application requires 2-3 layers. Each layer is dried under a lamp. The fixer/topper is used depending on the type of varnish chosen. Very small fibers can be fixed. Longer coats may lose their fluffy effect when applied.
Acrylic powder/dust
- If the last layer of gel polish has dried, reapply. Do not dry!
- Sprinkle the required amount of flock/dust/powder onto a convenient surface.
- Using tweezers, your hands, or directly from the sheet, sprinkle the nail generously with the spray. (The hand should be placed on a sheet of paper so that the scattered material can then be collected back into the jar and to avoid “scattering all over the room”)
- Gently press the spray onto the nail plate with a brush or cotton pad for a strong “adhesion” to the varnish.
- Dry under a lamp.
- Brush off any remaining dust from the nail with a brush.
Any chosen method for bringing the idea of velvet manicure to life will look impressive. Velor nails are suitable for any event and everyday wear. A little patience and dexterity, and cashmere nails will delight others and delight your loved one.