How to glue film onto regular polish and gel polish
The basic element without which it is impossible to make a broken glass manicure is foil. Its texture effectively imitates glass shards. It is very easy to work with, you just need to cut it into small pieces and stick it on the nail.
The sticker occurs in two ways:
- If you are manicuring broken glass with regular varnish, then glue the film onto a thin, wet layer of transparent varnish (applied over colored varnish). You can attach the film with a special glue, which is used for gluing rhinestones.
- In the case of gel polishes, a rainbow film is applied to a sticky layer of gel polish. In both cases, securing with a top coat will be required.
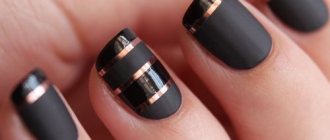
Broken glass in matte manicure
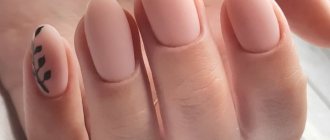
“Broken glass” on nails (photo with a matte manicure below) looks very stylish in a matte manicure. Here, as in the French manicure, you can cover a single nail or all of them - the matte background will ideally highlight the “fragments.”
This design will look good with an office dress code (if you decorate one nail).
- Prepare the glass pieces.
- Cover your nails with base and color using a matte polish. Some fashionistas, if there is no such varnish, use a regular glossy one and dry their nails over steam.
- Attach the “shards” in the required way. If it is gel polish or matte manicure, then do it without waiting for it to dry. If the nails are dried over steam, then apply a transparent layer and attach “glasses” to it.
- Apply a top coat - transparent for regular manicure and a topcoat with gel polish. In the latter case, dry each layer in a UV lamp.
We will need
To make a manicure with the effect of broken glass, we need the following equipment:
- Cuticle oil.
- Degreaser (medicinal alcohol).
- Base coat (Bonder) for nails, which will provide excellent durability to manicure for up to two weeks.
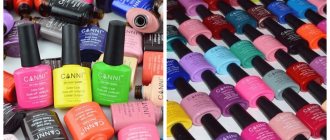
- Colored varnish.
- Foil (holographic film). It can be found and purchased in online stores (the price is low, the consumption is economical).
- Scissors.
- Clear nail polish.
- Orange stick or toothpick.
- Top Coat (gel or regular).
If desired, it is possible to use several types of mother-of-pearl film of contrasting color. As a result, the manicure will be more festive and bright.
Step-by-step instruction
Step 1. For a flawless broken glass manicure, you need to tidy up your cuticles. Therefore, you will first need to buy caring oil. Remove the cuticle and treat with a special caring oil. After the oil has been absorbed, remove its remnants from the nails using a cotton pad soaked in an alcohol solution.
Step 2. The next step is to apply a thin layer of base coat of varnish. It is necessary to prepare the surface of the nails for applying the main color.
Step 3: Now apply the colored polish, several times if necessary. In our case it is black.
Step 4. The most important step in creating a manicure with the effect of broken glass is cutting pieces of holographic foil. This film is sold in great abundance in stores selling manicure supplies. The pieces should be different in size and size, so you get the effect of broken glass as close to reality as possible.
Step 5. The film is glued to the nail using a previously applied transparent varnish or special glue. But in this case it is convenient to use a colorless varnish coating. Using an orange stick or toothpick, randomly place the cut film on your nails as shown in the photo. If the foil extends beyond the edge of the nail, trim off the excess.
Step 6. Secure the broken glass effect manicure with clear polish or top coat. The result can be seen in the attached photo.
Manicure “Broken glass” photo
Tags: nails
Market Analytics
- 2020 in the beauty industry – innovation without borders
- Black Lives Matter movement: reaction and consequences for the beauty industry
- COVID-19 is changing the rules of the game in the cosmetics market
Convenient search for beauty salons on our website
Beauty salons in Moscow Beauty salons in St. Petersburg Beauty salons in Ekaterinburg Beauty salons in Novosibirsk
Latest blog posts on our website
- Naturecream / Arnica - the magical plant of alchemists
- Naturecream / Tremella Extract - Snow Mushroom Detox for Skin
- Prostye-sovety / How to visually enlarge your lips with makeup
- Naturecream / Apricot kernel oil for face
- Naturecream / MATRIXYL3000 - the best skin elasticity stimulator
- Naturecream / SPF in Natural Oils
- Naturecream / Geranium (Pelargonium) oil for skin health and beauty
- Prostye-sovety / Save on a beauty salon: procedures that can be done at home
- Naturecream / Growth Factor - brings back youth?
- Oksana-Lezina / 3 effective abdominal exercises from a fitness instructor for beginners
Latest forum topics on our website
- Natalya / How to properly make a gelatin mask?
- Mrs._Smith / Badly sunburned! What to do?((
- Ice / Is it necessary to combine fitness classes with a diet?
- Antonova / What can be used for hair loss?
- Radio operatorKat / Who was on a protein diet?
Other articles in this section
| Manicure for September 1st with a jacket September 1st is coming soon. Children will go to school, some even for the first time. And on this day you want to have a corresponding manicure. We offer you an interesting nail design with a jacket pattern for girls and boys. Your marigolds will be dressed in school uniform just like your children. |
| How to choose and make the right nail shape The choice of nail shape directly depends on the shape of the cuticle edge and the length of the nail plate. A manicure can look completely different in each case. Choosing the shape of your nails is like choosing a silhouette in clothes: it will help hide imperfections, visually lengthen your nails, or vice versa, make your hands coarser and your fingers shorter. |
| Hardware manicure Hardware manicure is a way to tidy up your nails without using cutting tools. The method is an excellent alternative to trimmed manicure, especially if the nails are problematic or deformed. |
| Drawings on nails Drawings on nails can be done with acrylic paints, gel polish or shellac using a needle, brush, toothpick, stamping, water, tape, sponge and newspaper. If you are tired of a boring, monotonous manicure, it's time to familiarize yourself with unique design options that allow you to create beautiful designs on your nails. Some of them require professional skill, but many of them can be learned on your own. |
| Means for degreasing nails Nowadays, many different degreasers, hardeners, and hardeners are used to perform manicures. |
| Nail art at home Nail design is a great idea for self-expression and completing your look. The most popular way to decorate nails is to apply drawings and patterns. It turns out that decorating your nails yourself is not at all difficult, and the samples of nail designs presented in our article at home will help you see this. |
| Correction of ingrown toenails with plates and staples: what you need to know about the procedure An ingrown toenail (onychocryptosis) is a rather unpleasant phenomenon. Typically, the problem occurs on the thumbs and little fingers. A piece of the nail plate “cuts” into the soft tissue, and while walking, pain, redness, and discharge appear. If the problem is not corrected in time, suppuration and infection will occur. Everything can end sadly, including sepsis and bone deformation. Recently, in addition to the surgical method, nail correction using plates or staples has been used. The methods are relatively new, but have already proven themselves to be the best. What nuances you need to know about the procedures will be discussed in the article. |
| Gradient manicure. How to make a gradient on nails Bright and unusual color combinations, smooth transitions of shades on nails - a fashionable manicure with a gradient effect has not lost its relevance for several seasons. Despite all the apparent complexity, the gradient manicure technique is quite simple, and making a manicure with a gradient effect at home is quite simple. Read our article about how to make a gradient on your nails correctly, what techniques exist for creating smooth color transitions on your nails, and what shades are best to choose. |
| Laser treatment of nail fungus: pros and cons of the procedure According to statistics, nail fungus is the most common dermatological disease. It is also called mycosis or onychomycosis. It is not always possible to cure with tablets and ointments. In the first case, intoxication of the body occurs and there is a large load on the internal organs. Ointments are not always able to penetrate into tissues. Therefore, such therapy is often ineffective. Laser treatment of nail fungus is a modern and effective method. Thanks to him, in 95% of cases it is possible to cope with the disease. In the article we will consider what nuances you need to know about the procedure, what to pay attention to when preparing, whether there are contraindications and side effects. |
| Manicure on short nails Fashion trends in manicure today favor short nails. Just a few years ago, preference was given to long, well-groomed nails: they were carefully nourished and grown or lengthened in other ways, without neglecting the extension of nail plates using acrylic or gel. Today, natural manicure is popular, and caring for it is much easier. |
Broken glass on gel polish
- Use a buff to remove the gloss from the surface of the nail.
- Degrease the surface and coat your nails with primer.
- Time for the base coat (remember to seal the end and cure the coat under a lamp).
- Apply the required number of layers of colored gel and dry each layer in a lamp.
- Without removing the sticky layer, transfer finely chopped transparent foil to the nail. If the stickiness of gel polish is not enough to fix the sticky film, then you can cover it again with a base on top of the colored layer.
- Cover the finished manicure with the broken glass top coat and dry it. To make the surface perfectly smooth, treat with a buffer and apply the finish again + final drying.
Nail art: step-by-step instructions for “Broken Glass” manicure
1. Diagnostics and preparation. It is necessary to examine the nail plates and treat them with a special agent that eliminates pathogenic bacteria. You can do a light nail massage. The cuticle is softened using a special composition and removed. Then you need to degrease the nail plates.
2. Applying the base layer. You must act carefully and slowly so that the end result is excellent.
3. Combination of two effects. For a space with broken glass, there is no need to choose bright and too rich colors. It is better to prefer milky or pale beige shades. They are applied in one layer.
4. You can divide the nail into two parts if desired. To do this, use a special tape designed for nail decoration. It sticks neatly.
5. Creating an effect. Mica needs to be poured onto a white sheet of paper. You need to choose the pieces you like. If you take cellophane, then you use not the usual familiar material, but a special hard and durable glossy cellophane. You can get similar material from a craft kit or at a flower shop.
6. To create the desired effect, pieces of cellophane, foil or mica are applied to the varnish that has not yet dried. To do this, use a cosmetic pencil or tweezers. The material must be laid out in any order. The pieces should lie very tightly on the varnish, which is a kind of adhesive base for the material. Large pieces of material should be placed in the center, and smaller pieces should be brought closer to the edges of the nail.
7. Applying the finishing coat. A clear finishing varnish is used. It should be applied quite carefully. As a result, the surface of the nail is even and smooth.
8. Drying nail polish. The final stage, after which you can fully enjoy the beauty of your nails. You can dry your nails in a lamp.
To see the broken glass manicure visually, how to do it yourself at home - watch the video:
Manicure “Broken Glass” is a new trend in the nail industry. Its sparkling bright design will not leave anyone indifferent. You can decorate your nails this way for any occasion. For this purpose, you should choose a brighter varnish. The main thing is that the color of the manicure is in harmony with the overall outfit. You can also use “broken glass” every day if you use neutral, delicate shades of varnish.
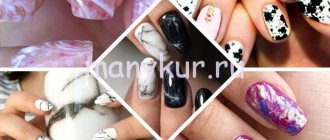
Interesting ideas
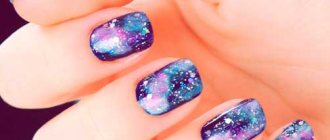
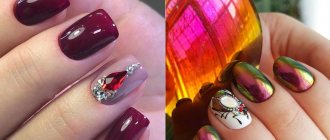
The glass shards already look impressive, but, nevertheless, in addition to the monochrome color base, try using the ombre, French and moon manicure techniques. Thus, the design will become much more impressive. Moreover, there is an impressive series of holidays ahead. You can also fold multi-colored pieces of foil on a neutral background so that you get a gradient transition from one color to another (as in the photo).
From the presented photo you can see how to create a combination of ombre + splinter effect. In this option, in addition to foil, you will need a sponge and water, but ideally it is better to buy a special sponge. With the help of the necessary materials, your manicure will be more neat.
The next photo shows a slightly different technique step by step. The film is glued to a neutral base, and then each piece of glass is outlined in a contrasting color. The stroke should be made as even as possible.