Makeup artists offered so many variations of manicure design. Fashionistas have already decorated their nails with bright, delicate, pastel shades of gel polish. The new season pleased fashionistas with a geometric pattern on their nails. According to nail industry experts, stripes in different directions painted on the surface of the nails are a fashionable creative solution. Professionals will tell you which manicure design to choose for spring-summer 2021.
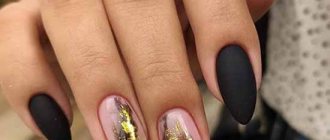
Nail design with black gel polish with stripes
How to glue strips onto gel polish: basic techniques
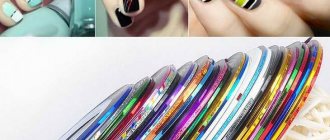
There are several ways to glue strips onto gel polish and for different purposes, but the most popular is the use of shiny strips as a design element:
- First, prepare the nails for coating. It is necessary to file them to give shape, remove excess cuticle, and sand the skin around the plates.
- The surfaces of the nails are treated with a buff to remove the sticky layer. Then they are wiped with a degreaser and a primer is applied, which is air dried for a couple of minutes.
- The first layer of coating is the base. It is polymerized until it dries, and then the stickiness is removed with a cleaner.
- Nails are covered with colored gel polish, preferably in 2 layers. Each one is dried after application. It is also better to remove the sticky layer, otherwise it will not be possible to carefully glue the decorative tape.
- The strip is removed from the base on which it is attached using tweezers. You need to grab the tip of the tool and pull it towards you.
- The first edge of the strip is placed on the plate in the selected location. The second tip is held with tweezers. And press the tape, gradually turning it so that it bends. For a tighter fit, the decor is smoothed with an orange stick, and the excess part is cut off with scissors.
- A top coating is applied, which will secure the tape more reliably. All that's left is to dry it.
The strips can be laid evenly, without bends, and can be used to create patterns and different shapes. For simpler designs, another technique is used:
- A base is applied to prepared nails and polymerized. Then the flower bed is painted in 2 layers, both of them are dried in turn.
- Top coat is applied next. After its polymerization, remove the sticky layer using a cleanser and treat the nails with a buff to remove shine.
- The dust is removed with a degreaser and, using tweezers, separated from the base, and then the tape is applied. It is carefully smoothed and the excess is cut off.
- The edges of the glued strip are coated with base and dried in a lamp. Then the same product is applied to the entire nail and polymerized again.
- The last layer is the finishing coat. After drying it, the design is ready.
Adhesive tape: application options
A shiny narrow tape, reminiscent of a miniature roll of adhesive tape, somehow ends up in the work case of every master, and often lies there unclaimed. The reason for this oblivion is simple: the most obvious application, that is, decorating nails with glued-on designs, turns into disappointment. The tape bristles at the edges, quickly chips off the top, and after just a couple of days of wear, the decorative shiny layer begins to wear off. These processes are understandable: the smooth polymer layer does not adhere well to gel polishes. But everything is not hopeless: those using the NeoNail gel polish system can use the compositions developed for sliders: rubber base and plastic Top for Slider. A video with a master class from a NeoNail technologist will help you understand more about working with these materials. TOP will secure the edges of the ribbon and protect the striped manicure or geometric composition made with its help. Working with the ribbon is simple:
- Apply tape to the pre-applied and dried gel polish;
- we level, press and cut off the protruding tails;
- Cover with Top for Slider in 2 layers, polymerizing each one.
The second option for using the same decorative tape is to use it as a stencil to create an even strip on the nails. And if everything is clear with the first technique, then the second requires a visual demonstration. We will look at the example of a manicure with a gel polish design using the fashionable “French Wallpaper” technique: stripes on the nails combined with a naive floral design.
Types for shellac with stripes and gel
Shellac with stripes or gel polish with the same decor are made using several types:
- wide or narrow ribbons;
- straight or wavy, with sharp bends;
- bending;
- shiny, matte;
- single-color, with iridescent shades or classic silver, golden;
- with a smooth surface or textured with spraying.
The decor can be attached to a paper base or wound into a reel. The surface that should be in contact with the nail is sticky. This makes the connection stronger, but sometimes makes the strips more difficult to work with if they bunch up.
The current nail design option is a manicure with stripes.
In the new season, manicures with stripes of gel polish are considered quite popular. This is a new trend in the warm season, spring and summer 2019, this fact should be taken into account.
Designs with stripes should not be intimidated, because it is this unremarkable option that can create a completely interesting design. This manicure option is imbued with creativity and individuality.
A manicure with stripes can neatly complement a lady’s entire look and become the final stage. A photo of a manicure with stripes illustrates newfangled trends in this industry, as well as spectacular types of nail design.
Striped manicure can be done on nails of any shape and in any color, which is clearly a plus.
Nail art ideas for gel polish with stripes
Gel polish with stripes offers many options for nail art:
- French manicure. You can make a classic French jacket with a white free edge and a nude base color. Flexible strips are glued to the border of shades. Or for a French jacket they choose contrasting colors and make it reverse. But the lines between tones are always marked with tape.
- Geometric nail design with tape on gel polish. The strips are laid parallel to each other or intersecting. You can move them to the free edge or closer to the cuticle, to the center, or connect them into shapes or broken lines. This design uses one or several coating colors. In the second case, you can separate the shades into stripes.
- Shellac with checkered design ribbon. Here you can use only one flower bed and different shades of stripes. Or take a silver ribbon and use 2-3 shades of gel polish for the cells. The mesh pattern is made on the entire nail or shifted to the edge, the side roller.
- Marine design with tape on gel polish. The main background of the nails is made white. And the stripes are blue or light blue, or matte. 2 pieces are glued along the side rollers and 2 more tapes are glued parallel to each other on the free edge. They should be perpendicular to the first stripes. But you can make it simpler - stick on parallel strips, like on a vest.
- Chaotic striped manicure with gel polish. Nails are covered with the color you like, using only 1 shade. Thin intersecting lines are depicted in white or black web gel. And some of them are distinguished by narrow shiny stripes.
- Lunar manicure with negative space. You can use any color as the main color. But the holes leave a natural shade. Their border can be made natural or angular. And it is emphasized with stripes of contrasting color.
- With drawings of geometric shapes. Here they use 2 tones of gel polish - the main one and for making rhombuses, triangles, squares. Their edges are outlined with tape. If you draw 3-4 small figures, the work is painstaking, but the effect is worth the effort.
- With highlighting of the cuticle line. Flexible tape must be used. It is placed tightly to the cuticle and along one of the side ridges.
- With a combination of wide, narrow and wavy stripes. As a basis, you need a monochromatic manicure. And ribbons can be used in bright colors. Narrow and wavy tapes are attached diagonally to the nail plate parallel to each other. They should be crossed by a wide strip. Another option is to stick all the strips parallel to each other along or across the nail.
- With sparkles. For this design, dark gel polish is more suitable - blueberry, black, burgundy. Tapes are used for 1 plate, gluing them in a zigzag pattern. The edges of the strips should be secured to the side rollers. The adjacent nail is completely covered with glitter.
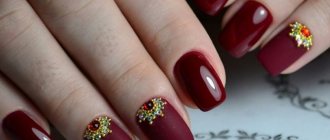
- With rhinestones. The pebbles and flexible tape should be the same color, and it is better to choose an unobtrusive shade of the colored coating - pink, beige, white, cream. The strips on the nail of the middle finger are glued so that an arch is formed, that is, from the beginning of the side ridges and to the middle of the free edge.
A medium-sized rhinestone is attached to the cuticle. On the index and middle, a pattern is made of 2 parallel curved ribbons, repeating the line of the base of the marigold and the side roller. On the thumb, the stripes are glued so that they repeat the shape of the nail, except for the end part. 2 pebbles are attached in the center and slightly above.
The simplest thing is to glue 1 strip to each plate. The decor looks good if it is in the center and along the nails. No less attractive are the transverse “belts” made of adhesive tape. You can use decor of different colors. On a dark surface it will be especially appropriate, reviving the main color. And the light one will become even more festive.
Watch the video about 5 simple manicure ideas with ribbons:
Geometric figures
Geometric shapes on nails are very popular. These can be complex drawings consisting of the intersection of various figures and small simple figures in the style of minimalism. This manicure can be done in various colors. If you want a discreet style, then nude shades are suitable for the base with white or black figures. You can complement it with small rhinestones or sparkles. If you want something bright, then the possibilities for imagination are simply endless, from a bright base with figures to a complex intersection of lines, where each small figure will be highlighted in a different color.
Master class on adhesive tape on nails
It is quite difficult to glue tape onto gel polish in the form of an abstraction, but the design turns out very bright and memorable:
- Nails are properly prepared by filing the ends and treating the cuticle.
- You need to go over the surface of the plates with a buff to give it a slight roughness.
- Dust and excess moisture should be removed using a degreaser.
- The base is applied first - a thin layer and leveling, with the ends “sealed”.
- The product is polymerized in an ultraviolet lamp for 2 minutes, in an LED lamp for 30 seconds.
- Using a thin brush and a bright color of gel polish, draw squares on 1/4 of each nail; they should be located in different places and may vary in size.
- This layer is dried in a lamp.
- With the second shade, which should be lighter, squares and rectangles are also drawn on another 1/4 or 1/3 of the nails, and this coating is also polymerized.
- Then the fourth color is used - the darkest one; the same shapes are drawn with it, leaving part of the surface unpainted (about 1/4).
- Small sparkles are applied to areas of the plates in a natural shade, matching the tone of one of the gel polishes (special glue or a transparent base is used for this).
- After drying, a finishing coating is used, which also needs to be polymerized.
- Remove the sticky layer from the nails with a clinser.
- The silver tape is glued at the border of the flowers, first along the nails, then across.
- Each piece of decor is carefully smoothed out and the excess part is cut off.
- The final steps are to cover the design with a finishing agent and dry it in a lamp.
Ways to create stripes
To create a striped design, you can use one of these methods.
- After painting your nails with the varnish you like, dry them well and paint stripes with a varnish of a different color using a thin brush.
- Glue a special adhesive tape to the surface of the nail, forming the pattern you like, and then cover it with a layer of varnish. When the varnish is dry, carefully remove the tape. The result will be a pattern of unpainted stripes. You can also paint your nails, glue the stripes on, and then paint them again with a different color polish. This is how colored stripes are obtained.
- Glue the ready-made colored strips onto the painted nail, and apply a fixing agent on top.
Editor's choice: Nail design: the best manicure solutions for all occasions
It is worth noting that it is not at all necessary to limit yourself to stripes located exclusively vertically or horizontally. Stripes angled at different angles create a unique nail look.
When choosing the direction of the stripes, you need to take into account the shape of the nails. For those with wide and short nails, vertical stripes are suitable; narrow nails can be visually expanded using horizontal stripes.
How to make stripes on nails with gel polish
To make stripes on your nails with gel polish, you can also use self-adhesive tape:
- After a hygienic manicure, the nail plates are covered with a base and dried.
- Next, use gel polish of the main shade on each of them entirely, maybe in 2 layers for brightness.
- Both times the coating is dried in a lamp.
- Surfaces must be degreased to remove stickiness.
- Tape is attached to the nails, making sure that the strips are parallel and the spaces between them are the same.
- The space between the decor is painted with a second color of gel polish; you can use a thin brush for this.
- Next comes drying in a lamp.
- After this, the adhesive tapes are carefully removed using tweezers.
- The nails are covered with a finish and polymerized.
A similar design, but even more original, can be made using airpoofing and gel paint:
- Nails are coated with gel polish of the main color and dried.
- Wipe with a cleaner to remove the sticky layer.
- The next stage is gluing the strips, as in the previous case.
- The airpoofing is dipped into gel paint and tapped on the nails where the tapes are glued, but the last gap between the pieces should remain clean.
- The hand is placed in a lamp to dry the layer.
- The strips must be removed.
- The last layer is the finishing coat.
- It is also dried in a lamp.
This creates a combination of striped design and ombre. You can use contrasting colors of gel polish and paint or shades that are similar in intensity.
White and black stripes
The most popular color in striped design is without a doubt white and black or a combination of both. Typically, masters draw one strip along the nail, and place others at their discretion or at your request. This type of striped design is perfect for many things, including office style.
For more leisurely occasions, masters make even stripes on the nails of the ring fingers, and cover others with bright varnish. Clothes for this type of striped manicure should be selected in a single color - red, black or white.
Useful tips on how to glue correctly
To carefully glue decorative tapes, you should use a few secrets of the masters:
- It is always better to measure strip pieces exactly to the size of your nail. But if due to inexperience it is not possible, you should cut off a little more than necessary. And after smoothing, the excess is removed with nail scissors.
- Long pieces of tape are used to create a striped design. The tips sticking out outside the nails are needed to quickly and without damaging the coating to remove the parts that have served their role.
- To prevent the decor from slipping off the coating, it is necessary to wash off the sticky layer of gel polish. Or before gluing it, apply a non-sticky top coat to the flower bed. But when the stripes are on the nails, use the finish on top again.
- It is best to smooth out the tape using an orange stick or a silicone applicator. If you do this with your finger, the decor will not fit tightly and may fall off long before correction.
- To avoid bubbles under the tape, apply it with light tension. That is, press one edge tightly to the surface, pull it, press it at the most convex point of the nail, then at the other end.
- When cutting strips, it is more convenient to use tweezers. Nail scissors can bend the ends of the tapes, and they will stick up, risking quickly coming off.
- The gel polish under the tape must be well dried. If this is not the case, detachments on the coating will be revealed very quickly, and the decor will contribute to their appearance.
Not everyone can immediately stick strips neatly and beautifully, but even non-professionals learn this quite quickly. Decor has never gone out of fashion since its inception. It is inexpensive and allows you to make unique designs.
Fashionable colors of striped manicure
First, it’s worth considering the primary colors that have created a real boom in the fashion universe!
Nail design with black thin lines
Black will always be in fashion, and in tandem with minimalism it is an example of neatness. Therefore, by the way, not every master can draw it.
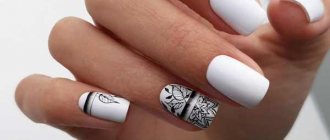
Black cobweb easily combines with white and any light tones. In addition, the base can be any nude shades or soft pastels.
Smooth, thin lines have become a living classic, but even sharp curves will not spoil the manicure.
A manicure with black stripes is a simple and neat style that combines geometricism and abstract patterns well, as in this photo.
Nail design with gold stripes
In 2021, you can't do without gold stripes. It is devoid of geometry and clear abstraction; smooth lines and neatness prevail here.
Any nude shade is suitable as a base, but don’t forget about pastel. But white won’t work – the contrast is too big. Too dark and cold tones are also best avoided.
Nail art with white stripes
Neil using voluminous white stripes is the best solution for every day. A universal nude base with a light pattern is suitable for both a business meeting and a date!
A striped manicure must be voluminous. A flat drawing is a boring rudiment that will only spoil the design and give it a “collective farm” feel.
By the way, the base should be matte, but the stripes should be glossy. The result will be a light contrast, discreet, but pleasant.
Nail design with silver stripes
Manicure with silver stripes? Suitable for modern design: glitter, rubbing, sand varnishes. However, regular gel polish will also work. Fashion has not set restrictions on the thickness of the stripes, so they can be anything.
Naturally, lines should not be on all nails. You can take this idea as a basis.
Any tone goes with silver, from white to black. A bright base is also a good option for a party or a holiday at sea. In this case, a manicure with shiny stripes will definitely be noticed.
Nail design with stripes of different colors
Who said that striped nails have to have a single color? Quite bold combinations of bright, pastel, and dull colors are allowed. How to make them? You can use glitter, gel polish, foil, rubbing. They are also easy to combine with each other.
The design can be made discreet, in just 3 tones, as in the photo. You can go to work or a business meeting with these nails. It doesn't catch your eye, but you can't call it boring either.
And if you want more colors, then how about a rainbow pattern? A simple but fun manicure with lines and a parrot design.
