Sand nail polish is a fun new thing in the world of manicure. Small grains of sand—sugar grains—densely cover the nails, creating a rough surface. How to choose, how to apply and remove sand varnish - read on. Many photo ideas for sand manicure are included!
What is “sand effect varnish”?
Today, probably every manufacturer offers sand nail polish. Even short nails are transformed with sugar, as it is also called, sand. Varnishes of both bright and neutral shades, having an unusual structure, will definitely decorate a woman’s hand. What does sand nail polish consist of?
Sugar or sand varnishes contain small particles, usually silicone grains of different sizes. They give the rough texture. In addition to saccharine, sandy-effect varnish often contains small sparkles, giving the manicure a delicate glow. Thanks to this texture, sugar varnish lasts longer than or even more so. The grains of sand set quickly and the manicure lasts longer.
How to apply sand varnish?
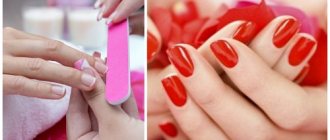
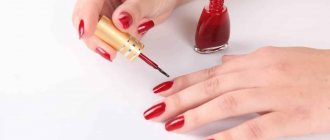
Sugar manicure is no different from the simplest glossy manicure. To create it you will need a base varnish and sand or sugar varnish itself.
1.
Apply base coat to your nails.
2.
Paint your nails with sugar polish, after shaking the bottle. The grains of sand should be distributed throughout the varnish. Sometimes even one layer is enough for a uniform and rich shade. Two coats will give your sandy nail polish even more richness and texture. It is not necessary to use a fixative varnish, but it will help to slightly smooth out the bumpiness of the manicure.
Sand varnish dries quickly and lasts quite a long time. As the layer dries, the grains of sand appear.
How to remove sand varnish?
Removing sand varnish is not an easy task. For long-lasting friction, manufacturers suggest generously moistening a cotton pad with nail polish remover and pressing it firmly against the nail for a minute or two.
After this procedure, the sand nail polish should be soaked and removed from the surface without any problems.
How to choose sugar varnish?
Sand or sugar nail polish is included in the lines of many manufacturers: Kiko Sugar Mat, Dance Legend Sahara Crystal, Zoya Pixie Dust, Holiday Golden Rose, Color Sugar Jerden, OPI Liquid Sand.
Advice from: When buying sand-effect varnish, pay attention to its texture. Too few grains of sand will spread over the nail, and it will be possible to get the desired result only from the second or third layer. If there is a lot of sugar, the varnish will be difficult and uneven to apply.
Sugar manicure. Photo
I suggest you look at interesting ideas for sand and sugar manicure. Unusual options guaranteed!
Sugar manicure with different shades of varnish looks interesting and unusual:
Sand manicure in silver is a great option for a festive look:
Notice how beautiful the varnish looks with bright splashes:
An interesting idea for a summer sand manicure:
Sand manicure. Video
To finally understand what sand or sugar manicure is and how to do it correctly at home, watch this video:
If you want to make an interesting manicure, but have little time to create a masterpiece, then use sand-effect polish!
Sugar manicure confidently takes a leading position in nail art and is becoming a favorite of modern fashionistas. Ideal for creating solid colors, gradients or three-dimensional designs. With this material, a sea of ideas and opportunities to express yourself opens up. We have prepared a huge number of photos so that you can choose something original for yourself.
Sugar candies
Nowadays, many products have appeared on the nail design market, thanks to which you can achieve the effect of sugar on your nails. You can choose any colors: neon or melange.
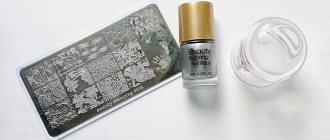
You can create a sweet surface using acrylic powder with small glitter.
- Each nail needs to be covered with a base, two layers of colored varnish and polymerized in a lamp.
- Apply a thin layer of top.
- Immediately, gently sprinkle acrylic dust using a pusher over the entire surface of the nail.
- Dry in a lamp and remove all excess with a brush.
To prevent excess powder from spilling, it is recommended to hold the nail over the jar and sprinkle glitter on top.
Technique for performing manicure with granulated sugar.
Sugar manicure with gel polish
This design looks most attractive on gel polish. It is with it that you can not only create the cutest marmalade coating, but also draw a variety of patterns and designs using the “sugar” technique.
Follow the instructions and you will have a gorgeous sugar manicure.
- Standard cleaning is performed, a shape is given, then the gloss is removed using a buff, the nail plate is degreased and a bond is applied.
- The nail is covered with a base and dried in a lamp. Next, a base in the form of colored gel polish is applied in two layers and dried one at a time.
- Using a pusher or brush, apply melange powder to the remaining sticky layer. It is most economical to do this procedure directly over a jar of material, so the excess is poured into the container.
- The powder must be covered with a finish; to do this, pour the finish onto a piece of foil and cover the nail with it using an old or separate brush. All this is done to prevent particles of “sand” from getting into the bottle. Afterwards, the nails usually take longer to dry.
- If you want your sugar manicure to look even more natural, then cover it with another layer of top coat. Then, without putting your nails in the lamp, apply a layer of powder and, after drying in the lamp, remove the excess using a hard brush.
Editor's choice: Nail design: the best manicure solutions for all occasions
If most of the words in this instruction are incomprehensible, or you realize that you do not have all the tools, feel free to go to a manicurist.
Jelly beans
Sugar manicure with gel polish is very versatile and suitable for any season. During the cold season, on the eve of the New Year holidays, your nails can be decorated with multi-colored confetti. For spring and summer designs, choosing light yoghurt shades, curly melange sparkles will flaunt on your nails, reminiscent of sweet ice cream. In any weather, the manicure will look stylish and gentle.
Melange is a special material with a multi-color effect of small particles that helps create a sweet design.
- Melange can be poured onto a colored base or a regular base.
- The top is applied in a thick layer so that the glitter adheres well.
- The glitter should cover the nail on all sides. You need to wait a minute so that they are well fixed in the top.
- Do not forget to organize the melange at the end, removing excess and protruding pieces so that it does not catch hair and clothes.
- You need to dry it 2 times longer than usual. Afterwards, brush off excess glitter with a fan brush.
You can also get a completely different effect with melange. With this design, your nails will be smooth and will not cling to clothes.
Small confetti
A sugar effect manicure can be done using regular glitter. They are applied to the top coating in the same way as acrylic powder and melange. As a base tone, you can use any suitable color that matches the glitter.
Unfortunately, this design has one drawback - the surface of the nails is rough. After drying, it is necessary to lightly sand with a soft buff and brush away any remaining residue with a brush.
Using glitter, you can simultaneously create a sugar gradient effect on your nails. It is necessary to sprinkle a light shade of glitter on part of the nail, and a darker shade on the other.
Sugar varnish
Many companies produce special varnishes that, after drying, create a rough coating that looks like sugar or the first snow. A wide color palette of varnishes allows you to decorate any New Year or summer design. Sugar manicure using special varnishes can be seen in the photo.
It’s spring outside, and episodes of the upcoming summer holiday are replaying in my head for the hundredth time. The warm sea, the hot sun and the burning sand under your feet are moments that remain only in your memory or in a photo saved on your phone. To ensure that the summer mood never leaves you, despite the weather outside, try doing this. Using sand nail polish, you can easily create beautiful nail art that will remind you of your upcoming vacation. Our photo gallery will help you choose a suitable design that will not leave anyone indifferent.
Texture manicure is a relief coating with small grains reminiscent of sand. Depending on the manufacturer, the varnish may lie on the nails with a smoother or, on the contrary, a bumpy layer. A manicure with a very voluminous coating is often referred to as a sugar manicure. If the sand varnish is liquid enough and the grains are very small, the result is a velvety design that looks like velor. The final result largely depends on the ability to carefully apply the coating. The nail polish itself is very unusual and has an amazing structure.
Features of sand nail polish
If you look at photos of sand nail art on the Internet, you will notice that many designs are very different from each other. These differences are due to the different structure of the coating, but in general they are all similar to each other. Sand varnish is usually somewhat thicker than usual. This is due to the presence of a certain filler in the vial. Silicone grains can be the same or vary in size. Some manufacturers enrich sand varnish with fine glitter. The presence of glitter gives the manicure a shining effect.
High-quality sugar varnish is applied without streaks and lies evenly on the nails. It does not flow onto the cuticle and into the sinuses of the side rollers. Due to the high density of the coating, for high-quality nail art, as a rule, one layer is enough
. Only in rare cases will it be necessary to apply an additional layer to create a more voluminous relief.
How resistant is the varnish to various damages and chips? All girls note different times for wearing manicure: from one to five days. This factor depends on the characteristics of the nail plate and the quality of the varnish itself. Many people have the question of removing the texture coating. Clean the surface of the nails with a regular nail polish remover.
When purchasing the shade you like, pay attention to some nuances.
- Date of manufacture. The fresher the sugar varnish, the longer it will last you.
- The texture of the composition. Excessively liquid varnish will leak and form streaks on your nails. Too thick a coating can cause wrinkles and bumps to appear. If necessary, purchase an additional special varnish thinner.
- Amount of texture filler. Too few grains of sand will make your nail art sloppy and deprive you of the desired result; too many will give it an untidy, bumpy look.
So that you can visualize a bottle of sugar nail polish, we bring to your attention the “sand” collections from global manufacturers, shown in the photo.
Sand effect polish or sugar manicure
Sand nail polish is a fun new thing in the world of manicure. Small grains of sand—sugar grains—densely cover the nails, creating a rough surface. How to choose, how to apply and remove sand varnish - read on. Many photo ideas for sand manicure are included!
What is “sand effect varnish”?
Today, probably every manufacturer offers sand nail polish. Even short nails are transformed with a sugar, as it is also called, sand manicure. Varnishes of both bright and neutral shades, having an unusual structure, will definitely decorate a woman’s hand. What does sand nail polish consist of?
Sugar or sand varnishes contain small particles, usually silicone grains of different sizes. They give the rough texture. In addition to saccharine, sandy-effect varnish often contains small sparkles, giving the manicure a delicate glow. Thanks to this texture, sugar varnish lasts longer than French or, especially, velvet varnish. The grains of sand set quickly and the manicure lasts longer.
How to apply sand varnish?
Sugar manicure is no different from the simplest glossy manicure. To create it you will need a base varnish and sand or sugar varnish itself.
1. Apply base coat to your nails.
2. Paint your nails with sugar polish, after shaking the bottle. The grains of sand should be distributed throughout the varnish. Sometimes even one layer is enough for a uniform and rich shade. Two coats will give your sandy nail polish even more richness and texture. It is not necessary to use a fixative varnish, but it will help to slightly smooth out the bumpiness of the manicure.
Sand varnish dries quickly and lasts quite a long time. As the layer dries, the grains of sand appear.
How to remove sand varnish?
Removing sand varnish is not an easy task. To avoid damaging the nail plate with prolonged friction, manufacturers suggest generously moistening a cotton pad with nail polish remover and pressing it firmly against the nail for a minute or two.
After this procedure, the sand nail polish should be soaked and removed from the surface without any problems.
How to choose sugar varnish?
Sand or sugar nail polish is included in the lines of many manufacturers: Kiko Sugar Mat, Dance Legend Sahara Crystal, Zoya Pixie Dust, Holiday Golden Rose, Color Sugar Jerden, OPI Liquid Sand.
Advice from: When buying sand-effect varnish, pay attention to its texture. Too few grains of sand will spread over the nail, and it will be possible to get the desired result only from the second or third layer. If there is a lot of sugar, the varnish will be difficult and uneven to apply.
Sugar manicure. Photo
I suggest you look at interesting ideas for sand and sugar manicure. Unusual options guaranteed!
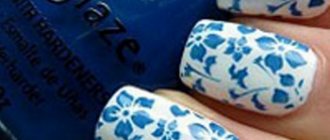
Sugar manicure with different shades of varnish looks interesting and unusual:
Sand manicure in silver is a great option for a festive look:
Notice how beautiful the varnish looks with bright splashes:
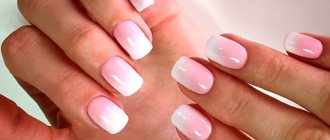
An interesting idea for a summer sand manicure:
Sand manicure. Video
To finally understand what sand or sugar manicure is and how to do it correctly at home, watch this video:
If you want to make an interesting manicure, but have little time to create a masterpiece, then use sand-effect polish!
Stylish sand nail art ideas
After the long-awaited purchase, you can move on to the creative part and bring your ideas to life. A colorful collection of photos will inspire you to new experiments and unleash your imagination. Try to start with a solid color, because sandy nail designs look perfect with light and delicate shades of white, pink and peach. Sugar nail art also looks very impressive in black. If you want to choose bright, variegated tones like blue, green or red, you should keep in mind that such contrast is not always beneficial for a textured manicure. To make the sand nail design look new, you can apply a top coat, and the nail art will look very mysterious and alluring. The photo shows several variations of the original manicure.
Sugar nail design is not limited to just a monotonous finish. To create patterns, you can use sand varnishes of various shades. Try, for example, painting each finger in a different tone or focusing attention on two nails by making. You can very successfully combine a sand coating of the same shade with or without glitter. In addition, sugar polish can complement the patterns and pictures of regular nail designs. Look at the photo and choose the right nail art for yourself.
Ease of use makes sand nail polishes accessible to girls with different skill levels. Thanks to its original and attractive appearance, sugar manicure is becoming increasingly popular, and manufacturers are expanding their product range every year. In the final video, beauty blogger VashaNedasha will show you 2 luxurious shades of sandy Sahara Crystal nail polishes from. Experiment and always remain beautiful!
Every girl should have well-groomed nails, so designers create original prints, designs and images to decorate nails all the time. But who would have thought that a sugar manicure would appear. A nail treated with this technology becomes velvety - to the touch and visually reminiscent of velor fabric.
Of course, nail art masters do not cut out pieces of their velvet, much less attach it to the nail. Everything is much simpler - there is special velvet sand.
We suggest making a velvet design with your own hands, at home, but first you need to understand who will suit this method of decorating their nails, and who would prefer something else.
Advantages and disadvantages of sugar manicure
Representatives of the fair sex increasingly prefer to choose sugar nail designs because:
- this type of manicure looks chic, others notice it;
- With this coating technique you can not only cover the entire nail plate, but also draw a pattern, which will make the design even more attractive;
- it takes much less time to complete such a masterpiece than others;
- the design is unlike any other - bright, stylish and easy to implement;
- The material used is safe and harmless.
Luckily for fashionistas, there are much fewer disadvantages.
- Carrying out such a design requires meticulousness and skill, otherwise the grains of sand will fly off very quickly.
- When doing household chores, women need to wear rubber gloves, which will allow them to wear this design longer.
Advantages of sugar manicure
Granulated sugar perfectly laid out on your nails has several advantages:
- The manicure is unlike any other - bright, stylish, unusual and extremely original, a real exclusive.
- Sand particles can be used as a solid coating of the nail plate; they are also used to form images, impressions and other ornaments and patterns.
- The designer nail decoration has no analogues, and it is absolutely harmless and safe.
- If a sugar manicure is done according to all the rules, it will last for 20 days.
Benefits of sugar manicure
Girls and women around the world increasingly prefer this type of manicure because:
- in this design, nails look stylish and attract the attention of others;
- Using this technique, you can cover all your nails, or you can only cover individual parts of them, which will make the design even more original;
- the procedure does not take long and can be easily performed at home;
- the material used in the work is quite durable: it will stick to the nails when doing household chores and frequent contact with water;
- If you don’t do a sugar manicure yourself, but go to a professional, it can last about three weeks.
The first method of applying granulated sugar to nails
There are several techniques for applying manicure, it is better to familiarize yourself with each and then choose the most suitable option. The first way is as follows:
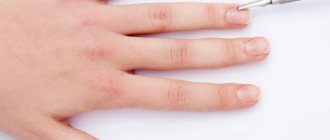
- Do a regular trimmed manicure, be sure to steam your hands in a warm herbal bath, push back and trim the cuticles, use a nail file to give them a better shape, and dry each nail plate well with a towel.
- Apply a protective base to your nails.
- Now scoop up a small amount of colored dye and make a couple of strokes on each nail. Most often, calm pastel colors are chosen - sand, beige, milky, soft plum, soft pink. Sometimes, on the contrary, strongly contrasting shades are selected.
- While the composition has not yet dried, quickly but carefully sprinkle granulated sugar on the nail and wait until it sticks completely. According to nail art masters, 10-15 minutes is enough for this.
- Next, use a hard miniature brush designed for working with nails to sweep away any loose grains of sand; if you need to make a pattern, form it.
- To make a sugar manicure last longer, it is advisable to seal the result with shellac, but this technique will not work if you want a 100% velvet feeling.
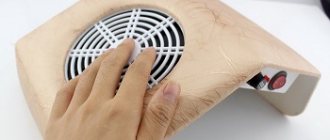
Manicure with gel
The initial stage is the same: perform a manicure and shape your nails. Next, you should apply the gel to your nails with a special brush and dry each nail in succession in a lamp. If several layers of gel are applied, each of them should be dried. After the first layer of gel, you can mix some of it with melange sand and apply it like that to the nail. This is necessary to remove roughness from the nails, since under the influence of the lamp the layer will dry out and sand particles will be inside the gel coating.
If a girl wants to get a natural sugar coating, then after applying the second layer of gel, she should not dry it in a lamp, but first apply sand particles to it with a brush. It is best to do this over a jar of product so that you do not end up wasting a lot of material.
Then you should carefully remove the excess with a fan brush and fix the result in the lamp. After the nails have dried, you can use a hard brush to smooth out the edges of the nail.
This manicure looks especially beautiful in the summer, made in bright colors. Reviews of girls who use this type of coating indicate its high durability.
Second method: if you have gel polish and a UV lamp
If you have gel polish and a special UV lamp, you can make a velvet design easier and faster, even at home:
- Paint your nails with the desired shade.
- Draw a diagram of the ornament, pattern with which you want to decorate your nails.
- Cover the diagram with sand so that it is not visible. If the grains do not stick well to the base, lightly press them with a bamboo stick; you should not do this with much pressure - there is a possibility of losing some of the volume.
- Next, place your fingers in a UV lamp, just a couple of minutes and the design is already dry.
- Be sure to shake off loose particles and apply a few strokes of clear gel polish, or better yet, a professional sealer.
How to make a sugar manicure using melange?
The second way to create the effect of sandy nails at home is by using small grains of sand – melange. They can be plain or multi-colored. Melange is quite easy to use, and it is suitable for both regular polish and gel polish.
Melange with regular varnish. First, as usual, you need to perform a hygienic manicure procedure. Choose a varnish that will match the color of the rub. If the grains of sand in the melange are of different colors, you can choose a calm, not flashy color of varnish, or match the varnish to the color of one of the crystals. Apply this polish to your nails and let them dry thoroughly. After this, apply a second layer of varnish, but without waiting for it to dry, you need to apply melange to the nail. It is best to apply it with light, gentle, tapping movements. It is very important during the application process not to touch the nail plate with your finger until it is completely covered with melange. Only then can you press it in a little to strengthen it.
The rubbing particles remaining at the edges can be easily removed with a brush.
IMPORTANT TO KNOW: Nail design with stripes: technique and fashion ideas
Melange with gel polish. Many girls prefer to use gel polish even at home. You can make a sugar manicure with it. After the nails are in perfect order, they need to be covered with a base and dried under a lamp. After this, you need to apply gel polish in two layers, drying it in a lamp each time.
Next, you need to apply melange to the stickiness remaining after the gel polish. It is more convenient to do this with a brush, and immediately above the jar of rubbing, this will allow you not to spill the material, thus saving it. At the end of the procedure, the manicure should be covered with a top coat and dried in a lamp a little longer than usual. In case of a rough manicure, after drying the main layer of gel polish, a top coat is applied on top of it and does not require drying. From above, the entire surface of the nail is sprinkled with melange. Excess, exactly as in the previous description, is easily removed with a brush. At the end, the nails must be dried in a lamp. The photo shows interesting solutions for sugar manicure.
How to make a sugar manicure original
If you are bored with the traditional technology of creating velvet nail art, then use one of the tips from beauty specialists:
- The grains can be attached not to the entire nail plate, but to capture only part of it, for example, highlight the hole of the nail bed with velvet or apply it to the tip. Don’t be afraid to decorate with rhinestones - French and moon manicures require additional elegant framing.
- Saving material can lead to a result that you are clearly not happy with. When working with velvet sand, you need to understand - either sprinkle it generously, or not use it at all. Don't be afraid to get your fingers dirty - the particles can be easily rubbed off and fall off.
- Uneven lines, ornate patterns, monograms drawn using several colorful shades at once look very stylish and expensive.
When it’s winter outside, and the Christmas holidays are visible ahead, thoughts increasingly arise in our heads about how we will decorate our home. And girls, among other things, are looking for ways to transfer elements of the holidays to themselves. And those who want to have a manicure for all seasons will like our article even more!
More than once we have heard fashionistas say that they don’t want glitter, colors, yes, but not glitter. Varnishes are steamed to give them a matte finish, or even become matte. The use of manicure sand has become a new breath in nail art.
Manicure sand
– special powder of various colors. Sand varnish is distinguished by the size of the grains. For example, a very fine grind can give your nails the appearance of velor, while a coarse grind can give your fingers a shade of granulated sugar.
Varnish with additives is a little thicker than usual, but differs only in the structure of the coating. It is convenient to apply, it does not tend to creep onto the cuticle during coating, and besides, one layer of varnish is almost always enough, in rare cases - two if you want to give your nails a more voluminous look.
How to remove sugar manicure?
Sugar manicure on nails will last much longer than usual, up to about five days. But if you use high-quality professional materials and pay due attention to the fixative, then any manicure, including sugar manicure, can be worn much longer.
Sugar manicure is very durable and, as it turned out, making one at home is not at all difficult. However, some difficulties may arise in removing it from the nails. First of all, just before starting the procedure for removing such a manicure, you need to soak your nails in cotton swabs soaked in nail polish remover for five minutes. Only after this can you try to remove the coating from the nails.
Nowadays you won’t be surprised by new nail art, but to be in trend, every fashionista should try the superiority and unusualness of sugar manicure.
Advantages of sand nail polish
- Quite easy to do
.
Painting a house is quite easy. If you resorted to combining sand with varnish, without buying a ready-made mixture in advance, then to cover the nail you will only need a napkin on which you place a small handful of sand and then carefully place each finger in it.
- Suitable for any age.
This is actually true! As we said earlier, sand gives the varnish a matte finish. Any color looks calm and expensive. Who doesn't love velvet? From one glance at it you get a feeling of softness, luxury and tenderness. It is these qualities that are adopted by those who use sand for manicure, or purchase sand varnishes right away.
- Durable.
Some will argue here. But in truth, if you sanded your nail well before polishing, your base was applied in 2-3 layers, which completely evened out your nail, then the sand will not want to fall off on its own. It all depends on you and on the remedies available at home.
- Enjoys versatility
.
This is undoubtedly true. With this manicure you can go out into the world, as well as go to work, take a walk with your child on the street, go shopping, or go on a date. Your fingers will look equally suitable in any situation. All you have to do is choose the right color!
- Available
.
On Aliexpress you can purchase 18 colors of 10 grams for only 2-3 dollars. In Moscow, the cost of one box of 10 grams will cost from 50 to 100 rubles. I don't want to take it.
Wear and removal
Here opinions vary somewhat. Some write that 2-3 days, others – up to 5 days. In fact, everything will depend on what you plan to do in the next week. If you don’t bother yourself with household chores and expose your hands to excessive moisture and friction, then the sand varnish will last you from 5 to 7 days. Otherwise, have the indicated 3-4. Don’t discount such factors as the structure of the nail and the quality of the varnish.
The quality of varnish should be considered based on the following points:
- Date of manufacture;
- Texture of the composition;
- Amount of filler in the bottle.
Why is all this important? The fresher the varnish, the longer and more efficiently it will serve you. The density of the content affects whether the layer will spread or, on the contrary, create folds. For these reasons, it is safer to choose thick varnishes, and additionally have a thinning agent with you. The amount of filler sometimes depends on the manufacturer. There are greedy, economical ones, and there are those who carefully monitor the satisfaction of the client’s desires, his positive feedback, so they add sand from the heart, as they say.