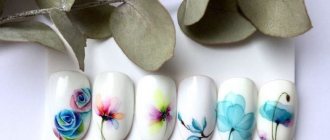
Manicure is a necessary and very pleasant procedure that gives girls a lot of positive emotions. The variety of shades and techniques is so huge that after every visit to a manicurist, a girl can see new and original design ideas on her nails.
A single-color nail coating, which was initially considered the only option for most fashionistas, has today turned into mega-stylish, voluminous and bright designs. French, lunar design, gradient - all this has already been repeatedly used to decorate marigolds. If you want more, then we suggest getting acquainted with a new nail design that undoubtedly deserves close study - stained glass manicure.
What is stained glass gel polish and how to use it
Stained glass gel polish is a material that visually resembles glass. The structure of the polymer is changed in such a way that a transparent base predominates in it. It is this that creates that beautiful glass effect that changes depending on the main shade.
Visually, stained glass varnish resembles gloss with enhanced color depth. On nails, stained glass looks airy and weightless.
Stained glass gel polish is used as a base coat for painting and small decoration. In this version you can find light and pastel gel polishes, sparkling and deep shades.
Stained glass varnishes look chic on a silver and mirror base. In this combination, transparent stained glass paints look very gentle and beautiful; they saturate the main shade, making it deeper and brighter.
To create a stained glass manicure, you need to prepare the following tools:
- standard set for edged or unedged manicure: tweezers, scissors, remover, orange sticks, dust removal brush, pusher
- UV lamp for drying gel polish
- strengthening base for stained glass gel
- color gel polish
- top coating
- optional decor - rhinestones, sparkles, kamifubuki
- stained glass gel - if it is not available, then read below about how to create it yourself from ordinary varnish
About technology
Since ancient times, humanity has been using the technique of creating stained glass to decorate window and doorways. Stained glass paintings are hung on walls and used as elements of architectural decor. It is not surprising that in our time this technique has found its way into many areas. Today, one of the most common trends in nail art is the design of stained glass gel polish for natural and extended nails (photo). To create it, both ordinary varnishes and fashionable gel-based coatings are used.
Color palette
At first glance, it may seem that this technique is very complex, and the materials for it are expensive. Reviews from professional craftsmen claim that if you have certain skills, using stained glass varnishes is very easy. They differ from conventional materials:
- translucent “glass” structure;
- independent smoothing and leveling on the nail surface, which avoids additional grinding and leveling.
Stained glass multi-colored manicure
To decorate natural nails, such varnishes are used only with additional drying in a lamp; without this, the coating will not be as durable as we would like. They look best on natural nails using the “French manicure” technique. Gel compositions can be used as a base and topcoat.
In order to get the desired result, you need to buy quality products from branded companies. Stained glass gel polishes are produced by Bluesky, Haruyama, Kodi Professional, TNL and other companies.
Design with stained glass varnish
#1 Plain stained glass nail design
Thanks to the glass texture, stained glass manicure will look beautiful even in a single color version. Just look how airy and light nails with this design look. Use light shades for manicure: green, blue, pink, yellow. Visually, this manicure looks like candy, how bright and beautiful they are.
If a solid color design seems boring and simple to you, then add foil to it. To do this, use ready-made foil shapes: diamonds, hearts, triangles, thin stripes. The design will look voluminous and light.
#2 Stained glass stains on nails: a strikingly beautiful design
Stained glass stains are an amazingly beautiful nail design that is easy to do yourself. To create a design you will need:
- silver gel polish as a base
- stained glass gel 3 shades
- thin manicure brush
Cover your nails with a continuous layer of silver or mirror gel polish and dry it in a lamp. Apply stained glass paints in a chaotic manner and blend the borders with a manicure brush. The design is ready.
Stained glass colors look beautiful on a gold and silver background, adding volume and depth to the design.
Manicure “broken glass” at home: step-by-step instructions
A shimmering manicure using the broken glass technique can be done at home. To create an effective design, it is not necessary to attend courses or train for a long time. Just watch a few video tutorials, get inspired by the ideas of fashionistas, look at photos online, and purchase the necessary materials and tools. To get a manicure you will need:
- foil;
- mica;
- convenient tweezers;
- varnish or gel polish;
- finishing coating.
Instead of foil, use oilcloth or polyethylene. The materials are cut into pieces, laid out on the nail plate and secured with a gel coating.
Nail design is done in several stages depending on the chosen type of base. When using regular polish, the procedure for creating a manicure includes the following steps:
- applying the base to the nail plate;
- evening out the tone by applying another layer of varnish;
- laying out cellophane, foil, mica or stickers on undried varnish;
- fixing shimmering elements with colorless varnish;
- drying.
The same principle applies to a “broken glass” manicure on a transparent base. Instead of colored varnish, colorless varnish is used, the same base for fixing shiny plates. This design looks more gentle, fresh, and goes with any outfit.
Nude shades are suitable for creating a design: caramel, pink, white and light brown varnish.
“Glass” manicure on shellac lasts longer. The design procedure will be slightly different:
- nail file treatment;
- degreasing;
- applying primer;
- application of base color;
- drying under a UV lamp;
- gel coating, end sealing, drying;
- laying out the cut pieces of foil using tweezers;
- application of finishing coat and drying.
This “broken glass” manicure will be suitable for fashionistas who have previously worked with gel polish. If you have no experience, then it is more advisable to get your hands on the first method - with regular varnish.
#3 Stained glass pattern on nails: imitation of stained glass using gel polish
In our minds, stained glass windows are echoes of a mysterious and sometimes magical past. Stained glass windows decorated churches, administrative buildings and simply people's homes. It was considered art; with the help of images on stained glass windows one could read historical events, feelings and emotions of people. Today, stained glass windows are present almost everywhere: in the decor of apartments and office premises. This technique has also found its application in nail design.
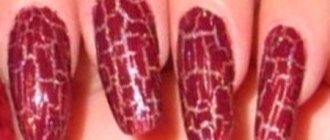
The simplest stained glass design looks like many pieces connected into a single whole. Creating such a pattern is not difficult. Use light pastel shades of gel polish for design, black, white or silver gel polish to draw partitions. Secure the design with clear stained glass gel.
Which design to choose with stained glass gel polish
Due to the significantly smaller amount of pigments (compared to other products of this type), the varnish has a transparent structure, which allows you to apply a stamping pattern, foil backing or any painting underneath it.
Against such an amazing background, all this will look new, causing delight and admiration not only among others, but also among the owner of a stylish manicure.
Stained glass design is especially harmoniously combined with transparent French, fan French, and stretching. Using acrylic paints you can create incomparable stained glass nail art.
This varnish also goes well with the ever-popular “Cat Eye”, allowing you to give your manicure more depth and volume.
#4 Aquarium nail design
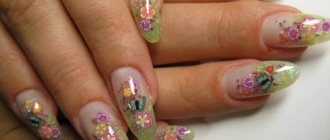
Stained glass gels are often used by craftsmen to create three-dimensional designs. Aquarium design is one of the uses of stained glass gel. To create a manicure, use ornate patterns with sparkles, gold or silver gel polish. To make the resulting design look three-dimensional, it is decorated with a layer of stained glass gel.
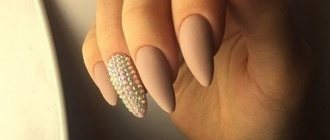
Aquarium nail designs look great on long, pointed nails. The manicure looks especially beautiful with a floral theme. In the photo below you can see examples of this stylish nail design.
Manicure with mosaic
You can do a simple but original mosaic manicure yourself. No artistic skills required.
Materials and tools:
- file and buff;
- degreaser;
- base and top;
- orange stick;
- stained glass gel polish;
- diamonds for nail design. Irisk offers about 10 colors. For decoration, you can use one or more decor colors.
- Do a hygienic manicure and prepare the nail plate for applying the base by filing off the shiny layer with a buffer;
- Apply a thin layer of base and dry in a lamp;
- Now it’s the turn of the gel polish. Cover the plate with the chosen color so that there are no stripes or bald spots - dry again in the lamp;
- Instead of a second layer of varnish, apply a base or top coat over the dried stained glass. Lay out a pattern of diamonds on the “wet” material. You can combine colors and place the decor the way you like or repeat the design shown in the photo;
- Dry the base or top with the design in a lamp. Apply another layer of stained glass gel polish over the pattern and dry again. If you want to achieve the effect of an aquarium, first apply a fixing layer of top coat over the design, then gel polish and again top coat. But be prepared for the fact that the overall thickness of the coating will be impressive.
According to these instructions, you can place any non-volumetric design under the stained glass - mica, kamifubuki, sparkles, foil.
Nail decorations - an overview of all types
Sprinkles and loose decor for nail design
#5 Cat eye manicure: stylish ideas for stained glass nail design
The cat eye design looks very rich. Manicure is created using special gel polishes that contain metallic pigments. For them to show themselves, you need to run a special magnet over the surface of your nails, which is included with the gel polish.
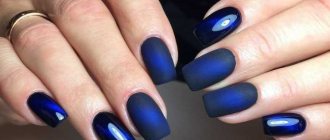
For cat eye manicure, deep dark shades are used. In combination with stained glass gel, the manicure will look rich and noble. Use blue, burgundy, green gel polish for nail design.
The great advantage of a cat's eye manicure is that it practically does not require additional decor. The coating itself looks bright and rich, so additional decor can simply ruin it. The only exception can be considered rhinestones and sparkles, neatly located in the root zone.
About designs
Design with stained glass gel polish involves creating the following effects:
- Aquarium. For it I select deep and rich shades of emerald, sapphire and garnet colors (photo).
- Liquid gems. It is very easy to create the shape of a gem flowing from a nail thanks to the thick consistency of stained glass gel polishes. Stones made from gold, silver and chameleon-colored varnishes look especially impressive.
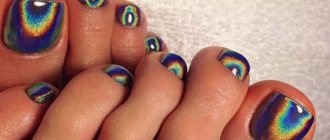
- Broken glass. A manicure with a broken glass effect is given a stunning look by adding pieces of foil or mirror polyethylene to the varnish, to which the stained glass translucent varnish adds even more shine and shimmer.
- Cat's eye. Stained glass coating can be applied to any base with a cat's eye effect. For greater color depth, craftsmen advise using a black backing and using branded magnets, for example, magnets from Bluesky or Kodi Professional. The closer the magnet is to the nail, the larger and wider the shiny strip will be; the further away, the thinner the highlight will be.
- Gradients. A smooth stretch of two or several colors using the ombre technique looks extremely stylish on nails of any shape and length. Fixing the color with a stained glass base will help give your nails a candy-like shine and transparency.
- Foil. Holographic materials for nail art can be supplemented with stained glass gel with a more liquid consistency. The secret and trick of many masters is to add a few drops of darker paint, which gives the manicure the effect of expensive Venetian glass.
- Additional decor. The use of stained glass varnishes with the additional inclusion of sparkles, beads and rhinestones can add shine and bright accents to your manicure.
Bright colors
How to create stained glass gel yourself
If you don’t have stained glass gel on hand, but want to create a three-dimensional design, you can use a simple recipe. To create a stained glass gel yourself, you need to mix a high-quality, loose gel polish with a top coat in a 1:1 ratio.
Choose a gel polish that does not contain white pigment. The ideal option would be a transparent gel polish with a small amount of glitter.
Stained glass manicure looks amazingly beautiful and airy, and creating such a design is not difficult even at home. We offer you a photo selection of stylish stained glass manicure ideas that you can repeat on your nails.
Features of the “broken glass” manicure and materials for its creation
Foil creates a glass-like coating and a holographic effect on nails. It adds shimmer to the manicure and also makes a bright accent on the beautiful shape of the nails and well-groomed hands. This design is best chosen for long oval or rectangular nails. If your own length is not enough, then you can increase it - get extensions in the salon or use false nails.
The advantages of the “broken glass” manicure include ease of creation and uniqueness. You can make an unusual design at home from scrap materials. It is almost impossible to copy a bright pattern that shimmers in the sun, so there is no need to be afraid that at work you will meet a colleague with the same manicure as yours.
Bright nail designs perfectly complement everyday and evening looks. For every day, it is more advisable to create a light manicure - it will not tire the eye and will emphasize individuality. Designs in subtle shades also look good on short nails.
For special occasions, dark shades of varnish are used - blue, blood-burgundy, black, etc. Small pieces of foil in combination with the deep, rich tone of the nails will shimmer beautifully when hit by rays of light. Such a design solution will not go unnoticed.
You have to pay for beautiful pleasure. The average cost of a “broken glass” manicure is from 450 rubles and above. The price increases if gel is used instead of regular polish.
You can make “broken glass” on shellac at home or in a salon.
It will be cheaper to do a manicure at home. The materials - foil, mica packaging and varnish - cost about 150 rubles. It will take a little nerve and time, since you need to get used to it in order to correctly and beautifully glue pieces of iridescent material and apply varnish.
Complex types of “broken glass” manicure can be done by girls who have a UV lamp, varnishes and gels at home.

