Basis for decorating a cake with roses: necessary ingredients
The most common option for decorating a cake is flowers made from cream. In most cases, these are roses. They can be of various shapes, any color and as many as you want.
- Additionally, you should have special kitchen auxiliary equipment on hand - a pastry syringe and plastic nails of various sizes, which today can be ordered on the Internet at an affordable price. You can order on Aliexpress, see the catalog at this link.
- And even if you don’t have such a syringe at hand, arm yourself with a simple plastic bag. It just needs to be strong enough, ideally using slice bags. The main thing is that you have desire and patience!
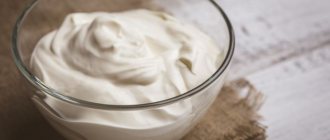
- The most suitable mass for decorating a cake is considered to be one that has the following characteristics: oiliness, which can be of any intensity;
- thickness, because the cream should not spread, but retain its shape and patterns until it hardens;
- therefore, the most important criterion is the ability to maintain the original shape for a long time;
- be moderately harsh in structure - so that the cream does not spread, but also does not turn out to be very hard;
- chilled;
- and only cooked.
The rose cream should be thick enough to hold its shape.
- It is for this case that the expression that “the more modest the better” is typical. The best option is a mixture prepared on the basis of only two components. All you need is butter and condensed milk. And the resulting composition can be diversified as desired by adding some of these ingredients: dyes - natural and food (if the decorations are white, then they do not need to be added);
- instant coffee – adds a pleasant aroma and, accordingly, a brown color;
- sugar syrup;
- sour cream - it is imperative that it be homemade, as it is richer and whips better, turning out thick;
- cocoa - to give the mass the color and taste of chocolate;
- cream to improve the white color;
- flavorings: vanilla or vanilla sugar, cinnamon powder or stick, lemon zest or juice, etc.
It is better to avoid adding the following elements to the cream:
- whole pieces of fruit or berries;
- pieces of chocolate. The exception is if it is ground to a powder;
- any other bits and pieces that may prevent the mass from becoming ideal for further use. After all, it should come out smooth, uniform and shiny, without foreign elements.
This is interesting: Pizza mince: recipe
Wedding cake with red flowers and other decor ideas
It is not without reason that lovers choose red as the main color of the celebration. After all, red is the color associated with passion and love. Accordingly, this mood should be conveyed in the treat to each guest. But what is an unusual way to decorate wedding cakes in red so that they surprise and fascinate? Let's figure it out.
Form
A red wedding cake can have one, two, or three levels. You can choose a classic round or square shape, or play with asymmetry. But red heart-shaped cakes look especially touching. Moreover, they can also be in several tiers.
Flowers
The most important decoration of cakes are flowers. Most often, confectioners use artificial plants, flowers made from mastic or cream. But in recent years, fresh flowers have peaked in popularity. The main thing is to choose non-poisonous varieties. A white and red wedding cake is ideally complemented by bright red flowers.
We advise you to pay attention to roses, peonies, nasturtiums, and poppies. Do you doubt whether you should choose this decor option? Photos of cakes with fresh flowers will definitely inspire you and help you understand which dessert option is right for your couple
A color scheme
The red shade is quite capricious. And not all colors will go well with it. Therefore, be careful when choosing a palette. First of all, start from the color of the event. A red wedding cake is best combined with the following shades: white, black, gold, silver. Desserts with an ombre effect look fascinating.
painting
Painted cakes are an eternal classic. Graceful thin lines and monograms will emphasize the elegance of the treat. Moreover, red painting will look great on a white wedding cake, but a red dessert can be decorated with painting in white, black, or chocolate colors.
Other decorations
As with any other decor, the main thing here is not to overdo it. Additional elements can include beads, greenery, berries (garden and forest), ribbons, initials of the newlyweds, wedding date, figures of lovers or hearts, images. Additional decoration of a red and white wedding cake will not only impress guests, but will also help the dessert look even more beautiful and attractive in the photo.
How to make buttercream roses
Buttercream - ideal for creating roses on a cake. Buttercream roses are realistic, retain their shape well and taste good - they can be made in different colors and tastes, as discussed above.
To make roses from cream you will need:
- a culinary bag with a special attachment for creating roses;
- butter cream;
- baking paper;
- marzipan or a piece of biscuit in the form of a small cone, it will be the base on which the rose will grow;
- pastry nail.
If you have these elements, then you can safely start making buttercream flowers to decorate the torus.
Step-by-step instructions for making buttercream rosettes for decorating a cake:
- Cut the baking paper into small squares slightly larger than a rosebud;
- You need to attach a cut out square of paper to the base of a cooking nail with a drop of cream;
- A cone made of marzipan or biscuit with a wide base should be attached to a piece of paper with a drop of cream. The cone will be the core of the rose, petals will grow on it;
- Rotating a culinary nail, squeeze the core of a rose onto a cone from a culinary bag with a nozzle for creating roses;
- Next, squeeze out 3 petals with the second layer by rotating the nail. Each petal should occupy 1/3 of the circumference;
- With the third layer we make 5 petals, occupying 1/5 of the circumference of the cone;
- With the fourth layer we make 7 petals, occupying 1/7 of the circumference of the cone;
- The rose is ready, carefully remove it from the nail and repeat steps 1 to 7 to prepare other roses;
- Place the finished rose or roses in the refrigerator;
- After the roses have cooled, they can be placed on the cake;
- All that remains is to make green leaves. To do this, you will need a culinary bag with an attachment for creating leaves for the cream cake and green cream. The cream should be squeezed towards the base of the rose to create the appearance that the leaf is part of the rose.
Popular articles Memorial ribbon for Radonitsa
In order to create rosebuds from butter cream you need:
- Pipe a small strip of buttercream onto a piece of baking paper, using the same pipette used to create buttercream roses. This will be the base of the bud. The buds can be immediately planted on the cake.
- Squeeze the same strip of cream to the right of the base of the bud;
- Squeeze the same strip of cream to the left of the base of the bud;
- The bud is ready. You can make other rosebuds by repeating steps 1 to 3;
- Place the rose buds in the refrigerator. After the buds have cooled, they can be placed on the cake.
Thus, you can make roses, buds and leaves for the cake of different colors and tastes. Experiment, use different colored creams to get multi-colored roses, be creative in placing them on the cake and you will get a real culinary masterpiece.
How to make a cake with roses from mastic
1. As a base, you can bake absolutely any cake that you like. After you have assembled it, coat it on all sides with butter whipped with condensed milk, carefully leveling it out.
2. Now you can start preparing the mastic. In this case, marshmallows will be used as the base. Place them in a deep bowl, sprinkle with water and lemon juice and place in the microwave for literally 15 seconds.
3. Gradually add powdered sugar, kneading into a homogeneous mass. Use a spoon first, then place on a work surface and knead like dough.
4. The result will be a smooth, moderately dense mass that slightly sticks to your hands. If you did everything correctly, then making a cake with roses from mastic at home will be quite easy.
5. Use food coloring to make all decorative elements bright and colorful. I recommend using gel dyes. Leave some of the mastic white.
6. The cake covered with cream should stand for 2-3 hours in the refrigerator. A piece of mastic may also lie there with it. Then sprinkle the table with powdered sugar and carefully roll it out quite thin.
7. Carefully transfer the rolled sheet onto the cake.
8. And, pressing tightly, remove the resulting folds. Using a sharp knife, cut the bottom exactly along the bottom edge of the cake. This is, in fact, a ready-made basis for decoration.
9. Now we need to talk directly about the roses. So, take a small piece of mastic and form it into a “droplet” that looks like a flower bud.
10. Sprinkle the surface with powdered sugar and roll out small pieces of mastic into circles like these. At the edges they should be thin and slightly curved. You can do this simply with your hands or a spoon, for example.
11. Wrap each petal around the base, gluing it with water (moisten the brush a little and coat the joints).
12. That’s the whole secret of how to make a cake with roses from mastic. Leave the flowers to dry, after going over them with a brush and removing excess powder.
13. Using a brush dipped in water, coat the bottom of the flower and glue it onto the cake. If you wish, you can also make small petals or stems, for example. Very beautiful and festive, isn't it?
Rate the recipe for Cake with mastic roses:
0
average rating: 0.0, total votes: 0
I cooked)
Recipes we recommend: Kefir shortbread Melting “Honey” Thin pancakes French pie in 5 minutes Onion pie made from puff pastry
The editors recommend:
Similar recipes:
“Fruit Basket” Cake Lazy Honey Cake “Lady Fingers” Cake Jewish Cake Biscuit with Nuts “Nastenka” Cake “Nike” Cake “Fixies” Cake
Recipe collections:
Dough for pies and buns259
Kefir dough96
Dough for dumplings69
Pie dough168
Pizza dough163
Oil cream based on Swiss meringue for spectacular roses
For those who find the taste of meringue “empty,” we suggest making a full-fledged butter cream based on it - for this, take 450 grams of softened good quality butter for the serving above.
Add butter to the already whipped whites in portions, beating well each time. The resulting cream will be airy, with an intense creamy taste. The main requirement for a successful cream is that the butter and meringue must be at the same temperature! From the indicated proportions of cream you get a lot, so you can safely divide the products in half. This buttercream can not only be used to decorate a cake with roses - it can be used to layer the cake, fill eclairs, etc.
Ingredients for Cream Cake Roses:
Cream 1
- Butter
— 250 g
- Milk
(200 ml) - 1/2 cup.
- Sugar
(200 g) - 1 cup.
- Chicken egg
- 1 PC
- Vanilla sugar
— 1 package.
Cream 2
- Butter
— 250 g
- Condensed milk
- 8 tbsp. l.
- Vanilla sugar
— 1 package.
Recipe for Cake Cream Roses:
I make roses on a piece of white bread crumb. I cut out a cube of bread, put it on a fork (I use a fork for peeling jacket potatoes), or you can put it on a pencil.
We begin squeezing the cream out of the bag with a rose tip, from the top side of our cube and placing each next petal under the previous one in a checkerboard pattern until our cube is covered in petals.
Carefully remove the rose from the fork with scissors and place it on the cake.
This is what the rose looks like from above.
But do not rush to remove the lily from the paper, first you need to put it together with the paper in the refrigerator or freezer for a while, after cooling, carefully separate the paper from the flower and transfer the flower to the cake
We put the leaves on the cake in advance and then put flowers on them and next to them, as we like.
This time I decorated the sides of the cake with a braided pattern. It is made with a special nozzle - a flat straight one, one side of which is serrated.
Preparation of the cream: Remove the butter from the refrigerator in advance so that it becomes soft. Pour the sugar into a small saucepan, pour in the milk and heat, stirring constantly, until the sugar dissolves. Beat the egg with a mixer and, continuing to beat, pour in the resulting syrup (hot) in a thin stream. Allow the syrup to cool until it becomes fresh milk. Put the butter in a cup, mash it with a spoon, add a little syrup and stir. With a mixer at low speed, begin to beat the butter, gradually adding syrup in portions. When you have added all the syrup, beat the cream well into a fluffy white mass. Color the cream in different colors in portions, place it in a small cup, and then decorate the cake.
Cream with condensed milk: Mash soft butter, adding condensed milk, then beat with a mixer until fluffy. The cream is ready - you can start decorating, as in the previous version.
I wish everyone good luck!
Recipe Rose from mastic. MK
We will also need round recesses (ordinary shot glasses will do), toothpicks, a rolling pin, thin foam rubber, a special tool with a circle at the end and food glue. Let's take mastic. We paint it in the desired color. Take a piece and roll it into a ball.
Next we stretch it into a cone. We attach it to a toothpick. I’ll say right away... I make roses for a long time... I believe that after each stage you need to let them dry. This makes them easier to work with and they do not become deformed. After this stage, I leave the cones to dry for a day.
For the next step we will need recesses... You can use regular glasses, preferably, of course, with thin walls. A large circle may not be needed; it is needed if you decide to make a very lush and large rose.
The cone should be approximately the same size as our recess.
Drying.
The next day we prepare everything we need. You will need a tool like this with a ball at the end... I had a special one, but it was still Chinese - it broke... Now I do it with a regular ballpoint pen, you can use children's drumsticks or xylophone sticks.
Using a notch, cut out circles.
2 pieces for each rose.
We place our circle and special on the foam rubber. With the tool we roll along the edge, from the middle of the circle to the middle.
Then we turn our leaf over and draw a special one from the center. with the tool down, as if pulling it out a little.
Then glue it onto the bud like this. Parallel to each other...
Then we wrap the petals... They end up overlapping each other.
At this stage, I again let them dry, if there is time, of course... If you need buds, then that's it!
Done... you can stop at this stage.
Next, we prepare the leaves again. 3 pieces for each bud.
This is how we glue them on.
Then we overlap the other ends. Just gluing them on top.
Now the next stage is ready.
I put it out to dry again. You can, again, stop at this stage...
Next stage. We prepare the leaves again, 5 pieces for each rose. Now we need a toothpick.
This is how we wrap the edges.
At both sides.
Like this!
Prepared petals.
And in the same way as before, we attach the petals, just this time there are 5 of them. If you want a more magnificent and larger rose, then go ahead. stage you need a large cutting and 7 petals for each rose, etc. 9...
Further, if the leaves fall to the sides and do not hold their shape, then it is better to dry them this way. Of course, if they are dried and not deformed inside...
Girls, I hope you find it useful![/size][/color]
How to make roses on a cake with a pastry tip?
To start creating a rose, you need a base, which can be either some kind of cone-shaped surface or a ready-made confectionery product. But if you still have little experience, then you should practice first on a separate base, and then, for example, “transplant” the finished rose onto a cake or biscuit. You can also buy a special pastry stick, also called a “carnation”.
You can create magnificent roses in the following way.
We will need:
- pastry bag;
- rose attachment;
- cream;
- a blank on which we will make a rose;
- fork (to transfer the rose to the product).
So let's get started.
- Prepare your cone blank, we will attach the petals to it.
- Fill a pastry bag with cream and place a rose on it. Prepare a thick cream so that it holds its shape.
- Take the cap so that the thin part of the slot is at the top. The petals are different depending on the angle of inclination.
- Slowly turn your cone shape in one hand and press down on the piping bag with the other hand to create swirls around the base. Use your imagination, change your hand movements often, especially if you are just experimenting, and you will see how fancy the flowers turn out.
- Stop pressing on the bag and remove the nozzle. If you continue with other cones, then change them and continue decorating, but if you are finished, then remove the nozzle and remove excess cream from the end of the cone.
In the next video you can learn in detail the process of forming roses from protein cream.
Recipes for making mastic
So, what is this sugar mastic? This is a very convenient material for making a variety of culinary decorations, which quickly hardens after final processing.
To prepare mastic you don’t need to be a culinary master; you can simply do it in master classes, repeating the process step by step from the teacher.
Let's look at the recipes. Of course, each master uses his own recipe, developed by trial and error. But there are three main ones: gelatin, marshmallow and milk. It is impossible to say unequivocally which is better - everyone’s personal preferences still play a role here. For some, the capricious gelatin version is suitable, while others will stick to the milk version. In any case, we recommend trying all the recipes to compare the results. Or maybe you’ll even decide to work with a ready-made one – who knows?
For those who are not afraid to experiment: berry meringue with albumin
Very, very tasty cream and a great chance to get a non-greasy, light cream with intense flavor. Would you like raspberry cream roses? You will get them! Take:
- albumin (dry protein) - 34 grams;
- seedless raspberry puree - 340 grams;
- water - 100 grams;
- sugar - 300 grams.
Mix sugar and water in a saucepan, place over low heat and bring to a boil.
At the same time, mix until smooth and beat the albumin with raspberry puree.
Bring the syrup to a temperature of 120 ° C.
With the mixer running, pour boiling syrup into the berry mixture.
Beat the mixture until it cools completely.
The finished cream will be thick, shiny, with a rich raspberry flavor. Your loved ones will be amazed when you serve berry rose cake.
At the same time, you should not limit your imagination - you can take any puree to your taste.
Decorating ideas
Roses made from custard or other cream are used to decorate single- and multi-level cakes. Most often they are placed asymmetrically, as if repeating a picture observed from Mother Nature (see photo).
Flowers are arranged not only in the form of a basket. Roses on a cake-gift look very original. In this case, you need to make multi-colored stripes representing satin ribbons.
You can decorate both the surface of the cake and its sides with roses. Flowers of different sizes (from large to smaller) seem to descend downwards in a wave, creating a continuous line.
When choosing a color scheme, keep in mind that roses painted in either warm or cool colors look harmonious together.
World trends in decor. More roses for the rose god!
Cream roses are characterized by a clear, expressive texture - you should see every petal. This imposes a number of restrictions on the cream, since it must be very thick and stable. So forget about sour cream and mousses - the petals will blur before you have time to see them in their “assembled” form. We have described the most popular types of creams for creating roses below.
Cream decoration of confectionery products is now extremely popular thanks to the so-called Malaysian technique. It is based on neat buds that form a single composition. The most important thing in decor is harmony, it’s not just a basket of flowers. All shades echo each other and present a single picture. Ombre is welcome. The craftsmen who create masterpieces, as in the photo below, have probably leafed through a lot of information on the topic of botany.
Decor in the form of the newlyweds' initials
The inscriptions on the cakes add originality to the product and involvement exclusively in your celebration. You can ask the pastry chef to make a wide variety of inscriptions: diminutive forms of names, initials with curls, nicknames.
Another option would be decorations on skeins or toothpicks; the inscriptions on these decorative elements will be better visible and stand out.
A cake for a wedding celebration is still something more than an ordinary confectionery product, because a wedding is a special event.
The appearance of the dessert should be bright, original, exquisitely decorated, but the taste, of course, should remain pleasant, or better yet, divine.
Decorating a cake with roses: tips
We want to share with you some simple tips to avoid incidents and unpleasant situations. And as a result, you will get a beautiful masterpiece that will retain its freshness and original appearance for a long time.
- Try to avoid combining foods at different temperatures. Never pour melted or hot ingredients into the butter or cream base. That is, milk or chocolate, as well as gelatin. They must be at room temperature. And with gelatin you need to be extremely careful, since it can even form lumps from temperature fluctuations.
- Cream is a perishable product that can float in the literal sense of the word. Therefore, you need to store it both before and after decorating strictly in the refrigerator! And not even on the balcony in the cool season.
- The container that is used to mix the ingredients and beat them until smooth should be wiped dry with napkins. There should not be any drops of water and, especially, oil in it.
- Each component must have its own temperature. The oil should be soft and at room temperature, but not in a liquid state.
- But take cream, whites or sour cream only chilled. To make the cream whip better, you can use a popular life hack - place a container of cold water under the bowl.
- It is better not to overdo it with dyes, because the color may become too rich, artificial and unnatural. The optimal amount of dye is 1 drop or on the tip of a knife.
- You also need to know that each cream has its own shelf life. On average, this period does not exceed 24 hours. The only thing is that oil-based cream can last a little longer than a day. But it is not advisable to delay it to the extreme.
- Don’t forget about what surface the mixture will be placed on when decorating the cake. If you want it to “stick well”, it is best to use the following options: not completely hardened chocolate or caramel icing;
- jam, confiture;
- cream;
- grout used “under mastic” - cake crumbs mixed with cream.
Be sure to consider what surface the roses will stick to.
- On the contrary, the cream will fall off and slide off from such surfaces as: mirror glaze;
- jelly coating;
- cake without coating at all.
- Every experienced housewife already knows that the dough retains its properties for several weeks in the freezer. So cream for roses is no exception.
- Moreover, in the future you can even create compositions not only from multi-colored roses, but also from flowers of different textures.
- To make it easier to find the material you need later, divide the remains into different bags, labeling them by color and type.
- But keep in mind that you cannot suddenly throw the cream into the cold! First you need to put it in the refrigerator for a couple of hours, and only then in the freezer.
- And you need to defrost only under natural conditions. And again, don’t take it straight to the table. Place it on the refrigerator shelf overnight for at least a few hours.
- And even if everything didn’t go smoothly the first time or it took longer than originally planned, don’t be discouraged. Everything comes with time and experience. After some time, you will only remember this with a smile. And you yourself will share your experience and give valuable advice to beginners.
Decorating a wedding mastic cake: fashion trends
Wedding cakes made from mastic are subject to fashion trends to the same extent as other wedding accessories. Large wedding salons and private pastry shops will offer a catalog with a wide variety of cake decor, but recently two trends have prevailed:
- an asymmetrical cake with an abundance of decorations, flowers, and thematic compositions;
- a simply decorated confectionery product, with a minimum of decoration and a discreet color palette.
Of course, various variations and individual designs are implemented. The wishes of the newlyweds, adjusted by the master pastry chef, can ultimately become a real masterpiece.
Classic and minimalism
Classics, despite the fickleness of fashion, will always be held in high esteem. A classic white cake, with traditional wedding paraphernalia and cascading flowers, always makes an impression.
It is appropriate to complement such a cake with figurines of white swans or doves, hearts or wedding rings; it will wonderfully reflect the romantic mood of the celebration.
In turn, a cake covered with fondant with several discreet decorations (a sprig of lilac, a few hearts) will appeal to fans of minimalism. At the same time, it will not lose any of its sophistication.
Natural flowers
Fresh flowers are a rather interesting element in decorating a wedding cake. Traditionally, roses, petunia, chamomile, cornflower, orchids, and fruit tree flowers are used for this purpose.
Some guests may be drunk at the end of the evening and not realize that the flower on their piece of cake is just an inedible decorative element. Therefore, when decorating a cake with fresh flowers, you should remember that some of them, for example, lilies of the valley and some types of lilies, are poisonous. In addition, when growing flowers, various fertilizers are often used.
When buying flowers, you should inform the seller for what purpose they are being purchased. Florists, as a rule, know which flowers have which properties and how they were grown.
The stem is cut so that one centimeter remains, then the flowers are washed under running water and then dried with a paper towel.
Cakes with lace, inscriptions, figures, roses, mastic peonies
Confectionery products decorated with lace frills, inscriptions, and figurines of the bride and groom are no less popular. And cascades of roses or peonies made from mastic, made by a professional, are not inferior in beauty to fresh flowers.
The cake can be decorated in a fairy-tale-romantic style. By and large, with such a design there are no restrictions for imagination, except for common sense, a sense of proportion and taste.
Prints on rice paper
Another fashion trend is decorating desserts using various prints applied to special edible rice paper.
These can be photo prints of the bride and groom, illustrating the history of their acquaintance and relationship, images of flowers, birds. This service is relatively inexpensive and can be provided by any confectionery shop.
In wedding color and style
The cake should match the style of the wedding, especially if the bride and groom decide to have a themed wedding or if the style of the wedding determines the location. For example, a wedding of rockers will undoubtedly be decorated with a cake decorated with a pair of stylized motorcycles.
For a garden wedding, a cake decorated with apple blossoms would be ideal. A traditional wedding will be decorated with a cake made in colors that match the color scheme of the room decor. Additionally, it can be decorated with a pattern that echoes the bride’s outfit.
