Subtleties of cooking
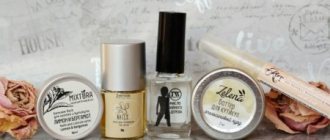
- buy a quality product . All recipes will be based on natural beeswax. You can buy it from beekeepers, as well as in soap stores. I saw an offer on Aliexpress, but it is better not to buy wax there, because it is not known whether it is really a natural product or simple paraffin;
- Use glass or ceramic dishes and avoid metal containers . Ingredients in the home remedy may react with the metal;
- Always check ingredients for allergies . Wax products rarely cause allergies, even in those who have a reaction to honey. However, before cooking, it is better to do a test - apply a small amount to the crook of your elbow and leave for 30-40 minutes. Ideally, check each component this way;
- do not boil the mixture . To prepare homemade cosmetics, the wax must be melted before cooking. The melting point is 65-67 degrees. This means that you do not need to bring it to a boil. Try to heat it in a water bath, not in the microwave. This way you can follow the process;
- Don't cook a large portion at once . Homemade cosmetics have a much shorter shelf life than store-bought ones. Shelf life in the refrigerator is no more than 3 months, and at room temperature up to 3 weeks;
- disinfect the jars in which the finished product is stored . Wipe the jar inside and out with alcohol or a disinfectant, and then rinse with clean water. This way you will destroy the microorganisms that were on the walls, and the finished product will be stored longer;
- Let the resulting mass harden at room temperature . It is important that the product hardens slowly, so you should not put the jar in the refrigerator. A sudden change in temperature will cause the mass to crack and make it difficult to use.
For dry nails
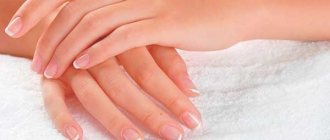
Suitable for girls whose nails are prone to dryness, brittleness and splitting. The first effect will be visible after the first use, and after a course of 5-10 procedures, the nails will noticeably become stronger, their quality and resistance to mechanical damage will improve.
Ingredients:
- beeswax – 2 g;
- Shea butter – 8 g;
- tea tree essential oil – 2 drops.
It is better to measure the ingredients using a kitchen scale, but if you don’t have one, proceed from the data that a 1*1 cm cube of wax equals 1 gram.
If the wax is foundation - a piece of 3*3 cm - 1 gram.
Recipe:
- Place Shea butter and wax in a container and place in a water bath. Melt the ingredients until they are completely dissolved;
- Wait 2-3 minutes for the mixture to cool slightly and add the tea tree. Stir quickly to combine the ingredients.
- Pour the resulting mixture into a wide-necked jar, such as a cream container, and let it harden. This usually takes from 30 minutes to 2 hours depending on the room temperature.
Apply to your nails once a week and repeat until your nails are in the desired condition.
How to use beeswax on nails
Based on natural qualities, the areas of application include:
- A large amount of vitamins, nutritional components, esters, saturated fats, acids helps strengthen and nourish the weakened nail plate.
- Gives a matte finish when polished; the water-repellent properties of honey cosmetic wax will protect the nails and skin of the hands from the harmful effects of aggressive environments such as household chemicals.
- The regenerating properties of the product will help fill voids and seal split nails.
- Antibacterial and antibiotic properties will help in the fight against nail fungus as an additional treatment.
Using hand and nail cream with the addition of wax, you can not be afraid for your hands when exposed to household chemicals: the skin of your hands and nails are completely safe
Strengthening and nourishing nails
Procedures aimed at restoring, strengthening and nourishing the skin of the hands, nails and cuticles are included in the list of services of beauty salons and manicure salons. Moreover, the cost of such services varies from 400 to 1000 rubles, depending on the interior and the material used. In order for the effect of the manipulations to become visible, you need to conduct from 8 to 12 sessions.
The process itself is easy to carry out at home. You just need to get silicone or glass molds, brushes that can be thrown away, polishing files with rubberized and suede surfaces, special orange sticks, and cosmetic gloves.
Polishing
Polishing is similar to sealing, easy to apply.
- Preparation. To soften the skin, place your hand in a warm bath of water and essential oils for a few minutes. Then the cuticle is processed or gently moved with a wooden stick closer to the root of the nail. And the plate itself is polished with a voluminous file with a suede coating.
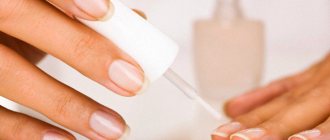
- Polishing. Wax ointment or softened natural wax is applied to each plate. Polish with a rubber file for 1–1.5 minutes. As soon as the fingertip begins to slide along the surface of the nail, the procedure can be stopped to leave a small layer.
To polish the nail plate you need to use a rubberized file.
Sealing split nails
Sealing is a healing procedure. It is carried out both in nail salons and at home. The mask is able to strengthen the nail and covers it with a protective film. After treatment, you can apply cosmetic, decorative varnish or gel polish. The procedure works with a cumulative effect, so this treatment is carried out at least once every two weeks. At the same time, the resulting film protects the nail from the aggressive effects of washing powders, dishwashing detergents and other household chemicals.
The following condition must be observed: you should not apply hot wax to your nails. This can completely disable it; in addition, the cuticle suffers.
Before sealing split nails, you need to first prepare the materials and work area:
- Pre-technical processing stage. Decorative varnish, if any, is removed. Using a file, the nail is given the desired shape. If necessary, a trim manicure is performed.
- Stage of treatment with protective substances. Nail oil is applied. It can be prepared in advance or purchased. This can be cosmetic essential oil from peach seeds, ylang-ylang, lavender. The oil is rubbed into the nail plate with massaging movements. Excess is removed with a soft cloth or paper napkin. As an alternative to rubbing, a bath with a few drops of essential oils can be used. But the nutritional effect will be lower. After the oil, a wax-based nourishing cream is applied. Rubbed in with a special stick.
- The actual sealing. After protective and finishing measures, you can begin sealing. The nail plate is covered with a thin layer of pre-melted wax and rubbed into it. Next, another layer is applied and rubbed in with a sanding file. Let it harden. Leave for about 15 minutes. Remove wax.
For 1-2 days, let your nails rest, do not apply any coating.
Liquid Ingress Protection
In order to provide protection against liquids, there are hand cosmetics based on or with a high content of beeswax. These are masks and cream waxes. When applied, a thin, barely noticeable film is formed, which has water-repellent properties. This product is suitable for girls and women who wash dishes by hand and also often do false manicures.
For cuticle care
Indication for use is rough cuticle. Wax in combination with oils effectively moisturizes, making the skin more supple and soft.
Ingredients:
- beeswax – 1 g;
- peach oil – 20 drops or 1 ml;
- jojoba oil – 1 ml;
- wheat germ oil – 2 ml.
Recipe:
- Add all ingredients to a small container and melt in a water bath.
- Pour into a jar with a lid and leave until completely hardened.
- Apply to the cuticle and nails once every 3-4 days until the problem of hard cuticles is completely resolved, and then once a week for prevention.
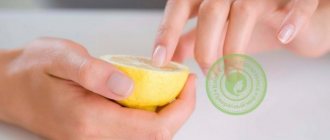
You can substitute oils in this recipe if desired. If you add lemon or grapefruit, nail growth will improve and there will be a slight whitening effect.
Cuticle Care Rules - A Guide to Products and Procedures
All about nail and cuticle oil
Strengthening nail wax
Strengthening cream-wax contains many more additional components that contribute to the formation of a protective film. Among other things, this product saturates the nail plate itself and makes it more resistant to damage. Wax-based medicinal nail cream has a fairly wide range of positive qualities. It is used not only to treat real problems, but also to prevent possible damage or disease.
For what purposes is strengthening wax used:
- if it is necessary to strengthen the nail plate and cuticle, the benefits of wax-based products will be most effective, since all the necessary components will not only penetrate deep into the nail plate, but also accumulate in it;
- to improve nail growth;
Strengthening cream-wax contains many more additional components that contribute to the formation of a protective film
- when cracks, hangnails, or any visible damage to the nail and the surrounding thin skin tissues appear;
- Wax is also very often used to seal the applied manicure. This product will provide its best protection for a long time;
- for polishing nails and giving them a pleasant matte shine and cleanliness;
- for preventive purposes;
- in cases of vitamin deficiencies or lack of calcium and magnesium in the body.
Biowax strengthening
The composition of biowax includes: beeswax, castor oil, silicone (fills microcracks), electric wax, vitamins B, D, E, pictin substances, glucose, microelements. Biowax strengthens peeling and breaking nails, making them stronger.
Bio-wax for nails nourishes nails, strengthens, polishes and creates an invisible protective film. Immediately after application, the nails look well-groomed, the cuticle softens and takes on a neat appearance. Biowax also protects nails and cuticles from adverse environmental influences. The wax is quickly absorbed and does not leave a visible greasy film, so it can be used both to protect manicures and for preventive procedures.
Sealing balm
To use, purchase a polishing block. Make sure that there are no hard particles on the edges, since its purpose is to rub the composition into the nail plate.
- wax – 3 g;
- ylang-ylang essential oil – 3 drops;
- grape seed oil – 1 tsp.
Recipe:
- To make the wax melt faster, grate it on a fine grater before heating.
- Mix with the rest of the ingredients and place in a water bath.
- Pour the resulting liquid into a cream jar and leave until it hardens.
- Apply to nails once every two weeks. To seal one nail, you need a small pea the size of a match head, which must first be rubbed into the plate with your fingers, and then “stamped” using a polishing block.
- You need to polish until the mass is completely rubbed in.
Read more about sealing and laminating nails:
Nail lamination - procedure and review of products
For nail fungus
It cannot be the only remedy for the treatment of onychomycosis, but it can significantly shorten the healing period and prevent the deterioration of the nails.
- beeswax – 5 g;
- tea tree oil – 5 drops;
- honey – 1 tsp.
- Mix the ingredients and place in a water bath. When the mixture becomes homogeneous, pour it into a jar and let it harden.
- Apply once every 2 days, rubbing into the nail plates.
Symptoms and treatment of onychomycosis
Nail wax dnc strengthening reviews
Strengthening nail wax allows you to restore strength to your nails, eliminating the causes of their brittleness and fragility. This is achieved due to the saturation of the wax with all kinds of nutritional components. Castor oil in biowax is responsible for providing nails with nutrients, helping to make the cuticle softer, healing damage and wounds; paraffin and beeswax protect the nail plate from the effects of aggressive substances and ultraviolet radiation.
Wax-based cosmetics receive a lot of positive reviews both from women themselves and from professional cosmetologists. Today there are no analogues that can to the same extent combine a healing, strengthening effect and an impressive external result of cosmetic care.
Strengthening nail wax how to use
It is enough to hold a small amount of cream or paste in your hands so that they melt a little, and then gently rub it over each nail and the cuticle around them.
Reviews on the use of dnc wax:
- Sofia D: moisturizes the cuticle very well, fingers look tidier, heals small wounds. Nails become stronger. I used it for a long time, then I couldn’t find where to buy it, so I ordered it again. Great product. Smells like propolis;
- Alena R.: a great thing for a more than modest price. I tried it by accident when I was looking for an alternative to oils, especially the last one, where I paid 230 re for 8 ml for sunflower oil (in common parlance). I liked the smell, composition and ease of use in this product. Then I noticed that drops of water on the nail with wax simply flowed off when shaken. I began to apply it more often - a real effect;
Nail wax is an easy-to-prepare product that will help solve many problems.
- Experience of use for several months: I bought this biowax along with the biowax from the same company “Nutritional”. To be honest, I didn’t find much difference between them; I used them in parallel. The wax did a very good job of restoring my damaged cuticle, which was dry and cracked in the winter, I applied it several times a day, rubbed it into the nail plate and the cuticle itself, and tried to put a little of this product under it. Within a week the cuticle became elastic and soft.
Nail cream
Nail cream is used to moisturize and nourish the plate. Unlike balms, the recipes for which are presented above, the cream does not need to be rubbed in. Its main purpose is to care for nails, not seal them.
Ingredients:
- wax – 10 g;
- chamomile decoction – 1 tsp;
- oil – 2 tbsp. l. Use any oil you have on hand - olive, peach, wheat germ.
If desired, you can add 1-2 drops of lemon, grapefruit or tea tree essential oil.
Recipe:
- Prepare a chamomile decoction – 1 tbsp. l. dry flowers, pour half a glass of hot water and leave for 30 minutes;
- Melt the wax in a water bath, add oil and broth to it. Stir thoroughly and remove from heat;
- Pour the resulting mixture into a sealable container.
- After 30-50 minutes the cream can be used.
- Apply every 3-4 days to nails and rollers. After 20 minutes, remove the residue with a napkin.
- After applying the cream, it is not recommended to wash your hands for 2-3 hours so that the components have time to take effect.
What is sealing nails with wax
Beauty salons offer this service, but it is very expensive, considering that sealing of nails must be done 3-4 times, with an interval of 2-3 weeks. In one procedure you will not get the desired result for a long time. After several sealing sessions, your nails will become strong and healthy and will delight you throughout the year.
The procedure for sealing nails is simple and accessible, let's do it at home. You will need 40-50 minutes of free time and a set of tools to carry out.
When is the procedure necessary?
- Nails peel and break.
- To accelerate growth.
- For medicinal purposes, to relieve inflammation.
- After removing extended nails.
- Before holidays or garden work.
Sealing Kit
- Sea salt.
- Specially prepared mixture of oils.
- A special cream with components - beeswax, vitamins A and E1, keratin.
- Disposable, tetrahedral file for grinding and rubbing.
Cosmetic companies quickly picked up the idea of sealing and offer ready-made kits for this procedure. The cost of such sets ranges from 200 to 2000 rubles. I would advise preparing the compositions of creams and oils at home; if you trust the company, buy a ready-made kit.
Video about wax polishing nails
Universal hand and nail cream
Equally effective for dry hands and thin, weakened nails. Systematic use allows you to solve the problem of peeling, as well as strengthen your nails and moisturize the cuticle and side ridges.
- wax – 1 tbsp. l.;
- apricot oil – 2 tbsp. l.;
- lanolin – 1.5 tbsp. l.;
- lecithin – 1.5 tbsp. l. Liquid or powder lecithin is sold in pharmacies, as well as in stores like iherb.
- lemon juice – 1 tsp;
- Shea butter – ½ tsp;
- vitamin E – 1 capsule.
Recipe:
- Melt the wax in a bowl along with Shea butter, lanolin and lecithin.
- Add the remaining ingredients to the resulting mixture and mix thoroughly.
- Use daily for 2 weeks and then take a break for 1-2 weeks. A break is needed so that the skin does not lose its own protective, healing and moisturizing functions.
Choosing hand cream according to skin type