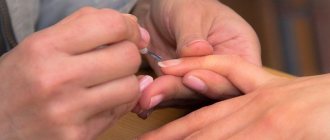
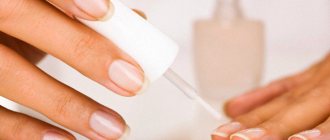
It's interesting to learn new knowledge and skills. The process is especially exciting when it comes to preserving beauty and health. Moreover, in the nail business industry, the flight of creative thought and concern for health are successfully combined. It is not easy to create something original and spectacular on uneven, flaky nails. Well-groomed hands and beautiful nails with a stylish manicure give a woman confidence in herself and her attractiveness. Therefore, the main task when caring for nails is to strengthen and improve them. Applying the base
Recently, it has become fashionable to learn how to do nail extensions and manicures at home. Many affordable, high-quality and easy-to-use materials have appeared. Strengthening nails with gel under gel polish has become a fairly popular procedure.
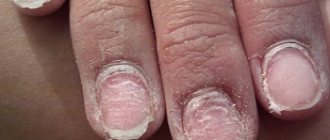
Causes of fragility
Before moving on to strengthening natural nails, you need to clearly understand that they are not brittle just like that. Nails can be considered one of the main indicators of human health, and their condition can determine more than 20 diseases before symptoms appear. Among the main reasons why nails break are the following:
- Incorrect or too frequent use of varnishes and polish removers lead to brittleness.
- Contact with household chemicals without gloves
- Harmful effects of chemicals that a person encounters in certain areas of professional activity. These can be burns from acids or alkalis.
- Sudden temperature changes. If you do not protect your hands from the cold by wearing mittens or gloves, your nails will dry out, become thin and brittle.
- Incorrect care. Avoid using clippers, which can damage the nail plate. Use special files that will allow you to remove excess length and not harm the nail.
- Long stay in the pool. Water with bleach dissolved in it negatively affects the health of nails.
- Lack of vitamins and minerals. The lack of calcium, selenium, zinc, silicon, iron and vitamins A, E, and D has a particularly acute effect on strength.
Why do nails become brittle?
This condition belongs to the so-called onychodystrophies - diseases in which the nutrition of the nail and its components is disrupted.
The causes of brittle nails are extremely varied. These can be both external and internal factors that affect the entire body as a whole. Thin, brittle nails are a common problem among the fairer sex1. Young women often use nail polish, regularly do manicures and other cosmetic procedures on their hands, and in the postmenopausal period, disturbances in calcium-phosphorus metabolism come to the fore.
In addition, women's nails also break during breastfeeding, since important minerals (including calcium) are washed out of the mother's body along with milk.
Other external factors that adversely affect the condition of nails include the following:
- Frequent exposure of hands to hot water.
- The influence of household chemicals.
- Chemicals used in industry.
- Physical factors such as chronic hypothermia and frequent drying out.
- Mechanical impact in the form of frequent trauma (for example, among musicians playing string instruments)1.
Onychoschisis (splitting of the nail plate), often combined with brittleness, can occur in somatic or infectious diseases. Thus, in men, increased brittleness of nails develops due to fungal diseases affecting the fingers3. This condition can also occur with a lack of calcium in food or as a result of a violation of its absorption in the gastrointestinal tract, with iron deficiency anemia, with a lack of vitamins A and C. Nails, especially on the toes, can peel off in diabetes mellitus due to the development of “ diabetic foot", increased fragility of the walls of the capillaries of the nail bed and prolonged compression of the toes by shoes.
How to remove polygel?
The polygel is easily cut off using hardware or dissolution.
To speed up removal, it is recommended to cut off the volume a little. For gentle removal, use good quality liquids, such as remover from LOVELY. It will take 15-20 minutes and the coating will be softened, you can remove it in a way convenient for you. With the correct use of all materials, the nails will be in their original form.
Strengthening nails with a certain skill takes up to 30 minutes. We wish you good luck!
Recipes for strengthening and healing nails
Mint will improve your nails
2 tbsp. crushed mint leaves pour 0.5 tbsp. boiling water, leave for 1-1.5 hours, squeeze, add 1 tsp. mashed cottage cheese and vegetable oil. Apply to nails for 15-20 minutes, rinse with warm water
Herbs will strengthen your nails
Chopped 2 tbsp. dandelion root, 1 tbsp. St. John's wort and sage; pour 1 tbsp. boiling water and leave for 1-1.5 hours, squeeze. Mix with 2 tbsp. unsalted cottage cheese, cover nails for 15 minutes, rinse.
Mixture with cottage cheese for nails
Grind 2 tsp. cottage cheese, 1 tbsp. honey, add 1 tsp. vegetable oil. Apply to nails for 10-15 minutes, rinse.
Nail strengthening mixture
Mix egg yolk with 1 tbsp. castor oil, add 1 tsp. glycerin and apple cider vinegar. Beat. Apply to nail plates. Wear cotton gloves and leave for 3 hours, rinse with warm water.
Advantages of using strengthening gel under gel polish
No matter how long your nails are, they should look neat and well-groomed. But the nail plate is constantly exposed to various mechanical and chemical influences. A special gel was developed to protect it. If your nails are thin and brittle, then it would be most rational to use this product.
- The gel strengthens nails, making them denser and stronger.
- Gives a well-groomed appearance.
- Reduces the impact of harmful factors on the nail plate.
- Prevents delamination and reduces fragility.
- Allows you to grow your nails to the desired length.
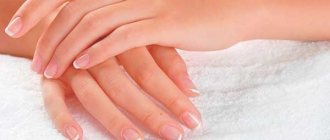
Gel polish coating on nails
Nail strengthening is becoming popular and should be done regularly. Since the procedure is not cheap, it is worth mastering it to do it yourself at home. It does not imply any special difficulties. This method is quite easy to use and gives noticeable health and cosmetic results.
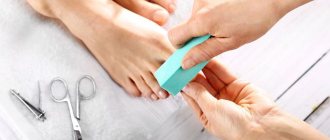
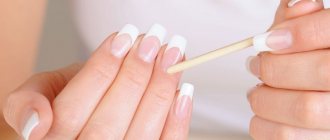
Filing nails before applying gel
For beginners, there are many instructions and descriptions of the principles of working with the material, but it’s easier to watch a video tutorial. It tells step by step how to perform the procedure, the expected results, the most common mistakes and shortcomings of beginners. A complete list of necessary materials and tools is also given.
Degreasing agent
In general terms, for work you will need:
- antiseptic solution;
- degreaser;
- 1-2 files with the finest abrasive;
- buff;
- several cuticle sticks.
During the work process, it is necessary to strictly follow the sequence of actions so as not to violate the technology. There is a preparatory stage and, directly, strengthening.
Nail treatment
During preparation, the following manipulations are carried out:
- antiseptic treatment;
- removing excess skin from the cuticle;
- giving the nail plate the desired shape;
- degreasing.
Nail strengthening is carried out using different gels - single-phase, two-phase and three-phase. The main difference between them is the number of stages. Single-phase coatings combine a base, base and topcoat, while three-phase coating is applied in 3 stages.
Ordinary
In most cases, this gel is used to build up and give nails a certain shape. There are various compositions. Some are quite elastic and suitable for creating only short nails, while others are more rigid and can be used to create any length.
But this strengthening is only minimal; the gel fills the unevenness and cracks on the nail plate and, as a result, a kind of protective shell is created. It is removed by filing; after removing it, the nails become weak and brittle.
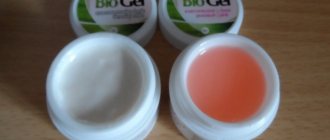
Biogel
Strengthening with this product differs from the previous one in that the biogel consists of natural ingredients. Also, to apply it, you do not need to file off the top of the nail. The main ingredient of the biogel is protein; its molecular structure is similar to the structure of the nail plate. Therefore, the gel lasts from two weeks to a month. Also, the coating is porous in its structure, which does not interfere with the access of oxygen to the nail cells.
Removing biogel is also much safer compared to the previous option. Therefore, it is most often used to restore nails.
How to strengthen your nails at home
Every spring my nails go on serious strike. Brittle, dry, thin, dull and growing almost a millimeter per month... In general: “Guard, save, help!”
Therefore, after the end of winter, I have to go through the “nail therapy” course again. How to strengthen your nails at home? Personally, I know dozens of simple and effective ways! Having tested all of them on myself, I discarded 90% as useless, too difficult or terribly unpleasant.
For example, my friend quickly strengthened and whitened her nails with regular... lemon. The recipe called for cutting a ripe lemon into two halves and soaking your fingertips in them for 10 minutes. I admit, I didn’t even have enough for 30 seconds. It turns out that when lemon juice gets under your nails, it’s disgusting to the point of cramps.
How to strengthen your nails with lemon
I tried more such “unsuccessful” recipes than I would like. I smeared my nails with iodine (I didn’t like the method because it was unaesthetic), applied a pepper mask (it stung terribly, although it shouldn’t), made baths with apple cider vinegar (the smell haunted me all day).
How to carry out the procedure
https://www.youtube.com/watch/arVRBjO_oNo
Due to the rapid development of the nail industry, strengthening with gel is now very popular. Why this procedure and not extensions?
- Strengthening is aimed not only at the nail plate, but also at improving the condition of the cuticle.
- The nail plate becomes smoother, thicker and stronger.
- The price of strengthening is much lower than the extension procedure
- Doable at home
It is better to solve the problem of brittle nails from the inside, and use gel to prevent unpleasant consequences. As such, the gel does not have any special healing properties, but it will create a protective shell and help minimize the negative effects on the nail plate.
You can contact a specialist, or you can do everything yourself.
In salons
Typically, the strengthening procedure in the salon lasts about an hour, but it all depends on the condition of the nails, the gel itself, and the experience of the master. When applying the product, follow the technique described above.
A few weeks after the procedure, the nail begins to grow back. A layer of gel becomes visible at the edge of the cuticle. In this case, two options are possible: either remove the coating or carry out a correction procedure. For removal, the technician will use a soft file to minimize possible damage.
The procedure should be repeated regularly for two to three weeks, if necessary.
On one's own
You don't have to go to a salon to strengthen your nails. This procedure can be repeated at home. To do this you will need:
- Pusher or orange stick. This “device” will help push back the cuticle.
- Cuticle remover or nipper. Depending on the manicure you want to do - edged or European.
- Degreasing liquid
- Primer
- File and buff. Needed to shape the nail and level the nail plate.
- Synthetic brush. Necessary for applying gel to the nail.
Strengthening your nails with gel is not as difficult as it might seem at first glance. It is enough to follow the instructions exactly:
- Step one. Remove the cuticle. There are two types of manicure:
- European manicure. In other words, unedged manicure. The cuticle is softened using a special product - a remover - and pushed back with an orange stick.
- Trim manicure. The cuticle is pushed back using a pusher or an orange stick and removed with nippers.
- Step two. Using a file, give your nails the desired shape.
- Step three. Removing shine. To do this, use a buffer or file with an abrasiveness of no more than 180 grit. It is best to use a tool with an abrasiveness of 200 - 220 grit. Grinding is carried out in one direction.
- Step four. Using a special product, degrease the nail plate and apply a primer. Remember not to touch your nails with your hands during the next steps.
- Step five. Apply base coat if necessary.
- Step six. The gel is applied in a thin layer and dried in a lamp for 2 minutes each layer. The number of layers depends on the gel itself. Before using it, read the recommendations that should come with the gel product.
- Step seven. If the gel is three-phase, then apply a top coat. To complete the procedure, remove the sticky layer with the product used to degrease the nail.
Strengthening by external means
Today it has become popular to strengthen nails with gel and biogel. These procedures are often confused with extensions. These are different things. With the help of gel, nails become healthier, because... it contains calcium .
Peculiarity. After strengthening, cosmetic varnish stays on the nails much longer.
The biogel contains vitamins that nourish and strengthen the nail plate.
After such manipulation, the nails become smooth and strong, that is, we can talk not only about strengthening, but also leveling the nail plate.
Strengthening the nail plate with gel polish, varnish or base can be done in a salon more effectively than at home, however, we recommend watching the following video:
Biogel and gel are cheaper than extensions. Strengthening can be complemented by a beautiful colored manicure.
Acrylic reinforcement is carried out in salons. After strengthening with acrylic powder, nails become strong and do not flake.
Both procedures can be carried out independently at home, strictly following certain rules.
Why is the procedure useful?
Due to the rapid development of the nail industry, strengthening with gel is now very popular. Why this procedure and not extensions?
Do you want to regain sensitivity after childbirth? There is a simple remedy... Click here >
- Strengthening is aimed not only at the nail plate, but also at improving the condition of the cuticle.
- The nail plate becomes smoother, thicker and stronger.
- The price of strengthening is much lower than the extension procedure
- Doable at home
It is better to solve the problem of brittle nails from the inside, and use gel to prevent unpleasant consequences. As such, the gel does not have any special healing properties, but it will create a protective shell and help minimize the negative effects on the nail plate.
To grow faster: 10 cool recipes for strengthening nail baths
Simple recipe with sea salt
There is absolutely nothing complicated in this composition: pour 250 milliliters of warm water, add 1-2 tablespoons of salt, optionally add 5-10 drops of iodine and 1 teaspoon of olive oil. Mix thoroughly and then put your hands in the water for a quarter of an hour. At the end, you should lightly blot your fingers with a napkin and allow the residue to absorb on its own. Then apply cream.
Oil bath for growth
To prepare you will need:
- 100 milliliters of almond or grape oil;
- 1 teaspoon each of vitamin A and E in liquid form;
- 5-7 drops of cinnamon ether.
Heat the oil in a water bath to 40 degrees, then add vitamins and ether to it and mix thoroughly. Place your hands in the container with the composition for 15-20 minutes. If the cinnamon starts to “burn” too much, you should end the procedure earlier, but not less than after 5 minutes.
Strengthening composition with wine
To get rid of yellowness on your nails and strengthen the plate, use the following components:
- 100 milliliters of white wine;
- 5 tablespoons apple cider vinegar;
- 3 tablespoons of any vegetable oil (almond, peach, olive or sunflower).
Lightly warm the wine to the desired temperature, add vinegar and vegetable extract to it and stir. Place your hands in the homogeneous mixture and hold for 10 minutes . After this, dry your fingers with a dry cloth and apply moisturizer to your skin.
- Strengthening nails at home: which methods actually work?
Wax bath for strengthening
You will need:
- 25 grams of natural beeswax;
- 1 chicken yolk;
- 7 grams of grape seed or almond oil.
The wax must be completely melted, then add the yolk to it and mix quickly. At the end, cosmetic oil should be added to the mixture. Pour the mixture into a convenient container and dip your nails in the resulting solution. Waiting time - 10-15 minutes . The session can be repeated daily.
Oil-lemon composition
Add the juice of half a lemon and 3-5 drops of iodine to olive oil heated to 40-45 degrees (100 milliliters). Hands are lowered into the prepared container for a quarter of an hour. After the specified time has passed, blot your fingers with a napkin and allow the remaining oil to be absorbed naturally.
- Strengthening nails at home: which methods actually work?
Chamomile decoction for the prevention of fungus
To prepare you will need:
- 150 milliliters of boiling water;
- 2 tablespoons chamomile flowers;
- 1 tablespoon of celandine herb;
- 1 teaspoon lemon juice;
- 5 drops of tea tree ether.
To begin, pour boiling water over the chamomile flowers and celandine and let it brew for an hour. After this, strain the broth, add the remaining ingredients to it and mix thoroughly. Immerse your hands in the resulting solution for 20-30 minutes, and after the specified time, wipe your fingers with a dry cloth.
Vitamin mixture with grapefruit and oils
To prepare the composition you will need:
- 100 milliliters of water;
- 1 tablespoon salt;
- Juice of 1 grapefruit;
- 2 tablespoons of vitamin A and E in liquid form;
- 1 tablespoon grape seed squeeze.
Heat the water to 40 degrees and dissolve the salt in it. Squeeze grapefruit juice into the same container, and then add vitamins and oil extracts. Mix thoroughly and dip your hands in the resulting mixture for 20 minutes. After the specified time, rinse off the remaining product with warm water.
- How to properly make paraffin baths for hands and feet?
Gelatin bath
To prepare you will need:
- 10 grams of gelatin;
- 100 milliliters of water or chamomile decoction;
- 1 teaspoon each of vitamin A and E in liquid form;
- A couple of drops of rosemary ether.
First, pour the gelatin with water and leave it in the refrigerator for half an hour. Next, place the container with gelatin in a water bath to melt it. Add vitamins and ether and mix thoroughly. When the mixture has cooled to a comfortable temperature, dilute it with a small amount of water (so that the gelatin does not harden again) and place your nails there for 10 minutes.
Whitening composition
To prepare you will need:
- Juice of 1 lemon;
- 2 fresh cucumbers;
- 1 tablespoon hydrogen peroxide;
- 3-5 drops of bergamot ether.
Grate the cucumber on a coarse grater. Squeeze lemon juice into a convenient container and heat it to 40 degrees. Add cucumber pulp, hydrogen peroxide and ether. Place your hands in the container for 15-20 minutes, then wash off the residue with water. Forget about light moisturizer!
Honey-milk nutritional mixture
Honey is also great for strengthening nails. To prepare this bath you will need:
- 100 milliliters of milk (the fattier the better);
- 2 tablespoons honey;
- Juice of half a lemon;
- 2 tablespoons apple juice (optional);
- 1 tablespoon sea salt.
Heat the milk to the required temperature of 40 degrees, and then dissolve honey in it. Add sea salt and mix thoroughly until all ingredients are dissolved. Add all the other ingredients, stir the mixture again and dip your hands into the resulting solution. Wait 15 minutes. At the end of the procedure, dry your hands with a dry cloth and apply a rich cream to the skin.
Coating technology
The technology is not particularly complicated; it is carried out using a gel and is quite simple to implement. Coating is carried out in several stages:
- Preparation. Before applying the gel, the nail plate and cuticle are degreased using a special product. After this, if necessary, the nails are shaped using a nail file. Then sand it with a buff. Repeat the degreasing procedure.
- Main stage. It involves the process of applying gel to the nail plate. Application technology may vary slightly depending on the material used. If the gel contains no substances that provide adhesion to the nail, a primer is used first. This product can be compared to double-sided tape. The number of layers also varies depending on its composition. But each individual layer is dried in a UV lamp for 1 to 2 minutes. The last layer is kept in the lamp for about 5 minutes.
- Consolidation of the result. This stage can be omitted, it all depends on the gel. Some of them need a topcoat. Upon completion of the procedure, the cleaner is used again to remove the sticky layer.
Nail care at home: procedures and products
Making baths
- Dairy.
Everything ingenious is simple. Milk contains calcium, which nails often lack. For the bath you will need whole milk (the fattier the better) and a deep bowl. Heat the milk to the appropriate temperature: it should be warm, but not hot. Dip your fingers into the bowl of liquid. The optimal procedure time is half an hour. The result will be noticeable within a week after daily milk baths.
- Gelatin.
Another simple but effective recipe. To make such a bath, buy ordinary food gelatin at any store. Dissolve the powder in hot water: 1 tablespoon of gelatin per glass. Immerse your fingers in the resulting mixture for 15-20 minutes.
- Butter.
Various oils are ideal for express recovery. Pay attention to olive oil - it will do a good job of moisturizing and nourishing the nail plate. Nails also “love” castor oil – it helps accelerate growth and restore elasticity. For maximum effect, you can mix these oils in equal proportions.
- Saline.
The most affordable and simplest option is a salt bath. Just dissolve 2-3 tablespoons of salt in water. Both sea salt and regular kitchen salt will do. You can add other useful components to this mixture, for example, cosmetic oil or vitamins. If repeated regularly, the procedure will return your nails to a healthy appearance.
Preparing masks
- Paraffin.
This long-term mask is essentially sealing your nails with wax. Paraffin and wax stimulate nail growth, making them strong, smooth and moisturized. We act step by step. For the procedure you will need beeswax or cosmetic paraffin. Melt it in a water bath until it forms a paste, add a few drops of oil or liquid vitamins. Apply this mixture to your nails and then rub in using a soft buff.
- From jojoba oil.
A mask using jojoba oil is an ideal winter care option. An important point: the oil must be preheated. Rub the prepared product into your nails and leave overnight.
- From chamomile.
Dried chamomile flowers have a healing effect on damaged nails. Mix chamomile with oatmeal and pour boiling water over it. After cooling, grind the mixture in a blender and then apply to the nail plate.
- From cottage cheese.
A curd mask will give your nails the same good strengthening as milk. To prepare the mask, take cottage cheese out of the refrigerator (it is better if it is natural and full-fat), mix it with vegetable oil and apply a generous layer for 30 minutes.
We use special means
- Vitamins.
Vitamins A and E are very useful for nails. In liquid form, they can be applied to nails alone, or added to various masks and baths. In addition, do not forget to take mineral and vitamin complexes - they will be an excellent addition to your daily diet.
SALLY HANSEN Vitamin E Nail & Cuticle Oil
- Firming cosmetics.
Don't ignore cosmetics for nail care. These can be special varnishes and other coatings.
Pay attention to the new product from the ANNY brand - Express Nail Hardener. The product contains keratin to strengthen and restore the nail plate, as well as silk proteins for additional protection.
ANNY Express Nail Hardener
A good choice would be 5 in 1 nail polish from the German company MISSLYN. The product protects and strengthens the nail plate, preventing it from delamination and brittleness.
MISSLYN Nail polish 5 in 1
And for quick nail regeneration after repeated use of gel polish, the Gel Rehab night mask from SALLY HANSEN is perfect.
SALLY HANSEN Night mask for damaged nails Gel Rehab
Which gel to strengthen nails?
There are many options for strengthening agents, for example:
- Bio Sculpture gel has a completely natural composition. The product dries in a couple of minutes, heals microdamages, and evens out the surface.
- Royal Sealer is a product for adding shine to the finished manicure. Can be transparent or colored. Helps whiten nail plates, used for strengthening or extension.
- UV biogel - used to strengthen the plates in the summer, protects against UV radiation.
- Irisk Classik Clear is a universal liquid coating that is completely transparent. Recommended for use when nails are growing slowly.
Where to buy and how much it costs
Prices for such coatings vary from 200 to 700 rubles. The cost depends, first of all, on the manufacturer’s brand, composition and other characteristics of the product. You can buy nail restoration gel in pharmacies or stores that sell products specifically for manicure. In addition, online cosmetics stores are actively engaged in the sale of such products.
Products for strengthening nails
To strengthen your nails, do not forget to “feed” them with vitamins A and E. At the pharmacy you can buy them in an oil solution or in capsules - any form will do. But I advise you to generously rub a mixture of oil solutions of vitamins A and E in equal parts into each nail twice a week before going to bed. Nutrition with vitamin oils is necessary to prevent nails from becoming too dry. After all, this often causes their separation. The oil is applied with the thumb of the other hand to the cuticle - the area from which the nail grows. This procedure heals the cuticle, improves its breathing, and the nail becomes stronger and more elastic. It’s good to brew tea with burdock, dandelion, or horsetail roots at the same time: 1 tsp. Pour 1 cup of boiling water over one of the plants, leave for 20 minutes, strain. Drink 0.5 glasses 3 times a day for 2-3 weeks. Herbal teas will provide your body with the necessary microelements that help strengthen hair and nails.
Rules for applying the gel
The gel is applied in three stages.
- The first layer, the base layer, is very thin and dries quickly, only 30 seconds. under an ultraviolet lamp.
- The second layer will become the main one, so it is applied tightly, from the edge of the nail to the cuticle. Drying is carried out within 3 minutes. If correction is required, it is carried out with a buff and a nail file.
- Finish - the gel is also applied in a thin layer, but dries for 3 minutes. If it is sticky after drying, you can remove the top film with an acetone-free remover.
You can apply layers using different compositions, but the “from one jar” option is allowed, observing the technology and drying time.
Applying the base
You can clarify the questions from the video and attached photo. Careful implementation of all manipulations in stages will gradually give the necessary skill and excellent results in the form of well-groomed nails, as well as possible additional income if you want to receive clients and perform gel coating at home.
Should I use primer and dehydrator with polygel?
It is recommended to use the dehydrator only on very wet nails. Because The dehydrator removes moisture deeply enough; it cannot be used for dry nails. Primer from Lovely is acid-free, but nevertheless, even it should not be used recklessly. It is recommended to be used for clients whose nails are prone to peeling (taking antibiotics, hormonal and pre-medicine medications, health problems, etc.). You can apply the primer not to the entire nail, but to a third of the nail and the end. Important! Apply once, in a thin layer, avoiding contact with the skin. The dehydrator and primer are air dried.
Contraindications
No matter how effective the gel is, there are a number of contraindications, due to which you need to wait a little with strengthening. In these cases, gel strengthening can be harmful.
- Fungal, bacterial or viral infection of the nail plate and skin of the hands
- Hematomas under the nail
- Allergic reaction to the gel. In this case, you can resort to using biogel, which is a hypoallergenic drug.
There are no side effects from using the gel.
The positive aspects of this procedure are quite obvious. The gel will help protect your nails and speed up their regrowth process. And the use of colored gels and various design elements will help create a unique manicure.
Liked? Share with your friends!
What is the difference between gel and regular polish?
Coating nails with gel polish, like biogel, is an innovative technique. Shellac is a hybrid of gel and varnish that combines the best properties of professional varnish (bright shine, ease of coverage, variety of colors) and modeling gel (strength, absence of acetone and odor). Despite the fact that shellac visually looks like ordinary varnish, it contains a super-resistant gel.
Unlike conventional varnish coatings, gel polish lasts much longer on nails, does not chip, does not peel, does not lose color, and at the same time gives strength to the nail plate. The advantages of shellac over conventional varnishes are significant:
- convenience and ease of application;
- the shine of the coating remains until the removal procedure;
- color stability;
- absolutely natural look;
- high speed of polymerization in a lamp;
- safety of use for nails;
- no additional correction needed;
- protection of the natural plate;
- hypoallergenic materials.
However, to obtain just such a result, it is necessary to properly prepare your nails and professionally apply the gel polish procedure.