Manicure with fruits, berries and vegetables - a vitamin nail charge! This nail design will be at the peak of popularity in spring, summer and autumn 2021 - it is associated with strawberries, cherries, sweet apples and other fresh fruits. To create it, you use sliders, stamping, hand drawings and a little magic to turn the design into reality.
Neon fruits on a nude base
If you are interested in getting an expressive manicure, then you need to think about the color of the coating. For example, experts note that a design built on contrast always looks advantageous. And a wide selection of acid tones will allow you to make the design bright - the manicure will receive an individual solution. Below are several manicure ideas with fruits.
Manicure with a pattern of juicy fruits using gel polish
Artistic painting with gel polish is available to masters who have learned to paint colorful fruit designs on their nails. The technique requires accuracy and patience. There are nuances in working with different materials, color wheels and decor. It is better to highlight individual nails with a design by choosing the color of the base for nail art. And the rest of the nails can be done to match the design or in a different color.
Manicure with kiwi: step-by-step photo instructions
When you want to experiment with bright shades, a manicure with fruits is the best choice. We'll tell you and show you how to draw a kiwi, even if you've never picked up a nail art brush.
it will take 7 minutes to read
Text: Victoria Volkova
- When is a manicure with a kiwi design on the nails appropriate?
- Ways to create a kiwi design on your nails
- Necessary materials and tools for kiwi manicure
- How to draw kiwi on nails: step-by-step photo instructions
- Kiwi design ideas for short nails
- Kiwi manicure options for long nails
- Summer juicy manicure with kiwi and other fruits and berries
First, let's figure out in what situations a kiwi manicure would be a good solution when choosing a nail design.
When is a manicure with kiwi on nails appropriate?
Nail art with a picture of a kiwi will look appropriate in the warm season. In spring and summer, you just want to choose rich shades not only in clothes, but also in manicure. A “fruit” nail design will harmoniously complement your look even on vacation in warm countries.
But if you don’t have a vacation in the near future, and every day in your diary is scheduled down to the minute, then it’s better to give preference to a minimalist nude manicure, which will ideally complete a discreet business look.
Ways to create a kiwi design on nails
Nail art is becoming more and more accessible. Creating a drawing these days is not as difficult as it seems. After all, every year more and more techniques and accessories appear that simplify the work of both craftsmen and amateurs.
Hand painted
Hand painting is an option for those who will not spare time to obtain a beautiful result. It is the brush that will allow you to create a truly original design, but any wrong move can cost you dearly. This is an option for those who have either already become proficient in nail art or are ready to devote time to training.
If you decide to choose this particular method, then below we will show you step by step how to paint a kiwi on your nails using a brush. In the meantime, let's talk about simpler methods that give effective results.
Stickers
Stickers allow you to get a finished drawing with a slight movement of your hand. You can choose small ones that cover only part of the nail, or large ones that cover the entire nail plate.
Stamping of finished patterns
The stamping technique is another quick and easy way to create a design that is perfect for beginners. It is enough to transfer the image from a special palette to the surface of the nail. It is not surprising that this technique has now become very fashionable. After all, creating a pattern will only take a couple of seconds.
Necessary materials and tools for kiwi manicure
Depending on the characteristics of a particular drawing, the set of necessary tools will change, but the required minimum is as follows:
base (for example, Dr. Rescue 3 in 1 from Maybelline New York), where to find it?
top (for example, Top Coat from Essie),
hand cream (for example, Coriander from Kiehl's). where to find?
How to draw kiwi on nails: step-by-step photo instructions
To paint kiwi on your nails, you will need:
Essie nail polish “Perfect cut”, where to find it?
Essie polish “Button Glitter”, where to find it?
Maybelline New York Colorama polish - 749. where to find it?
How to create a succulent kiwi design from scratch, how to mix polishes and how to draw a thin line if you are new to drawing - in our step-by-step instructions you will find all the answers. But first, take care of the condition of your nails, refresh their shape and get rid of hangnails, if any. You will find step-by-step instructions for basic manicure at home in this video.
Apply a base color of polish to your nails. For a bright kiwi, a white background is perfect, or a contrasting green if you want to make a design for the entire nail. But what to do if the desired shade is not in your collection?
You can create it yourself by mixing polishes of other shades. We are sure that the rules for mixing colors are well known to everyone. So, to get a green tint, you will need lemon and blue colors. To adjust the brightness, you can add white. In general, it is enough to have only three basic colors: red, blue and yellow, to get any other. Of course, in order to apply the newly created shade to all nails, this method is not the most suitable. But if you need a color missing from your collection to highlight one nail or a small accent in your design, then this life hack will help you realize your plan.
Place drops of the required shades side by side without mixing them at once. Then gradually start mixing the colors in the center. This way you will control the amount of this or that varnish and move the color in the right direction.
In order for the color to turn out light green, most of all there should be white varnish. In this case, you don’t have to mix the varnish until the color is uniform. The nuances of shades will make the drawing more interesting.
Using a wide brush, apply the resulting shade to the nail and wait until the coating dries completely.
Next, remove excess white varnish from the brush on the neck of the bottle or napkin. This dry brush technique is already familiar to you from previous photo tutorials (think about the dandelion manicure, for example).
Manicure with berries and fruits, photo
You can also be creative by using the perfect combination of fruits + berries and the top shades of this season. Like light green, orange, yellow, white, the color of green foliage and ripe berries. Still very beautiful ideas are obtained in the Negative space style on transparent and camouflage coatings.
This season's trends:
- slices of watermelon and melon,
- strawberry and cherry,
- banana and coconut
- sweet papaya and pomegranate,
- kiwi and avocado,
- lime and other citrus designs.
Bright manicure ideas with kiwi
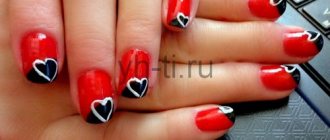
Kiwi designs can be combined with French manicure. First, the nails are covered with light green varnish in 2-3 layers. The tips are painted with white varnish, then rays are drawn using a thin brush, the space between them is filled with black dots. The decor looks very unobtrusive and is suitable even for everyday wear. Another motive for a French jacket is applying a pattern to the tips. The stock is coated with clear or light cream varnish. The free edge is painted green; to create a more even outline, you can use a stencil. Very thin white strokes are drawn on top and small black dots are placed. This design is especially beautiful on long nails: both natural and artificial. A transparent topcoat with a glossy effect will help give it completeness.
You can also try the option with a moon manicure. In this case, the holes at the base are painted over with thick white varnish using a stencil, and the bed to the tips is covered with a light green tint in 2 or 3 layers. A cross-section of a kiwi is drawn on a fruit background. The manicure is fixed with a shiny top.
There are many more options for how you can depict a kiwi in nail art, so you can give full rein to your imagination. And so that you can get some inspiration for your future creativity, we bring to your attention several bright and stylish photos.
Nail designs with fruits are an interesting idea for a casual summer manicure. This design is suitable for parties, the beach, gatherings in a cafe with friends or dates. The look will be complemented by rings and bracelets made of colored plastic, open sandals and bright outfits in green or white tones. Feel free and always be beautiful!
When you want to experiment with bright shades, a manicure with fruits is the best choice. We'll tell you and show you how to draw a kiwi, even if you've never picked up a nail art brush.
will take >5 minutes to read
Text: Victoria Volkova
- When is a manicure with a kiwi design on the nails appropriate?
- Ways to create a kiwi design on your nails
- Necessary materials and tools for kiwi manicure
- How to draw kiwi on nails: step-by-step photo instructions
- Kiwi design ideas for short nails
- Kiwi manicure options for long nails
- Summer juicy manicure with kiwi and other fruits and berries
Watercolor nail art with fruits and berries
Here, fruit masterpieces on nails are created with a natural bristle brush and watercolor paints. Maybe, for example, a manicure based on pastel colors to match the pattern will look original. To cheer yourself up a little, opt for bright fruits using the watercolor technique on a separate nail on a transparent base.
Manicure with kiwi: fashion trends and bright design ideas
join the discussion
Share with your friends
This type of “nail art”, like kiwi on nails, is an original version of manicure that is perfect for bright and confident girls. This nail design is especially popular in the summer season, when you want something unusual and colorful. This kind of manicure, emphasizing the tan, will be a wonderful addition to every girl’s summer look. Many people may think this drawing technique is complicated, but it is not.
With the right technique and accuracy, anyone can draw a kiwi on themselves or someone else’s nails. It is worth noting that performing such a pattern is simple, but painstaking and requires preliminary training on tips.
Peculiarities
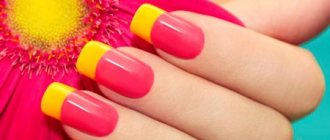
Manicure design options are limited only by the imagination of the artist or client. Not everyone will like painting a kiwi on every nail, as this is a matter of taste. Often the image of a fruit is made on only a few nails; all the rest are covered with a single color or a French nail is done. If you choose the option with a French manicure, you can make it not the standard white color, but, for example, bright yellow or, conversely, black.
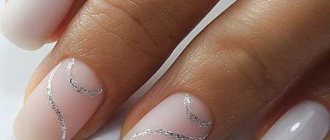
Another original way is to apply a design not to the entire nail, but to part of it. These fruits with droplets look beautiful and interesting.
If a person does not know how to draw at all, you can buy ready-made stickers with images of various fruits, including kiwi.
Necessary materials
In order to depict this design on your nails, you must first purchase the following materials:
- varnishes of the following colors: white, black, green (any shade);
- base - any color of varnish (shades of milky and gray are preferable);
- base coat;
- top;
- thin brush.
You should first prepare your nails by doing a manicure. To do this, you will need various auxiliary devices: a manicure set, cotton swabs, cuticle oil, nail files of different diameters and hardness.
Preparatory stage
To make the drawing look perfect, you should first carry out the procedure of trimming the manicure. In addition to cleaning, you should adjust the shape and length of the nail. Kiwi is well suited for girls with oval or round nails of medium length. Before coating, you need to carefully walk over the surface of the nails with a buff.
Having previously prepared the cuticle for removal (by softening it in water or using a special liquid), it is moved as far away from the nail plate as possible, after which it is removed with tweezers or a machine. After this, the nails are treated with acetone or a degreasing liquid. The next step is to apply a primer so that the polish adheres well to the nails.
Abstract manicure with fruits
Fruits are stylish and fashionable, no matter how you draw them. If your choice is abstract design, it is the most interesting, multifaceted and diverse. Can be made using 3D technique, watercolors or gel polishes. Fruit manicure in the abstract style is distinguished by a skillful combination of dots, lines, zigzags, gradients and natural shades. Doesn't need any detail.
Manicure with fruits: new nail design ideas
Fruit nail design - a fashionable trend in manicure
One of the latest fashion trends for summer manicure is fruit-themed nail designs.
Fruit manicure idea
Fashion trend in manicure – fruits on nails
Video. Fashionable nail art. Drawing watermelon, strawberry, pineapple and kiwi at the same time
When creating nail art with fruits, you need to consider several important points:
- The design on the nail plate should be applied carefully,
- At the same time, the design should be interesting and thoughtful,
- It is better to use bright and saturated colors. For some options, you can use neon varnish.
Medium length nails with different fruits
There are many options for fruit nail art: you can paint the same designs on all nails or highlight several fingers, and if you love kiwis, apples, bananas, pears and oranges, then apply them all at once.
Manicure with bananas
Fruits look very impressive in cross-section, but here it is important to take into account everything, even small details.
Fruit drawing on nails
For example, on a watermelon or kiwi you need to draw black seeds, and on a tangerine you need to work out its segments.
Cutaway fruit design
Video. Kiwi on nails
Fruit manicure with drops
The summer nail art trend with fruits does not stand still, it is developing and, recently, voluminous drops applied over the design using a glossy top have become very popular among girls.
The drops create the effect of reality and look very original.
Fruit manicure with dew drops
In order to create an original manicure design with drops, you need to use a special application technique, which consists of the following steps:
- Start by applying a base in the shape of the fruit you want. They can be flat or made using 3D technology.
- Let the drawing dry and then apply voluminous drops using a gel polish topcoat.
- Secure your result.
Video. Fruits in section
Manicure with water drops can be combined with other types of nail art. For example, with moon or French.
Drops on nails with fruits
Nail art with fimo fruits
Don't know how to draw beautifully? Not scary! A special trick has been invented for you that will easily help you create a fashionable manicure - these are fimo fruits.
Fimo decor for nail plate design
Fimo is a special stick measuring a little more than 5 centimeters. In the center there is a drawing.
All you have to do is cut off a small part and apply it to the prepared nail plate.
Fimo fruit for nails
As a result, you get a finished design, and you only need to secure it with clear varnish.
Fruit manicure on nails
Video. How to glue fimo on nails
Fruit sticker design
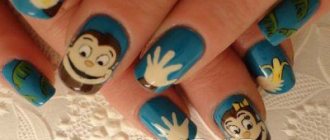
If you like the idea of decorating your nails with fruits, but don’t want to go to a nail technician at all, you can use special stickers with images of fruits, called sliders.
The stickers are applied to the finished base coat and fixed on top with a varnish fixer.
Stickers on the nail plate look like a real drawing
The advantages of using sliders are:
- Low cost,
- Ease of application
- Practicality,
- Additional decor is possible in the form of rhinestones, stones, sparkles, etc.
- Does not depend on the color of the base,
- Can be applied to any number of nails: from one to all,
- Stickers can be flat or voluminous, which makes it easier to choose ideas for nail art.
Manicure with berries and fruits
Many girls are not limited to drawings of fruits on their nails; they also complement them with berries.
Fruit manicure on a transparent basis
Here you should add bright colors, accents, catchy details on a transparent or translucent tone of the coating. But at the same time, your manicure can be similar to minimalism. If you decorate only one nail, a contour design, for example, a pear or an avocado, will be applied on it.
Fashion trend in manicure – fruits on nails
Video. Fashionable nail art. Drawing watermelon, strawberry, pineapple and kiwi at the same time
When creating nail art with fruits, you need to consider several important points:
- The design on the nail plate should be applied carefully,
- At the same time, the design should be interesting and thoughtful,
- It is better to use bright and saturated colors. For some options, you can use neon varnish.
Medium length nails with different fruits
There are many options for fruit nail art: you can paint the same designs on all nails or highlight several fingers, and if you love kiwis, apples, bananas, pears and oranges, then apply them all at once.
Manicure with bananas
Fruits look very impressive in cross-section, but here it is important to take into account everything, even small details.
Fruit drawing on nails
For example, on a watermelon or kiwi you need to draw black seeds, and on a tangerine you need to work out its segments.
Cutaway fruit design
Video. Kiwi on nails
Matte manicure with fruits
This option is good because you can create a pattern using the contrast of a matte base and a glossy pattern. Do not overload your manicure with decorative elements. For example, avoid large rhinestones. Instead, it is recommended to decorate fruit designs with drops of shiny top, dotted sparkles, foil, and delicate lines of spider gel.
Tropical kiwi in nail design
Kiwi on nails is an original design option for brave, original and eccentric girls. With the help of several shades of varnish, even a beginner who has no nail art skills can paint a juicy bright green fruit. To make the image look neat, you need to work slowly, having previously practiced on plastic tips.
What do you need for nail art?
To create a beautiful manicure with kiwi, you need to purchase:
- thick opaque varnishes in 3 shades (white, light green, black);
- background varnish of a suitable color;
- protective base;
- top coat with drying effect;
- thin round brush for painting.
You will need a high-quality manicure set, nail polish remover, orange wood sticks, cuticle remover liquid or gel, and cotton swabs for correction. The instructions and MK video presented below will help you understand how to draw a juicy fruit on your nails step by step. You will find several options for patterns from the simplest to the more complex, suitable for girls with good artistic skills.
It is not necessary to apply the design to all nails. A manicure looks very impressive, in which most of the nails are covered with a single-color varnish, and juicy kiwis decorate only 1 or 2 nails. Another interesting idea is partial coloring of the nail plates. There are options for those who can’t draw at all. Kiwi nail designs can be made using special stickers. You can find interesting ideas in the photo gallery at the end of the article, but now we bring to your attention the simplest step-by-step instructions.
Nail preparation
To make the drawing look perfect, you need to do a hygienic manicure. The designs are suitable for nails of moderate length, oval or rectangular, with rounded tips. The length is carefully leveled using a coarse file. To make the surface smooth, it is polished with a buff or a machine with various attachments.
The cuticle is removed using a liquid containing mild acids. It dissolves dead cells and softens the skin. The roller is pushed away with an orange wood stick, and the excess is cut off with pliers. The nail plate should be free of cuticle residue and absolutely smooth.
The surface of the nails is degreased with a special product or nail polish remover. After drying, a protective coating with vitamins, calcium, and silk fibers is applied to them. It levels the surface and prevents the varnish from chipping.
How is the drawing done?
Before you start painting on your nails, you should practice using plastic tips of the appropriate length. You can try on the finished overlays, this will help determine the desired size and location of the pattern. Manicure is done in stages.
- First, a harmonizing varnish is applied to the little finger and ring finger. Gray-beige colors go well with fruity greens. The varnish is applied in 2 or 3 layers, drying each one well.
- A little green varnish is poured onto a plastic palette. They paint the thumb, index and middle fingers on each hand. The design will be located only on 2 nails, the plate of the thumb will remain monochromatic.
- In the center of the nail, draw an elongated white oval - the middle of a kiwi. Using a thin round brush dipped in white varnish, thin strokes are drawn from the oval to the edges of the nail. Small black dots are placed in the spaces between the white rays. They are easy to draw with a manicure dot.
- You can draw half a kiwi slice on your thumbnail. A white oval is drawn at the very edge of the nail, white rays and black dots imitating bones are located only on one side. This decor looks casual and fun, it will perfectly complement summer outfits.
- The finished manicure is covered with a thick layer of transparent coating with a drying effect. To keep the design bright, the top is updated every 2 days. A drawing applied according to all the rules can last a whole week.
Bright manicure ideas with kiwi
Kiwi designs can be combined with French manicure. First, the nails are covered with light green varnish in 2-3 layers. The tips are painted with white varnish, then rays are drawn using a thin brush, the space between them is filled with black dots. The decor looks very unobtrusive and is suitable even for everyday wear. Another motive for a French jacket is applying a pattern to the tips. The stock is coated with clear or light cream varnish. The free edge is painted green; to create a more even outline, you can use a stencil. Very thin white strokes are drawn on top and small black dots are placed. This design is especially beautiful on long nails: both natural and artificial. A transparent topcoat with a glossy effect will help give it completeness.
You can also try the option with a moon manicure. In this case, the holes at the base are painted over with thick white varnish using a stencil, and the bed to the tips is covered with a light green tint in 2 or 3 layers. A cross-section of a kiwi is drawn on a fruit background. The manicure is fixed with a shiny top.
There are many more options for how you can depict a kiwi in nail art, so you can give full rein to your imagination. And so that you can get some inspiration for your future creativity, we bring to your attention several bright and stylish photos.
Nail designs with fruits are an interesting idea for a casual summer manicure. This design is suitable for parties, the beach, gatherings in a cafe with friends or dates. The look will be complemented by rings and bracelets made of colored plastic, open sandals and bright outfits in green or white tones. Feel free and always be beautiful!
Manicure with stickers and stamping with fruits
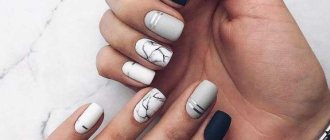
Not many masters can boast of the ability to draw beautifully. The easiest option is to place an image of a fruit on your nail using a slider or stamping technique. This solution will reduce the design time, visually improve and diversify, for example, a summer manicure. But regardless of the chosen type of design, you should consider the color scheme and composition of the design on the nails. For short nails, it is recommended to paint your nails in traditional white, gray, berry or milky beige colors. This will visually enlarge the nail plate.
What do you need for nail art?
To create a beautiful manicure with kiwi, you need to purchase:
- thick opaque varnishes in 3 shades (white, light green, black);
- background varnish of a suitable color;
- protective base;
- top coat with drying effect;
- thin round brush for painting.
You will need a high-quality manicure set, nail polish remover, orange wood sticks, cuticle remover liquid or gel, and cotton swabs for correction. The instructions and MK video presented below will help you understand how to draw a juicy fruit on your nails step by step. You will find several options for patterns from the simplest to the more complex, suitable for girls with good artistic skills.
It is not necessary to apply the design to all nails. A manicure looks very impressive, in which most of the nails are covered with a single-color varnish, and juicy kiwis decorate only 1 or 2 nails. Another interesting idea is partial coloring of the nail plates. There are options for those who can’t draw at all. Kiwi nail designs can be made using special stickers. You can find interesting ideas in the photo gallery at the end of the article, but now we bring to your attention the simplest step-by-step instructions.
Photo - manicure with fruits in different shades, techniques 2021
In principle, there are no special rules in creating a fruit nail design. In any case, you will need skill and a desire to experiment. The most important thing is that you like the design and that the manicure looks fashionable and neat. We collected examples in one photo gallery. And then all that remains is to choose a beautiful option.
- We recommend on the topic: Summer manicure - photos, new designs, trends.
- Nail design with a pattern: 101 photos, ideas, new manicures.
Manicure with drops
This is a spectacular, unusual design that requires skill to create. Drops can be combined with any background covering or pattern. They look very interesting on fruit. A kiwi manicure with drops turns out to be very juicy and stylish. To create it you will need:
- matte finish (to make drops realistic);
- gel finish without a sticky layer;
- dots with different tip diameters; if you don’t have one, you can take a toothpick or hairpin with a rounded tip;
- Ultraviolet lamp.
Before you paint the drops, you need to make a background covering. In this case, it is the creation of a fruit design - kiwi. After the drawing has dried, you can start making droplets.
- The background is covered with a matte finish.
- The gel finish is applied to the dots and dots are placed. After the entire nail is covered in droplets, it should be dried in a UV lamp without waiting until all the nails are done. The manicure will retain its shape, the dots made will be voluminous.
- If you do not have this product, you can use transparent gel polish. After drying with clinser or alcohol, you will need to remove the sticky layer. In the same way, you should dry each nail so that the manicure is voluminous and beautiful.
The drip design is ready! Look at the photo of the “kiwi” manicure with drops - it looks fresh, juicy and very summery. This pattern will give your image lightness and brightness.