Manicure is not just a pleasant procedure after which you can enjoy beautiful nails. It involves contact with the client’s skin, so it should be as safe as possible. The cleanliness of the instruments used during the session is very important. They must be not only visually clean, but also completely sterile. This can be achieved thanks to special equipment. Next, we will tell you how to get rid of pathogenic microorganisms that are dangerous to health and life, as well as why sterilization is mandatory for every beauty salon and master who works at home.
Sterilization of manicure instruments: why is it so important
Any products that come into contact with the client's skin or nails can become a source of infection for serious diseases. This does not happen as rarely as it might seem at first glance. Even during the simplest procedures, the integrity of the tissue can be compromised - this also applies to microtraumas without traces of blood, invisible to the eye. Such damage becomes an open gate for bacteria, viruses, fungi and other microbes.
The most common types of diseases transmitted by contact include:
- viral infections (hepatitis B and C, human papillomavirus, HIV);
- bacterial (mainly staphylococcal and streptococcal);
- fungal (Pityrosporum ovale, Candida sp., Epidermophyton sp.);
- parasitic (various forms of helminths).
A microscopic amount of blood is enough to become infected with the hepatitis B or C virus, which affects more than 300 million people worldwide. They lead to liver cirrhosis, jaundice, cancer and even death. During manicure procedures in salons that do not sterilize instruments, you can also catch less dangerous diseases, for example, the well-known fungus. But it causes a lot of discomfort - the aesthetic appearance of the nails deteriorates, peeling and itching occur. Treatment and recovery take several months. It is much easier to sterilize the instrument after each client and carefully follow safety rules.
High-quality disinfection of manicure tools will protect you from troubles
Dirty hands are one of the most powerful sources of infection. Through them, all kinds of harmful microorganisms enter the body and infect us with various, often dangerous, diseases.
Nail manipulations performed in beauty salons - manicure, pedicure - are useful, necessary, pleasant. But at the same time, they should not pose a threat of infection, which guarantees compliance with hygiene rules: manicurists properly treat their hands and the client’s, and after use they disinfect and sterilize instruments. Only, as far as absolute safety is concerned, not everything is as good as it should be. It’s sad, but we have to state the facts when, as a result of poor-quality processing of instruments, visitors to beauty salons became infected with serious diseases. These include AIDS, hepatitis B, not to mention all kinds of fungi and viruses. The cause of the trouble is the savings of salon owners on protective equipment, poor-quality sterilization, and non-compliance by employees with hygiene rules. But this does not relieve them of responsibility - if infected, the client can sue and win.
Properly carrying out disinfection and sterilization procedures, which means complying with the requirements set out in sanitary and hygienic documentation, helps to avoid possible infection. The documents state: when providing services, manicurists must use sterile instruments, and it is advisable to work in protective gloves.
Sterilization requires special equipment. It is preceded by pre-treatment - means for disinfecting instruments
. A nail bar or nail studio must shell out substantial sums of money to purchase them. Some people can’t afford it, others simply consider it unnecessary and decide to save money. True, they do not take into account the fact that disinfection (sterilization) of manicure instruments in salons should be a mandatory procedure; the health of visitors depends on its quality, which affects the image and, accordingly, the success and rapidity of business development.
Absolutely everything used by manicurists when working with a client is subject to disinfection; it is carried out after each use. Particular attention is paid to reusable items - scissors, nippers, cuticle knives, which are most necessary for performing manicures and come into contact with the skin and nails of the visitor. They are subject to disinfection, followed by sterilization. As for disposable materials, after preliminary disinfection, they are properly disposed of. Responsibility for cleaning instruments for manicure and pedicure lies with a specially designated and trained employee, preferably a permanent one. His responsibilities include disinfection, as well as monitoring personal hygiene by visitors and staff. In small establishments it is unprofitable to keep such a person, so responsibility for sterility is placed on the masters.
To carry out the manipulation, you need:
- instrument disinfection solution
;
- several types of containers: some contain disinfectant, others store sterile equipment;
- equipment and consumables for it.
Processing manicure tools
The complete cleaning process involves four steps and can take several hours depending on the type of equipment used. High-quality processing of accessories necessarily implies:
- Primary cleansing
- Disinfection,
- Sterilization,
- Proper storage.
Beginners often confuse disinfection and sterilization, mistakenly considering them interchangeable concepts. The difference between them lies, first of all, in the fact that during the disinfection process vegetative forms of mycobacteria, fungi and parasites are destroyed, which can contribute to the formation of various types of diseases. However, many pathogenic microorganisms survive the procedure and remain on the instruments, and may soon begin to multiply on their surfaces.
During sterilization, absolutely all microbes die, including the smallest bacterial spores. After such treatment, the products become completely sterile and do not pose any threat. But without proper storage they lose these properties. It is important to keep them in special craft bags and print them immediately before the session.
Sterilization of manicure instruments
What is needed to process instruments in the salon? How does sterilization of manicure instruments affect the image of the master? You will find out the answers to these and many other important questions in our article.
Sterilization of manicure instruments in a salon is not only a precaution against diseases, but also a matter of reputation for every master. When a client sees that the tools are taken out of a sealed bag, this creates trust and a desire to come again and recommend the master to their friends. And vice versa: seeing that the hygiene rules are not followed in the salon, the client will not come again, and those who are especially principled may also complain to official authorities or write a negative review on the Internet. In a word, sterilization in a salon is a serious issue that affects the income of the salon and the master himself. Not to mention how important it is to protect yourself and your clients from skin diseases and viral infections such as HIV and hepatitis C.
What is needed for sterilization?
During a manicure, wounds often appear through which various microorganisms are transmitted. Therefore, in terms of risk, manicurists are practically equal to medical workers. To perform full-fledged high-quality sterilization, you need to carefully prepare and purchase the necessary tools and equipment. For all stages of sterilization of manicure instruments you will need the following.
- Disinfectant (concentrate). Pay attention to the expiration date and instructions. Some products are used only immediately after preparing the solution, others, for example, Alaminol, can be stored for up to 10 days.
- Medical mask and rubber gloves - these will be needed when working with a chemical solution. A brush for cleaning tools and disposable wipes for wiping them are also useful.
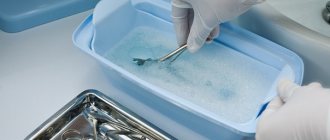
- Box or bath for disinfection. They are made from special materials that are resistant to chemicals. The boxes have removable grilles with holes for drying instruments after disinfection.
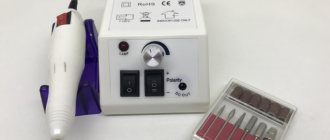
- Sterilizer. We recommend using dry heat: it is considered the most effective for combating all types of microorganisms and viruses, including hepatitis.
- Kraft bags for storing processed tools.
Vinar, Kraft paper bag self-adhesive
First stage: disinfection
- First, prepare the disinfection solution according to the instructions for the selected product. It is necessary to dilute the concentrate while wearing a medical mask and gloves to protect the respiratory system and skin.
- The instruments are placed in a box with a solution. This should be done immediately after the manicure, without pre-treatment and rinsing, so as not to spread particles of biomaterials in space. Typically, 30-60 minutes are sufficient for disinfection, depending on the product.
- After disinfection, the instruments are washed with a brush. You can wash them in a solution or under running water. Externally noticeable dirt, stains, and skin particles are removed.
- Now we leave the tools to dry. Either on a wire rack in a box, or place it on a clean napkin.
At this stage, the main bacteria and viruses are destroyed. But to get rid of resistant infections (hepatitis C) and fungal spores, you need to sterilize.
Second stage: sterilization
- Dried instruments are sealed in a craft bag and placed in a sterilizer. The dry-heat cabinet works without any additional equipment: scissors, pushers and files are laid out directly on the grate inside. If you are using a Glasperlene sterilizer, you must first fill it with quartz sand, and only then place the instruments in it.
- After calcination, let the tools cool and take them out. The identifier on the craft bag will indicate sterility. The effect will last for 72 hours. To prolong sterility, you can store instruments in a UV lamp. It will protect them from microparticles of dust, bacteria and viruses.
Jessnail, UV lamp for sterilization of instruments
Sterilization is not at all difficult if you understand it. The health of your clients and your prestige depend on it. The master always wants every client to become a regular one. All in your hands. You can give your customers the best service, and they will definitely come back to you again and again.
We wish you successful work!
Best regards, your online store imkosmetik.
SanPiN requirements
Disinfection and sterilization of a manicurist's working tools is regulated by sanitary and epidemiological rules and regulations (SanPiN). They apply to beauty salons and services provided at home. Failure to properly sterilize is considered a violation of the law, and a salon owner who does not follow safety rules may face unpleasant consequences, ranging from fines to being banned from operating.
The SanPiN requirements clearly state that instruments intended for reusable use must be washed, then disinfected and sterilized. A separate employee must monitor the process, but more often the masters themselves do this. In order for the disinfection and subsequent sterilization procedure to proceed without violations, it is necessary to keep a log and carefully monitor the cleanliness of accessories. It is important to use high-quality and modern equipment.
DISINFECTION OF PSO AND STERILIZATION OF MANICURE INSTRUMENTS IN PRACTICE
Hello, friends! Today we’ll talk about disinfection and sterilization of instruments.
The invited guest is Inna, a leading specialist at the Chistovye company.
Good afternoon, dear colleagues! My name is Inna, I am a specialist at the Chistovye company. Today I will tell you how tools are processed in manicure and pedicure rooms.
Processing is carried out in 3 stages.
1. Disinfection - according to the antiviral regime 2. Pre-sterilization cleaning 3. Sterilization
We put on gloves. We are diluting a disinfectant. It is best if your product has disinfectant and cleaning properties.
The lower the concentration of water in the solution, the higher the chances that your tools may begin to rust due to prolonged contact with water (not because of the disinfectant!).
Jars for sterilization must be special. You must fill out all the information on the container (see photo). The responsible person will then fill out the log.
When diluting the working solution, remember that the water must be potable and at room temperature (not lower than 18*C).
How to check the correct dilution of the working solution? Indicator strips and a scale will help us. Dip the strip into the solution and wait 15 seconds. The color turned out to be dark green, which corresponds to the scale. The solution was diluted correctly.
Pour the working solution into the bath. We put down the tool. We are waiting for the necessary time.
We cleanse from traces of blood, skin, and cosmetics. It is better to do this with a brush. Place the instrument in a clean container and rinse with running water for three minutes. Dry by placing on a napkin.
We carry out an azopyram test to make sure how well we carried out the pre-sterilization cleaning. The Azopyram kit will help us with this, which is relevant for beauty industry enterprises, because it does not require dilution with alcohol, which is prohibited for household enterprises. It contains instructions and two bottles.
Azopyram alone is not enough to carry out the test. We will need 3% hydrogen peroxide.
Drop hydrogen peroxide and azopyram solution in equal proportions onto a napkin and wipe the cutting surfaces.
If, after carrying out the azopyram test, a brown spot appears on the napkin after 1 minute, it means that the pre-sterilization cleaning was not carried out efficiently.
All results are recorded in a log.
We put all the instruments in the tray and into the sterilizer. Only within an hour will they be suitable for work.
To extend the “life” of sterilized instruments, it is convenient to use craft bags.
Thanks to indicators, we can check the quality of the procedure performed. Depending on the manufacturer, they are either placed inside the bags or glued to the outside. There are also universal ones.
Remember that every client trusts you and hopes that the tools you use will not harm their health.
You will need:
Chistovie company https://chistovie.ru/ instagram @chistovie
Watch the video on Sanitary Safety https://vip.grandnail.com/san-bezopasnost
What manicure instruments need to be sterilized?
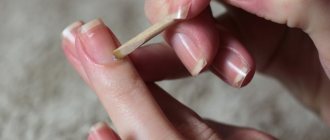
All accessories are divided into two main categories: disposable and reusable. The former can only be used once and disposed of after each client. These include soft buffs, brushes, orange sticks for removing cuticles and other products that cannot be heat treated. They accumulate skin and nail particles that cannot be removed by other means. Accordingly, all that remains is to throw it away after the session. But most instruments can be reused after sterilization. Among them:
- nippers and knipsers;
- scissors;
- pushers and tweezers;
- files;
- cutters for hardware manicure.
The main thing is that they are made of heat-resistant materials - steel or ceramics. Give preference to products without plastic, wood or silicone elements that can deteriorate when exposed to high temperatures. Such tools can be found in the Royal Gel online store.
Which Manicure Tools Need to be Disinfected and Sterilized?
The procedure is mandatory for all tools that the master uses to work at home. Disinfection is required for devices:
- wire cutter;
- scissors;
- nail files, baffy;
- pusher;
- nail brushes;
- dots;
- baths, rollers;
- LED or UV lamps;
- reusable forms.
We should also talk about files and attachments. It is necessary to consider what material was used in their manufacture. In some cases, wiping with a cotton pad may be necessary, but first it is moistened with a special composition. This applies to metal and glass files. They can also be placed in the oven for processing.
If the base of the file is wooden or paper, then a brush and an antiseptic are used for cleaning. Cutters are also sterilized depending on the material; rubber and silicone can be processed.
How to sterilize manicure tools
This function is flawlessly performed by special equipment, which is used not only by nail technicians, but also by cosmetologists, dentists and other medical professionals. It has a detrimental effect on microbes, killing them with high temperatures or ultrasound. For sterilization you can use:
- glasperlen balls,
- autoclave,
- dry heat cabinet,
- UV sterilizer.
They all differ in price, size, efficiency and operating principle. Glasperlene devices are considered obsolete because they require regular replacement of filler balls, which, in turn, cannot penetrate into all grooves of the products. Their main advantage is their affordable cost. Ultrasonic devices are best used in combination with heat treatment. Autoclaves and dry-heat ovens demonstrate the greatest efficiency, but they are quite expensive.
Other solutions for disinfecting manicure instruments
A solution for disinfecting manicure instruments can be chosen from several:
- MultiDez,
- Estilodez,
- Diamond,
- Bianol,
- Clean.
These are compositions based on surfactants or quaternary ammonium compounds. All are effective against microorganisms at the first stage of cleaning, consisting of disinfection, PSO, and sterilization of manicure instruments. Using concentrates, you can also perform a pre-sterilization procedure by adding less water when diluting. For example, to combine disinfection and PSO with MultiDez, you need a 4% solution, not a 2% solution.
MultiDez
Disinfection of manicure instruments with MultiDes is also popular among nail professionals, as the product:
- has a hazard class 4, that is, it does not threaten people and animals when used correctly;
- copes with several types of bacteria, viruses and fungi;
- does not spoil manicure accessories;
- is consumed little by little;
- has an affordable price - 700-900 rubles. for 1 l;
- the finished solution is stored for up to 28 days, and the concentrate remains valid for 5 years after the date of manufacture.
To dilute MultiDez to disinfect manicure instruments, you need to take 10 ml of this product and 400 ml of water. You will obtain a 2% solution in which the instruments should be soaked for 15 minutes. During this time, it is possible to get rid of 80% of microorganisms.
When making a solution, first pour the concentrate into the container, then the second component, otherwise there will be a lot of foam. After all, MultiDez contains several surfactants.
Estilodez
Estilodez for disinfecting manicure instruments can be prepared in several versions:
- 0.5% for keeping for 1 hour (dilute 5 ml of product in 995 ml of water);
- 1% is made per 30 minutes (10 ml of concentrate and 990 ml of water);
- 2% - for a 5-minute manipulation (20 ml of product per 980 ml of water).
To prepare the solution, the concentrate is first added to the container, then water. The effectiveness and safety of Estilodez are comparable to the same indicators of MultiDez. It can also be used for ultrasonic cleaning, since it contains a surfactant. The cost of the concentrate is 720-950 rubles. for 1 l.
Diamond
The Diamond product also has three types of activity, that is, it destroys bacteria, several types of viruses and fungus. It is pH neutral, so it will not cause rust on instruments. The composition contains detergent components, so Diamond cleanses manicure accessories well from particles of epithelium and nail dust.
The concentrate is mixed with water at a temperature of 20-50 degrees above zero. It is weaker than previous products, so it should be diluted to 4%. That is, take 40 ml of Diamond per 996 ml of water. Instruments must be immersed in the solution for 15 minutes. A liter canister can be bought for 500-600 rubles.
Bianol
Bianol is a transparent blue liquid, which consists of glutaraldehyde, alkydimethylbenzylammonium chloride, glyoxal and excipients. For disinfection, use a 2% solution. It is prepared from 20 ml of concentrate and 980 ml of water. The first component should be mixed before dilution. The disinfection procedure should last 15-20 minutes.
The solution destroys many types of bacteria, viral pathogens, and fungi. It does not corrode the skin upon contact with it and has almost no odor. But it can be stored for no longer than 10 days, and the concentrate can be used within 1 year from the date of release. The cost of Bianol is 400-500 rubles. per liter
Clean
Chistodez contains a complex of CHAS, PGMG, surfactants, and anti-corrosion components, that is, it works a little differently than previous products. It affects gram-negative and gram-positive bacteria, almost all known viruses, and fungi. The following solutions are used for disinfection:
- 0.5%. Prepared from 5 ml of concentrate and 995 ml of water. The procedure should last 1 hour.
- 1%. To prepare, take 10 ml of product and 990 ml of water. Soaking time for manicure accessories is 30 minutes.
- 2%. The solution is made from 20 ml of concentrate and 980 ml of water. It is enough to hold the tools in it for 5 minutes.
The cost of the product is from 500 rubles. and above for 1 liter.
Alcohol
Professionals do not use alcohol to disinfect manicure instruments because:
- it is ineffective against spores and useless against some bacteria;
- the liquid ceases its effect immediately after evaporation from the surfaces being treated, and this happens quickly;
- its properties deteriorate upon contact with mucus and proteins, which is difficult to avoid when processing scissors, files, pushers, etc.
You can wipe personal manicure accessories with a 70-degree liquid using a cotton pad generously soaked in it.
Stages of sterilization
The sterilization sequence must not be disrupted. It consists of several steps that cannot be combined with each other. Microbiological studies confirmed that after such treatment all known bacteria, viruses, fungi and parasites die. Consequently, the risk of contracting any disease is reduced to zero.
- The first step after using manicure accessories is preliminary disinfection using an ultrasonic cleaner or disinfectant solution.
- Then the instruments should be rinsed under running water and disinfected again in an ultrasonic bath.
- Next, the products must be washed in distilled water, dried and sealed in craft bags.
- The last step is heat treatment in an autoclave or dry-heat oven.
Each stage must be carried out in a separate place. It is also necessary to prepare a place to store used (dirty) and sterilized instruments. They cannot be in contact with each other, stored on the same shelf or on the same table.
Proper disinfection and sterilization of manicure instruments: stages
Proper disinfection and sterilization of manicure instruments consists of several stages:
- Prepare a solution in a container with a lid and stir.
- It is poured into the box where the instruments will be processed.
- They are placed in the liquid in an open form; it should cover the metal parts by a little more than 2 cm.
- Maintain the time required for processing.
- The instruments are removed and washed for several minutes under running water using a brush (this is the 1st stage of PSO).
- For some time, manicure accessories should be left in distilled water (2nd stage of PSO).
- Then they are removed and laid out on a napkin to dry until the liquid has completely evaporated.
- The next step is sterilization in a dry heater or glasperlene, infrared apparatus or autoclave for a certain time.
- Fully processed instruments are stored in a special box.
All manipulations are done with gloved hands, and there should be a mask on the face. After the sterilizer, instruments may be hot, so tweezers or forceps are needed to remove them. If a dry heat is used, after the 7th stage each tool is sealed in a craft bag. This way they are sterilized and then stored. And they print the package in the presence of the client.
Watch the video about disinfection and sterilization of manicure instruments:
How to sterilize cutters
Hardware manicure is not as traumatic as a classic edged one, and more effective than an unedged European one. It is impossible to perform it without special equipment, as well as a set of replaceable cutters. With their help, you can quickly remove old coating, get rid of cuticles and rough skin. They must be removed and sterilized after each client. They are made from heat-resistant ceramics or corundum, so they are not afraid of high temperatures. On the sterilizer, you should select the appropriate degrees and processing time. Modern devices are equipped with a user-friendly interface and ready-made modes, including for cutters.
Professional processing of manicure tools
Proper hygiene in hairdressing and beauty salons is the requirements of the sanitary and epidemiological control authorities - SES. Compliance with these rules requires cleaning the instruments properly at the end of each manicure or pedicure. Sanitary services recommend equipping salons with closed-type bactericidal recirculators that use ultraviolet irradiation. It does not directly perform sterilization, but disinfection of the instrument being processed is carried out successfully. It is the sterilizer that can be used with other processing methods.
The processes by which pathogenic bacteria and viruses are eliminated are divided into the following groups:
- Disinfection of manicure instruments in beauty salons. It is performed using special compounds. Particular attention should be paid to the process of disinfecting files. According to the rules, their processing involves only thorough disinfection. However, if there is a visitor’s blood on it, it must be removed from the work and subsequently destroyed.
- Pre-sterilization treatment. By mechanical cleaning, remaining particles of the nail plate and skin, as well as fatty deposits, are removed from the surfaces of the instrument. This point can be performed in combination with the previous one.
- Direct sterilization. This is the most complete and sufficient part of the tool processing process. Allows you to remove any bacteria or virus from surfaces. It is performed in specially produced sterilizers. The devices can use ultraviolet or infrared radiation, heat, and ultrasound.
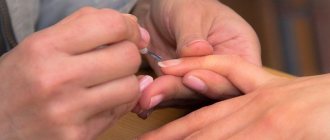
- Additional processing. The hands of the master and clients are treated with a special disinfectant. There is no need to wash your hands first. The fact is that such drugs can dry out the skin on your hands. Therefore, the layer produced by the sebaceous glands must remain. The drug should be rubbed into the fingers, between them, into the nail bed and the back of the hand.
How to sterilize files and buffs
The choice depends on the material of the products. Files with a hard abrasive coating can generally be reused multiple times and can be sterilized at high temperatures. They are designed for correcting the length of nails, cutting down artificial material and other manipulations that are considered “heavy artillery”. For delicate procedures, such as plate grinding, soft buffs are used. They should not be placed in a dry heater, autoclave or glasperlene sterilizer, as they may simply melt. Treatment is limited to disinfection using running water, antiseptics, and an ultrasonic bath. The ideal option is to use disposable files and buffs.
How to Properly Disinfect Manicure Tools?
Disinfection of devices at home should be carried out at least once a month. If more than one person uses the devices, they must be boiled after each procedure.
Ways to disinfect manicure tools with your own hands:
- Boiling . Using a soap solution, the devices are washed in advance to remove particles of skin and nails. Next, they are placed in boiling distilled water for 20 minutes. After this time, the instruments are taken out and laid out on a clean towel, allowing them to dry naturally. It is worth considering that not all metals can withstand boiling. If this disinfection procedure is carried out regularly, the scissors may become dull, and some elements may even become deformed.
- Dry heat treatment . To do this, you will need an oven, which is heated to 200 degrees. Manicure tools are pre-rinsed with soapy water and wiped dry. Place the cutlery on a baking sheet at some distance from each other and leave them in the oven for 15 minutes. As soon as the time is up, the baking sheet with the cutlery must be removed and left for some time to cool.
- Alcohol solution . This is an effective way to disinfect your manicure kit at home. To do this, you will need an alcohol solution in which the instruments are immersed for 30 minutes. To get them out, you can use tweezers. The devices are placed in a sealed bag, indicating the date of the procedure.
- Home sterilizer . If possible, you can buy a special device for disinfecting manicure accessories. The lid of such a sterilizer is tightly closed, and bacteria are killed under the influence of ultraviolet radiation. There are also devices that use hot steam.
How to sterilize manicure tools at home
When seeing clients at home, it is necessary to clean supplies in the same way as in a salon. This needs to be done even if you are doing a manicure only for yourself - after each use, bacteria begin to multiply uncontrollably on the surface of the product. Even conditionally pathogenic flora can become a source of disease over time. Therefore, do not be lazy to purchase a compact sterilizer for home use. If you don't have one, metal tools can be placed in an electric or gas oven. In this case, you should set the maximum temperature and wait at least 30 minutes. They must first be washed under running water and dried with a disposable towel.
Drying
After cleaning and rinsing the instrument under running water, wipe it with disposable towels or napkins and lay it out to dry. You can do this on a regular towel, which is used only for this purpose, or on a large non-woven napkin. The instrument can be dried either open or covered with a napkin.
Instruments that have not been dried should not be sterilized, either thermally or chemically. This is a violation of SanPiN requirements.
If the dryer has a drying function, then after PSO the instruments can be immediately placed in the sterilizer chamber and the pre-drying mode can be turned on. The disadvantage of this method is that the products cannot be packaged in craft bags.
The dried manicure tools are packaged in craft bags and sent for sterilization - in a dry heater or autoclave.
Sukhozhar - types, choice, use of a sterilizer
For chemical sterilization, it must be used within an hour.
MU 287-113 Guidelines for disinfection, pre-sterilization cleaning and sterilization of medical devices
How to choose a sterilizer
When choosing a sterilizer for a salon or home use, you should pay attention to a number of important factors:
- Manufacturer. We recommend trusting companies that have proven themselves in the nail service market. Cheap Chinese homemade devices may not live up to your expectations. You cannot skimp on safety - consider buying a sterilizer as an investment in your own reputation and health. Pay attention to certification.
- Time of processing. The greater the flow of clients, the less time is left for cleaning tools. It is important to be able to sterilize them during the working day on an ongoing basis and immediately before the procedure. In new generation devices, the shortest program lasts only seven minutes.
- Operation volume. Due to space constraints, sterilizers are often located in the same areas where clients are received. It is worth choosing equipment that is as quiet as possible.
- Dimensions. If you don't have a lot of space, pay attention to the dimensions of the device when purchasing. The stores offer a wide range of devices that will fit on a standard work surface.
- Appearance. Gone are the days when sterilizers were not a very attractive element of the interior of the salon. Today they feature a modern design and are available in many colors.
- Guarantee. When choosing equipment for a salon or home use, pay attention to the warranty period provided by the manufacturer and the store. In the event of a sudden failure, you will have to act very quickly.
Remember that manicure should be safe. It doesn’t matter whether you are a master or a client, following our recommendations will save your health and even life.
Disinfection of manicure instruments
Disinfection is a set of measures aimed at destroying pathogens of infectious diseases. Everything that the master comes into contact with during work (furniture, equipment, tools, inventory) is subject to disinfection.
Not for use on hands and nails. Requires compliance with safety precautions (use personal protective equipment: gloves, mask, goggles).
Disinfection ensures the death of pathogens and bacteria on the treated surface (lysoformin 2%, bacillol). Doesn't kill spores.
Preparation of a 2% solution of lysoformin - 250 ml of water + 5 ml of concentrated lysoformin. Exposure time (shutter speed) 15 minutes.
Batsilol is a ready-to-use solution. Tools are completely irrigated. Exposure time is 30 seconds.
Disinfection
- A dirty instrument is immersed in the solution for the time specified in the product data sheet. You can combine cleaning and disinfection.
- Mechanical cleaning under running water or in a sink. (After use, rinse under running water with a brush)
- Dry the instrument.
- We immerse it in the solution for sterilization for the time specified in the passport. Or, if you have a dry-heat oven or autoclave, place the instrument in a dry-heat oven or autoclave for the specified time. You can also use a craft bag.
- Wash in distilled water. Dry it. (Washed instruments instantly rust!!!!) After this type of sterilization, you can additionally use a Glasperlene ball sterilizer. 5-10 min.
- We store sterile instruments in a UV cabinet.
Disinfection at home
Gigasept 0.5% 99.5 ml water + 0.5 ml Gigasept 995 ml water + 5 ml Gigasept Exposure time 5 min.