DIY headband and hairpin for the bride
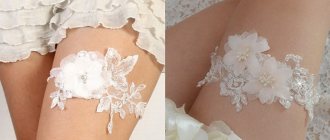
Using delicate lace, you can create with your own hands beautiful and delicate accessories for the bride: a headband and a hairpin. Choose the decoration option that best fits your wedding look and start making it!
Materials and tools:
- lace applique and ivory ribbon (for headband);
- lace applique, two hairpins, felt (for hairpin);
- scissors;
- glue.
Time: 20 minutes (for each accessory).
Step-by-step instruction:
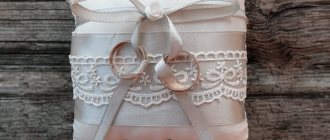
- To make the headband, glue the lace applique to the ribbon and let the glue dry for about 10 minutes. Then trim the edges of the ribbon into a “V” shape for a neat, elegant look. There you have it, a delicate hair bandage!
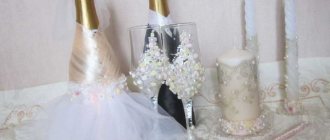
Here are a couple more examples of ribbon-based hair decorations that you can easily make for a wedding with your own hands by purchasing everything you need at your local fabric and accessories store. In addition, on our website you can find another master class on how to make a hair clip for the bride’s hair with your own hands.
Hair chain
Do you want something more original than a veil or hairpin? Then pay attention to the hair chain, which will allow you to create a spectacular and unusual wedding look. The main thing is that such an accessory will fit perfectly into a fashionable boho or vintage style!
Materials and tools:
- chain with pearls and stones;
- applique embroidered with stones and pearls;
- two studs;
- glue.
Time: 30 minutes.
Step-by-step instruction:
- Cut out a leaf from the applique and glue a pin to it at an angle. Do the same with the other leaf (in a mirror image).
Comb: 3 ideas for an accessory
A sophisticated and elegant accessory for a newlywed is a comb, which can be decorated with various materials, creating with your own hands from the simplest thing a unique and spectacular decoration for the bride’s hair.
Comb with lace
A gentle and romantic version of the comb can be made using lace - a favorite material of many girls, from which many accessories for the bride are made.
Materials and tools:
- plastic hair comb;
- lace;
- needle and thread in the color of the lace;
- PVA glue;
- wax paper.
Time: 30 minutes.
Step-by-step instruction:
- Thin the glue with water so that it is not so thick. Dip the lace into the glue, take it out after a couple of seconds and let the rest of the glue drip off. Place the lace on the wax paper and wait until it is completely dry.
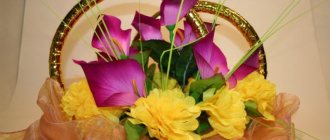
Comb with flowers
A popular option for decorations for the bride’s hair are fresh or textile flowers. There are many ideas for such accessories: you can make a flower for the bride’s hair with your own hands or decorate an ordinary comb with delicate buds yourself, as in this master class!
Materials and tools:
- crest;
- flowers and greenery to your taste;
- floral wire;
- floral tape;
- scissors.
Time: 30 minutes.
Step-by-step instruction:
- Cut the stems of the flowers, leaving 1-2 cm from the bud. String the inflorescences onto the wire, pulling it through the base of the bud. Wrap the ends of the wire around the stem to keep it secure.
Tip: attach tulle to such a comb using wire or thread, and you will get a spectacular and original veil that you cannot buy in any salon!
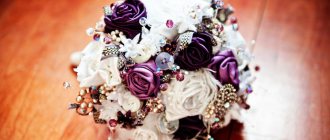
Comb with brooches and pearls
If your wedding look lacks shine, then a comb decorated with brooches and pearls would be an excellent option. They look impressive and luxurious, and making this decoration for the bride’s hairstyle with your own hands is quite easy!
Making a wedding hair accessory - a vintage twig as a dowry
From the stories of our grandparents, we remember that every bride should have a dowry, which she makes (sewing, embroidering, weaving, knitting) with her own hands. Paying tribute to tradition, we invite the most romantic among us to weave a vintage twig for the bride's hairstyle using baroque pearls, natural stones and exotic seeds, mother-of-pearl, Czech glass and ivory.
We will need:
1. Everything for the sketch: paper, pencil, eraser, ruler. 2. Wire with a cross-section of 0.5 mm, approximately 5 meters, in our case - Artistic Wire 24 Ga Gun metal (Bronze). 3. Two kinds of metal beads: 3 pcs. — with a pattern 6x5 mm, at least 10 pcs. - smooth 4 mm. 4. Carved mother-of-pearl leaves - 5 pcs. 5. Carved coral flowers - 5 pcs. 6. Rauchtopaz - 5 pcs. 8 mm. 7. Black pearls - 6 pcs. 8x6 mm. 8. White pearls, baroque - 8 pcs. 12x8 mm. 9. Small, freshwater pearls - at least 20 pcs. 8x6 mm. 10. Ivory beads (natural shade) - at least 10 pcs. from 5 mm to 10 mm. 11. Fire polished faceted beads made of Czech glass, color (transparent, topaz/rose) - 5 pcs. 12. Tools: pliers, wire cutters, round nose pliers.
STAGE 1
Let's start with a sketch. Draw a life-size twig on a piece of paper: measure 26 cm (the length of the decoration) and use dashes to indicate the twigs. Please note that our branch is asymmetrical, so a sketch is necessary so that during work the product does not “float” and turn into something else. We recommend checking the sketch regularly.
STAGE 2
To get an approximate idea of what the product will look like, let’s arrange our beads according to the sketch. During the work, it is not necessary to follow the order in which they will be laid out; the main thing is to clearly understand where the large elements will be located, and distribute the beads evenly so that beads of the same color or, for example, the same size do not crowd together on only one branch.
Let’s not forget about the symbolism that is present in wedding decorations, attire, and rituals, regardless of the era and time of year.
Whatever image you choose: a Roman goddess, a forest nymph, an aristocrat of blue blood or a touching village girl, your natural femininity will always be the basis. It will be emphasized by white coral and rauchtopaz . As our ancestors believed, these are strong amulets against any negativity, including the evil eye (the same function, by the way, is attributed to the bride’s veil). Pearls are a symbol of happy relationships and an integral attribute of marriage in the 19th century. At the same time, it is believed that black pearls provide its owner with longevity, prosperity and wisdom.
STAGE 3
Let's reveal the main secret of this master class - there is no need to cut the wire! Otherwise, your branch will consist of pieces fastened together and look sloppy. Our task is to make a branch without a single break. Therefore, we take the wire directly on the spool and begin to put the beads from the sketch on it in reverse order. That is, those elements that we will weave into the twig first should get onto the wire last.
STAGE 4
When all the beads and elements are put on the wire, move them approximately 50 cm from the beginning of the wire. This will be our leading “thread”, which will serve as the central branch. All secondary branches will go from it according to the sketch.
Take the first bead, bend the wire and hold the two ends of the wire with your fingers or pliers at a distance of about 2 cm. Now we begin to rotate the bead around its axis. The wire twists exactly to the point where you hold it. It is important not to overdo it here: if you twist it too tightly, the wire will become brittle. On the other hand, it’s bad to twist it too little: the beads will dangle and the product will look untidy.
We take the second bead and retreat from the place of twisting by 1.5 cm, repeat the entire procedure until the point where the two branches come together. Now we make 2-3 turns of the two strands of wire “idle”, retreating from the point of connection of the first branches. After that, take the third bead and repeat everything we did with the second. We do the same with the fourth bead.
STAGE 5
According to our scheme, after the fourth bead, you need to make a small indent to highlight the large elements - a leaf made of carved mother-of-pearl and a heart made of Buri palm seeds. Therefore, we twist the wire threads “idle” for about 2 cm, and then proceed to twisting the branches with large elements.
Don't forget to check the sketch. According to our sketch, the moment comes for the first major branching. We take the bead that will be at the top of the new branch (for us it is rauchtopaz), and move it away from the base of the already woven branch by about 6 cm, that is, the length of the new branch. Then we begin to twist as in step 4 until we return to the point where the first branch meets the second.
We continue to follow the sketch. Don’t forget that our sketch is two-dimensional, but the decoration is three-dimensional, so the branches should not lie flat, show your imagination and carefully straighten them in different directions, then the product will acquire volume.
STAGE 6
Finish the branch by carefully cutting the wire. We carefully tuck the ends and probe with our fingers several times so that there are no sharp edges and the bride does not prick herself. If the ends remain, we continue to hide them. You can carefully go over it with a file, but be careful not to remove the coating from the wire.
STAGE 7
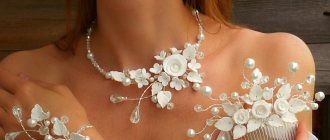
Let's try on a twig. We deliberately did not attach it to a comb or hairpin, so that the bride would have a choice of how exactly to use the resulting transforming accessory. This is another tribute to tradition - the versatility of decoration. Brides of the late XIX - early XX centuries. such branches could be used as a tiara, a brooch, a bracelet, and even a necklace. And rightly so - why limit your imagination on the most joyful day of your life?!
Below is just one of the options for using a twig. The decoration is attached to the hairstyle with hairpins or bobby pins. If you tie a satin ribbon to it, you will get a tiara or headdress.
Our jewelry will look great with an ivory or champagne wedding dress. These sophisticated shades of white, highly fashionable among brides all over the world, are associated with the age-old concept of luxury and family well-being.
Wear and be happy 
Your Black Cat!
DIY hair clips for a wedding – master class
Creating a unique image of a bride in an insufficiently original dress requires the use of various accessories. These include jewelry, which has become an excellent alternative to a veil for modern newlyweds.
We are talking about a variety of decorative elements that complement a girl’s hairstyle. Wedding hair clips help to add elegance to your hairstyle and emphasize the features of the chosen style. Those that were made by hand are especially attractive. The future bride puts her soul into her product, shows imagination, and reveals some aspects of her character.
Mesh
It appears as a cobweb that hangs from the top of the head along with the hair. This product serves as an assistant when creating difficult hairstyles, as the hair underneath becomes more flexible.
In order to give a special shape to your hair, you just need to place your hair in a net and give it the shape you like. Tip: the length of the mesh must be at least 35 cm for the intended hairstyle to hold.
How to make wedding hair clips with your own hands - tips
To ensure that a hand-made wedding hairpin does not look like those sold in specialized salons and stores, girls should listen to the advice of experienced craftsmen who make accessories for wedding celebrations. There is no need to look for rare and expensive materials. It is important to be able to use what is always at hand and create something extraordinary with effort and imagination.
The starting materials for making such an important accessory can be taken:
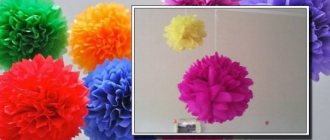
- Natural flowers;
- silk or satin, from which you can make the petals of a bud or a lush flower;
- tulle or organza to decorate the base;
- beads;
- rhinestones;
- bugles;
- thin and thick wire to give the product the desired shape.
What kind of material the craftswoman will choose depends on what type of hairpin will serve as decoration for the bride’s hairstyle. A feature that distinguishes hairpins designed to complement a wedding look is the ability to securely fix carefully styled hair.
The following will help you achieve the desired effect:
- wooden and metal studs;
- headbands;
- diadem;
- clamps;
- automatic hairpins;
- combs;
- "crocodiles".
Before you start work, you need to make a sketch of the future accessory, think over the method of fixation, and choose the most suitable material to create a small masterpiece.
If there are fresh flowers in the bride’s hair, then you will certainly need invisible clips, but imagination, fabric and wire will help you achieve originality.
The girl herself will come up with unusual exotic and even fantastic flowers, which will become a real decoration for her wedding hairstyle.
You can make flower petals that retain their original shape and attractiveness for a long time from satin, light but elastic leaves from tulle, dew drops resemble small rhinestones glued to flower petals.
A piece of cotton wool with rhinestones or small glass beads is attached to a long thin wire, giving it its final shape using ordinary PVA glue.
This is necessary so that sparks sparkle in the hair around the hairpin, like tiny stars.
Master class on making feather hairpins for the bride
Having chosen the shape and type of hairpin, and prepared a sketch of the future decoration of the wedding hairstyle, you can begin to create. The craftswoman needs to prepare:
- From 10 to 20 metal pins.
- Thin wire.
- Beads.
- Glue gun (if the accessory is additionally decorated with rhinestones and glass beads).
Thin steel wire is divided into pieces of different lengths using scissors or wire cutters. One bead is strung on each piece of wire, and the ends of the metal thread are twisted into a rope. The remaining wire pieces are folded in half so that when twisting the free ends, a loop is formed. The hairpin will look more voluminous if the wire with a loop in the middle is longer.
After applying a drop of hot glue from a gun to the loop, apply glass beads or large rhinestones to it.
Flowers or any unusual compositions are made from beads, adding wire threads to them as a sparkling element, on the loops of which sparkling rhinestones are attached.
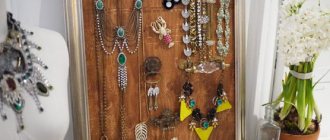
The advantage of decorating wedding hairstyles, which are created using a large number of metal pins decorated with a wide variety of decorative elements, is that they can be fixed at any point in the hairstyle, creating a unique composition.
A large bead is attached to the top of the pin by wrapping the wire around the rounded end. Next to it, metal threads with glass beads, rhinestones and other decorative elements are fixed in a chaotic (or chosen by the craftswoman) order.
The composition on all heels may be the same or very different from one another. What the decoration on the finished hairstyle will look like depends on the wishes of the bride, the styling features, and the style of the dress.
In this master class you will see how you can make a beautiful hairpin for a bride’s wedding hairstyle yourself:
Making wedding hairpins with your own hands is not so difficult, the main thing is to carefully consider the way to fix them on your hair, choose the right material and choose the right shape for the future decoration. Modern brides are attracted to hairstyles with loose curls or openwork braids. The easiest way to decorate them is with a tiara, but hairpins made of hairpins and beads of different sizes will make their styling unique. What materials make homemade hairpins look more attractive? What is the best way to mount decorative elements? Is it worth making artificial flowers with your own hands or is it easier to buy ready-made ones? How many hairpins will be needed to decorate a wedding hairstyle with an openwork braid? Future brides are interested in the opinions of not only experienced stylists and hairdressers. Those who have already celebrated their family's birthday can share their impressions and experiences.
Invisible
The main task of this type is fixation. With this decoration you can easily hide individual strands of hair or ends, simply by placing them in the right place on your head. Moreover, bobby pins can be used to attach ribbons to hair or other types of jewelry.
This accessory is an ordinary metal product in the form of a narrow plate, which is folded in half. Bobbins come in different sizes and colors.
The most common is size 50, and the color can be absolutely anything, from black to multi-colored. If you decorate such an item with sparkles or small rhinestones, then it will become a hair decoration, and not just an accessory.