What is a nail airbrush and airbrush?
An airbrush is a special device that allows you to apply paint to your nails by spraying under air pressure. Using the device helps to achieve a very clear picture with smooth transitions between dark and light shades.
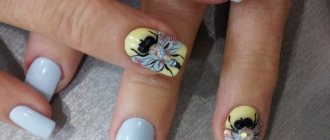
Airbrush nail designs are very popular. Using a paint sprayer, craftsmen create real miniature masterpieces. The device makes it possible to perform gradient and ombre, smoky halos or continuous painting.
Using an airbrush to create a manicure on your nails provides the following advantages:
- You can apply a drawing even without artistic skills, just choose a stencil;
- the procedure for creating a manicure takes little time, usually about half an hour;
- the paint applies evenly to the nails, without smudges or clots;
- The color rendering quality is very high.
Important! Airbrushing can be combined with sparkles, rhinestones and painting, they will make the manicure even more impressive.
How to airbrush nails
To avoid making mistakes and get a quality manicure, you need to take special courses. A general step-by-step description of how to use the nail airbrush and template:
When spraying the dye, the nozzle is moved away or brought closer to the nail plate to change the contrast of the pattern. When the pigment is applied by experienced craftsmen, the dye is applied to the nail in a dry layer.
Gradient on nails
The gradient technique involves a transition from one color to another. Using an airbrush, you can create unusual combinations of shades, complementing your nail design with graphics or decorative elements. The device allows you to accurately control each layer.
Airbrush ombre
The technique consists of smoothly lightening the ends by several tones within the same color range. An airbrush allows you to create such a design in a short time.
French airbrush on nails
Craftsmen use various techniques when creating a French jacket. 2 options for nail design in airbrushing deserve attention:
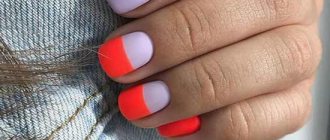
- The gradient is used for the main design, and the high contrast tips are painted on for a fixed effect. The technique is suitable even for short nails.
- An unusual play of shades can be created using sticky stripes and gradients.
The technique allows you to experiment with different shades, creating bold combinations and transitions.
Airbrush drawings
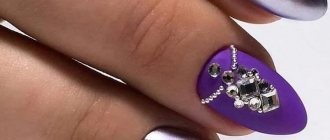
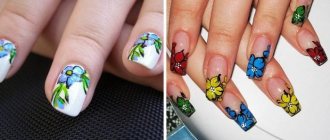
The airbrush is used in contrasting nail art, allowing you to combine a dark base with light patterns and vice versa. Using airbrush stencils on your nails, you can create a design of any complexity.
Knowing how to paint with an airbrush, you can master various application techniques and learn how to create unusual effects.
How does a nail airbrush work?
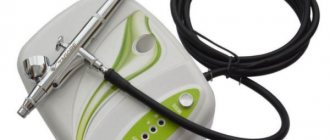
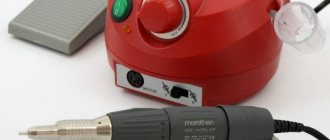
The photo of the airbrush for nails shows that it consists of a handle with a trigger, which is also called a gun. There is a paint tank on the top or side of the body, and at the end there is a nozzle from which the pigment is sprayed. An important element is also the compressor; it is not always included in the kit, but the device cannot work without it, so it is necessary to purchase it in addition.
The operating principle is as follows:
- paint and air are supplied to the handle under pressure using a compressor;
- when the trigger is pressed, they mix with each other;
- the paint is sprayed in an even thin layer onto the surface of the nail.
The paint tank can be located on top or on the side of the airbrush.
Airbrushes are not only simple, but also double. The former allow you to regulate only the flow of paint; with the help of the latter you can also control the amount of air during mixing. Professionals often use double models; with them, the drawings are brighter, with many small details. Air adjustment makes it possible to change the thickness and level of clarity of the lines.
How to choose an airbrush for manicure
Things to consider before purchasing a nail airbrush:
- Type. Simple devices control the flow of liquid, they are designed to treat one nail, and are suitable for teaching aerodesign. The dual-action airbrush regulates the flow of liquid and the amount of compressed air. It contains enough paint to paint all your nails. Thin lines are drawn with this tool.
- Equipment. Airbrushes are purchased complete with a compressor, so that you don’t have to look for a suitable one later. You will need special airbrush paints (varnishes), stencils, solvent and brushes, and cleaning fluid.
- Characteristics of the tool. Pay attention to the size of the nozzle and needle, container volume, type of tank, variable paint flow rate, external and internal spraying.
- Convenience. The noise of a working airbrush should not irritate, and its weight should not tire the hands of the master.
- Price. Inexpensive but high-quality models of Chinese airbrushes for nails - Fengda, Jas, TNT Air. The Japanese ones - Anest Iwata, and the Taiwanese ones - Sparmax (Aero-Pro) will cost more.
Before purchasing, check the pneumatic device for defects:
- switching the lever to adjust the jet should be smooth, without jerking;
- the substance (can be checked with water) is sprayed evenly, the applied stain is of the correct shape;
- After finishing work, there should be no paint left in the sprayer, which indicates the integrity of the nozzle and needle.
Which airbrush for nails is better to choose?
There are many models of airbrushes for nails in specialty stores. First of all, when purchasing, you need to pay attention to the manufacturer. Famous brands include:
- Sparmax;
- Iwata;
- Jas;
- Hansa;
- Evolution;
- Fengda;
- Air Nails.
The cost of professional airbrushes starts at an average of 3,000 rubles. Expensive models are the most convenient to use and allow you to achieve better results.
When choosing a device, you should take a closer look at its characteristics. To create a design on your nails, it is recommended to purchase airbrushes:
- with an air flow rate of 10 liters per minute and a pressure of 1.5-3 atm.;
- with a tank for 2 ml of paint or more;
- with a nozzle diameter of about 0.2 mm;
- with a compressor of 12 W and above.
Such devices will ensure the most uniform and smooth distribution of paint over the working surface.
In modern models, the compressor is activated automatically when the trigger lever is pressed. In budget outdated devices, it starts separately, and airbrushes make a lot of noise and vibrate, even if the working part is turned off.
Airbrush rating
To successfully choose a device for painting models, nails or cakes, you should familiarize yourself with a review of airbrushes and the best models on the modern market. Each of them has good reviews and is in demand.
The best airbrushes for modeling
Devices for painting models are mainly represented by simple dual-control devices. The differences are in additional features, cost and capacity.
Badger Sotar 20/20 Fine
The American-made device is equipped with a standard 0.2 mm wide, self-centering nozzle and is controlled according to a dual circuit - the user can adjust the smoothness of the paint and air supply. The device is equipped with a tank with a capacity of 2 ml, the tank is connected to the body.
Badger Sotar 20/20 Fine is one of the popular devices for modeling
The advantages of the model include easy and smooth control, a small exit of the needle from the nozzle when working with the device, this guarantees the accuracy of drawing lines. The device is easy to clean from dried paint residues, and the needle can be removed and reinserted without removing the nozzle. The cost of the device is about 6,000 rubles in retail outlets.
Harder&Steenbeck Infinity 2 in 1
The device of German origin comes complete with two nozzles - 0.15 and 0.4 mm, and also includes 2 tanks, a small one with 2 ml and a larger one with 5 ml. The nozzle of the device is self-centering; the user can control the air supply power during operation.
Harder&Steenbeck Infinity 2 in 1 allows you to accurately apply fine lines
The device is equipped with a limiter, which allows you to set certain values for the operation of the device and apply thin lines evenly and without defects. The device has an internal mixing type, the paint tank is fixed on top. The cost of the device is about 16,000 rubles; reviews characterize it as very reliable and easy to use.
GSI Creos Mr. Airbrush Procon Boy PS-274
The Japanese device comes with a 0.3 mm nozzle, dual independent controls, you can adjust both the paint supply and the air supply. The device is equipped with a 10 ml paint container and allows you to adjust the amount of force on the needle and on the air supply control valve.
Japanese device GSI Creos Mr. Airbrush Procon Boy PS-274 is suitable for painting backgrounds and drawing details
The advantages of the device include its high sensitivity, reliability and versatility; it is suitable for large projects and for drawing small details. The average price of the device is 7,000 rubles.
The best airbrushes for nails
Before purchasing a manicure airbrush, it is also recommended that you familiarize yourself with the list of the best models. Good devices are relatively inexpensive, and offer very wide possibilities.
JAS 1116
The device with internal mixing of air and paint has a nozzle with a 0.2 mm needle and a 2 ml reservoir. When working with the device, you can adjust the line thickness from 0.5 mm and the diameter of the sprayed cloud from 1 to 20 mm.
JAS 1116 - a reliable and inexpensive model for manicure
The device can be refilled with liquids containing alcohol, acetone and water. Reviews of the airbrush for nails confirm that the paint can be applied evenly using the device, without drips or bald spots. The average price of the device is only 1,500 rubles.
Vogue Air AN 07
The dual action airbrush has a narrow 0.3mm nozzle and is good for both fine lines and gradients. The device is equipped with a jet dispersion regulator; the kit additionally includes a compressor, holder, hose and charger. The device makes little noise during operation, does not burden the hand, and is suitable for long-term intensive use. The price of the device is about 6,000 rubles.
Vogue Air AN 07 - a fairly powerful model with a compressor
DIY Nail Art D-401
Easy to use, but functional, the airbrush allows you to create a wide variety of nail designs - create a 3D effect, apply thin lines, make gradient transitions. The diameter of the airbrush nozzle is 0.3 mm, the paint tank is located in the upper part.
The device comes complete with a hose, compressor, power supply, pipette and case. The price of the device is on average 4,000 rubles.
DIY Nail Art D-401 - a set for creating a beautiful manicure
Best airbrushes for cakes
The rating of confectionery airbrushes allows you to choose devices for decorative decoration of baked goods. An automatic dye sprayer will be of interest not only to professional cooks, but also to experienced housewives.
HD-130 with compressor Beauty 6 0000
A semi-professional airbrush is equipped with a standard 0.4 mm nozzle and has five operating speeds, which allows you to apply a pattern to a confectionery product evenly, accurately and very quickly. If you have a little experience, you can use the device to color the background with food coloring or work out very small details of the picture.
The device is often used in confectionery
A compressor and power supply are supplied with the device. The device must be used with Americolor gel food colorings, for which it is best suited. The cost of the device is about 5,000 rubles.
Attention! The HD-130 cannot be used to work with cocoa butter; in this case, the device nozzle is highly likely to become clogged.
Airbrush with compressor TC-12BK
The model with a nozzle diameter of 0.3 mm is intended for background and detailed painting of baked goods. Thanks to the presence of a compressor, the device can be used to work in very large volumes.
An airbrush with a TC-12BK compressor is used both privately and in cafes and confectionery shops
The device uses energy economically and is suitable for both home use and use in cafes and restaurants. The model costs only about 4,500 rubles.
IWATAHP-TR2
Double airbrush with a side-mounted 15 ml tank has a standard 0.5 mm nozzle. The device is considered universal and is used not only in cooking, but also in other areas. However, it is very convenient to use it for confectionery purposes, especially if you need to color cakes or pastries over a large area.
IWATAHP-TR2 is one of the most famous food airbrush devices
When working with the device, it is advisable to use food colorings with a low viscosity so as not to clog the nozzle. The cost of the device is about 10,000 rubles; the device is not only reliable and durable, but also quite light, only about 400 g.
What you need to use an airbrush
To apply a manicure, you will need, first of all, the nail airbrush apparatus itself, consisting of an automatic pen, a compressor and a connecting hose. You will also need to prepare:
- a thin brush to clean the nozzle during operation; the airbrush may become clogged with paint;
- disposable or reusable stencils, as a rule, using spraying, a pattern is created using them;
- tweezers;
- base varnish;
- special paints;
- thin rubber gloves that will protect the artist’s skin from pigment getting on it;
- plastic tips;
- disposable towels for removing excess pigment and dirt from the workbench.
Tips are especially useful for beginners; they allow you to practice applying manicure.
Paint and tips are usually supplied in a set with an airbrush.
But if necessary, they can be purchased separately, like all other elements.
Examples of designs using the aeropuffing technique: photos and videos.
Even the most demanding client cannot resist the beauty of an air puffing manicure. It will captivate with the play of color and light, smooth transitions, rich, realistic and natural patterns. In the training videos you will be able to see firsthand the quality of drawing details and the effectiveness of gradient transitions.
As for the images that can be created with this technique, they are almost limitless. The most popular are, of course:
- three-dimensional 3D paintings (stars, planets, volumetric glare effect in precious stones);
- a variety of ombre gradients (both soft pastel and brightly saturated);
- bright and attractive images for the holiday, evening images. For example, painting or spectacular stained glass;
- original and mesmerizingly beautiful abstractions and geometric designs;
- manicure based on the seasons;
- and many many others.
By choosing an air puffing set as your assistant for decorating nails (both natural and extended) of any length and shape, you can be sure:
- the ideas embodied will be deep and voluminous, clear and impeccable;
- smooth halftones and airy transitions will give any design a special appeal and appeal;
- With air puffing, you don't have to worry about common imperfections like too much paint, brush marks in the design, or uneven coloring.
You can buy Aeropuffing using this link and bring your manicure fantasies to life in bright colors!
How to assemble an airbrush for nails
The paint sprayer is usually stored disassembled in a special case. Before you start creating a manicure, all parts will need to be connected. The algorithm may vary slightly depending on the airbrush model, but in general it looks like this:
- the gun is connected to the compressor;
- fix the hose through which air is supplied;
- Screw on the paint container if it is not integral with the body of the gun.
Pour a little ordinary water into the tank of the assembled airbrush and make several sprays. This is necessary to remove remnants of the previous pigment. Then the water is drained, the tank is wiped with a disposable towel and fresh paint is poured into it.
Advice! Before starting work, you need to test the airbrush on a sheet of paper and adjust the pigment supply and color density through the trigger.
How to use a nail airbrush
Before using an airbrush, you first need to prepare your nails. To do this, do a hardware or edged manicure, and then apply a base coat and level it. It is advisable to protect the cuticle and side ridges with a special liquid film, so that later you do not have to wash off the remaining paint.
There are several popular airbrush techniques on nails. Which one to choose depends on preference.
How to make a gradient with an airbrush on your nails
A gradient, or ombre, is created on a colored background of gel polish, for example, nude or camouflage. Step-by-step use of an airbrush for nails looks like this:
- the selected paint is poured into the tank of the device in a volume of about 2 ml;
- the nozzle of the device is purged and an even flow of pigment is adjusted;
- The paint is sprayed from the tips of the nails to the middle from a distance of approximately 1.5-3 cm.
The airbrush allows you to easily adjust the intensity of the applied gradient.
Videos about using an airbrush for nails show that the pigment should lay down in a very thin and even layer, drying almost immediately in the air. After applying the paint, you need to moisten the brush in the primer and remove the residue from the sides of the nails; you can also treat the ends with a buff.
At the last stage, the pigment is coated with a topcoat, dried in a lamp and the dispersion is removed. Then all that remains is to remove the remaining paint from the skin with a cleanser or remove the protective film from the cuticle.
How to make airbrush designs on your nails
The fill pattern using an airbrush is performed through a stencil on a contrasting background. They do it like this:
- the template is pressed tightly to the nail plate;
- use an airbrush to spray paint through the holes;
- the template is removed and a fixing agent is applied over the design;
- the ends are treated with a buff if there is pigment left on them;
- The nails are dried in a lamp and then the dispersion is removed.
A regular fill on nails done with an airbrush has very clear lines.
The colors for the fill pattern are chosen at your own discretion. A manicure that combines 2-3 contrasts looks brighter and more noticeable. But you can also use shades from the same range.
How to apply a halo to your nails using an airbrush
Another interesting technique is creating a halo based on the applied pattern. Manicure is performed according to the following algorithm:
- the selected stencil is glued or pressed tightly to the nail;
- the airbrush is filled with contrasting pigment;
- apply paint in a very thin layer without smudges around the perimeter of the template, creating a slight haze;
- the edges of the pattern are drawn with a brush, accentuating strokes or in one line.
The halo makes the manicure pattern more voluminous and deep.
Next, all that remains is to remove the stencil and, according to the standard procedure, dry the nails in a lamp, clean the skin and remove the dispersion.
How to make a complex painting using an airbrush
The device for spraying paint can be used not only on one, but also on several stencils. This allows you to create a complex graphic design on your nails.
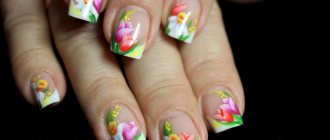
For example, you can perform a floral spring-summer manicure using the following algorithm:
- make a French base using two or three colors of varnish;
- apply a stencil to your nails and use it to create abstract lines;
- fix the result with topcoat and lamp;
- reapply another stencil to your nails and paint the second layer with butterflies with an airbrush.
A graphic design using an airbrush is applied to the nails in 2-3 layers.
If desired, you can combine not only different stencils, but also combine styles, achieving the most original graphic design.
Proper care of your food airbrush
The last important issue is cleaning the airbrush with detergents (during and after each use) and mechanical cleaning with disassembling the airbrush.
The airbrush can only be washed with substances that are non-toxic and can be eaten, i.e. alcohol and vodka. To wash the nose of the airbrush, just pour vodka into the tank, plug the “nose” of the airbrush with your finger and press the trigger lever. The dirt will gurgle on its own and go from the tank to the nozzle and from there back, washing away the remaining accumulated dirt. Thus, we clean the airbrush without mechanical disassembly.
Dirt can also build up in the airbrush bore all the way to the trigger. To clean such contamination, you can unscrew the back of the airbrush, i.e. fingerboard, loosen the collet clamp and move the needle back and forth. As a result, the entire necessary part of the channel through which the dirty needle walked will be washed.
If, after the above-described manipulations, the flow is still weak and you feel that something is not cleaned somewhere, then you will have to disassemble and clean the entire channel with brushes, as well as twist and clean the nozzle with a brush. But this happens extremely rarely if the fresh dirt has not been washed off well.
Beginners should practice on paper first to see the marks they leave and learn how to airbrush the gradient and background. And only then move on to fine lines, so that it makes sense to do the entire drawing with an airbrush.
How and how to wash your nail airbrush
From time to time, your airbrush needs to be washed, especially if it is used infrequently. The paint has time to harden inside the nozzle and in the tank, which reduces the functionality of the tool. You can tell that the system is dirty by the appearance of drops or characteristic “snow”—sticky pigment particles.
If you do a manicure with an airbrush for yourself occasionally, you need to clean it after each use before storing it. In a salon or home office, washing is carried out at the end of the day; with a dense flow of clients, the internal parts of the device do not have time to clog.
The choice of cleaning agent depends on the type of paint. If your airbrush uses acrylic pigment, you can wash the device with plain water. For silicone paint you need to take a special cleaner, for example, TEMPTU.
To clean the nozzle, simply unscrew its tip, moisten a brush in water or washing liquid and treat the area around the needle. Then the device is dried with a stream of air and the nozzle is fixed back.
Cleaning at the end of the working day is carried out more thoroughly. The procedure looks like this:
- blow the remaining pigment out of the nozzle onto a napkin or cotton pad until the air flow becomes clear;
- wipe the walls of the container with a small napkin;
- a few drops of water or a special liquid are poured inside;
- the nozzle is aimed at the napkin and the trigger is pressed several times in a row;
- pour a little more cleaner or water into the tank and turn on the compressor;
- press the trigger, after closing the nozzle with your finger, so that the liquid inside the tank bubbles.
It is better to clean the airbrush with disposable gloves.
Then you need to drain the water or cleaner, blow the remaining air out of the nozzle and repeat the entire procedure. At the last stage, remove the tip, pull the trigger so that the needle is completely hidden, and use a cotton swab to wipe the walls of the outlet hole.
Regular washing of the device allows you to maintain it in working condition. If the airbrush does not become clogged with paint, then it will not have to be completely disassembled to clean the dried pigment.
Airbrush tools
The airbrush for nails itself is accompanied by the necessary kit for work, which includes:
- special airbrush paints,
- stencils;
- training tips;
- tweezers.
Airbrush tools are sold in specialized stores; it is better to purchase from trusted manufacturers so as not to harm the equipment with low-quality components and paints. The kit includes special paints, stencils, cleaners and a compressor. Tools are sold separately or in sets for nail art. The price of components is almost equal to the price of the tool itself. In online stores, you can select a product in a catalog where there is a description of the characteristics and advantages.
Stencils
Stencils are designed to create a given design using simple-action nail airbrushes. But, even when using templates, each drawing is carefully planned to make a quality painting:
- paints are selected and mixed;
- the flow (quantity) of the supplied dye is adjusted;
- the distance from which the paint will be applied is thought through.
Stencils are created from film, which can be transparent or translucent. They are very elastic, which makes them convenient for use with nails of different shapes. Stencils are made using high-precision cutting of the pattern, so the designs are created clearly and the use of a stencil template is not visible.
- Recipe for making zucchini and potato stew in a slow cooker
- Toothpaste from Thailand
- DIY rugs made from scraps of fabric
Airbrush paints
Special paints are used for painting with this tool. Airbrush nails are created with dyes that have a different consistency. If you use regular varnishes and dilute them with solvents, you can break the equipment. Acrylic airbrush paints are often included with the tool. If you want more colors than the standard set, then it is better to buy paint from a well-known manufacturer, for example, Fluo, Premium. It’s easy to order kits in online stores and specialized salons for nail technicians.
Compressor
For convenient work, it is important to choose the appropriate compressor that is suitable for your instrument. Device requirements:
- maximum quiet operation;
- light weight;
- performance.
Without this important detail, your airbrush will be useless. You need to approach the choice of compressor responsibly. Productivity, which characterizes the volume of air passed through the device per unit of time, is the most important requirement.
How to replace airbrush for nails
An airbrush is a rather expensive device. If you don’t have the money to purchase one, but still want to get a high-quality manicure, you can design a homemade coloring device.
The easiest way is to create an airbrush machine for nails using a ballpoint pen, a wine cork and a container for pigment. The diagram looks like this:
- the pen rod is removed and blown through, removing the writing part;
- make a corner from a wine cork and drill a hole in it;
- insert the plastic body of the handle into the prepared cork stand, and attach the rod to the bottom;
- the excess length is cut off with a knife, and a hole of a suitable diameter is drilled in the lid of the paint container;
- the rod is inserted into the bottle and the cork stand is secured with glue.
The entire structure can be assembled in just a few minutes. When using it, you don’t even need to connect a compressor; you just need to blow hard into the plastic tube.
This DIY alternative to a store-bought airbrush is good for creating a simple manicure.
Attention! Any homemade tool will be noticeably inferior in capabilities to a purchased device.
