How to dilute thickened nail polish?
Nail polish thickens because the liquid evaporates from it. Knowing this, you can use a lot of ways to bring it back to life.
- Special product for thinning varnish. Manufacturers know that varnishes often dry out, and therefore they came up with thinners. They are sold in the same department where varnishes are sold. Instructions for use are written on them. In appearance, the thinner is a transparent liquid resembling varnish
- Add varnish without color. This method will not help save your favorite polish. But on the other hand, the colorless product will take on some of the color and can be applied to the nails
- The easiest and most affordable way is to add nail polish remover. You don't need much of it to make the varnish come to life. Unfortunately, the effect is temporary
- Heating the varnish is another easy way. To do this, heat the water until hot and place the varnish in it for 10-15 minutes. After this, the varnish can be used again
- Paint thinner. It would be useful to remind you that paint thinner is a strong chemical and is not very beneficial for nails and skin. However, if there is no other way out, the varnish can be diluted with it.
Ways to thin nail polish
how to make gel polish thick
This information is especially important for allergy sufferers, pregnant women, and young mothers.
Everyone remembers her from childhood. Our grandmothers and mothers also used it to clean sinks and bake pies. But today there is a huge variety of all kinds of highly effective means. So why go back to banal soda? Because it is very cheap, effective and environmentally friendly. It can be used for more than just cleaning. Baking soda will help you do things you had no idea about before. 1. Baking soda will easily destroy any odors. For example, in the freezer and refrigerator, trash can, shoe closet, car and cat litter box. To prevent the appearance of an unpleasant odor, you just need to spray a solution of soda in these places. 2. Baking soda is used as an antacid, that is, it effectively reduces stomach acidity. If heartburn occurs, mix a teaspoon of baking soda in a glass of water. However, it is not recommended to use baking soda often for this purpose. 3. Baking soda can be a great substitute for expensive bath salts. Such a bath will have a strong anti-inflammatory effect. If you are tired and the state of your nervous system leaves much to be desired, then simply pour a few tablespoons of soda into water and add a little of your favorite essential oil. The beneficial effect will not be long in coming. After taking such a bath, you will feel the softness and smoothness of your skin and pleasant relaxation. 4. Using soda you can clean almost all surfaces: stainless steel, sinks, bathtubs, tiles and chrome. It is very effective and completely environmentally friendly. You can even whiten your teeth with it, that is, remove deeply ingrained plaque from tea, coffee and cigarettes. 5. Baking soda is excellent at cleaning drains. To do this, pour a glass of baking soda into the drain, then add a glass of alcohol vinegar, leave for 5 minutes and rinse with water. 6. You can also use baking soda to care for your pet. If you simply don’t have time to bathe the animal, then spray a solution of soda on the fur and then comb it. After this procedure, the fur will stop smelling like dog, will become smooth, and will look clean. 7. You can add a glass of soda when washing. It enhances the effect of washing powder, softens water and helps preserve the color of things or the whiteness of linen. It works no worse than well-known brands. So why spend the extra money? 8. If necessary, soda can replace hair shampoo. Simply mix baking soda with water to form a paste, apply to hair and rinse thoroughly. Your hair will become shiny, clean and soft. Baking soda is great for removing hairspray and other fixatives from your hair. 9. Baking soda is an excellent carpet cleaner. Simply spray the baking soda solution onto the carpet, wait about 30 minutes, and then vacuum. This will not only keep your carpets clean, but will also rid them of unpleasant odors. 10. Do you have your own swimming pool? In this case, soda will help restore it to its normal acid-base balance. And such a problem as “blooming” water will disappear by itself. Baking soda is safe for skin and eyes. Therefore, you can splash around in a pool with soda added for as long as you like. 11. Soda instantly extinguishes the fire. Therefore, always keep it near the stove. If something catches fire while frying, simply sprinkle a handful of baking soda on the area of the fire. 12. Baking soda relieves skin irritation and itching from insect bites. To do this, you need to make a paste of soda and apply it to irritated areas of the skin. This remedy is effective even against wasp and bee stings. Attention pregnant women! You can only use soda in your household. It has zero toxicity and will not cause any harm to the fetus. Using baking soda for acne. Cleansing the skin with baking soda.
It is known that skin care begins with high-quality and gentle cleansing.
If you use gel, foam or milk, add a pinch of soda to the cleanser and stir in your palm before applying to the skin. Cleansing with soda will remove the dead layer of cells from the surface of the skin and give it smoothness. This method of cleansing the face is suitable even for sensitive skin, because baking soda has a calming effect and anti-inflammatory effect. Soda for acne and blackheads.
This recipe can be used both for washing and for preparing a mask for problem skin.
Its main ingredients are baking soda and warm water. Washing with soda softens the skin, reduces the symptoms of irritation and inflammation (suitable for systematic care of problem skin). But concentrated soda “mush” is used for targeted fight against acne. To do this, soda paste is applied pointwise to problem areas of the skin. The mask is left on the face for 40 minutes. Wash off with cool water. If you feel that this recipe suits you, the skin is smoothed and cleansed, you can conduct a course of soda masks - 6-8 procedures, with an intensity of 1-2 procedures per week. Baking soda also helps get rid of blackheads. To do this, in a similar way, soda paste is applied pointwise to the skin for 15-20 minutes and washed off with warm water. The procedure is repeated 1-2 times a week. Soda for acne and problem skin.
Another recipe for a soda mask to treat acne at home.
To prepare the mask, you will need soda for acne, a few tablespoons of flour (no matter what - oatmeal or wheat) and 1 teaspoon of baking soda. The components are mixed together and diluted with a small amount of warm water to a thick paste. The mask and soda are applied to a previously cleansed face for 10-15 minutes. Wash off with a cotton pad soaked in warm water. The mask is used in a course of 6-8 procedures, once a week. Aspirin also helps with acne:
Aspirin is the most popular and well-known painkiller among the population. Aspirin tablets contain a large amount of acetylsalicylic acid (as do many facial products), which is why aspirin helps with acne. A therapeutic mask is made from aspirin tablets, which helps fight skin redness, pimples and marks left by acne. 1. Five aspirin tablets need to be crushed, then mixed with water (about 2 tsp) 2. Add a little natural honey to the resulting mixture and mix. When the honey dissolves, the mask is ready. 3. Apply a thin layer of the mask to damaged skin. After ten minutes, wash your face with water. It is enough to apply the mask at night, every two to three days. It is not recommended to apply an aspirin mask frequently - this leads to dry skin. 4. After a couple of weeks of use, redness will decrease and the number of pimples will decrease. The aspirin mask should not be used for too long a period of time. 2-3 weeks are enough, and if desired, the course can be repeated, allowing the skin to rest for two weeks. 5. After using the mask, be sure to moisturize dry skin with a nourishing night cream.
What to do with dried nail polish, what to add to it?
There are many ways to restore hardened varnish. But as the saying goes: “A problem is easier to prevent than to solve.” Therefore, use these tips to keep your polish fresh longer:
- Varnish does not like cold or heat. Therefore, do not store it in the refrigerator. The common myth that polish should be kept refrigerated has ruined many of your favorite nail products.
- Also, do not leave the varnish in direct sunlight or near heating elements.
- The varnish should be stored in an upright position, in a dark and cool place.
- Shake it a little before using the product. But do not overdo it so that bubbles do not form in the varnish.
- To make the polish open easily, wipe the tip of the jar with nail polish remover after use. This will remove any remaining product and prevent the lid from sticking to the jar.
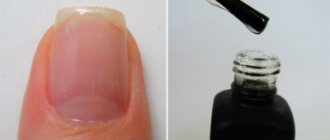
Here's how to properly use varnish thinner if it's dry:
- Add a few drops of the product to a jar of varnish and actively shake it. You can open the varnish and stir it with a brush. The procedure is carried out until the varnish is diluted
- There is no need to add a lot of solvent at once; it is better to do this in several stages. Then the consistency of the varnish will be ideal
- The solvent has a long shelf life and is suitable for varnishes of any manufacturer. It should be stored in a cool, dark place, away from hot objects and children
Varnish thinner
Dried nail polish - what to do: nail polish
Many women notice after several months of use that their favorite nail polish has dried out.
The life of a cosmetic product can be extended with the help of available components available in every home.
Nail polish remover and acetone
This is a proven method, known for many years. But today the use of the method is undesirable.
It has been proven that acetone and nail polish remover have a negative effect on the condition of the nail plates.
Hot temperature water
To “treat” dried varnish, you can place a closed bottle of the product in a bowl of hot water.
The procedure will help improve the structure of nail polish for a certain period.
The method is recommended to be used immediately before applying nail polish.
Special product
You can dilute nail polish using a special thinner suitable for gel polish and acrylic polish. The product is available for sale in cosmetics stores.
The liquid does not contain acetone and allows you to quickly and safely dilute the varnish without changing its shade.
The duration of action of the diluent is limited and is usually no more than 1 month. After this period, nail polish becomes unusable.
Prevention of drying out
To prevent the varnish from drying out, it is recommended to adhere to the following simple rules:
1. The varnish should be stored at a cool temperature, out of reach of sunlight.
2. The neck of the bottle of varnish should not have dried deposits.
3. The bottle of varnish must be tightly closed.
4. Before closing the varnish, you can blow into a bubble to displace oxygen from the container, which destroys the enamel of the varnish.
Remember! When purchasing nail polish, give preference to products with special balls built into the bottle, which, when shaken, effectively remove any formed clumps of polish.
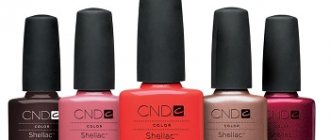
How to dilute thick gel polish?
To prevent the gel polish from thickening, it should be stored in a dark and cool place, avoid contact of the product with sunlight
There are several ways to dilute gel polish:
- Using alcohol. Regular medical alcohol is what you need to save gel polish. To begin, add a few drops of alcohol and mix it thoroughly with the varnish. If the product is not liquid enough, repeat the process.
- You can also add gel polish remover. It will naturally prevent the polymerization process. However, this method will make the gel polish less durable; it will chip off the surface of the nail.
- You can dilute the gel polish with the same color gel polish. Another way is to dilute the product with a top coat for manicure.
Thick gel polish
Why does the varnish become thick?
Before you start fighting the problem, you need to find out the reasons for its occurrence.
The main reason that leads to drying of the product is the formaldehyde included in its composition. It is an essential component of any decorative coating, as it ensures quick drying of the product.
Reference. Expensive products contain less formaldehyde than inexpensive options.
There are also a number of other reasons that lead to thickening of the varnish coating. These include:
- Frequent use. During application of the product, the bottle of varnish remains open for a long time. This leads to rapid evaporation of the solvent, which provides a liquid consistency. As a result, the composition becomes thick.
- Rarely used. In this case, delamination of the ingredients included in the decorative products occurs. As a result, it becomes thick.
- Violation of storage conditions . In order for the product to retain its qualities for a long time, it requires certain storage conditions. Exposure to sunlight and elevated room temperatures can cause the dye to dry out.
Reference. Inexpensive decorative coatings can thicken within 60 days after purchase.
!— Yandex.RTB RA-461895-3 —
—>
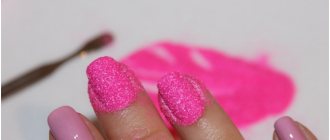
How to dilute matte nail polish?
- Matte nail polish is essentially no different from glossy polishes. Therefore, any means for diluting regular varnish are suitable for it.
- Since the matte finish is very capricious, you should not experiment. The best solution is to use a special varnish thinner
- Matte varnish quickly loses its dullness and chips. It is better to apply it in 2-3 layers and dry naturally for at least an hour
How to dilute matte nail polish?
How to clean brushes from dried varnish?
- The easiest way, which is always at hand, is nail polish remover. You need to pour it into a small plastic container and place the brushes there for a couple of minutes. After this, wipe the brushes with a cloth and rinse with water.
- Another way is to clean with paint thinner. If you have it in the house, then use it according to the instructions. After this, the brushes should be thoroughly rinsed under running water, because the solvent is toxic.
- Brushes can be cleaned from gel polish with a special product to remove the sticky layer. Also - gel polish remover
- Manicure brushes need to be cleaned promptly so that the product does not harden on them. This will make the cleaning process easier