Rating: 5/5 (1)
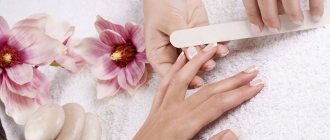
New ideas for fashionable nail design replace each other at a rapid pace and it is becoming increasingly difficult to remain the most stylish, as well as keep up with new trends. However, there is another problem - how to keep your masterpiece on your nails longer ?
Many women have denied themselves the pleasure of creating the perfect manicure or pedicure, because ordinary varnish is instantly damaged at the slightest contact with water or any object and with great difficulty maintains the original appearance of the manicure until the end of the event for which it was made. Gel polish not so long ago, but quickly burst into our lives and made a real revolution in the world of the nail industry.
Thanks to its amazing and even shocking strength, in one fell swoop it saved representatives of the female half of the population from annoying situations - when, at the most inopportune moment, unexpected scratches or, even worse, chips appear on the nails. In addition, this famous durability allows a manicure or pedicure to retain its original beauty without losing color for up to 25-40 days . However, to get all the benefits listed above, you need to take the choice of a high-quality manicure product very seriously. I propose to jointly consider all the pros and cons of Kodi Professional gel polish, and also analyze in detail how to apply it correctly to your nails.
Advantages
- amazing durability and stability of the original color;
- safe use for the surface of the nail plate;
- intensive fight against fragility and delamination;
- strengthening the nail plate due to a dense gel coating;
- protection of nails from negative external influences;
- giving fingers a neat and tidy appearance;
- facilitating and simplifying nail care;
- the ability to paint yourself at home;
- the simplicity and convenience of the process of coating nails with gel polish is accessible even to beginners;
- the appearance of a unique shine that lasts up to 15-25 days.
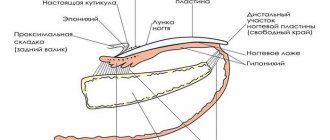
About strengthening nails: types of strengthening, how to quickly strengthen with a rubber base
Often girls and women experience brittle nails. They crumble, break, bend. It is impossible to grow such nails and get a beautiful manicure. In a situation where the nail plate is brittle, the question of how to strengthen your nails means a lot.
Nail care at home
Taking care of your nail plate will not only improve their appearance, but also eliminate nail brittleness.
It is necessary to adjust the shape of the free edge of the plate in time. Don't forget about the cuticle - once a week it needs to be softened with special products and pushed away from the nail plate with an orange stick.
Nail care
Important! All nail care tools must be treated with alcohol before use.
You cannot achieve beautiful nails without healthy and beautiful hand skin. During the cold season, be sure to wear gloves outside. You should also use disposable rubber gloves when doing housework. With such protection, the overall condition of your hands will improve significantly.
For daily nail care, it is better to purchase hand cream with jojoba oil. It will nourish not only the skin of the hands, but also the nail plate.
A variety of baths are very useful for strengthening nails. Do them 2-3 times a week. Depending on the composition, they will strengthen, nourish and moisturize the nail plate. Here are some recipes:
- Bath with sea salt. In 1 tbsp. warm water dissolve 1 tbsp. l. sea salt. Hold your hands for 10 minutes.
- Bath with oils. Mix equal amounts of castor and olive oil. The liquid should be warm, but not scalding. Dip your fingertips into the liquid and hold for 10 minutes.
- Milk bath. Heat whole milk to 25-30°C and keep your fingertips in it for 20-30 minutes.
Important! You may be allergic to some components of the baths. Before using the composition, it is checked for safety.
Strengthening natural fingernails
In addition to daily care, special procedures will help strengthen your nails. You don't have to visit a salon to do this. At the pharmacy you buy a special essential oil for the cuticle and apply it every day to the root of the nail and the side ridges.
How to restore nails after extensions
Strengthening your nails can be achieved with lemon. One fruit is cut and fingers are dipped into it. Citric acid will not only strengthen, but also whiten the nail plate.
There are other, more radical ways to strengthen natural nails. Salons will help you find a procedure that answers the question of how to strengthen your fingernails.
Today there are several ways:
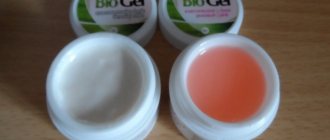
- Strengthening with biogel. After treating the nail, a special composition is applied to it, which hardens under ultraviolet rays. Bio gel creates a protective layer under which the nail is restored.
- Reinforced with acrylic. To add strength, a mixture of acrylic powder and liquid is applied. This nail hardener hardens quickly, so the procedure should be done by a professional.
- Strengthening with gel polish. This is a more gentle procedure. Under shellac, the nail is not sharpened as much as for the first two options. When using gel polish for the base, you can use biogel. This method will not only prevent mechanical damage, but also provide nutrition to the nail plate.
Important! These procedures can be done at home, but to get a lasting effect, it is better to entrust it to a professional.
If you cannot use gel or acrylic, then you can choose another method - a strengthening nail coating.
Smart enamel
Smart enamel – nail strengthener
Smart enamel – nail strengthener. Manufacturers of Smart Enamel varnish included microelements such as calcium, collagen, vitamins A, B, E, formaldehyde and others in a light, air-permeable base.
To apply this varnish, you do not need to go to a manicurist. It is enough to give the nail plate a shape and cover it with a layer of enamel. After the layer has dried, a second layer is applied. If the nails are severely damaged, then this procedure is repeated every day for a week. Before applying the product again, you must remove the previous layers.
On a note. You can apply decorative varnish to the layer of strengthening nail coating. In this case, the enamel layer is renewed after removing the decorative layer. Smart enamel will help accelerate nail growth, give it hardness and improve its structure.
Strengthening products developed recently under the Horsepower brand will help make your nails elastic, smooth and hard.
Strengthening nails with a rubber base
Strengthening nails with a base is the easiest way to do it. Of all the existing bases for strengthening nails, it is better to choose rubber. The rubber included in its composition makes the coating durable and flexible. If accidentally hit, such a nail will not break, but will bend and return to its original position. Even a novice fashionista can use it.
Considering that this base is quite thick, it perfectly forms an arch and does not spread. Its ability to reflect light and create glare increases the aesthetics of the coating. Due to the rubber, this base can be applied in two layers, perfectly leveling the nail plate.
To effectively and quickly strengthen your fingernails, the first thing you need to do is review your diet. It must be balanced. All necessary minerals and vitamins must be supplied to the body with food.
Be sure to take strengthening nail baths and cover the skin of your hands and nails with cream.
On a note. For quick and gentle strengthening of the nail plate, a strengthening nail coating is well suited. It is applied like regular varnish. This coating will protect the plate from environmental influences and make it more elastic and dense.
How to strengthen soft nails
Soft nails need more nutrients. You can fill the missing elements by rubbing wax, vegetable oils or lemon juice into the nail surface.
A mask made from a mixture of lemon juice and olive oil serves the same purpose. It is applied to the plate and cuticle before bedtime. After application, you should wear cotton gloves.
Restoring a soft nail plate takes a long time. You can prevent further damage to such nails by applying biogel.
Soft nails
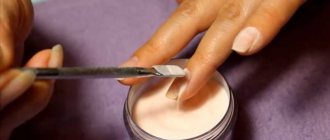
To apply biogel at home, you need to follow the following step-by-step plan:
- Disinfect the plate and cuticle with an antiseptic.
- Push back the cuticle with an orange stick and give the free edge the desired shape.
- Level the plate with a polishing file.
- Apply a layer of primer.
- Cover your nails with biogel.
- Dry the layer in an ultraviolet lamp.
- Apply top coat and dry it with a lamp.
- Cover the cuticle with special oil.
On a note. Brittle, peeling nails do not bring joy to their owner. You can correct the situation either with the help of professionals or on your own at home. Proper nutrition, baths, special creams and coatings will help make your nails strong and beautiful.
calenda.ru
Flaws
- only following the rules when applying gel polish guarantees the durability of the manicure and the preservation of shine;
- the need to purchase the Kodi gel polish system (Kodi), which has a high cost ;
- not suitable for owners of nails with a weak and thin structure - their varnish lasts no more than five days ;
- gel polish Kodi (Kodi) creates a dense film on the nail , due to which the plate loses its own protective coating and ability to “breathe”.
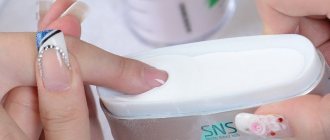
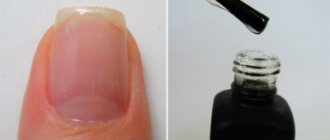
Photos of the necessary tools and materials from Kodi (Kodi)
How is it done?
Strengthening nails with a base is performed in the following sequence:
- removal of old coating;
- preparation of the nail plate - combined or hardware manicure. A classic manicure that involves steaming is not suitable!
- applying and drying the primer;
- applying the first thin layer of base;
- drying in a lamp;
- the actual alignment of the nail plate - to achieve the effect of perfectly straight nails, you need to apply a medium-sized drop of base to the middle of the plate and distribute it, forming the correct architecture. It is important to wait a few seconds for the coating to even out. You can hold your finger upside down;
- drying in a lamp.
After this, you can cover your nails with colored varnish or finish the job.
Color palette
An extensive color palette of Kodi gel polish (Kodi) with digital names allows you to use it both as a main color and at the final stage as a fixer. Today the palette includes more than 200 color shades. Such a wide choice allows you to get a manicure or pedicure of the desired shade, color, density and structure. In addition, you can independently regulate the intensity of your manicure using the number of layers of gel polish applied - the richer the manicure you want, the more layers you apply.
Photo of the main palette of Kodi gel polishes (Kodi)
Particularly popular among both craftsmen and women is the Kodi “cat’s eye” gel polish palette – a completely separate series of the brand.
Photo of Kodi gel polish palette “cat eye”
Composition of Kodi gel polish (Kodi)
- Film former: a substance that forms a dense coating on the nail surface. Due to this, gel polish has such durability and resistance to negative external influences.
- Photoinitiator: A compound that receives UV rays and in turn transfers energy to the film former.
- Pigment: coloring matter.
- Thinners: are responsible for maintaining the viscous consistency of the cosmetic product, which helps to apply the nail polish easily and evenly.
Additional Information:
- The basis of gel polish is a polymer of natural origin , which does not dissolve in acetone, water, or alcohol. The base does not contain harmful chemicals, therefore, the gel polish is non-toxic.
- Gel polish has a rubber coating , which is very difficult to damage.
- The non-viscous texture of the gel polish allows you to easily and evenly apply it to your nails.
Gel polish base: which is better?
Not only novice nail aesthetics masters wonder what the best base for gel polish is; experienced specialists also find the best option for themselves through trial and error. That is why, when choosing a base for gel polish, it will be useful to listen to the advice and recommendations of practicing masters.
- Compound. A good base for gel polish should contain rubber fibers for flexibility and strengthening of the natural nail plate, nutrients and a vitamin complex to nourish and restore nails throughout the entire period of wearing the gel polish coating (2-3 weeks). Many clients of nail salons have probably long noticed that nails grow much faster under gel polish and become stronger, since the elastic polymer coating reliably protects them from negative external influences.
- Price. A basic product that meets high quality standards and contains all the necessary components is, accordingly, more expensive. When buying a base for gel polish, it is better not to save money, since the result of all your work depends on the quality of the chosen product.
Consistency. Depending on the condition of the nails and the type of polymer materials, the base for gel polish can have a different degree of viscosity, a slightly stretchy consistency, which ensures self-leveling of the product when applied to the surface of the nail.- Color. A high-quality base has a transparent color to maximize the natural tone of the natural nail plate in the design of translucent decorated nail designs.
Before purchasing a base from a particular company, carefully read the design features (font, shape, special symbols) of the bottle with the product. It is also worth paying attention to the fact that the volume, composition of the product and country of manufacture completely coincide with the declared data of the manufacturer. This way you are guaranteed to purchase an original product.
Technique for applying Kodi gel polish (Kodi)
Regardless of the design option, it is initially necessary to get your nails in complete order and prepare them for coating with Kodi gel polish (Kodi) - your hands must be in perfect condition. In order to get a flawless manicure that will delight others, it is important to take seriously the choice of nail shape and careful removal of cuticles and hangnails. Otherwise, your efforts may turn against you - the manicure will look sloppy and sloppy.
Starter kit from Kodi (Kodi)
- buffs and files for preparing the nail plate;
- UV lamp;
- degreaser;
- sticky layer remover;
- basic gel polish;
- colored gel polish;
- fixative;
- cuticle oil;
- napkins or cotton pads.
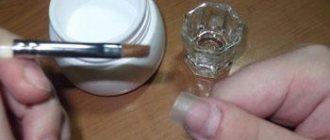
The process of preparing the nail surface
- Non-acetone nail polish remover remove old manicure.
- When using gel or scented soap, wash your hands thoroughly and pat dry with a towel.
- Using scissors with straight ends, we give the nails the desired shape and adjust their length.
- Using a nail file, we trim the edges : start from the outer edges of the nail and slowly move towards it src=»https://www.joxin.club/wp-content/uploads/2017/10/Protsess-podgotovki-nogtevoj-poverhnosti-3 -min.jpg" class="aligncenter" width="660″ height="440″[/img]
- Pour hot water into a bathtub or ceramic bowl and put your hands in it. We keep our hands in water until the nail surface is completely soft - this will allow us to painlessly remove the cuticles.
- Using scissors with rounded ends remove cuticles and hangnails. If your cuticles become rough during trimming, be sure to soak your hands in hot water for a few minutes.
- Then rub the oil into the nails and wait for complete absorption.
Gel polish application process
- We treat the surface of the nail with a buff, then remove the dust with a cloth pre-moistened with nail polish remover.
- Cover the nails with a thin layer of degreaser Nail Fresher from Kodi Professional and wait until it is completely absorbed.
- Cover the nail with a thin layer of gel polish base Kodi Rubber Base Gel and dry it in a lamp for a couple of minutes.
- Using a cloth pre-moistened with Kodi Cleanser, remove the sticky layer from the base coatwhich will appear after drying under the lamp.
- Covering the nail a thin layer of the selected color gel polish Kodi Professional company and dry under the lamp for two minutes.
- To obtain a richer and richer color in the same way apply a second layer of colored gel polish.
- Finally Apply a final thin layer of sealer Kodi Rubber Top Gel and dry it under a lamp.
- With a napkin moistened with a special Kodi Cleanser, remove the sticky layer that appears.
Rubber base for gel polish
Since gel polish conquered absolutely all manicure lovers, coating technology continues to improve. For a long time now, everyone has heard such names as rubber base and rubber top, but not everyone knows how they differ from the usual one. In this article, I propose to understand in detail all the nuances of the rubber base and will definitely do a similar review in the future for the top.
A rubber base is the same base that is applied under a colored gel polish coating in a three-phase system, but it has a number of distinctive properties and advantages over the usual one. Its composition includes, as you might guess, rubber, which makes it thicker. Actually, thanks to this, it acquires those very distinctive features:
- Simplifies the process of straightening the nail plate. This is especially useful for nails with tubercles, waves and other defects. The base fills the recesses evenly and makes further work much easier.
- More convenient to apply. Since the base is thick, it does not flow onto the side rollers, so you can apply it to four nails at once and then put it in the lamp.
- This base is recommended for brittle and thin nails. Applying a rubber base in two thin layers will significantly strengthen them.
- Rubber has special elasticity, which eliminates the appearance of cracks when the coating is worn for a long time.
- It perfectly protects nails from the coloring pigments of colored gel polish.
- Even though those perfect highlights are created with a top coat, thanks to an even layer of base, this is much easier to do and accessible even to non-professionals.
- The thick base does not shrink at the tips of the nail plate and does not leave bald spots after drying, which is typical for many regular bases when you have to apply a second coat.
As for durability, the bases here are equal: the durable coating lasts up to four weeks. Deviations may vary depending on the manufacturer. The same applies to polymerization time. For an ultraviolet lamp this is usually 2 minutes, and for an LED lamp from 30 to 60 seconds. However, there are also some nuances of working with a rubber base:
- Again, due to its thickness, the liquid tends to bubble. To avoid this, it is recommended to: close the lid tightly after use,
- do not leave the bottle open for a long time,
- take out the brush and put it back without sudden movements so that the bristles do not bend.
- First, you should get rid of excess material on the brush and its base so that a large and thick drop does not fall on the nail.
How to apply rubber base
I talked about the intricacies of applying and distributing a base with rubber above. And here I would like to talk about the preliminary manipulations to prepare the nail plate for gel polish coating.
They can be divided into stages:
- Using a file, we even out the shape and length of the nails.
- Soften, push back and remove the cuticle.
- We remove the natural shine from nails using a polisher,
- We use a degreaser or disinfectant.
- Apply the base for gel polish.
Well, then the nails are usually covered with gel polish, if desired, a drawing is made and covered with a top coat.
Next, I propose to consider all this in practice using the example of several rubber bases I have: UNO, In'garden and Premiere.
Rubber base UNO
Bottle volume – 15 ml.
Country of origin: Hong Kong.
The base has a very thick consistency and dense texture, is viscous and holds a drop well. However, due to its thickness, a lot of material remains on the brush stem, so you need to wipe it thoroughly on all sides in order to apply a thin layer of gel polish.
The brush is flat, made of translucent synthetic bristles and, in my opinion, a little short. It’s not entirely clear to me why they made it so short: it’s unusual in application, and I didn’t notice that it made it any more convenient.
The brush is a little harsh, so when applying gel polish in a thin layer, it leaves streaks. However, due to the self-leveling property, they disappear after some time. Therefore, before placing it in the lamp, I recommend holding the nails in the air for 30 seconds.
Polymerization time in an ultraviolet lamp is 2 minutes, in an LED lamp – 30 seconds. It has residual stickiness, which should not be removed before applying the color coating: it improves the adhesion of materials.
According to the manufacturer, the base does not require a primer and adheres well without it, even on thin and soft nails. Wearing time is from 2 to 4 weeks. Another advantage of the base is that it is based on a soluble formula, thanks to which the gel polish can be easily removed with the product in 5-7 minutes, even without filing!
Rubber base In'Garden Ideal Nails
You won’t find the words “rubber” on the bottle; it simply says “leveling.”
I have a large 30 ml jar. I do not recommend using the material directly from such a jar; it is better to pour it into an empty one: if you frequently open and wipe the brush on its edges, the base will accumulate there, the lid will begin to open poorly and bubbles will appear in the base. In addition, the lid itself springs back and tends to slam shut, which is inconvenient to use. This volume is, of course, an economical option, but it is worth considering these subtleties.
As for the base itself, it is a little thinner than UNO, but it also holds a drop well and is applied thinly. But, again, I couldn’t evaluate her original brush; I used an ordinary flat one.
This is how the base shines after drying in a lamp:
Rubber base Premiere
Bottle volume – 8 ml.
I have written a lot about this brand. It is distinguished by its budget price, because of this, some may feel that the quality suffers. Yes, the label on the bottle tends to peel off, but I don’t think that because of this it’s not worthy of attention.
The base here is the thinnest of all in this review, but it is still a little thicker than usual. The brush is flat, synthetic and long. I liked it the most when applying it.
Since I have had this base for a long time, I noticed that it curls up a little and thickens on the brush. Apparently my bottle was not tightly closed. Therefore, take care of your materials and handle them carefully!
As you can see, all the bases give a fairly even highlight. However, it is worth considering that my nails do not have large uneven spots, so I do not need much effort to straighten them.
That's all, if you have used another rubber base company, write your reviews and observations in the comments. I'd be glad to hear your opinion. Bye bye!
Bases can be purchased in stores:
UNO – krasotkapro.ru
In'Garden – ingardenshop.ru
Premiere – vselaki.ru
moi-manikur.ru
Allergy to Kodi gel polish (Kodi)
In the case of gel polish, an allergic reaction can be of two types: respiratory and contact.
Contact allergies occur when gel polish extends beyond the nail surface and onto the skin. Treating the nail surface with each new layer increases the likelihood of the substance coming into contact with the skin, and the more substances are applied, the higher the likelihood of an allergic reaction.
Signs of contact allergies
- redness;
- blisters;
- rash in the fingers;
- dryness and flaking of the skin;
- itching and burning in the fingers;
- in advanced cases, nails come off and peel off.
Respiratory allergies occur if you inhale gel polish vapors.
Signs of respiratory allergies
- swelling and redness of the eyes;
- increased lacrimation;
- constant sore throat, sneezing, cough;
- frequent discharge of mucous from the nose;
- heaviness of breathing.
Treatment of allergies to gel polish
- First of all, and without fail, remove the manicure and pedicure.
- , especially your fingers, at least three times a day
- During the first days , make hand baths from medicinal herbal decoctions. Shilajit is an amazing savior.
- Until complete recovery, forget about any varnishes.
- To thoroughly care for your nails, use special oils that contain vitamins A, E and glycerin.
- In advanced cases, complete removal of the nail plate is possible - to do this, be sure to consult a doctor.
Reviews from artists about Kodi gel polish (Kodi)
The largest cosmetology center in our city decided to conduct an online survey among regular visitors to its website, the topic of the survey was Kodi gel polish. I was interested in this survey because experts in their field who knew almost everything about this cosmetic product were invited to comment. I made a selection of the most interesting and informative answers from experts.
Marina, 18 years old
Could you tell us more about the Kodi “Cat Eye” gel polish palette? How does this palette differ from the main palette of Kodi Professional?
Expert's answer: The peculiarity of the gel polishes included in this line is that they have an unusual shine that resembles the twinkling of a cat's eyes in the dark - it looks very unusual and impressive. Gel polishes in this series are also called magnetic, because a magnet is used to obtain an interesting structure and volumetric color effect when applying gel polish to the nail surface. In addition, this application process allows the polish to stay on the nail longer than others.
Oksana, 20 years old
I heard very bad reviews from my friends about the gel polish base from the Kodi company. What can you say about this?
Expert Answer: Unfortunately, if you use a two-in-one base/top cosmetic product, your coverage will be very short-lived. Therefore, I recommend purchasing the topcoat and basecoat separately. Believe me, the manicure will turn out flawless and will last up to three weeks.
Natalya, 24 years old
Please tell me how to properly remove Kodi gel polish from nails?
Expert answer:
- We knock down the shine of the top coat with a file or buff.
- We moisten a napkin or cotton pads with Kodi Tips Off gel polish remover, press the cotton wool firmly to the nail surface and wrap your fingers in foil.
- After about fifteen to twenty minutes, remove the foil and napkins, and remove the remaining gel polish with an orange stick.
- We thoroughly treat the surface of the nail with a buff and polish it with a nail polisher.
Our conversation has come to an end. Hope the information helps you. If you have any additional questions while reading the article, ask them, I will definitely answer. Also, if anyone would like to share their manicure design ideas, show them photos, I will be glad to share your joy with you. Good luck and success to you!