Advantages and disadvantages of classic edged manicure
The frequency of performing classic trim manicure has made it possible to repeatedly identify its advantages and problem areas. Among the advantages of classical technology are the following:
- This option is suitable even for cases where the hands have not been looked after for a long time.
- It can be done with a minimum amount of funds, as well as at home.
- Available to everyone, you can learn how to do it yourself.
- Financially accessible.
What are the disadvantages of this method?
- Requires some skills.
- Traumatic (cuts occur).
- Not suitable for people with delicate cuticles and people with diabetes (it is better for them to use an unedged manicure).
- May lead to infection with certain infections (European manicure is considered safer in this regard).
Video on how to properly do a trim manicure
In this video you will learn step-by-step technology for performing a classic, or edged, manicure. The heroine of the story will tell you what tools are needed for this and demonstrate each stage of this procedure: from sawing the nails to lubricating them with a special nourishing cream.
After watching this video, you will be convinced that the technology for cutting manicure is simple , and therefore you can easily do it yourself at home.
What tools are needed to complete this?
To do such a manicure yourself, you will need the simplest and most common means and items (and not necessarily all of them listed at once):
- tool for cutting nails (nail scissors, tweezers - optional);
- a manicure file designed for processing the edges of nails (glass files are often among the recommendations, but metal files, on the contrary, are not recommended by many);
- scissors for cutting cuticles;
- nail skin pliers (cutters);
- container for a warm bath (special or on hand);
- napkin or small towel;
- water, soap (for example, grated), salts or oils for preparing a bath;
- manicure spatula (for example, a double-sided tool, on one side of which there is a spatula for pushing back the cuticle, pusher, and on the other side a knife, scraper);
- remover designed to remove cuticles at will;
- cuticle oil;
- if available, a file, bar or buff for polishing the nail plates;
- liquid to remove existing nail coating (if necessary);
- varnish for new coating;
- hydrogen peroxide and cotton wool in case of a cut;
- disinfectant;
- nourishing hand cream.
Most of the items and tools used are listed here. Professionals and beauty salons have a wide variety of products. But to perform a classic edged manicure, it’s easy to get by with a significantly smaller number of them.
Tools for manicure and pedicure at home
Before you skip going to the salon, you need to purchase quality tools. A beautiful manicure at home is only possible with the use of sharp, high-quality tools, which necessarily include:
- Cuticle tweezers (or nippers) are made of medical alloy, have a smooth motion, remain sharp for a long time without sharpening and fit comfortably in the hands. Such characteristics will ensure an effective and quick procedure, as well as an excellent manicure result, which you can do for yourself at home.
- A pusher is a metal tool that is a thin handle with a spatula on one side and a sharpened scraper on the other. Use a spatula to move the skin, and use a mini-knife to cut off the keratinized cuticle.
- A nail clipper is a device for cutting nails, which is similar in configuration to a guillotine. Indispensable for manicure at home on short nails, as it makes the cut even, preventing delamination and the formation of nicks on the plate.
- File - designed to change the shape of nails. For working with natural nails, a gridness of 180-240 is recommended.
- Orange sticks - this element is not always used, but it is very useful to have it on hand, because it can be useful during the manicure procedure for beginners at home - both trimmed and untrimmed, and at the stage of applying a decorative layer. With a stick you can push back the cuticle, remove it after softening, clean the inner surface of the plate, and carefully apply glitter. In some cases, such a tool is preferable to a metal one, since it does not damage the surface of the nail and does not leave unsightly scratches.
There are not only useful tools for manicure at home, but also harmful ones. One of these is a fork. A small forked blade often leaves wounds on the fingers, as it cuts off not only dead skin, but also living skin. You won't need such a tool if you have purchased good tweezers and a pusher.
There is also a warning regarding the nail file - if it does not have a grid marked on it, then you should not buy it. Most likely, this is a very rough tool that will not be able to accurately process the nail cut, causing delamination.
When doing your own manicure at home, remember that only dry nails can be treated with a file. A wet plate is characterized by excessive flexibility, so a neat, perfect cut will not work. There is also a risk of breaking off the edge of the plate. You can also use a polisher only on dry nails; this will give you a really smooth and shiny surface and not cause any harm.
Doing a trim manicure at home: step-by-step instructions with photos
It should be noted that the methods of implementation differ among different nail salon masters. Each of our readers (or readers) will ultimately determine for themselves a technique that will be individually convenient. Next, we list the main stages of performing a manicure step by step with some variations.
STEP 1: Hand sanitizer, disinfecting tools (especially if they have been used by someone else) . Later we will dwell on why this is extremely important. In the meantime, a short recommendation: avoid using manicure tools that have been used by other people without proper disinfection. This is especially true for everything that can hurt to the point of bleeding: scissors, wire cutters, knives.
STEP2: Nail treatment . At the first stage, while the fingers are dry, the nails are processed (soaked nails, when treated with a file, can bend and then peel). Therefore, first dry cut them with scissors or pliers to the desired length and give the desired beautiful shape to the edges of the nail, and then file them. When using a file, try to make movements in only one direction, since moving in different directions will damage the nail and subsequently peel it off. The final part of processing the nail plates is polishing them with a buffer or a file intended for polishing. With their help you can remove uneven nails and also make them shinier.
Why is it dangerous to use unsanitized tools?
The answer to this question is simple - if you prefer this classic method of nail care, injury is possible. And if you come into contact with the same tools that another person used, dangerous infections can be introduced into the wounds, including viral hepatitis and even HIV. In a manicure salon, you can become infected with other diseases, including nail fungus.
Even if you think that your master is a decent person, and all the clients of the salon as a whole, too, then still clarify how the tools are disinfected after each client.
If you do your nails at home, also keep an eye on who else is using your manicure kit. After all, guests rarely come with medical records, and they themselves may not be aware of some of their diseases.
We also recommend watching video tutorials for beginners:
Which is better – edged or hardware manicure:
We are constantly looking for the most gentle ways to get our hands in order. The aggressive trimmed manicure was replaced by the European one, with its careful processing of the cuticle without removing it. However, this technology is not suitable for everyone.
Hardware manicure is the next step towards the development of the nail industry. Its undoubted advantages:
- The cutter carefully removes only dead skin particles without damaging the cuticle, as often happens when trimming with tweezers. As a result, there is no danger of wounds with further possibility of infection. Not only thin, but also denser cuticles are effectively removed, leaving the nail hole smooth and neat.
- To perform a classic manicure with high quality, hands are first steamed in a bath, which provokes the spread of fungal diseases. Hardware treatment is performed on dry skin, so it is much more hygienic.
- After gentle removal with a cutter, the cuticle grows longer and does not become rough, as with a trimmed manicure.
- Problematic nails are treated delicately: brittle, flaking, uneven, damaged by improper extensions. As a result, any gel polish then fits and lasts much better on them.
- The skin around the nails looks healthier and more well-groomed. You can also use a cutter to remove calluses from your fingers if they have formed from work.
- The procedure is easy to carry out at home. It is enough to go through video training, watch relevant lessons and step-by-step photos from professionals, and then practice a little to achieve tangible success. The machine for hardware manicure is so easy to use that high-quality nail treatment will not be a problem even for beginners.
- All necessary operations are performed in 30–50 minutes. For a trimmed manicure, the master will need 1.5 hours.
Machine processing is often called the improved European method. Problems can only arise if the nails are in very poor condition. It will not be possible to bring them back to normal in one session.
Pros and cons of edged manicure
It’s worth starting with the positive aspects , of which there are incomparably more.
- a classic manicure will take a little time;
- you will need a minimum of tools and materials;
- This method is suitable for hands that are regularly cared for, as well as neglected nails in very poor condition.
Among the disadvantages of this method, we must first mention its high risk of injury. If you cut the skin or cuticles poorly, you can cause an infection. Another “minus” is the risk of ruining the appearance of your nails . Carelessly cut skin creates an unpleasant impression. Therefore, you should approach classic manicure with great caution.
What you need:
- an orange stick or a special spatula for moving the cuticle,
- nail file (it is best to use ceramic or glass),
- straight manicure scissors (as an option - nail clippers),
- cuticle tweezers,
- disinfectant liquid,
- cotton swabs.
First, you need to remove old nail polish (if any), using liquid and cotton swabs. This step cannot be skipped, since a layer of varnish will not allow you to do a manicure. In addition, after completing the procedures, the coating will look unaesthetic.
Pay attention to the sequence of steps, it is very important for the health of the nails and obtaining the most effective result.
After removing the polish, start straightening the lengths of the nail plates . Use wire cutters or nail scissors. After this, you need to give the nails the desired shape. special attention to the corners , cutting them at the desired angle. File the edge with a nail file, positioning it directly perpendicular to the nail. You need to file your nails before steaming! Many girls make the mistake of using a nail file after baths, which leads to splitting of their nails. If you want to get not only a beautiful, but also a safe manicure, then perform these procedures only on dry nails.
Small roughness can be removed using a buff, but this is not necessary. If necessary, polish the nail . But it is best to carry out this procedure no more than once a month, so as not to risk your health.
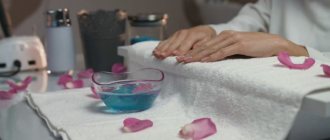
The next stage, which will definitely appeal to all representatives of the fair sex, is baths . Fill a small container with warm water and add one or more ingredients: bath salts, aromatic oils and special herbal mixtures. If there is nothing similar in the house, then you can use the most common liquid soap . It needs to be added to the water and stirred slightly, do not whip the contents into foam. Place your hands in the bath for five to seven minutes and relax. If you also care about the skin of your hands, you can purchase special compositions for baths.
Steamed skin is already ready for the most important stage. Try to work quickly but carefully. You should not rush too much so as not to damage the nail. an orange stick or spatula to move the cuticle , directing it not only away from the nail, but also slightly upward. The video will help all beginners understand how to do a trim manicure.
The danger of the trimming method lies precisely in the removal of rough skin and cuticle .
Before starting the procedure, do not forget to thoroughly treat all instruments with a disinfectant. To avoid harming yourself and ruining your manicure, try to trim the entire cuticle as a whole, and not in pieces. In this case, you will get a beautiful and well-groomed look for your nails. In addition, during removal in parts, the risk of burrs increases. Treat not only the nail hole, but also the sides. Don't be afraid to pull the skin away from the nail a little to get to those hard-to-reach areas. The more thoroughly you treat the surface around the nail, the more beautiful and well-groomed your hands will look.
If in the process you accidentally touch sensitive skin and get hurt, be sure to treat your finger with a disinfectant. This could be iodine or its analogue, vodka or alcohol. This way you can prevent infection.
We recommend that you spend a little time and finish the procedure with a massage . Apply special cuticle oil and gently rub it into the skin. If you are going to coat your nails with varnish, wait until it is completely absorbed and degrease the surface.
to contents ^
Types of hardware manicure
We can do it:
- Classic nail treatment with a cutter.
- Combined manicure.
- Treatment with further coating with gel polish under the cuticle.
The first method has already been discussed above.
Alignment of the nail plate (if necessary).
Coating application technology: primer base gel polish top.
For more detailed information on performing a hardware manicure at home, see the step-by-step instructions in the photo below.
The second is a combination of hardware and edged manicure. In this case, the cuticle is first processed with a cutter and then adjusted using tweezers or scissors. There is no need to hold your hands in the bath to soften the skin; all the preparatory work is done by the device.
The main advantage of a combined hardware manicure is the complete removal of the stratum corneum, even if the nails have not been cared for for a long time.
Having tidied up our hands, we usually strive to decorate them with fresh nail art. But even the most fashionable manicure will look ridiculous if the nail hole is not completely or unevenly painted. This occurs either due to poor adhesion to the coating and subsequent slipping of the varnish during polymerization, or due to nail regrowth.
As a preventive measure, the technique of applying gel polish under the cuticle is used. The pterygium is lifted with a proximal roller, the pterygium is carefully cleaned, and then coloring is done close to the base of the nail.
Gel polish under the cuticle can be applied using a thin brush.
How to do a gel manicure at home
The popularity of gel polish is explained by practicality. This coating remains undamaged for 2 weeks. And today, even beginners can perform gel manicure at home, because everything necessary for the procedure is available in many specialized stores:
- lamp (LED or UV) - with its help, the varnish is dried very quickly, it will take a few minutes to dry completely;
- primer - a product that degreases the nail and promotes reliable fixation of the coating;
- base - levels the plate, making it perfectly smooth;
- color gel - the range of shades is very wide, you can choose a tone to suit every taste;
- top - final coating that guarantees resistance to mechanical stress;
- buff - a special flexible file that levels the plate and also serves to remove the decorative layer;
- nail polish remover - you will need a special product to work with gel; also purchase cotton pads and foil for easy removal of the coating.
No special training is required for manicure at home, just apply the listed products according to the instructions in the correct sequence and enjoy the look of well-groomed hands for a long time.
After a hygienic procedure - trimmed or untrimmed hardware manicure, which even beginners can handle at home with the help of this article, follow these steps:
- Apply a thin, even layer of primer;
- then use the base coat, drying it under the lamp (1 minute);
- Apply directly the gel polish of the selected color - like the previous layers, this one should be very thin;
- dry under the lamp (1-2 minutes);
- paint your nails with gel again, at this stage the layer can be made thicker, and put your hands under the lamp again (2-3 minutes);
- the finishing layer is top, it should also be dried, maybe a little longer (3-4 minutes).
A manicure with gel polish at home is ready - you can apply caring oil and enjoy the result.
What do you need for a hardware manicure at home?
First of all, we need a router and a set of attachments for it. In addition, you will need additional tools:
- Orange sticks or pusher to push back cuticles.
- A special brush that is used to remove dust while processing nails.
- A file (preferably glass or ceramic) with a hardness of 180 – 240 grit.
- Often craftsmen buy a special desktop vacuum cleaner for the convenience of sawdust extraction.
How to choose a router for home hardware manicure?
- The power of the device must be at least 35 W. If you plan to do manicures not only for yourself, but also for clients, the optimal value will be 100 - 120 W.
- Another important indicator is speed. For a hardware manicure at home, a cutter rotation speed of 20 thousand rpm will be sufficient, and a pedicure will require 35 - 40 thousand rpm.
- The device should not be too expensive, but you should avoid cheap models as their quality leaves much to be desired.
- A machine with reverse is preferable.
- It is important that the handle of the router has a collet clamp - it is the most convenient and reliable, and is also equipped with a cooling system.
How to do your own manicure at home so that the polish fits perfectly and lasts longer
- Be sure to use a base coat and a top coat.
- Before applying the first layer, the plate should be sanded and degreased.
- You should never apply more than 3 layers of colored varnish.
- Do not shake the bottle of nail polish; sudden movements may cause bubbles to form. It is recommended for both beginners and experienced people to carefully roll a bottle of polish before using a manicure at home.
- Take your time - give each layer enough time to dry. Use devices and means for faster drying.
- Do a manicure at home step by step after completing household chores so that the decorative layer remains undamaged as in the photo; it will take at least 12 hours to gain high strength.
- To ensure that your evening shellac manicure at home retains its pristine smoothness, generously apply a special oil before going to bed. It will carefully care for the skin and protect the decorative layer from deformation.
- To achieve a long-lasting gel manicure at home, use quality products that are stored properly (in a cool, dark place).
- Do not use quick-drying analogues. Their secret is a large proportion of solvent in the composition. They dry quickly and peel just as quickly. In addition, such products are more harmful to the nail plate and can change the appearance of nails for the worse over time.
- Do not blow dry, as hot air changes the structure of the product, making it less durable. If you want to speed up the process of step-by-step manicure at home, we advise both beginners and experienced people to use the cold air option.
Description of cutters for hardware manicure
Diamond tips work best with thin cuticles; you can “trust” them with the most complex nails. However, the cost of such products is high. When performing hardware manicure at home, two cone-shaped diamond cutters of different diameters will be quite sufficient.
Pay attention to the markings of the cutters. For manicure, you usually need a tool with a red and blue line, which means low and medium abrasiveness, respectively.
Master class on implementation
Preparatory stage
- All instruments are disinfected in a special chamber or using alcohol solutions if the procedure is carried out at home.
- Hands are treated with antiseptic.
- If the nail plates are covered with varnish, it can be removed with a nail remover.
Treatment of nail plates
- Using a nail file, the nails are given the required shape.
- It is recommended to start processing with the little finger and finish with the thumb.
- The file must be professional to avoid delamination and damage to the edge of the plate.
Filing technique
Only clean and dry hands should be processed.
- The file should be manipulated in one direction, starting from the left side, otherwise you can seriously damage the nail plate. The file should file the inside of the nail.
- The nail plate is given the desired shape, however, we do not recommend rounding the side edges too much.
- To eliminate small roughness, you can use a block or buff.
Baths for softening cuticles
- Fingers are immersed in a special container with warm water.
- You can add essential oils, herbs or sea salt to the liquid.
- When the skin softens, you can complete the procedure.
- While your fingers are wet, you can treat your nails with a special brush to remove any remaining filings or cuticle particles.
Cuticle removal
- Excess moisture is removed from the fingers.
- The cuticle is treated with a special preparation for removal - but this is not necessary.
- Using an orange stick, the peel is carefully moved away from the plate and lifted up slightly. It is necessary to act delicately to avoid damage.
- All elements are trimmed with sharp, sterile tweezers.
Manicure with water
Let's talk about another simple way to create an unusual manicure yourself. First you need to cover your nails with varnish of any color you like. Now pour water at room temperature into a saucer and add varnish of a different, contrasting color to it.
Using a manicure stick, mix the varnish and water until a simple pattern is obtained. Then we put our finger in the water and, when we take it out, we get a very interesting pattern.
In order to keep the side rollers and the finger itself clean, first apply a special product or office glue to it.
Features and Recommendations
- When visiting the salon, you should make sure that the technician takes out disinfected instruments.
- If the nail plates are surrounded by a soft cuticle, you can avoid trimming the manicure by removing the leathery roller using special compounds.
- At home, all instruments should also be antiseptic.
- It is better to choose a ceramic or glass file.
- To prevent the growing cuticle from drying out, it is recommended to carry out a special procedure: cream or oil is applied to the skin before going to bed.
The condition of your nails should always be perfect. A beautiful shape, the absence of hangnails and cuticles, the shiny surface of the nail plate - all this indicates that the woman takes care of and cares for herself. A trim manicure will keep your nails in excellent condition at any time.
Sources:
https://www.ladywow.ru/kak-sdelat-obreznoy-manikyur.html https://womenshealth.su/kosmetologiya/apparatnyj-manikyur/ https://pro-cosmetic.net/manikyur/klassicheskij-obreznoj-video -urok.html


